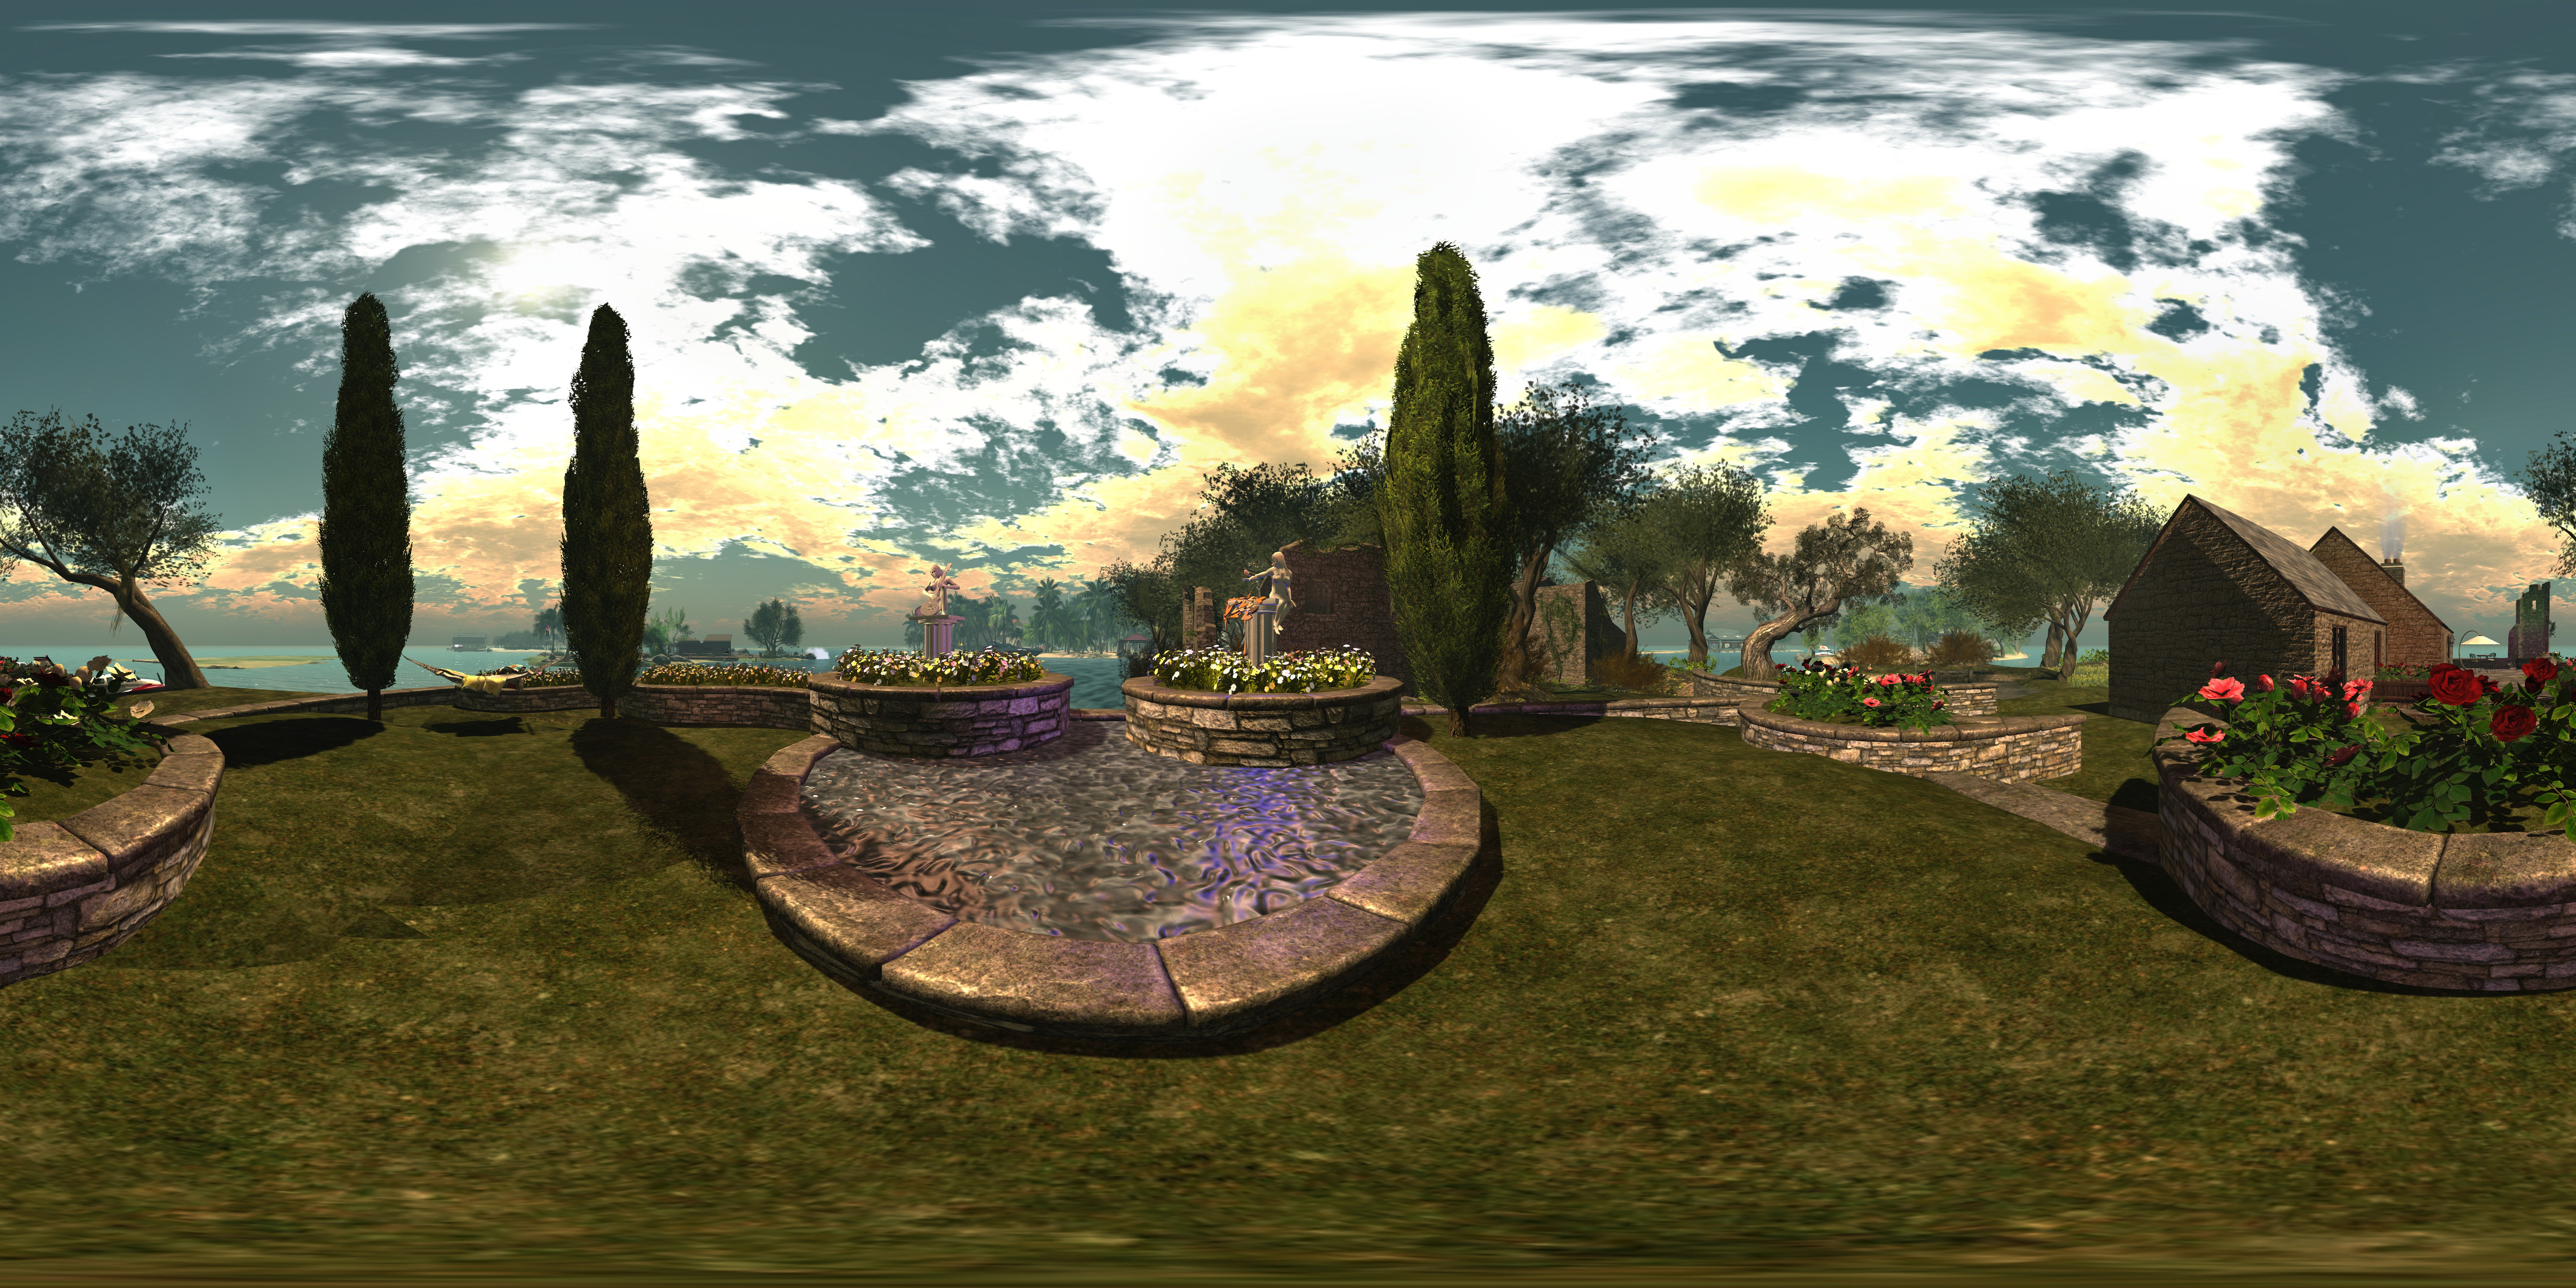
 Camera Panoramic 360o spherical demonstration via Flickr – click to view with 360o scrolling
Following my look at the Illiastra Panoramic Camera HUD, Lalwende Leakey invited me to try the HUD system she has been developing for 360o cylindrical and spherical images from within Second Life.
Called Camera Panoramic , the system is a comprehensive package for producing cylindrical (rectangular) images, full 360o spherical images suitable for upload to Facebook, VRchive, Flickr and other platforms or uploading as 360o videos on YouTube, as well as planar images and 360o “little planet” images. A set of image presets are coded into the HUD to make taking shots easier – including the ability to take “selfies” of your avatar in 360o views.
Full documentation for the HUD is available on the web and via a downloadable PDF file file. In this article I’ll be looking at some of the core aspects of the system and running through how to produce a 360o image for uploading to Flickr.
The HUD
The Camera Panoramic HUD comprises 8 buttons, summarised below and described in detail in the supporting documentation.

Note that some of the camera placement buttons may appear greyed-out; this is because they are toggle activated; clicking one shows it in blue (active), while the others turn grey – as is the case with the camera placement options in the image above. The camera image options are only available when the HUD is capturing images.
All of the options can be accessed by gesture-driven hot keys and chat commands on channel /3, as detailed in the camera documentation. I’ll be referring to the HUD buttons throughout this article.
 When worn, the HUD also displays information in text. Again, full details on this information can be found in the camera documentation, but in brief, the information comprises: the image type you’re using (cylindrical or 360o) with the selected preset; the number of pictures to be captured: whether you are using a camera offset (X,Y,Z axis), and the required camera defaults.
Note that FOV and Focal Length are determined by the preset, but you must manually set the Camera Angle within your viewer (you may also need to remember the Focal Length value for stitching your shots together into a single image during post-processing).
To set the camera angle, use either the debug setting – use CTRL-ALT-SHIFT-S to open the debug floater and type CameraAngle – or use the Cam tab in Phototools.

Before starting to take shots with the HUD, there are a some things you’ll need to do:
- Set your preferred windlight and daytime settings.
- Make sure you freeze the clouds – you’ll be taking up to 26 images which will need to be stitched together, and moving clouds could make that a bit of a bugger to do. Use Menu > World > Environment Editor >Sky Presets > Edit Presets or PhotoTools > Clouds and check the scroll lock check boxes
- If you are using the At Avatar position, hide yourself from view – used the supplied alpha mask after removing all attachments or use something like a Vanish gesture. Otherwise, parts of your avatar will appear in some of the shots.
Taking Your Shots
Important Notes:
If you want to upload your images to something like Flickr, VRchive or Facebook, you should use the 360o spherical image type, as this will produce an image in the required 2:1 (width:height) pixel aspect ratio (PAR).

When using the 360o spherical image type, you must set your viewer’s window size to a square aspect ratio. Use Advanced > Set Window Size (click CTRL-ALT-D to display the Advanced menu option, if required) or if you have Phototools, click on Aids > Set Window Size.
Either option will display the Window Size floater (right) – type 1024×1024 in the text box and click Set. Your viewer window will resize itself.
Image Capture Basic Steps
Detailed instructions on taking shots with the HUD can be found in the documentation. The following is a summary of key steps:
- Prepare your viewer windlight, freeze the clouds and, for 360o spherical images, set the viewer window size.
- Wear the camera HUD and select your desired preset.
- Make sure the preset’s Camera Angle is set for the viewer’s camera (see above)
- Select the require camera position in the HUD (remembering to hide yourself if using At Avatar)
- Tap ESC to free your camera, then click the Start button on the HUD to position the camera for your first shot, and pressing
CTRL-‘ (tilde) to capture your first frame to disk.- The first time the camera is used, you’ll be asked for a file name and location for the shot & all subsequent shots will be automatically saved to this location
- Subsequent uses of the HUD will automatically save shots to the last location you used to save snapshots to disk when using the snapshot floater.
- Click the Right arrow on the HUD to advance the camera and use
CTRL-‘ (tilde) to save all remaining shots. After saving the last shot, the camera will automatically exit the capture mode.
You should now have a set of images ready for stitching together.
Selfies / Camera Offsets
Camera Panoramic has a set of presets for “selfies”, allowing you to include your avatar in your images. The process for capturing is the same as above, and the presets are selected by clicking the Offset button on the HUD, then selecting Preset from the dialogue box. The presets are defined by starting position.
Remember, as well, the offset option also allows you to offset the camera in increments of 0.1, 1.0 or 10 metres in the X, Y and Z axis’s – refer to the camera’s documentation for more on this.
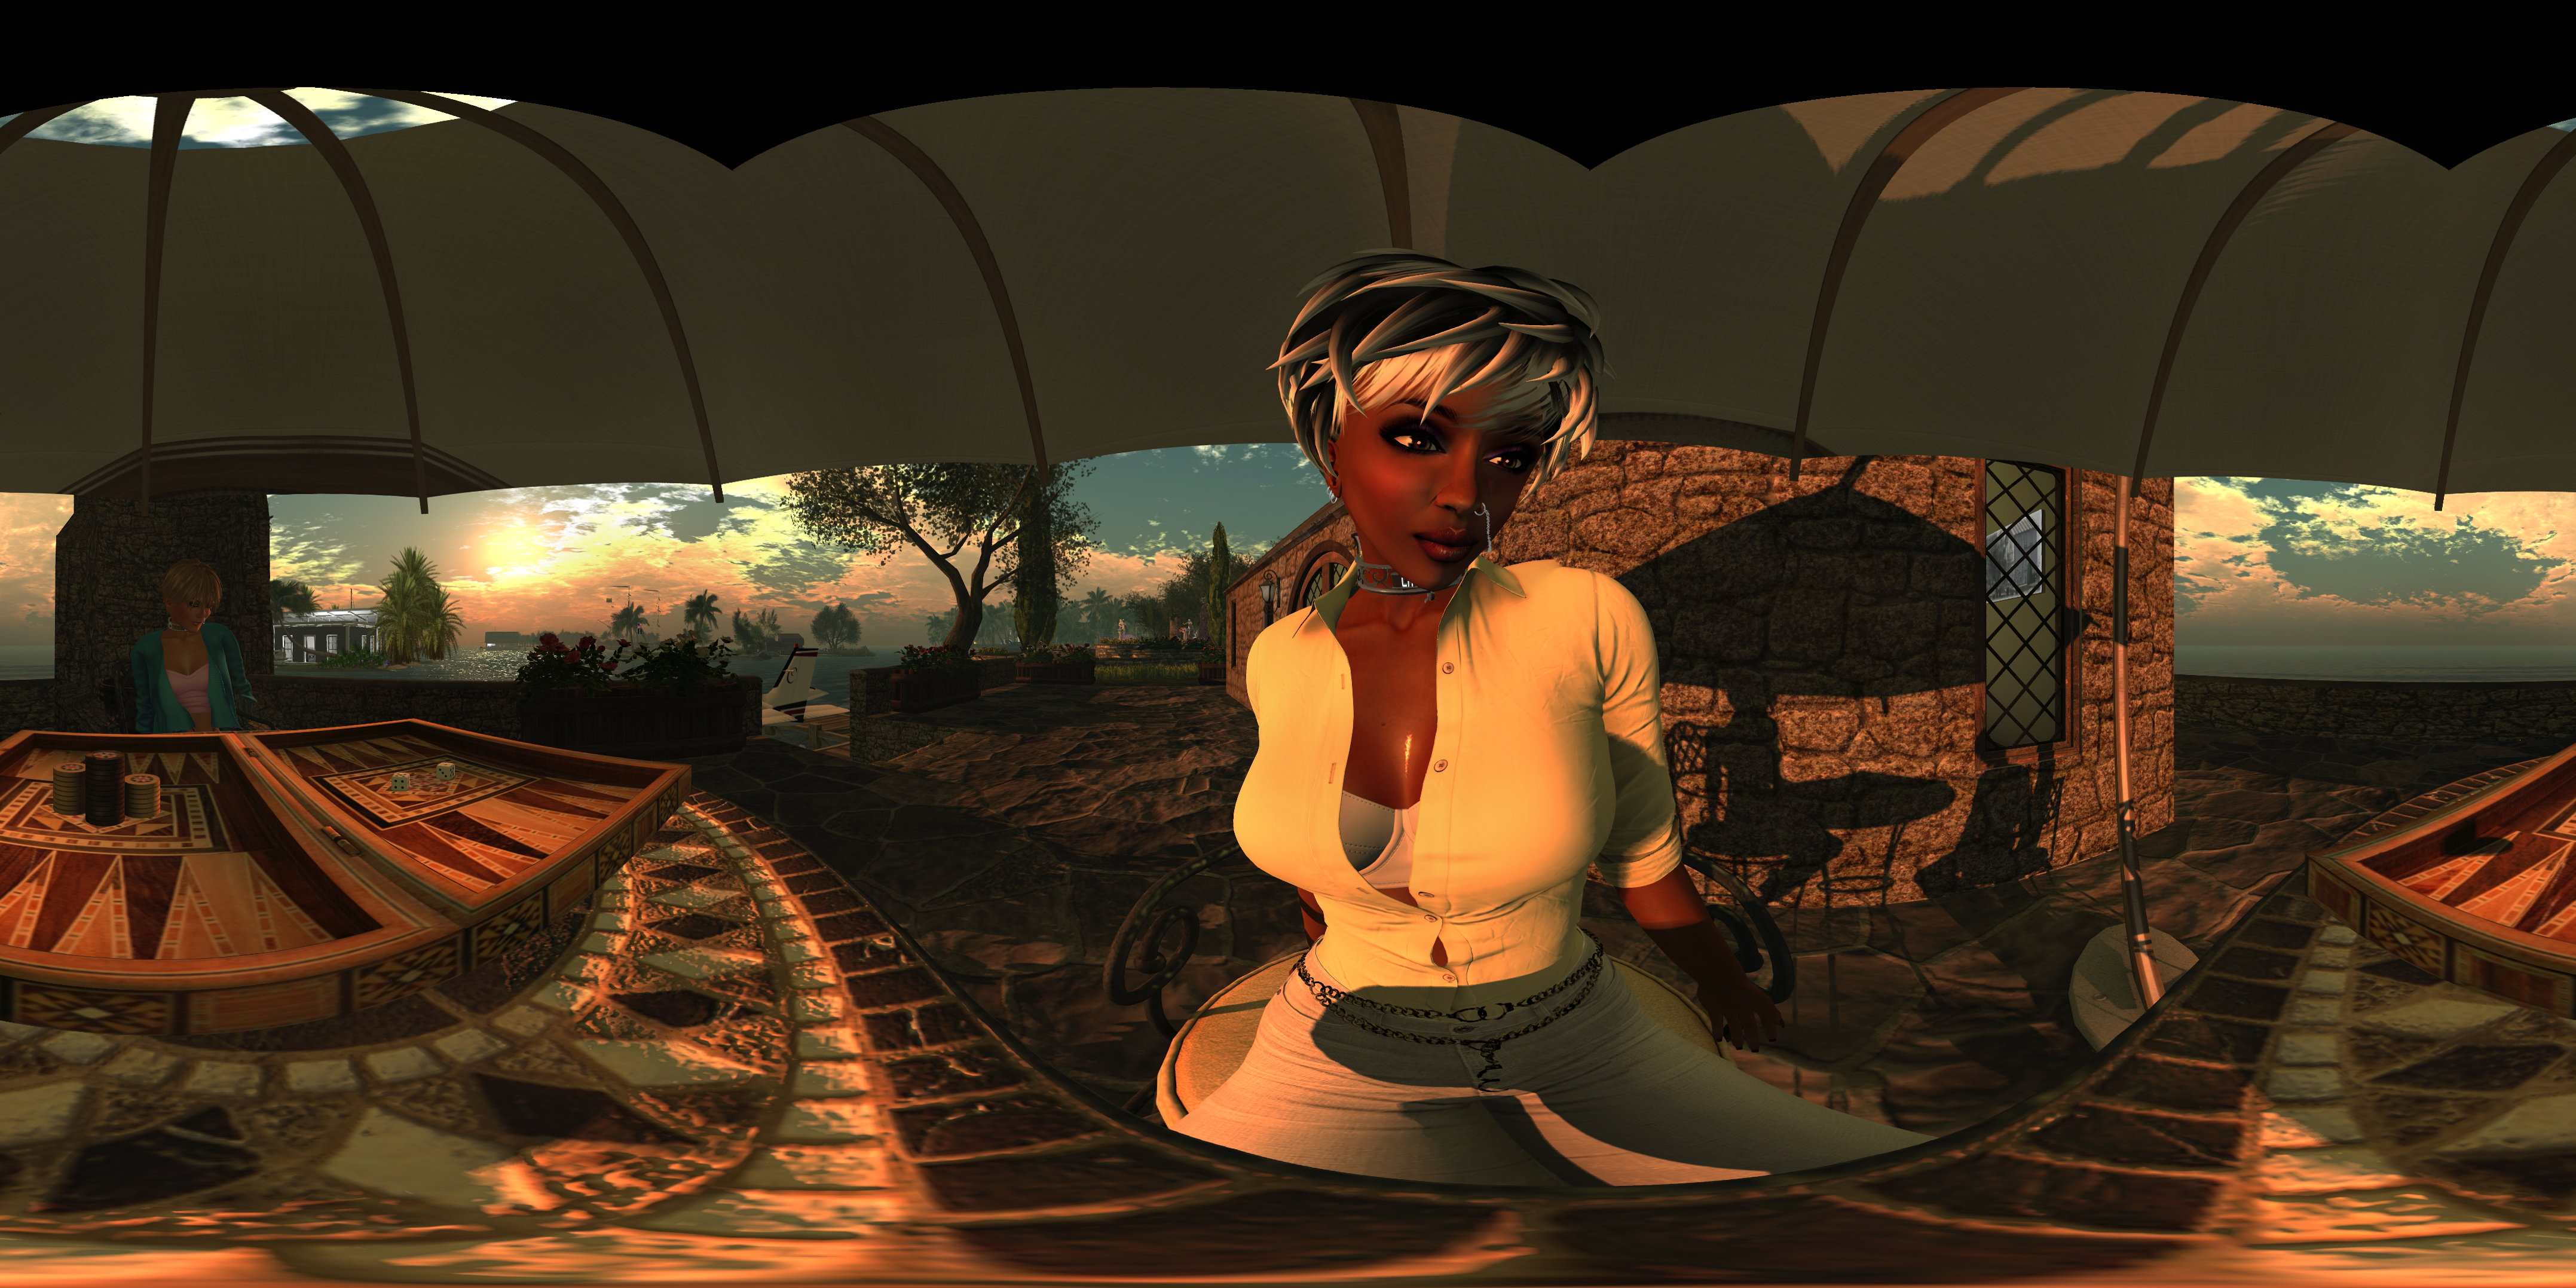 Camera Panoramic 360o “selfie” shot demonstration with extreme close-up, via Flickr – click to view in proper perspective and with 360o scrolling
Producing your Image
Once you have taken your shots in-world, you need to “stitch” them together to produce your final image. There are several software tools you can use for this; my preferred choice is the Hugin Panorama Stitcher available through Sourceforge.net, as I’ve found it to be fast and efficient.
With Hugin installed and launched, proceed as follows:
- In the Assistant tab, click on Load Images… Navigate to where your images are locally saved and select the require set, then click Open.

- The Camera and Lens Data dialogue box is displayed. Check the focal length reported by your Camera Panoramic HUD, and enter it into the Focal Length text box in the dialogue box. This will also update the HFOV above it. Don’t change anything else, just click OK to load your images.

- Once your images are loaded, use the Align button to arrange them. This may take a few minutes, just keep an eye on the processing window that opens.
- When Align has completed, click on the Move/Drag tab and click Straighten. If your shots are displayed upside down, enter 180 in the Roll text box and click Apply to flick them the right way up.

- Click on the Crop tab in Hugin and adjust the values to ensure your entire images is selected – set Left and Top to 0; Right and Bottom to 9999 – note the latter two will snap to the maximum size of your image
- Click on the Assistant tab once more and click Create Panorama. A dialogue box will open:
- If you are producing a 360o spherical image, make sure the image size Width and Height are in a 2:1 format – if not, check the Crop tab to make sure the entire image is selected.
- Set the image format to JPG and set the quality to 100%
- Click OK to run the output process.
- You’ll be asked to give a file name for the Hugin .PTO batch process file and the rendered image file. Enter a name for both, confirming each in turn.
- Image processing will start, and could take several minutes.
Do be aware that Hugin can be sensitive in handling images, particularly those with poor contrast / brightness, or which feature a lot of water, and this can lead to problems during the alignment process or in production of the finished image.
Uploading your Image
There are a number of options available for displaying your completed images (e.g. Facebook, VRchive, Flickr, YouTube, etc.). Remember, for these to work, your image should be in a 2:1 (width:height) ratio (created by taking a 360o spherical image with the Camera Panoramic HUD).
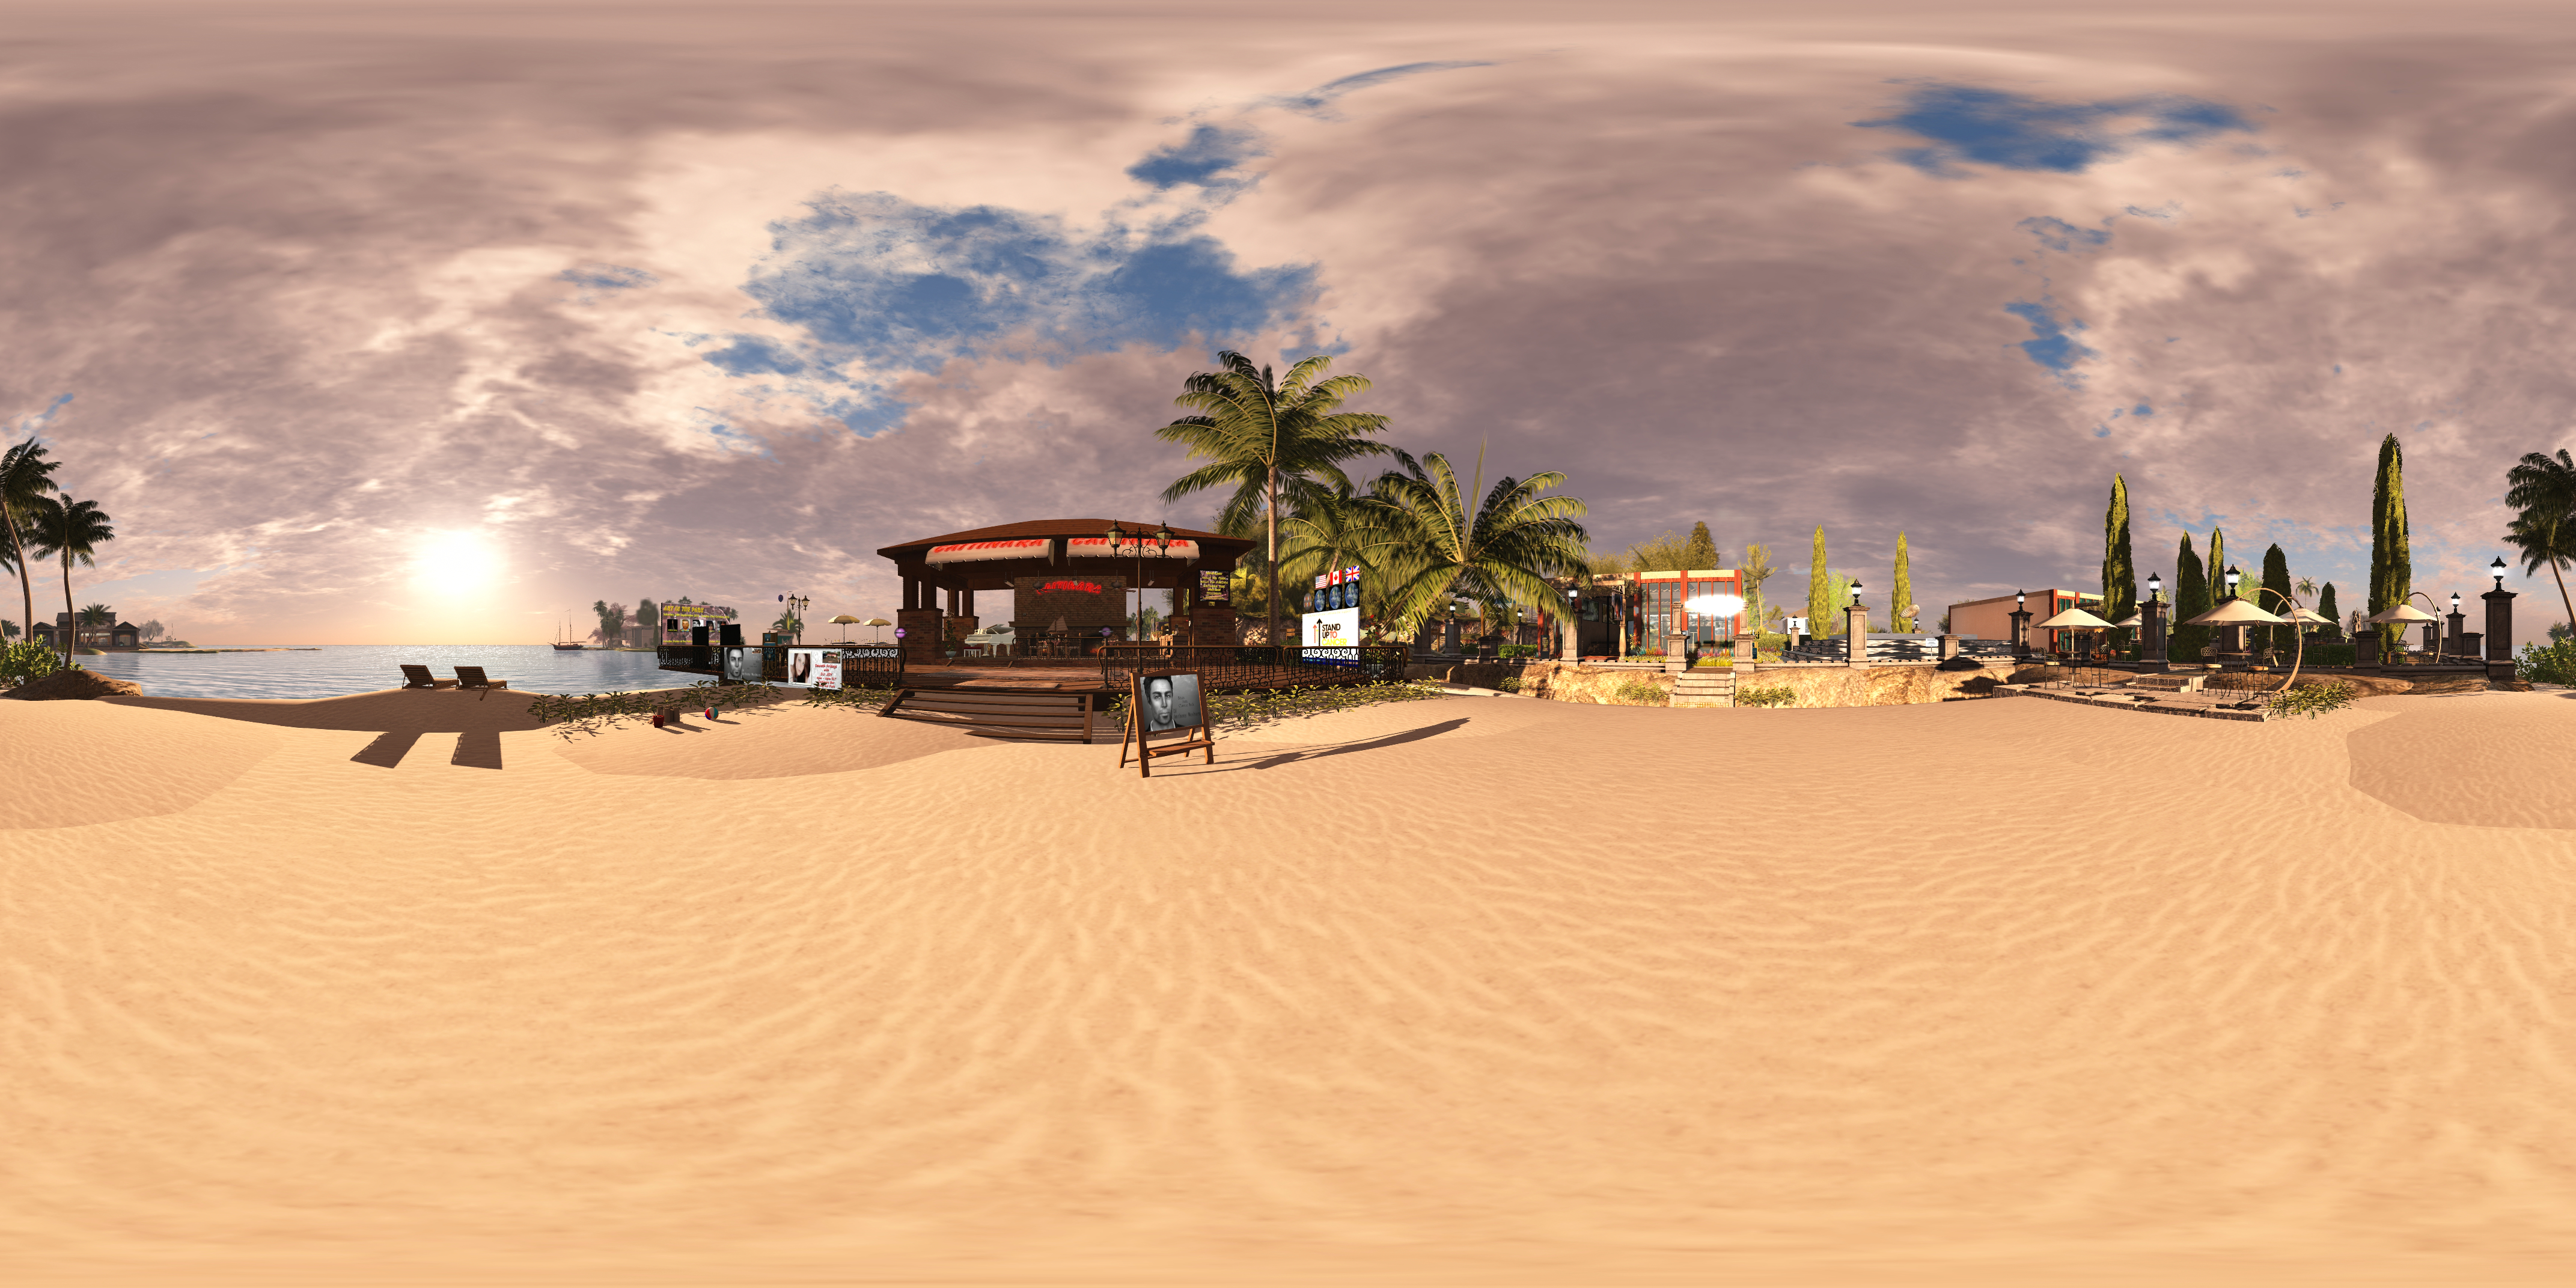 Caitinara Bar, Holly Kai Park via the Camera Panoramic HUD on Flickr – click to view with 360o scrolling
- I’ve previously covered uploading to VRchive (here) and YouTube (here).
- To upload to Facebook, try following the advice here.
- To upload to Flickr, and providing you have a 360o spherical image in 2:1 PAR, you can upload it directly to Flickr (don’t manually edit an image to change its PAR after it has been processed by Hugin or another package, as this will likely lose the metadata Flickr requires to make it a scrollable image).
Feeback

Both the Illiastra Panoramic HUD and Camera Panoramic are aimed at the same capability, and both do that job pretty well for anyone wanting to have a go with cylindrical and spherical 360 imaging.
However, it is also worthwhile pointing out that the Lab is attempting to develop a solution of their own. While there is no delivery indication on this, or a clear understanding of the capabilities it will include, that it is in development might be reason enough to wait before investing in either of these systems.
For my part, and after after two weeks of playing with both HUD systems, I have to admit my preference lies with the Camera Panoramic. It may require more fiddling in setting-up shots, but with all of the preset options and range of capture capabilities, it is a fair more flexible system at this point in time, with the added bonus of very easy upload to Flickr, the preferred choice of many SL photographers for displaying their work. For those on a budget, it is also by far the cheaper of the two systems (L$490 compared to L$999 at the time of writing).

Reblogged this on KULTIVATE MAGAZINE.
LikeLike
This looks a fun little gadget, and with your superb walk-through I think I’ll give it a go when I get back to my home PC.
Thanks Inara 🙂 x
LikeLike
Thought you might :). It’s fun!
LikeLike
Uhuh…I think I’d like to document Hestium in 360o before it goes – a little keepsake 🙂
LikeLike
Thanks for this interesting and detailed post, Inara. I tried already the panoramic camera and I enjoyed taking these pics :
Lalwende was very kind answering some questions and it was easy. I will try the Illiastra camera also but as far I’m happy with my IOL panoramic camera 🙂
LikeLiked by 1 person