Note: due to transitional issues, a temporary GTFO forum has been set-up for users. This currently supersedes the web addresses in this article.
Those wishing to learn more about GTFO are invited to read Get The Freight Out in Second Life.
Obtaining a GTFO Pack
There are two GTFO kits available:
- The free “trial” kit (the L$1 fee is refunded on purchase).
- A “full” kit, costing L$699.
Despite being called a “trial” kit, the L$1 pack is actually fully functional, however, it is limited to the first five levels of the game. The “full” kit is unlimited in the number of levels offered. Should you opt to start the game using the trial and then upgrade to the “full” pack, the G$ and any experience points you’ve gained using the “trial” kit will still be valid with the “full” HUD system.
Both kits can be obtained as follows:
- In-world from the GTFO world headquarters.
- Via the GTFO Marketplace store.
What’s in the Kit
The kit comprises the following items:
- The GTFO HUD.
- A sample GTFO vehicle API (VAPI) object.
- The GTFO vehicle API (VAPI) script.
- Documentation note cards, including set-up instructions.
When you have obtained a kit, unpack it to your inventory.
Setting Up a Vehicle for GTFO
Over 270 vehicle types are currently compatible with GTFO – and many have support built-in as standard. A list of current vehicles can be obtained from the GTFO vehicle database. Vehicle offering GTFO support built-in are often sold with the GFTO logo featured in their vendor / Marketplace displays / listings.
Vehicles with GTFO Support Built-in
If you have a vehicle with GTFO built-in, you don’t have to do any setting up. All you need to do is :
- Sit in your vehicle.
- Attach the GTFO HUD to your viewer window.
- Wait for your vehicle to register with the HUD.
You’re now ready to play the game!
Manually Setting-up a Vehicle
To set-up a vehicle for GTFO:
- Go to the GTFO vehicle database and locate your vehicle type, and note the VAPI code for it.
- For example, the Bandit 280 has a VAPI of BNDT280.
- Rez your vehicle.
- Rez the object GTFO!putVAPIhere from the GTFO folder in your inventory.
- Edit the object and replace “putVAPIhere” with the VAPI code for your vehicle.For example, if you are using the Bandit 280, you would rename the object to GTFO!BNDT280.
- If you prefer, you can rez a blank prim and rename it in the format above as use that as your GTFO object.
- Take the object back to inventory
- Edit your vehicle and drop the object into the vehicle’s Contents.
- Drag the VAPI script from your inventory into the vehicle’s Contents.
- The API script should report it recognises the vehicle.
- If not, check to make sure you have given the object the correct name; if you haven’t, rename the object in your vehicle.
- Providing the object has been named correctly, your vehicle should be recognised as being GTFO ready, with the followinng (or similar) series of messages:
Get The Freight Out! by SHiNYbrand – Booting App with 13008b free.
Welcome to [regional location]! Number of Hubs: [number]
Vehicle Connected: Boat | Capacity: [number / type] | Overhead: [G$0 per kilometre]
You’re now ready to play the game!
Making a Hub-to-Hub Freight Run
- Wear the GTFO HUD.
- Click it and click the option to Find Hubs.

- Select a Hub and fly / sail / drive / teleport to it.
- Keep the GTFO HUD attached.
- You can use the HUD to open the Map to help with navigation, if you like.
- The HUD will inform you when you’ve arrived at the hub.
- If you teleported there, rez your vehicle and sit in it.
- Click the HUD and select [Get Cargo].
- Jobs will be displayed based on your vehicle size (Freight for large vehicles, Courier for smaller), and if you are using an aircraft, offer you the option to make an air drop (see Air Drops).
- Jobs list the amount you’ll be paid on delivery and the haulage fee you must pay to carry them – this is held in “escrow”, and “refunded” to you if you complete the delivery within an expected time frame (or will be lost to you if you do not).
- Page through the available jobs and select the one you want to take by clicking [Load Job] and confirm your selection by clicking [Confirm].

- WAIT for the cargo to “load”, as indicated in the HUD.
- Transport the cargo to your selected destination.
- On arrival, the HUD will inform you that you can off-load the cargo.
- Click the HUD to display the menu.
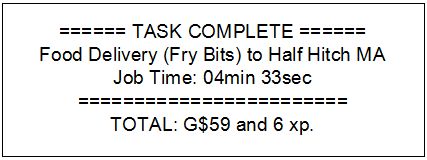
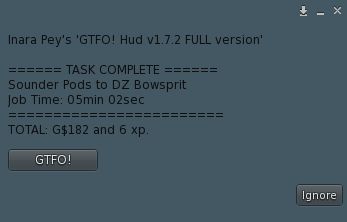
- Click Deliver Cargo to off-load and receive your payment and experience points.
- A message is displayed in Chat confirming the successful delivery.
- You can now opt to collect another cargo from the hub for delivery elsewhere, if you wish.
Air Drops
Air Drops are slightly different, in two main ways:
- They require the use of an aircraft – ‘plane or helicopter.
- Deliveries are made by flying over the destination and “parachuting” / “dropping” the cargo in.
To complete an air-drop:
- Select a hub and fly to it / rez your GFTO enabled aircraft there.
- Click the HUD on arrival to view cargo options.
- Click the Drop option (Freight or Courier, depending on your aircraft size).
- Select the Drop Zone (DZ) to which you want to fly.
- Page through the cargo options and select the one you want by clicking [Load Job] and then [Confirm].
- When the cargo is loaded, fly to the Drop Zone.
- As you fly over the Drop Zone, a dialogue box is displayed information you the cargo has been successfully dropped.
- Continue on your flight – perhaps to another GTFO HUD.
Applying to Become a GTFO Hub Provider
- To become a GTFO hub provider, the following requirement must be met:
- Location is inclusive. (does not exclude large groups of avatars).
- Open rez area available.
- Airports: runway cannot be sited above 500 metres.
- Spaceports: must be 3,000 metre or above, unless entire region is space only.
- Complete and submit the Hub Application Form.
Additional Information
