2016 SL project updates 40 (2): TPVD meeting, Bento

It All Starts With a Smile; Inara Pey, October 2016, on Flickr It All Starts With A Smileblog post

The majority of the notes in this update are taken from the TPV Developer meeting held on Friday, October 7th. The video of that meeting is embedded at the end of this update, and references to it are indicated through the use of time stamps in the paragraphs below. My thanks as always to North for recording and providing it.

This is not intended to be a transcript of the entire meeting, which featured discussions of some situations specific to individual region rather than SL as a whole. However, key discussion points have hopefully been highlighted.

Server Deployment – Recap

As always, please refer to the server deployment thread for updates or changes.

  • Tuesday, October 4th saw the Main (SLS) channel updated with the server maintenance package previously  deployed to the three RC channels, which includes a fix for BUG-40565, introduced as a result of the deployment of the week #38 server maintenance package.
  • There was no planned deployment / restart for the three RC channels, although there should be a new RC package available for week #41 (commencing Monday, October 10th).

SL Viewer Updates

From 00:05 in the video.

The VLC Media Plug-in RC viewer updated to version 4.1.1.320331 on Thursday, October 6th, intended to fix a number of outstanding bugs, including setting the volume slider to maximum, causing the voice sound to cut out completely. This view has been performing well, with a low crash rate, so if this trend continues with the latest update it may well finally make it to release status in week #41 (commencing Monday, October 10th).

The Project Bento RC viewer updated to version 5.0.0.320160 on Friday, October 7th (see below for more).

Project Bento

There was no Project Bento user group meeting during the week, due to a timing conflict with the Lab’s internal monthly meeting. The next Bento meeting will be on Thursday, October 13th, at 13:00 at the Hippotropolis camp fire circle.

In the meantime, as noted above, there was a new Bento RC update, which includes the following additions and fixes:

  • Adds a scale locking feature to mesh upload
  • Optimisations should improve the frame rate in mesh-intensive regions
  • Probable fix for an intermittent crash.

The scale locking feature adds a check box which, if checked will lock joints against scale changes, and thus the sliders affecting the joint will no longer influence it. Leaving the box unchecked for the joint will allow scale changes. This might be useful for those wishing to produce (non-human?) avatars where it might be preferable to have certain parts of the body locked from slider-driven changes to prevent distortions / conflicts arising, without necessarily locking in the entire mesh against slider changes (e.g. the face could be “frozen” to prevent distortion, but body height or tail length, etc).

In addition to their brief Bento Hands preview first seen in July, Vista Animations have now produced a more details preview, with the beta version of the hands (with free update to the release version) available on the Marketplace for L$999.

64-bit Viewer and Viewer Build Process

[03:19] Work on the 64-bit viewers is temporarily paused as the Lab shifts over to their improved viewer build process, which will come into effect with the 64-bit builds.

The updated process involves changes to almost everything in the build pipeline other than the compilers. However the work is progressing well, and the Lab anticipates running builds using the new libraries from week #41, and the library repositories are already public for TPVs to examine and use.

In particular, the Autobuild environment has been updated to support platform-specific switches within the build scripts via a new option in the autobuild_source_environment command. The varsfile is a file containing template variable assignments to be modified based on the build type, so that all builds(library and viewer) use the same compilation and option switches. The variables file used by Linden Lab to build the viewer and its libraries is in the viewer-build-variables repository. TPVs are free to us this, or adopt / continue to use their own.

As noted, given the extent of the work, the Lab is avoiding updating Visual Studio and Xcode. Instead, they will be updated as a follow-on project once the current work is completed.
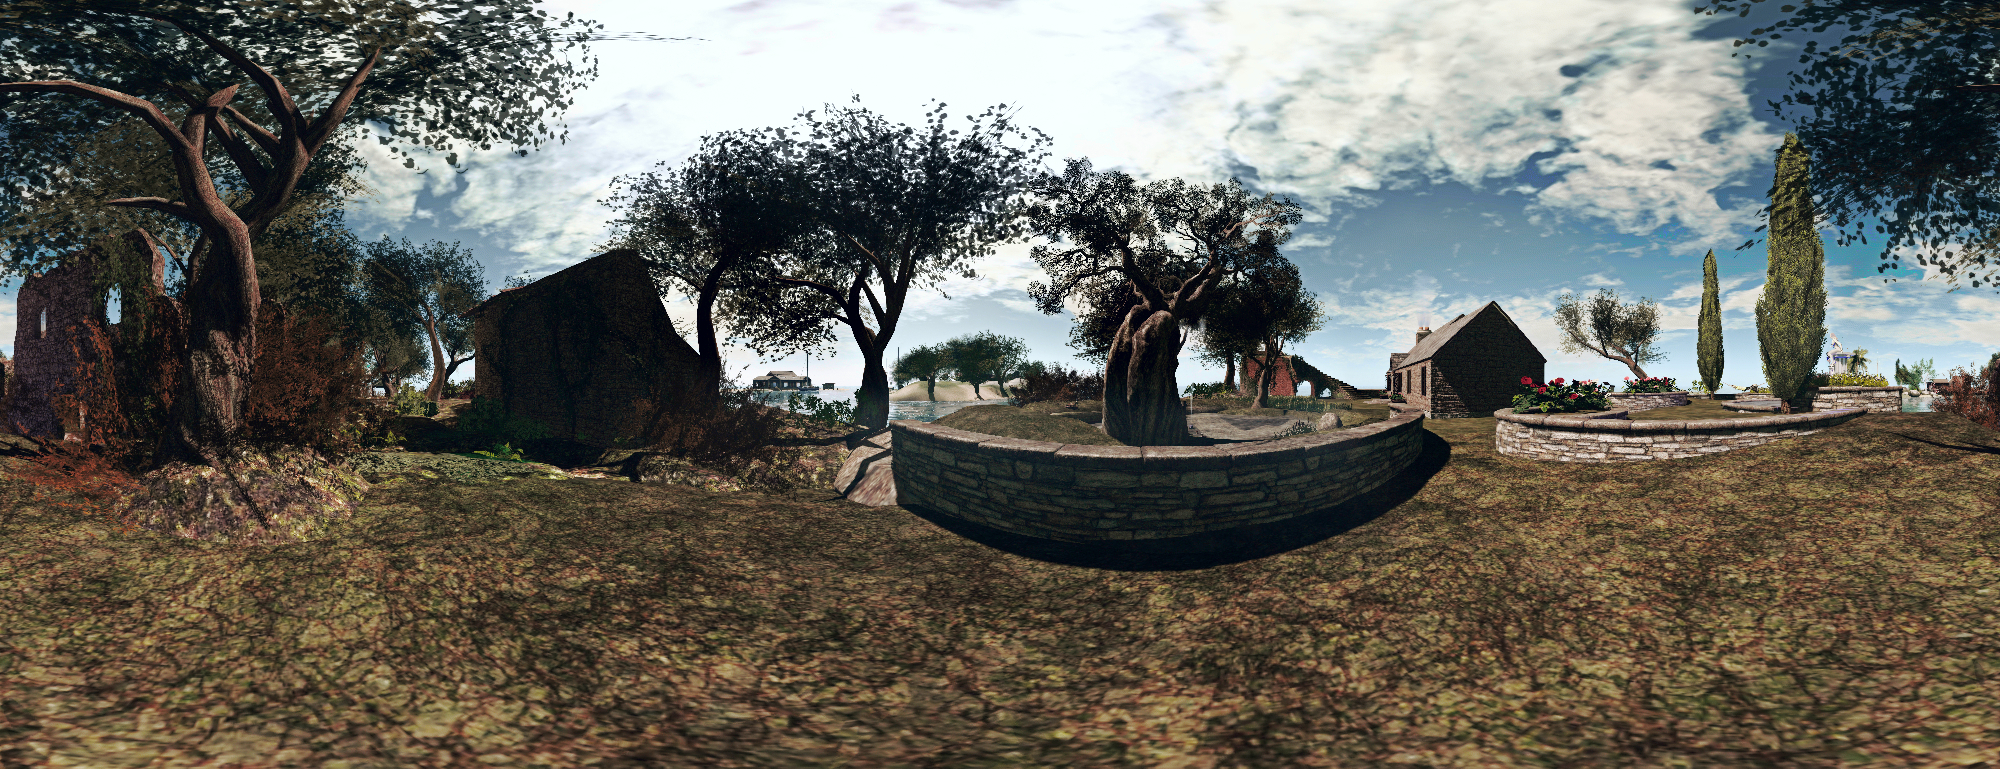
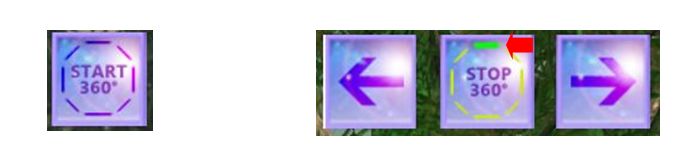
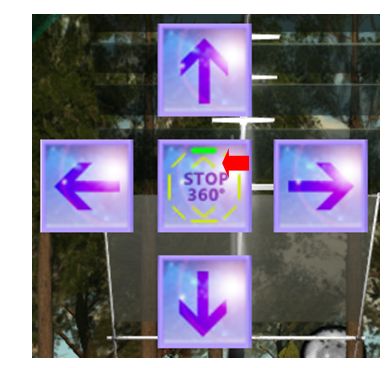
Snapshot 360

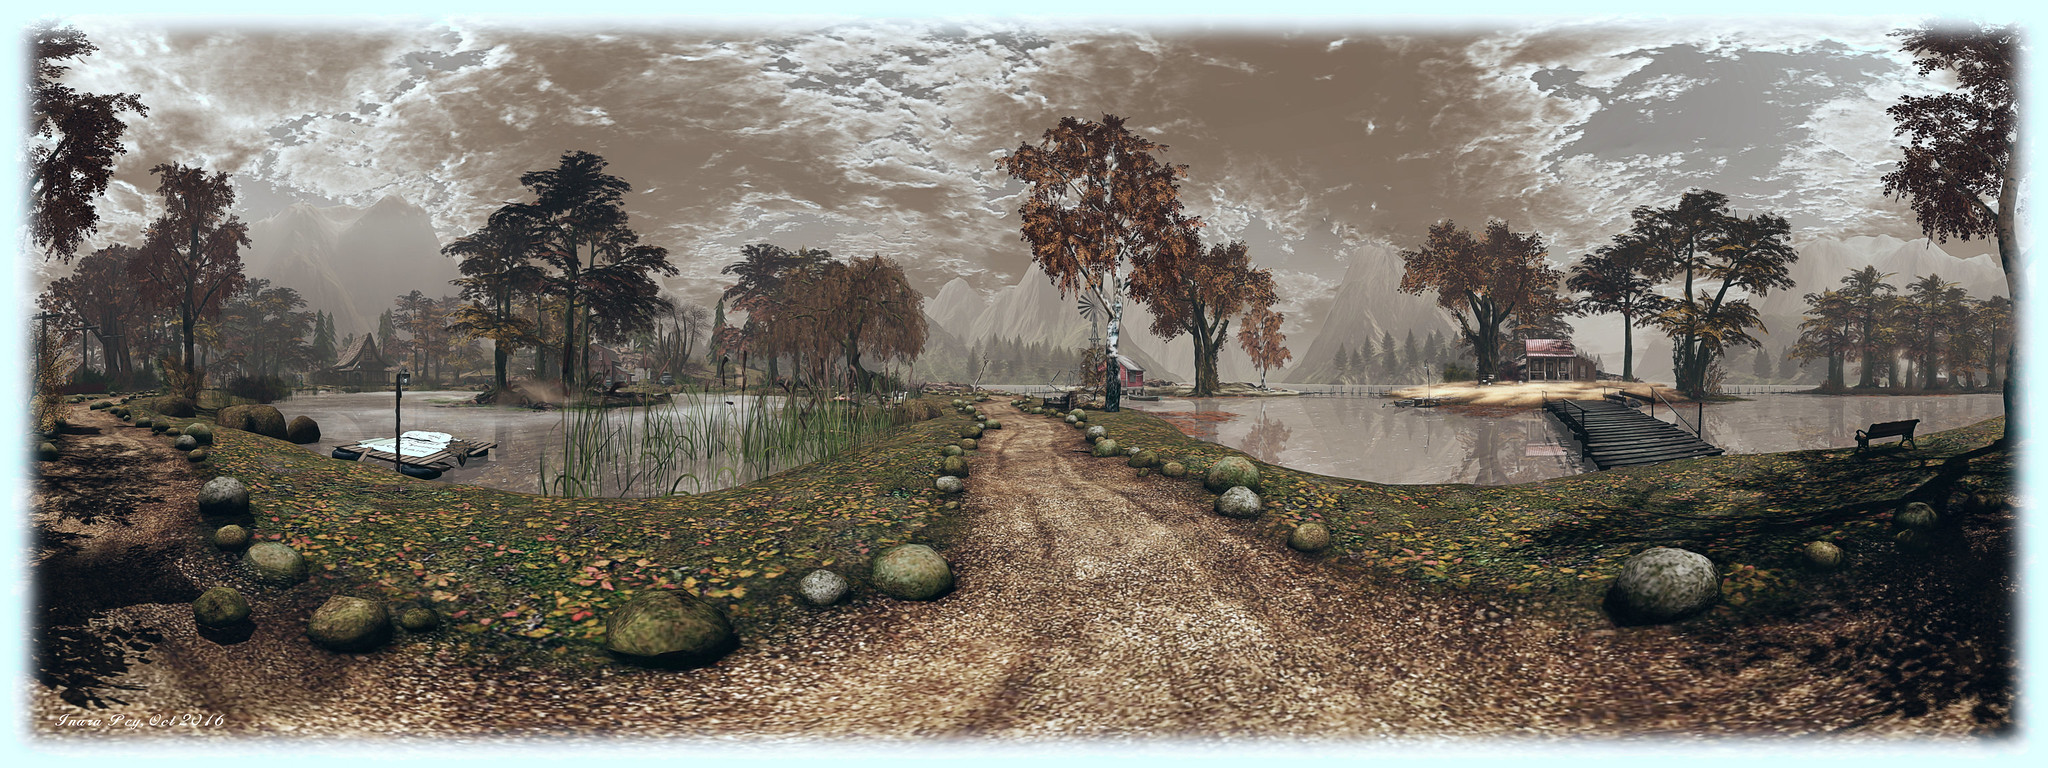
[08:49] The Lab is working on a new viewer capability – the ability to take 360-degree panoramic snapshots using the snapshot floater. I’ve covered this in a separate article, with key audio extracts.

Experience Force Sit

Rider Linden is continuing to work on this new capability (see my article here) which will allow for the scripted seating of avatars engaged in experiences (Project Espeon). In particular, the latest Maintenance RC allows avatars to use the stand button to stand (Server Beta Meeting, Thursday, 6th October).

Nessuno and Kicca in Second Life

The White Gallery
The White Gallery

Tucked away in a corner of a region called Battlestar and rising from calm waters are two galleries of modern, open design. They are the respective homes for art by Nessuno Myoo and Kicca Igaly.

The White Gallery is  a glass-sided C-shape building rising three levels above the water. It is home to Nessuno’s 2D and 3D art, and includes a rooftop auditorium for presentations – although I’m not sure how active this is; the last event shown on the screen dates back to 2012.

The White Gallery
The White Gallery

Between the auditorium and the water, however, there is much to see; Nessuno’s sculptures are highly stylised in form, captivating the eye and drawing the observer into their narrative with ease. Some offer a twist of humour, others a sharp observation, all are evocative. His 2D art is equally attention-grabbing and can be sharply observational (iGirl). When visiting, do keep an eye out for the cubes displaying his art from the physical world.

Across the water, Kicca’s Art Gallery also rises three to three levels above the water as a C-shaped building. It is slightly offset to Nessuno’s gallery as they face one another, with the three levels connected by a central spiral ramp. Kicca makes similar use of the space to display her 2D and 3D art, including pieces from the physical world.

Kicca Igaly's Gallery
Kicca Igaly’s Gallery

Kicca’s 3D work can also be stylised in looks, but also carries sentiment and narrative which draw the observer into each piece. Her 2D art, static and animated, offers excellent pieces for home display. Such is the diversity of pieces displayed, it is easy to find oneself drawn back to particular pieces – I freely confess to being attracted to her physical world art on display on the upper level of the gallery (three of which are imaged below).

Like the artists themselves, the two galleries complement one another and offer an overlapping display of fine 3D and 2D art. Almost all of the pieces on display at both are for sale if you are collector, and if you have enjoyed Nessuno’s and Kicca’s work and installations on display elsewhere in Second Life, but haven’t previously visited their galleries, then this is a destination very much worth adding to your itinerary.

Kicca Igaly's Gallery
Kicca Igaly’s Gallery

SLurl Details

Lab: 360 panoramic image capture coming to the viewer – soon!

It All Starts With a Smile; Inara Pey, October 2016, on Flickr The ability to take 360-degree panoramic shots is to be integrated into the viewer, with access via the snapshot floater (Image location: It All Starts With A Smile  – blog post – static image produced with the Illiastra Panoramic Camera HUD) – click the image to see it in 360-degree format

Just as I was working on an article about  the Illiastra Panoramic Camera and producing static / interactive 360-degree images of Second Life, I attended the Third Party Viewer Development meeting on Friday, October 7th. During that meeting, Troy Linden announced that the Lab are working on incorporating the capability to generate 360-degree snapshots directly into the viewer.

The new capability is to be called 360 Snapshot, and will be integrated into the snapshot floater (alongside of additional snapshot improvements contributed by TPV developer NiranV Dean – although these sit outside of the 360-degree feature).

In essence, the snapshot floater will act as a 360-degree camera rig, allowing you to position your avatar almost anywhere in-world and capture a full 360-degree image, stitched together by back-end processing by the Lab. The image will then be shareable via the SL Share feature, and should be available for download to your local drive.

The work is far enough advanced such that a test viewer (not a project viewer) will be appearing sometime quite soon, with the Lab being keen to get it capability out into the hands of users to try. However, the important thing to note is that it will be a test version – it will not be a final, polished solution right out of the gate. The idea is to give users an indication of things like picture quality, approach taken, etc., and allow the Lab to examine exactly how much additional functionality they need to consider / include in the capability.

Initially, the stitching element will be absent; users will have to take care of that themselves after saving the image set to their local drive. There are also some potentially significant issues the Lab want to look at in detail through the use of the test viewer.

In particular there is the question of how the capability will interact with the simulator Interest List: will items effectively behind your avatar’s field of view update correctly in order to be properly imaged by the system? If not, the Lab will need to look in to how things might be adjusted. The idea here is that by carrying out such tests publicly, the Lab can work with interested users and photographers to identify potential limitations and problem areas in the approach, and so hopefully address them.

In commenting on the project, Oz acknowledged that there are HUD systems available which have been inspirational, and much of the driver behind this capability is the desire to give users a simple “point and shoot” interface.

There is no indication yet on limitations which might be placed on the system, such as image resolution, etc. Hence again why the capability will be appearing in a test viewer when it emerges, rather than a project viewer. The Lab also isn’t committing to any kind of time scales for this work, other than the test viewer is liable to appear reasonably soon; or how long the project will take to reach a release status once a test viewer does appear. The focus is on a step-by-step development of the capability.

Note: the audio clips here are extracts of salient points from the discussion on the 360 Snapshot capability. To hear the full discussion of the capability, please listen to the video of the Third Party Viewer Meeting video, starting at the 08:49 point.

Venta Silurum in Second Life

Venta Silurum; Inara Pey, October 2016, on Flickr Venta Silurum – click any image for full size

Venta Silurum, a homestead region by Tally (Tallyesin) and Kiana  (kiana Jarman), takes its name from a small town which once existed in the Roman province of Britannia (Britain), the remains of which now lie in the village of Caerwent, Monmouthshire, south-east Wales. It also, in part, reflects its physical world namesake, in that it includes a number of ruins open to the public to explore, while part of the landscape pays homage to the more rugged parts of Wales.

However, a facsimile of ancient Venta Silurum this most certainly isn’t; as the About Land notes state, this region is a place for adventure and exploration – and it offers one or two unexpected surprises along the way.

Venta Silurum; Inara Pey, October 2016, on Flickr Venta Silurum

An explorer’s visit commences on the west side of the region, atop a grassy plateau fronted by jumbled rocks dropping sharply to the waters below. A lighthouse stands at this small headland, while behind it are the narrow fields of a small farm, watched over by the whitewashed tower of a windmill. Caught in the spell of a forever dusk, the region inspires and immediate air of mystery, which is heightened by the distant line of ruins and a single  finger of a folly standing before the eastern sky.

How one reaches these may not immediately be apparent; wooden steps offer a way down between the rocks beneath the lighthouse, and thence out across the reedy waters that cut into the land, pointing the way to a lone farmhouse to the north. However, a careful examination to the south and east, over the still waters of a flooded quarry, will reveal stone steps winding their way up the ridge on which the ruins sit, and which are reached by following the rutted track past the squeaking sails of the windmill.

Venta Silurum; Inara Pey, October 2016, on Flickr Venta Silurum

Following the track will bring you, by way of a narrow gorge spanned by a covered bridge and a gated fence, to the foot of the stone steps. These in fact lead both up and down – up to the ruins, and down to a secluded southerly beach with ramshackle bar and places to sit and cuddle or lie quietly on the sand. Beside these stone stairways sits one of wood, dropping away into the heart of the region.

Climb the stone stairs and you’ll find your way through ancient walls of square-cut stone and flgstone floors to the folly, now apparently the lonely sanctum of someone interested in the sciences – or perhaps magic. Take the wooden steps and you’ll be led under rock to where more mysteries await beneath the boughs of trees, and onward and northward to where more ruins sit under the shoulder of the sheer ridge, a stone bridge spanning a channel of water, leading the way back to the small farmhouse first glimpsed from the landing point.Venta Silurum; Inara Pey, October 2016, on Flickr Venta Silurum

Set beneath a marvellous windlight, filled with ambient sounds and rich in opportunities for photographs, Venta Silurum offers an intriguing and delightful visit, sure to conjure up stories about its various sights and offerings, ancient or more modern.

SLurl Details

The Illiastra Panoramic Camera: 360-degree images of Second Life

Illiastra Camera Test; Inara Pey, October 2016, on Flickr A static panoramic view of our home island produced using the Illiastra Panoramic Camera and the Hugin Software.

I received a generous gift from Illiastra Ascendent (NVZN, aka James Reichert in the physical world) over the weekend, who sent me the Illiastra Panoramic Camera (MP link) to try-out in Second Life.

This is a HUD-based system which can be used to produce set of images of an in-world scene which can be stitched together using suitable software to create a static 360-degree view. These can in turn be uploaded to Facebook or websites such as VRchive and YouTube, as scrollable, 360-degree views of a location.

The system comprises two camera HUDs, “basic” and Pro, together with a photosphere for viewing captured images in-world. The difference between the two cameras being that the “basic” model uses 8 images to create a 360-degree panorama, while the Pro version takes a total of 26 (including directly above and below you) to produce either a panoramic view using 24 images, or a spherical view using all 26 images.

Producing your static panoramic image is a 2-step process:

  • Capturing your in-world shots using the camera
  • Stitching them into a panoramic mosaic using a suitable software application.

Once this is done, you can proceed to prepare them for 360-degree viewing on Facebook, VRchive, etc. Illiastra provides comprehensive set of videos on producing your panoramic shots, stitching them together and uploading them to Facebook, which I highly recommend.

For the rest of this article, I’ll take you through producing a panoramic shot and then uploading it to VRchive and converting it to a 360-degree video for You Tube.

Taking the Shots

There are some basic steps to follow when preparing to take shots using the system:

  • Position yourself at the centre of the location you want to capture in a 360-degree image. Be careful of where you select – too close to building or trees, etc., could have them dominating a part of the view.
  • Set your preferred windlight and daytime settings.
  • Make sure you freeze the clouds – you’ll be taking up to 26 images which will need to be stitched together, and moving clouds could make that a bit of a bugger to do. Use Menu > World > Environment Editor >Sky Presets > Edit Presets or PhotoTools > Clouds and check the scroll lock check boxes.
  • Make sure the viewer’s camera is set to the default view  angle, FOV and focal length
  • Hide yourself from view  – used the supplied alpha mask after removing all attachments or use something like a Vanish gesture. Otherwise, the top of your head will be in every shot.
  • Tap ESC on your keyboard to free your camera (and free it from any other influences acting upon it).

Once you’re set, click the camera HUD your camera will rotate and position itself for the first shot. Use the Snapshot shortcut CTRL-‘ (tilde) to save the image – you’ll be prompted for a file name and location on your computer for the very first short after the HUD is attached.

The Pro version of the camera produces 24 shots using the left / right keys (+ CTRL-' for image capture), the chevrons denoting the progress through upper / lower sets of 8 images apiece. The up and down buttons position the camera for taking sky / ground shots respectively, which can be used to create spherical views
The Pro version of the camera produces 24 shots using the left / right keys (+ CTRL-‘ for image capture), the chevrons denoting the progress through upper / lower sets of 8 images apiece. The up and down buttons position the camera for taking sky / ground shots respectively, which can be used to create spherical views

When you’ve saved the shot – which is effectively the first frame of your panoramic image – click the right arrow on the HUD to advance the camera to the next point (indicated in green on the HUD), and take another snapshot (CTRL-‘). You won’t be prompted for a file name for this and the remaining frames – simply progress on around the HUD, capturing a snapshot at each of the highlighted views in turn.

If you are using the “Basic” camera, you’ll be taking a total of 8 shots – once around the HUD. If you are using the Pro camera, you will be taking 24 shots around you – that’s 3 times around the HUD clicking the right button, giving you 8 horizontal shots, 8 angled upwards, and 8 angled downwards – just follow the prompts on the HUD. When you’ve taken all 24, click the UP arrow on the HUD to capture an overhead view, and the DOWN arrow to capture a shot of the ground under your feet. Again – remember to press CTRL-‘ to save each image.

Note that after the very first instance of asking you to select a file location / name for your shot for image ever captured using it, the HUD will automatically save any subsequent set of shots you capture to the last location on your hard drive you used to save images captured using the snapshot floater

Producing your Panoramic Image via Hugin

Once you have taken your shots, you’ll have either 8 (“basic” camera) or 26 (Pro camera) shots of your location. These now need to be stitched together. GIMP or PhotoShop can be used for this for those proficient in using them, otherwise Illiastra recommends using the Hugin Panorama Stitcher available through Sourceforge.net.  I opted to use this.

With Hugin installed and launched, proceed as follows:

  • In the Assistant tab, click on Load Images…
    • If you have been using the “Basic” camera, select all 8 of your shots
    • If you have been using the Pro camera, selected the first 24 shots  – do not include the final overhead sky shot or ground shot – these can be added later, if required.
  • A dialogue box will appear. Enter a value of 90 in the Horizontal Field of View (HFOV).
  • Click OK to load your images into Hugin – things will initially look a mess – don’t worry!
  • Click on the Align button to initially align your shots – this may take a while to process, depending on your system, the image resolution, etc., and then may end-up upside down. Again, don’t worry!
Loading and aligning your images in Hugin
  • When Align has completed, click on the Move/Drag tab and click Straighten. If your shots are upside down, enter 180 in the Roll text box and click Apply. Your images will further align and flip the right way up.
Straighten and correct inverted image, if required

Continue reading “The Illiastra Panoramic Camera: 360-degree images of Second Life”