On Tuesday, July 23rd, 2019, Linden Lab issued a Sansar point release containing the first cut of the user-generated quest authoring tool.
Also within the release are a couple of performance improvements:
- Avatar movement and camera rotation are faster in keyboard turn mode.
- Panels now retain their positions in the avatar editor.
Quests – Key Points
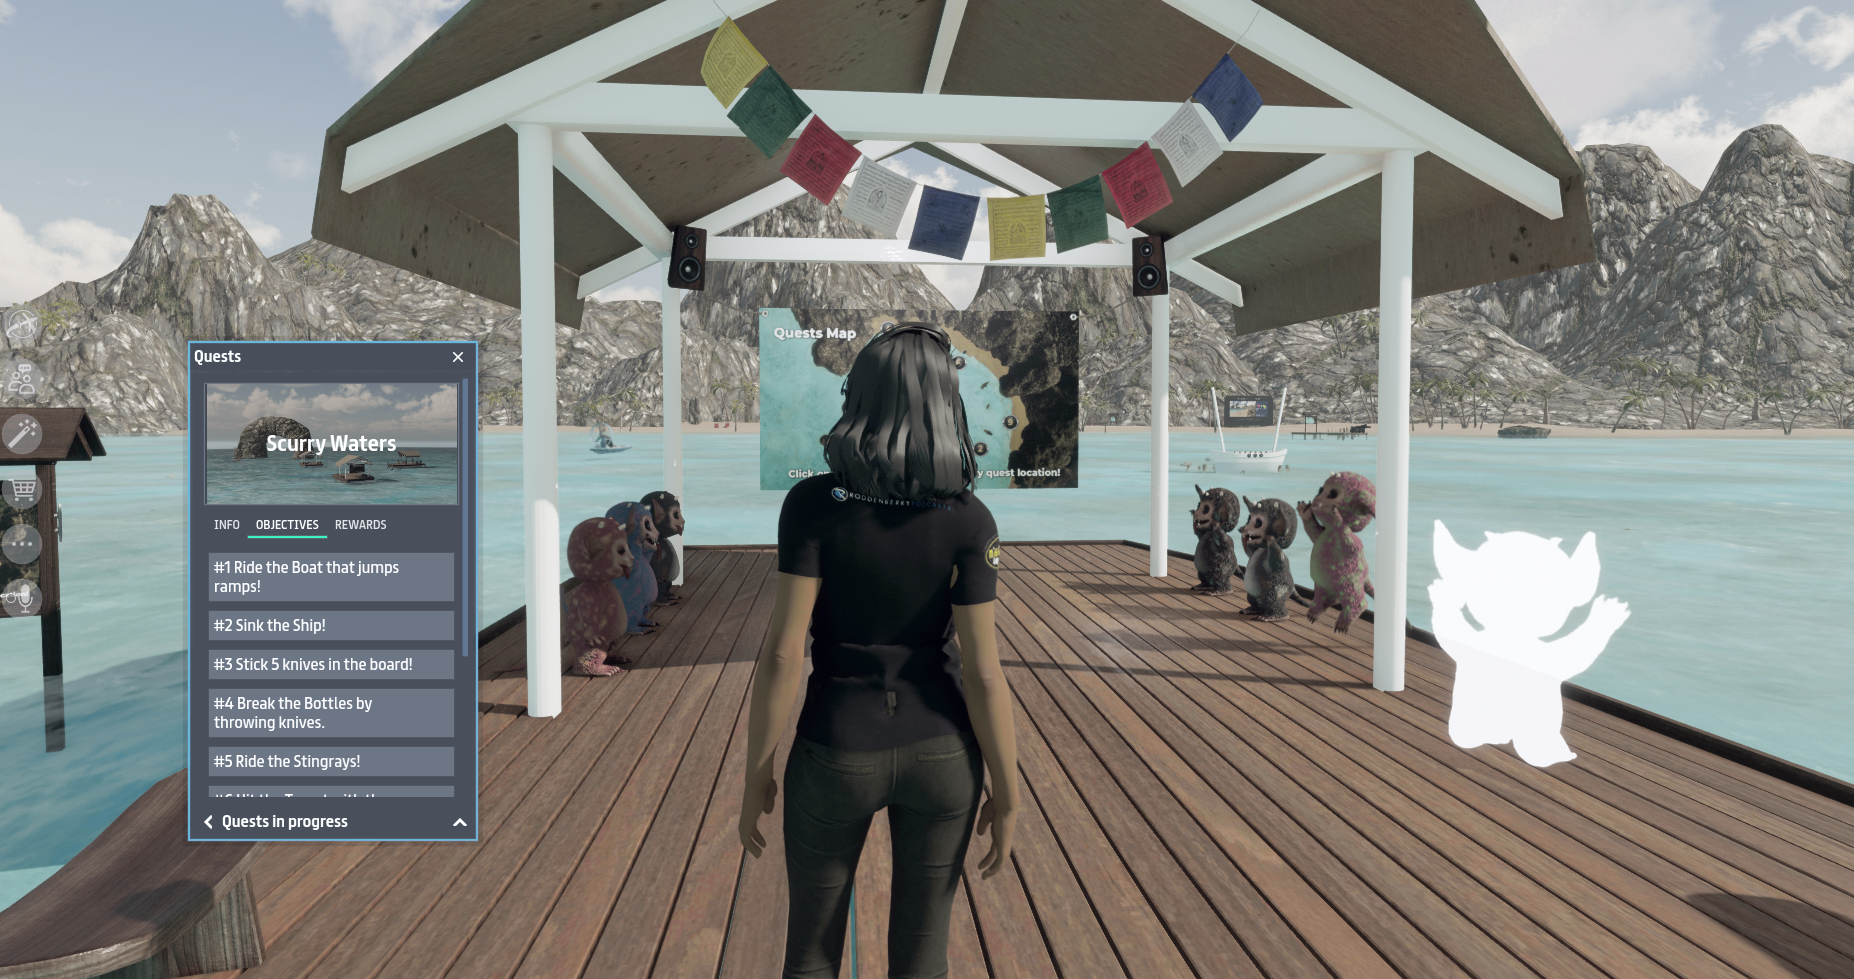
Quests are seen as a means of generating user engagement within experiences. A basic system – available only to the lab – has been used to provide a flavour of quests / hunts in places like the Sansar Social Hub, but which offer Sansar Dollar rewards.
The new quest system provides an new quest authoring tool directly to experience creators, however there are some key points to note about this first release:
- Quests can only be linked to experiences owned by the quest creator (so creator X cannot develop a quest for use in creator Y’s experience(s).
- Quests can be set for an individual experience or across multiple experience – again, providing all the experiences at are owned by the creator making the quest.
- While it includes a tab for establishing rewards within a quest, this is not active with this initial release.
- Once the rewards capability has been added by the Lab in a future update, quests will initially be limited to offering up to three objects as rewards, which will be presented to users completing a quest through the Sansar Store.
How quests might be used is down to individual creators. Ideas include:
- Guided tours of experiences.
- Simple introductions to a game.
- Games.
- Hunts. / actual quests.
- Leaning experiences.
- etc.
Obviously, some of these will be more likely to be attractive to users once the rewards system has been added – and may well require more that 3 rewards in order to maintain focus / interest – and this is something the Lab have indicated they would be willing to review in the future. But even without a reward system, the deployment of the quest system offers creators the opportunity to play with the tools and gain familiarity with them.
Quest creation comprises two parts:
- Creating the quest data itself, using the authoring tool.
- Using objects in scenes (experiences) that are directly linked to the quest and use / present the quest data.
The quest can be tested by the creator in the unpublished scene (by building and saving the scene), and it becomes public when the scene is published as an experience.
The Tools
The initial quest system comprises:
- The quest authoring tool, available from the Create menu button in the Sansar client. This allows:
- A quest to be defined.
- Objectives for the quest to be defined.
- In a future release, rewards to be defined for a quest.
- A new snapshot size option to allow snapshots to be taken that are sized so they can be displayed in quest launch pop-ups.
- A new set of script elements:
- Used with the Edit Mode, these allow a creator to associate objects within a scene / experience with a quest and the objectives for that quest.
- The script elements are: Objective ; ObjectiveData ; ObjectiveDefinition.GetObjectiveData ; ObjectiveDefinition ; ObjectiveState ; Quest ; QuestData ; QuestDefinition.GetQuestData ; QuestDefinition and QuestState.
- (Note that in addition, two script API elements have been updated in support of quests: AgentPrivate ; Sansar.Simulation namespace.)
Quest Building Basics
There is Lab-supplied documentation on making quests and assigning objectives. the following is a simple overview of the basics.
There are three parts to creating a quest:
- Define the quest – via the quest authoring tool.
- Define the objectives for the quest – via the quest authoring tool
Defining a new Quest
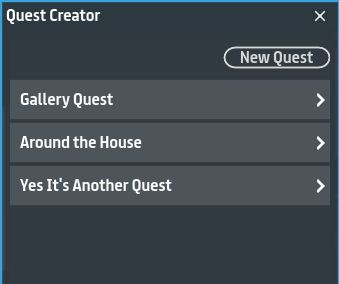
Create button > Create Quests > Quest Creator > New Quest.
- Every quest requires a name (up to 100 characters) and a description (up to 250 characters).
- Quests can optionally have:
- A thumbnail image, displayed when a user viewer the quest, and captured using the For A Quest drop-down in the snapshot tool to generate any required image.
- A completion message up to 250 characters in length, displayed when users complete the quest.

Save the quest when done.
Editing a Quest
 The Quest Creators records all quests you have created. To edit a specific quest (e.g. to add / change objectives):
- Create button > Create Quests > Quest Creator.
- The list of all your quests will be displayed.
- Click on the name of the quest you want to edit.
- The Quest Creator will display the quest and all defined objectives.
- Edit and save as required.
Defining Objectives for a Quest
Note that when you create a new quest, you will automatically be presented with the option to add objectives to the quest – and you can have as many objectives in a quest as you require.
Select the required quest (if not already selected) > make sure Objectives is selected (default) > Click New to display the objective fields.
- All objectives require a name (up to 200 characters), and should be set to Active or locked:
- Set to Active if there is no dependency on the objective (i.e. it can only be completed if pre-requisites are met.
- Set to Locked if it is dependent on completing certain objectives.
- Prerequisites can be other objectives, scripted activities etc.
- An optional description, up to 250 characters.
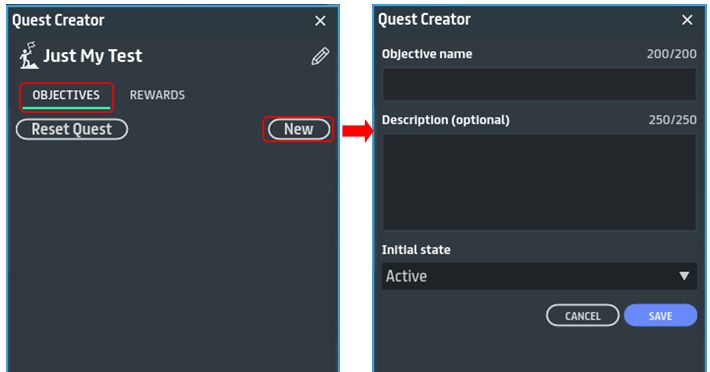
Save the objective when done.
Adding Objects as Givers and Objectives in an Experience
Notes:
- All quests require a Giver – the item that sets users on the quest, generally through direct interaction.
- A quest can have as many objectives as required.
- A quest should have a completion element.
Basic steps: edit the experience scene in which the quest will appear > add and place an object as the quest giver. Then:
- Right-click the object and rename the object, if required.
- Right-click the object > Add > Script.
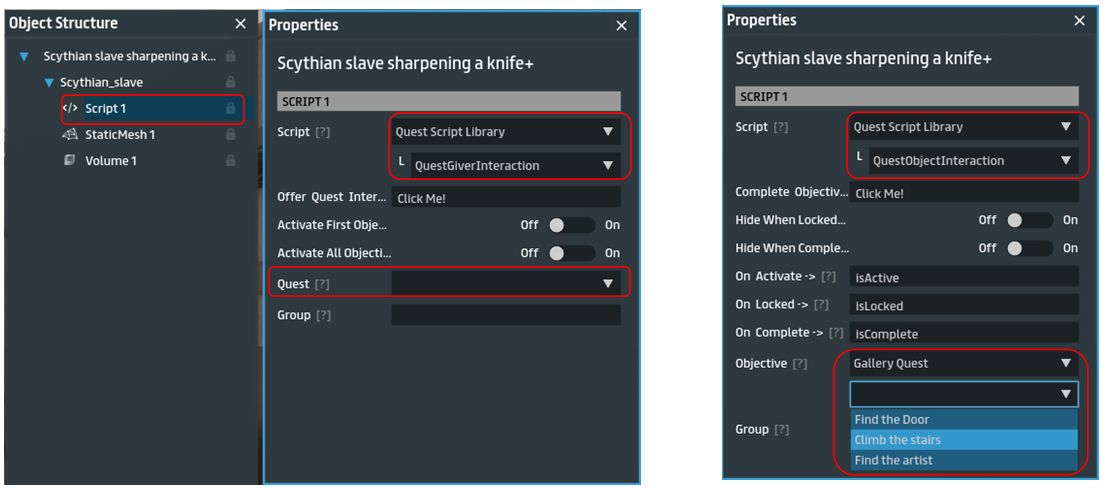
- In Object Structure right click on the new script (general “Script1”) > Properties. Then:
- Set Script to Quest Script Library
- Set the script type to one of the available scripts (QuestGiver, QuestGiverInteraction, etc).
- Use the Quest drop-down to select the quest with which the object is to be associated.
- If setting a quest objective, also set the quest objective with which the object is to be associated (below, right).
Testing a Quest
To test a quest in a scene:
- Build and save the scene.
- Visit the scene.
- Click the quest giver – the quest should launch > test the objectives.
- To reset the quest at any time (incl. testing): Create button > Create Quests > select quest > Edit > Reset Quest.
Feedback
A simple, easy-to-understand system (easy enough for me to understand!) with some built-in complexity (see the associated scripting documentation) and with a lot of potential for expansion. As always, check the official documentation for full details on the capability.
