A while back Yasmin (YouAintSeenMe) mentioned to me that she was considering a rock climbing system for Second Life. Being one who doesn’t particularly handle looking over the edge of extreme tall / high things in the physical world, it struck me that a) rock climbing would not be my first recreational pursuit, and b) but why not have a go in Second Life where bones don’t get broken?
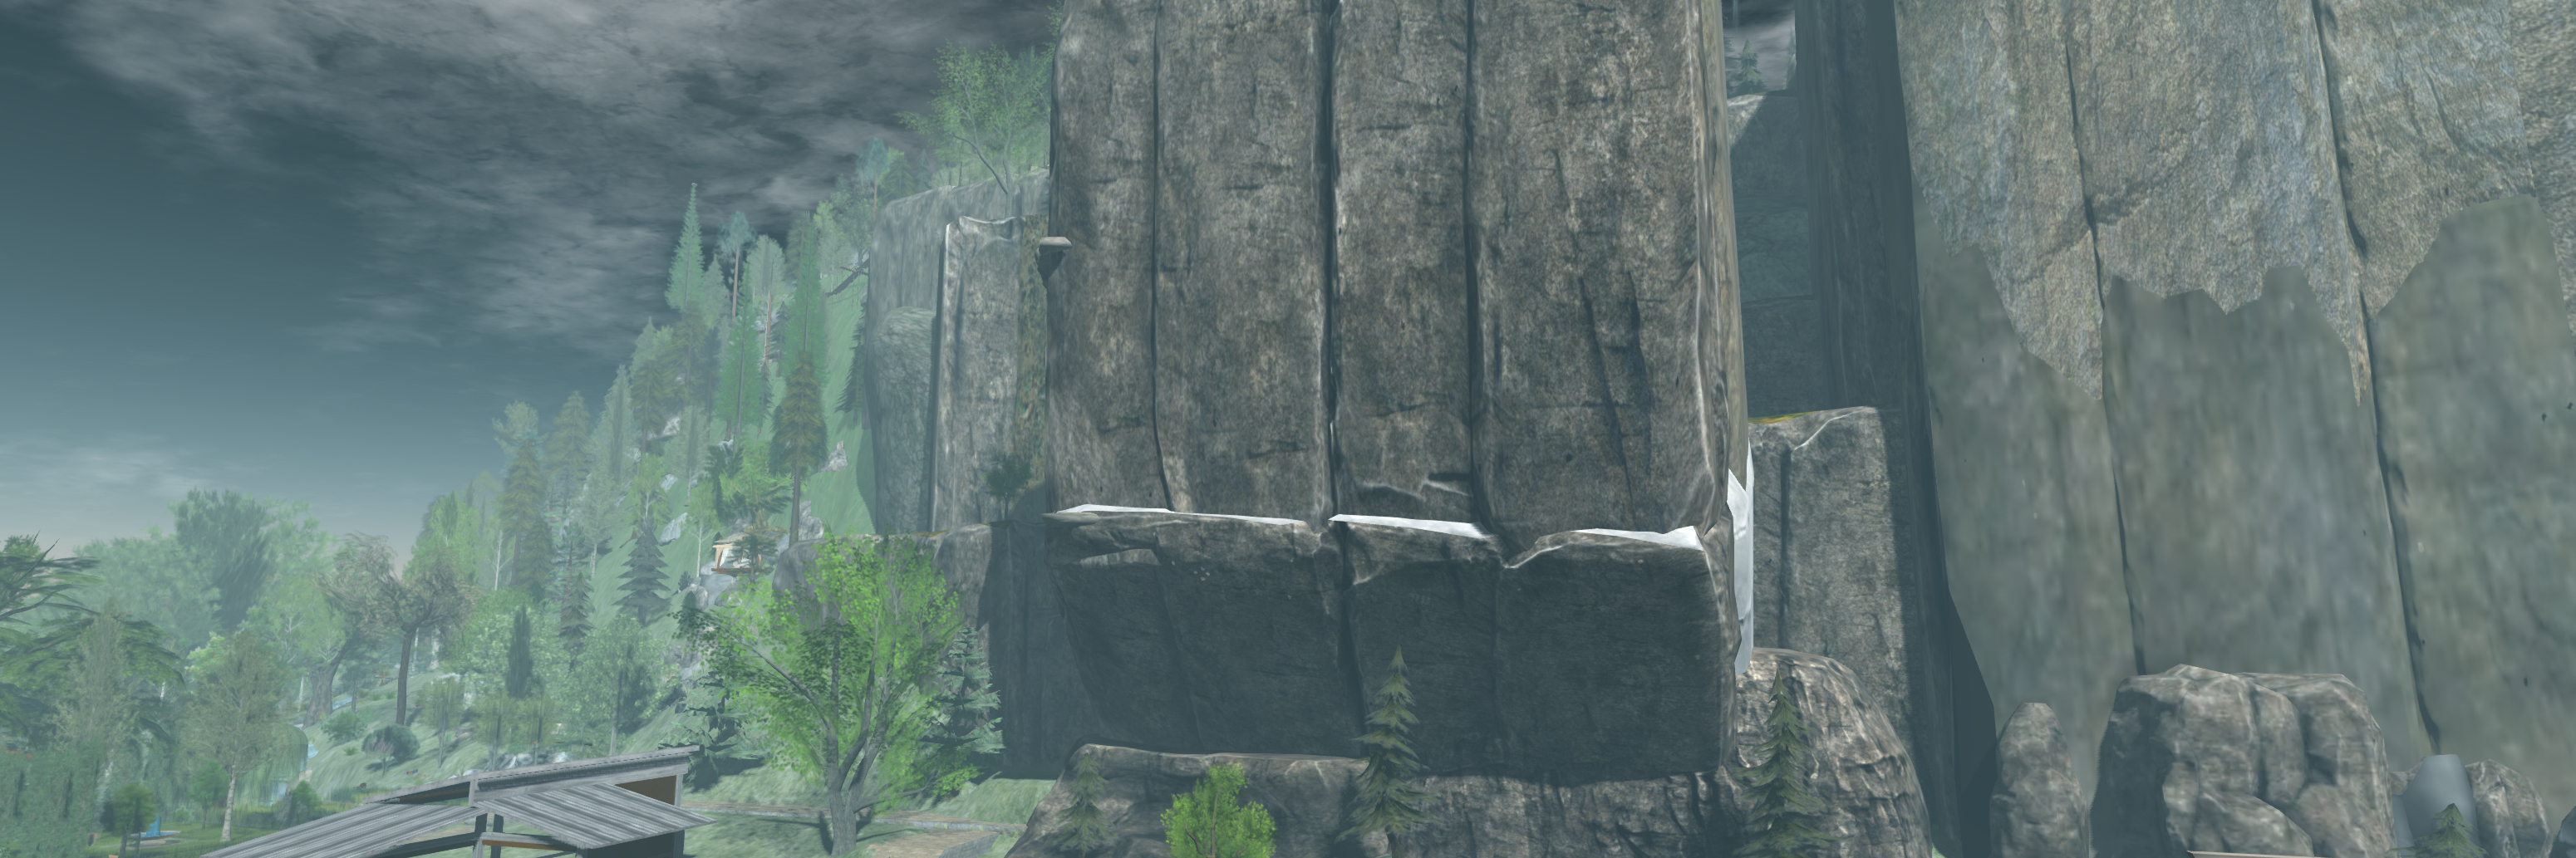
So, armed with a follow-up note card from Yasmin on the subject, I toddled off to try out a climb she’s set-up on the west face of Nitida Ridge, Heterocera.
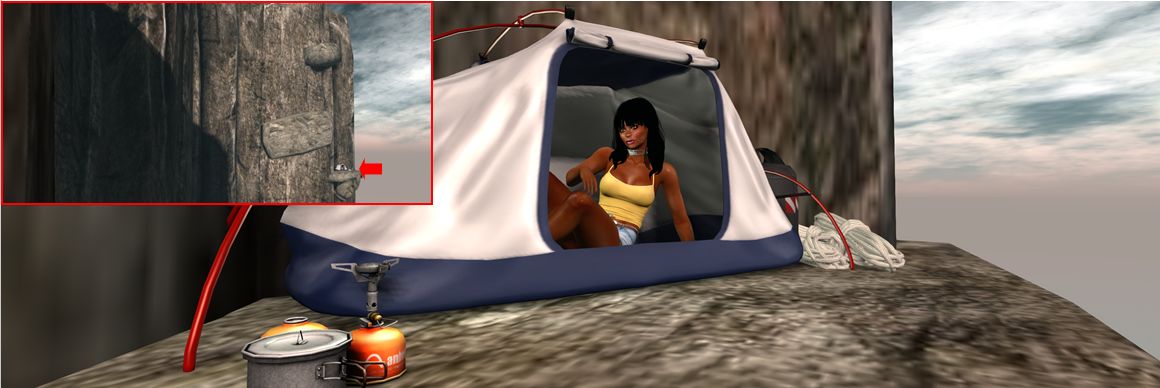
Here, at the foot of the ridge, sits a little base camp established by Yasmin, with tents, food and a warm fire. Close by is a sign that both introduces the climb(s) up the rock face and provides visitors with the necessary kit when touched. The latter is free, and comprises:
- An abseil harness (worn invisibly, just ADD to attach to the stomach attach point); information on the climbing HUD, a note card on the routes up the cliffs – direct or extended; and an image of the cliffs overlaid with the routes up (green) and abseil descents (red).
- The climbing HUD – clicking the sign will cause a pop-up asking for this to be attached so your avatar can be animated during a climb.

The HUD attaches towards the lower right of your screen by default – although obviously can be repositioned. It is colour-coded as follows: Blue (generally the default) = ready; Green = active climb located / engaged; red = disabled. In addition, touch the HUD brings up a dialogue box. There are a handful of points to be remembered when climbing, and with the HUD in particular:
- It is still an in-development system, so not all features may be present and the occasional bug might try to put you off your climb.
- Not all the options on the dialogue box may be fully functional at present.
- The ones you are most likely to want to use are the climbing speeds (Faster / Slower) and the avatar position options (In / Out) – the latter to move your avatar either further away from the rock face (so you’re not up to your elbows inside the rock, for example, or climbing air).

Climbing is a matter of finding the first pitch along the foot of the ridge. To do this, it is suggested that you examine the image of the ridge and then zoom out with your camera and align things visually. This can be a little difficult (but then, it’s not like people hang signs on rock faces that say, “Start Your Climb Here!” – you pick your start point by eyeballing the best spot to make an ascent), so for those who may get frustrated in trying to work out where to start, there is a direct SLurl link.
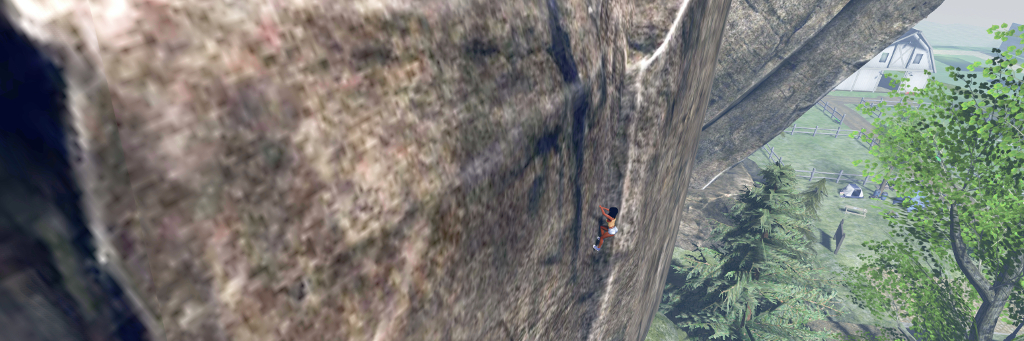
When you’ve found the correct point, the HUD will try green to indicate you can start to climb. Use the Up arrow key to climb – turning off any AO system can be an advantage here to prevent conflicts. When pressed, your avatar will start what is effectively a solo free climb. Releasing the key will pause you, but shouldn’t cause any backsliding.
The nature of SL may mean at times you might get stuck. Should this happen, release the Up key and they resume. Similarly, you may “slip” and assume your default falling pose – again, releasing the Up key should revert your avatar to the “rest” pose. Also, sometimes using the Left / Right arrow keys can help a little – but take care. Left / Right can help you crab diagonally sideways in the climb, but use one of them too much and you’ll leave the “climbing path” – your HUD will turn blue and you’ll take a fall!
After the first 15 metre climb to a very broad ledge, you’ll have a choice: the direct route, or along the “bivvy” (bivouac) route. The latter is the more challenging, and requires you channel your inner Tom Cruise (Mission Impossible 2) for some diagonal climbing across the rock face to reach various ledges – including one with the tent, allowing you a little respite from the exertions of climbing – and additional vertical ascents.

The direct route is just that – straight up the cliff, using a natural fold in the rock, just as a real climber would. I admit to having a little trouble at the top of this – the climb animation refused to release, so I’d reach the top, fall back a couple of metres and resume climbing, reach the top, fall back… A double-click TP resolved this.
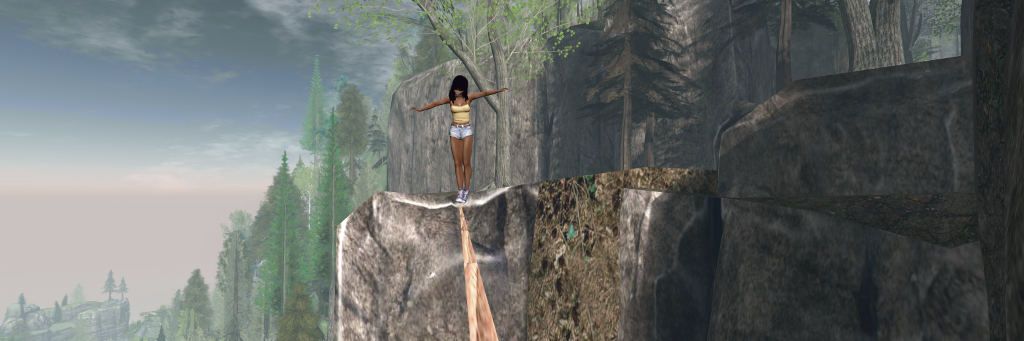
For those prone to a little daring-do, the Nitida Ridge climbs also include a couple of high lines (shown in blue on the climb image), where a little tightrope walking can be, um, enjoyed, using Yasmin’s tightrope kit.
Of course, getting up a climb is half the story – there is also getting back down. For this, Yasmin has included abseil options. Just find the anchor points located at various places on the cliff face (again, use the supplied image to help in locating them). Each is a square metal plate fixed to the rock with a carabiner hanging from it. Touch the carabiner and you’ll abseil neatly down the rock face.
Ropes for abseiling are invisible (a particle system would likely complicate matters), but the animations are fun to watch, and in keeping with climbing (I assume at least, not being an expert in any way whatsoever!) the shorter descents are more hand-over-hand.
This system is – as noted – still somewhat in development, but it is simple and clean – and works. Obviously, you can add to the feel of climbing by dressing appropriately if you wish – I was tempted to add either a rucksack as a climbing backpack, or at least a bum bag to double as a chalk bag, but in the end just opted to get on with it.
Yasmin offers a number of alternate possible climbs within the HUD instructions note card, but as the HUD appears to be temp attach, you’ll need to keep it in place in order to try them, or return to Nitida Ridge to affix a new one before visiting an alternate climb. Overall, however, the Nitida Ridge climb is the most well-rounded in terms of climbs and features.
You still wouldn’t get me hanging off the side of a cliff at the end of a length of rope in the physical world, but within Second Life, free climbing / rock climbing like this is fun, and Yasmin has put together an excellent package that can be enjoyed individually or with friends. The kit isn’t (yet?) commercially available as it is in development (a further reason to try it at Nitida Ridge!), but I would suggest that if / when it is made commercially available, anyone with reasonable cliffs and highlands (say 15m or greater), it could be an attractive addition as an activity.
SLurl Details
- Nitida Ridge (Nitida, rated Moderate)