Back in 2018, I wrote about Stevie Davros, and Australian photographer, who had produced as series of Windlight skies and clouds for people to use to help enhance their environment when taking pictures, or to offer a unique environment within their region (see: Clouds and windlight skies by Stevie Davros).
Since the arrival of the Lab’s Environment Enhancement Project (EEP), Stevie has been working on new skies and cloud assets specifically for use with EEP, and offered me the opportunity to try some of them out. And I have to say, that like his Windlight skies and clouds, these are impressive collections, ideal for photographers looking to enhance their images, and offering region and parcel holders a set of options for setting a Fixed Sky over their parcel / region (and which can also be used to create dynamic Day Cycles).
If you are unfamiliar with using EEP assets and settings, I recommend you refer to one of the following:
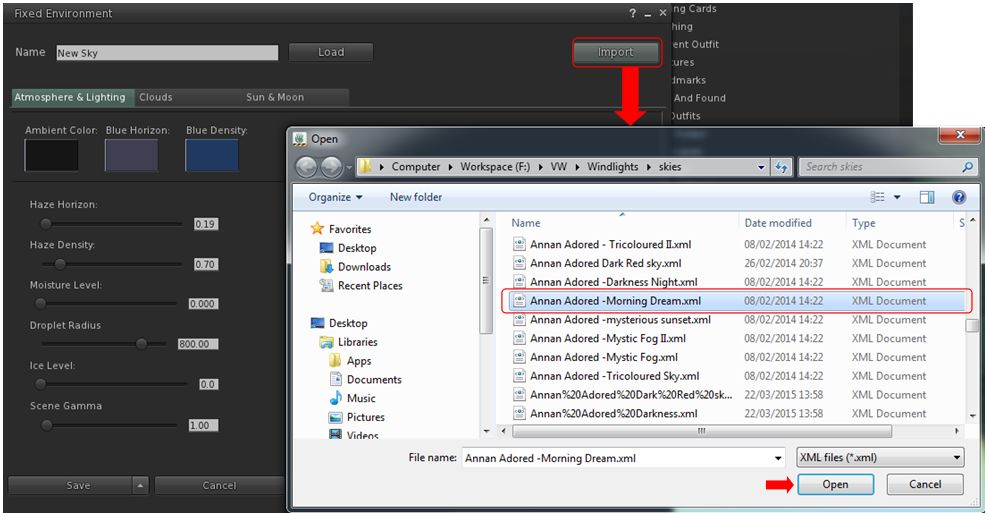
However, and for completeness, these notes include a quick overview of how to apply Stevie’s settings.

At the time of writing this article, Stevie had a dozen EEP packs available via his Marketplace store, comprising:
- Painted Clouds: a folder of 13 Fixed Sky assets featuring cloud texture files sampled from the brush strokes of 19th Century French impressionist painters.
- Aussie Cirrus: a folder of 19 skies featuring cloud texture files created from photographs Stevie took of the skies over Adelaide in Australia, and then processed.
- Gossamer Cirrus: a set of 19 skies featuring cloud textures depicting very high altitude cirrus strands, some of which are presented in a their own “fantasy” style of sky.
- Cirrus Cloudbank: a set of 21 skies featuring strands of cirrus cloud overlaid with / extending from banks of cloud
- Cirrus Clouds: a bumper set of 34 cloud textures, suitable for “real” and “fantasy” settings.
- Stormy Skies: a selection of cloud texture collages created by Stevie to give dramatic sky and cloudscapes.
All of these packs, whilst focusing on cloud formations, include customised ambient lighting and may include custom Sun / Moon textures.

In addition, Stevie has produced several sets of Fixed Skies offering more of a “cosmic” setting:
- Replacement Moons: a set of six replacement Moon textures (crescent, waxing, full, gibbous dual crescent and blue).
- Replacement Suns: a set of replacement Sun textures very suitable for sci-fi settings, including a blue giant and a binary system with a blue giant and red dwarf star.
- Cosmic skies: a set of 10 textures offering various astronomical / sci-fi images, including solar eclipses, a comet, a (frighteningly large) meteor, galaxies, a crescent Earth (ideal for a Moon base setting) and Saturn with his rings.
- Aurora Night Sky: a selection of night skies with cloud textures designed to give the effect of looking at the aurora (Borealis or Australis, you pick 🙂 ).
The remaining two packs are more quirky in nature the first presents something for the romantics: link heart clouds, and the second that places an erupting volcano on the horizon (the volcano replacing the Sun texture).

There are a few points worth noting with these sets:
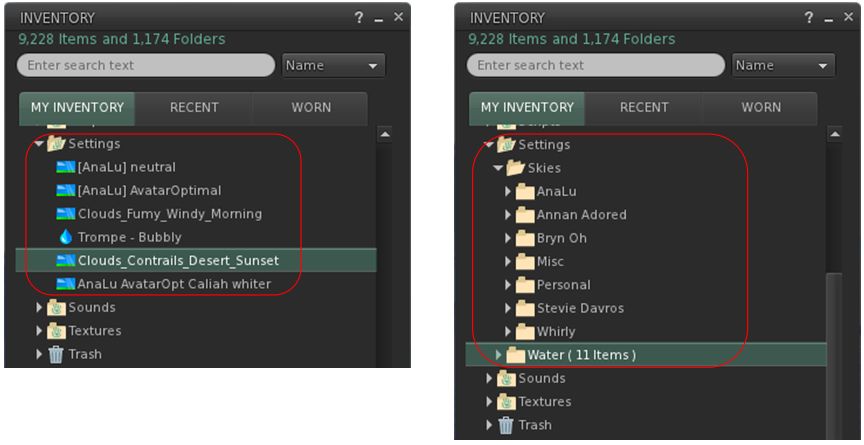
- When purchased, each pack is delivered as a folder to the Received Items folder / panel of your inventory (so no unpacking required). They can all be used directly from the folder they are received in; however, you might want to copy said folder to the Settings folder in your inventory – the system folder than is intended to contain all EEP assets you create and / or purchase.
- As Fixed Sky elements, these are all assets that have fixed ambient lighting, and fixed Sun / Moon positions in the sky, with the clouds moving dynamically in response to the wind direction and speed.
- The assets are supplied Copy / Modify, so you can make copies of any of them and then make alterations to it using the EEP Fixed Sky editor to produce your own variants. You can also use any of them as a basis to create your own dynamic Day Cycles.
- Alternatively, to make changes purely for photography purposes, these assets can be applied and then adjusted using the Personal Lighting panel.
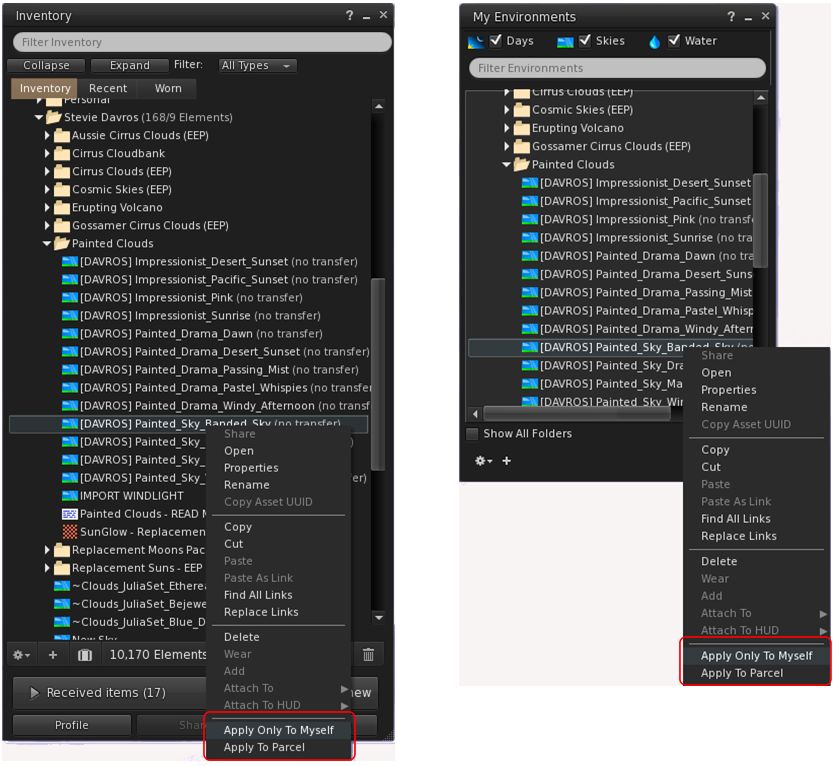
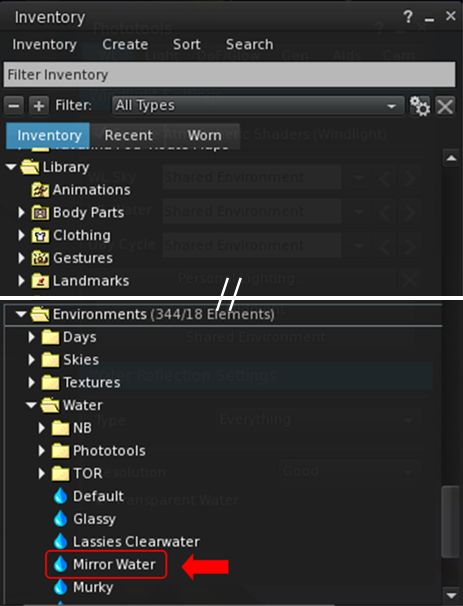
The easiest way to use these assets is to apply them directly to your avatar – highlight the asset you wish to use the right-click on it and select Apply only To Myself. This can be done from inventory or from World → Environment → My Environments … Applied in this way, the setting you’ve selected is only visible within your viewer, and will not be seen by others.
Alternatively, and if you have the requisite permissions, you can apply the asset to your parcel, where anyone within it who is using an EEP-supporting viewer set to (World → Environment →) Used Shared Environment, will also witness it. Further, if you are a region holder, you can apply the asset to your region this option is not shown in the image above, as I do not have region rights, and so Firestorm has removed the option from my context menu).

Again, you can pick up Stevie’s packs from his Marketplace Store, and my thanks to him for taking them for a test drive.