
ReShade is an application which has been generating a bit of buzz around Second Life for the last couple of weeks. When installed on a Windows PC (7, 8 or 10), it allows you to overlay you Second Life world view with a wide range of shader-based effects, which can be used in screen captures for images, or when recording machinima to offer real-time visual effects.As it is an overlay system, it also works with OpenSim environments.
I first got to hear about ReShade from Whirly Fizzle at the start of August (she in turn got to learn of it through Caetlynn Resident), and having been playing with the beta since then. Just how practical it might be is a matter of personal choice / want / ability with more traditional post-processing tools, etc. However, as version 1.0 launched on August 10th, with some much-need clean-up, I thought I’d offer a write-up on it, together with a few thoughts.
Remember, ReShade is third-party application, LL and TPVs cannot provide assistance in using it – and nor can I. If you need help with it, please refer to the ReShade forums. As relatively new software, it can be a little buggy, and it doesn’t always run with the viewer when installed – again, if you have problems getting it going, neither viewer support teams nor I can really help.
A quick and dirty demo video showing how ReShade effects can be used in real-time machinima capture in Second Life
Set-up
Please ensure you’re logged-out of Second Life when setting-up ReShade.
- Download the ReShade Framework ZIP file from the ReShade website.
- Unzip the contents of the downloaded file to a location of your choice.
- Navigate to the unzipped folder location and right-click on ReShade Mediator and Run As Administrator.
- The Mediator will launch to display the configuration tab (shown below). This is the UI element used to apply and adjust effects.
- You now need to create a profile for Framework to work with your viewer.

- Under the Profile section on the left of the Mediator, click Add. A file picker will open Use it to navigate to your viewer’s installation folder.
- Locate the viewer’s .EXE file in the installation folder and click it once to highlight it, and then click the Open button in the picker
- You will be returned to the Mediator panel, and the viewer name or “Second Life” should be displayed in the profile drop-down (below) – note that some TPVs may display their own name or may display “Second Life”, it makes no difference.
- Make sure OpenGL has been correctly identified. Click on the Confirm button to create a profile for your viewer.

- When Mediator has finished creating the profile, click Apply at the top right of the panel.
The set-up process is now complete. However:
- Note that this has created two files in your viewer’s installation folder: reshade.fx and opengl32.dll. These must be deleted if you decide to remove ReShade from your PC.
- Also, as I’ve found ReShade to be slightly flaky, before going any further, copy the opengl32.dll and save the copy in another location – I’ll explain why later.
Using ReShade Framework
You can launch ReShader Framework and the viewer in any order – although starting the Framework first has been recommended by some.
On starting the Framework, make sure your viewer (or “Second Life”) is displayed in the profile drop-down. If it isn’t, click on the drop-down arrow and select the viewer / “Second Life” from the list. You may need to click the Update button if you have set-up multiple profiles.
When you launch the viewer, some text messages should be displayed in the log-in screen / splash screen. These will fade after a few seconds, and indicate ReShade is working with your viewer.
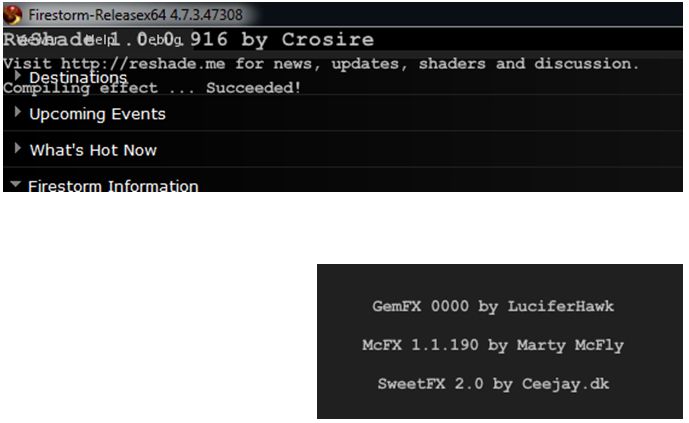
If these messages are not displayed, ReShade is not overlaying your viewer. If this is the first time you’ve run ReShade after setting it up, try logging-out of the viewer, removing the reshade.fx and opengl32.dll file from the viewer’s installation folder, then running the set-up steps again, and try running the viewer directly from its EXE. If you still have no luck, I’m afraid I cannot help – please seek assistance via the ReShade forums.
Assuming the messages are displayed for you, you’re good to go.
Effects are applied via the Pipeline tab in the mediator. Simply click the check box next to one or more effects and then click Apply to add them (best to only do it one at a time when trying-out the software).
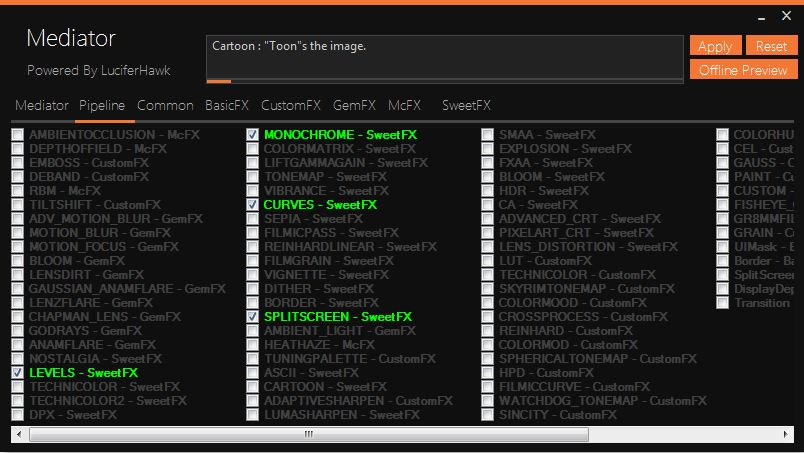
A handy tip when playing is to turn on the split screen mode (shown checked above). In its default mode, it allows you to see a “before and after” view of things as you play, with effects applied by ReShade generally appearing on the right of the screen (although some will affect both sides of the screen), making playing around with things easier. When you’re satisfied, simply turn split screen off.
Do note that effects can use more than one shader, and ReShade will only allow a maximum of 32 active shaders at a time. If you activate multiple effects that use more than 32 shaders, you will get a warning displayed on your screen (top left of the viewer), and effects exceeding the 32 shader limit will not be applied.
You can adjust individual settings for an effect via the FX configuration tabs to the right of the Pipeline tab. The labels on the tabs correspond to the names after the effects listed in the Pipeline tab. So, for example, if you want to change the split screen setting (to have multiple splits), it is a part of the SweetFX set of effects – so click on the SweetFX tab, then on the SPLITSCREEN option to display the effect’s settings.

Be aware that when adjusting an effect’s settings you can overload things, resulting in FPS drop-off, viewer stutters and possible crashes, depending on your GPU. Use the Reset button in the top right of the Mediator to revert any changes you’ve made should this happen.
And the Rest is up to you!
Issues You May Encounter
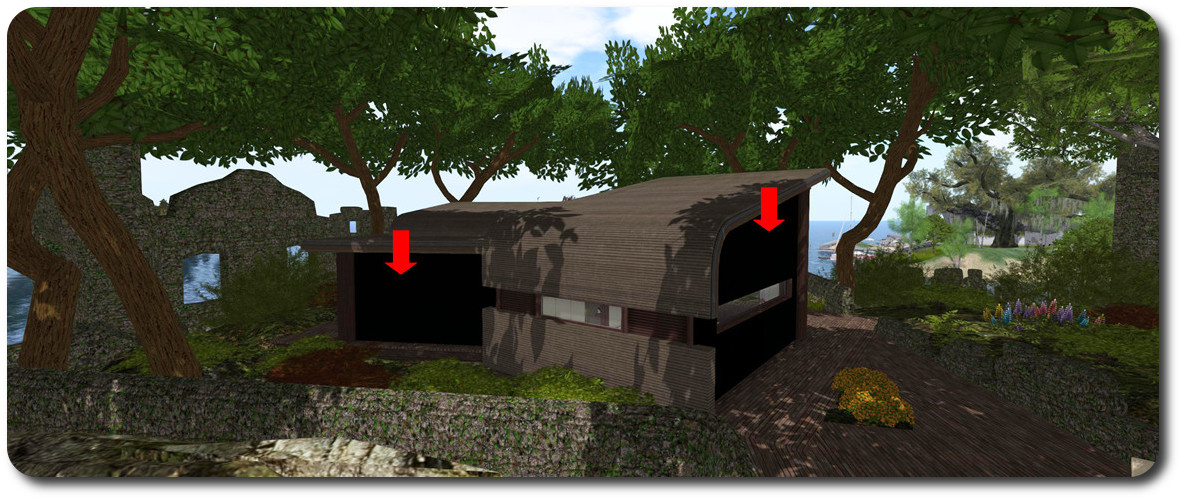
Black Surfaces
When running the beta versions of ReShade, I found that teleporting with effects active could result in surfaces failing to render their textures (show below). Again, as this was the result of an overlay issue, the only way to reliably clear it was to log-out of SL, delete the opengl32.dll file in the viewer installation folder and replace it with a “clean” copy – hence my recommendation that you take a copy of the file following initial set-up.
I’ve actually yet to encounter the issue with Framework 1.0, so consider this a “just in case” advisory rather than something you’ll definitely encounter.
ReShade uses it own AA filters by default, so things like text can sometimes look a little weird. If this happens to you, try disabling anti-aliasing in the viewer.
Removing ReShade
To remove ReShade from your viewer:
- Log out of Second Life
- Navigate to your viewer’s installation folder and delete reshade.fx and opengl32.dll.
You can now remove the ReShade software from your computer, if you wish, by deleting the folder to which you originally unzipped it.
Summary Thoughts
First question is – why would you use ReShade? Many TPVs offer a wide range of snapshot enhancements for photography, there’s GIMP and PhotoShop, etc. As ReShade overlays the world view, it requires a screen capture tool to grab images (don’t be fooled by the snapshot floater appearing to show the effects, they won’t appear in your snapshots). This limits images to your screen resolution, which may be off-putting for some photographers.
For machinima makers ReShade may offer more, allows for a range of visual effects to be added during the filming process, potentially avoiding some post-productions headaches. Hopefully, the quick and dirty video towards the top of this article offers some idea about the effects – although it is only a small selection.
I’ve found ReShade to be a fun little package, niggles notwithstanding. I’ve not used it with photography, but might at times. I’ll certainly be experimenting more with machinima. The handy thing is that once installed, it’s there should I want to fiddle, or I can ignore it.
I leave it to you to decide whether you want to give it a go or not.

Reblogged this on Windlight Magazine and commented:
Inara covers the new photo app that works with Second Life, Reshade:
LikeLike
Reblogged this on Bagunçário | Art & Originality.
LikeLike