Visiting The Fallen in Second Life

The Fallen City
The Fallen – click any image for full size

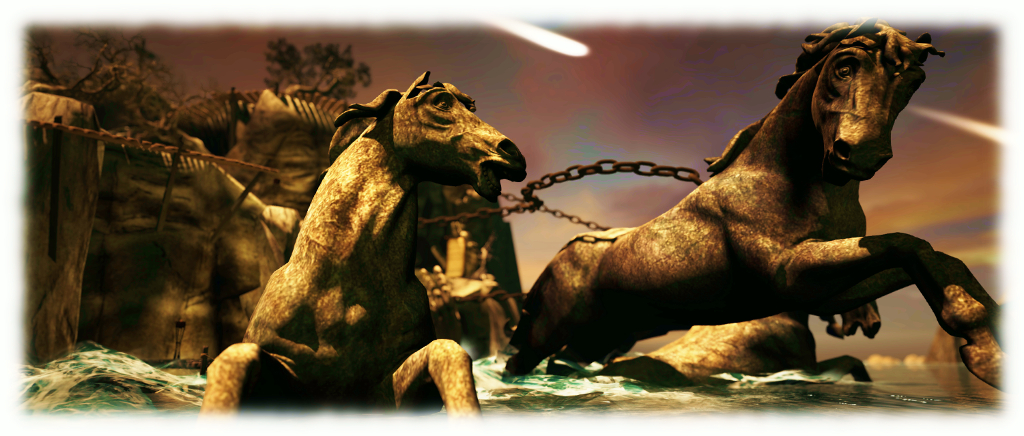
Halloween is always a time when ghostly goings on and ghoulish gambits of games and explorations take over many parts of the grid. The Destination Guide can be awash with places to visit, so much so that those who love this time of years have both a cornucopia of places to visit, and a bit of a headache in choosing where to go and what to do.

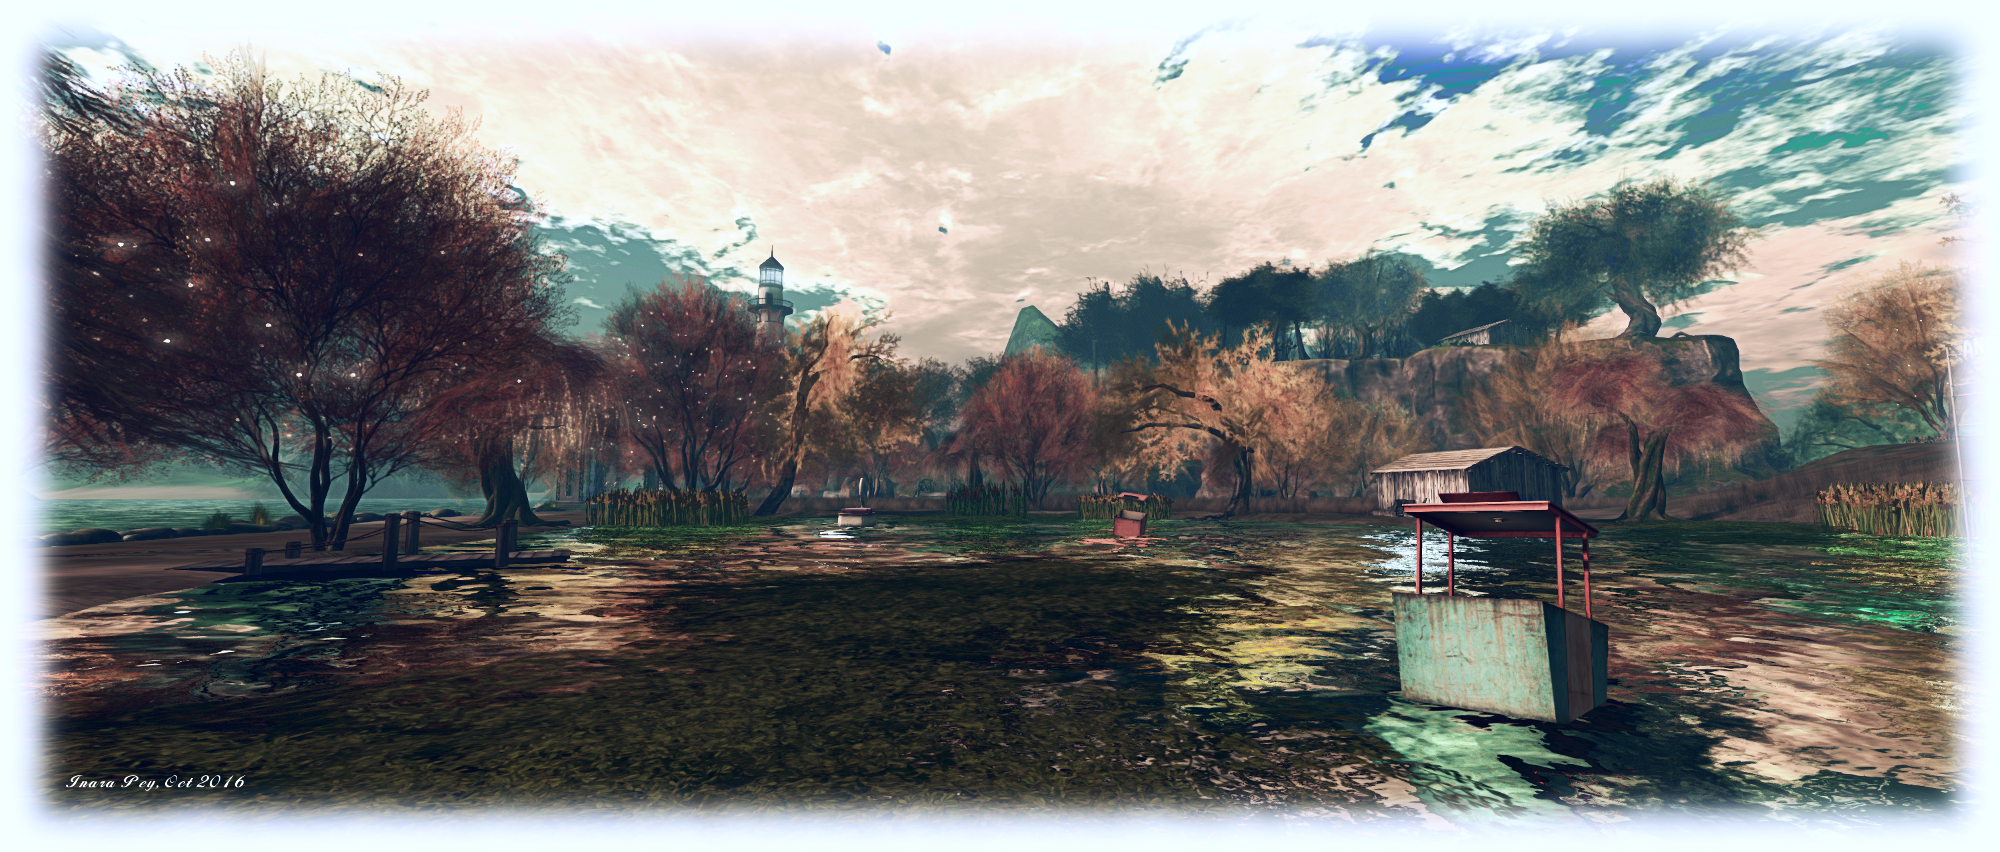
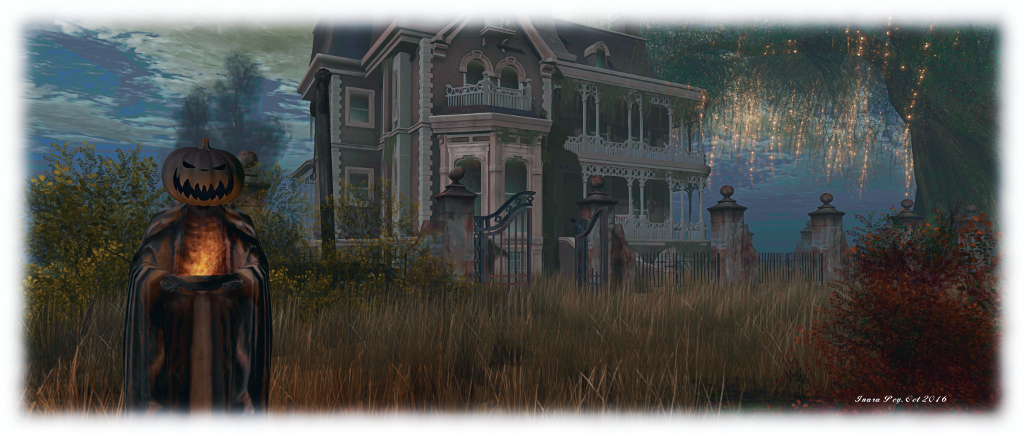
The Fallen, open for the month of October, offers a destination which includes touches of Salem, Sleepy Hollow and Transylvania gathered around a small urban setting overlooked by castle and mansion. It’s a dark, mysterious place which extends over a rolling, misted landscape – and also under it at the couple of locations.

The Fallen City
The Fallen

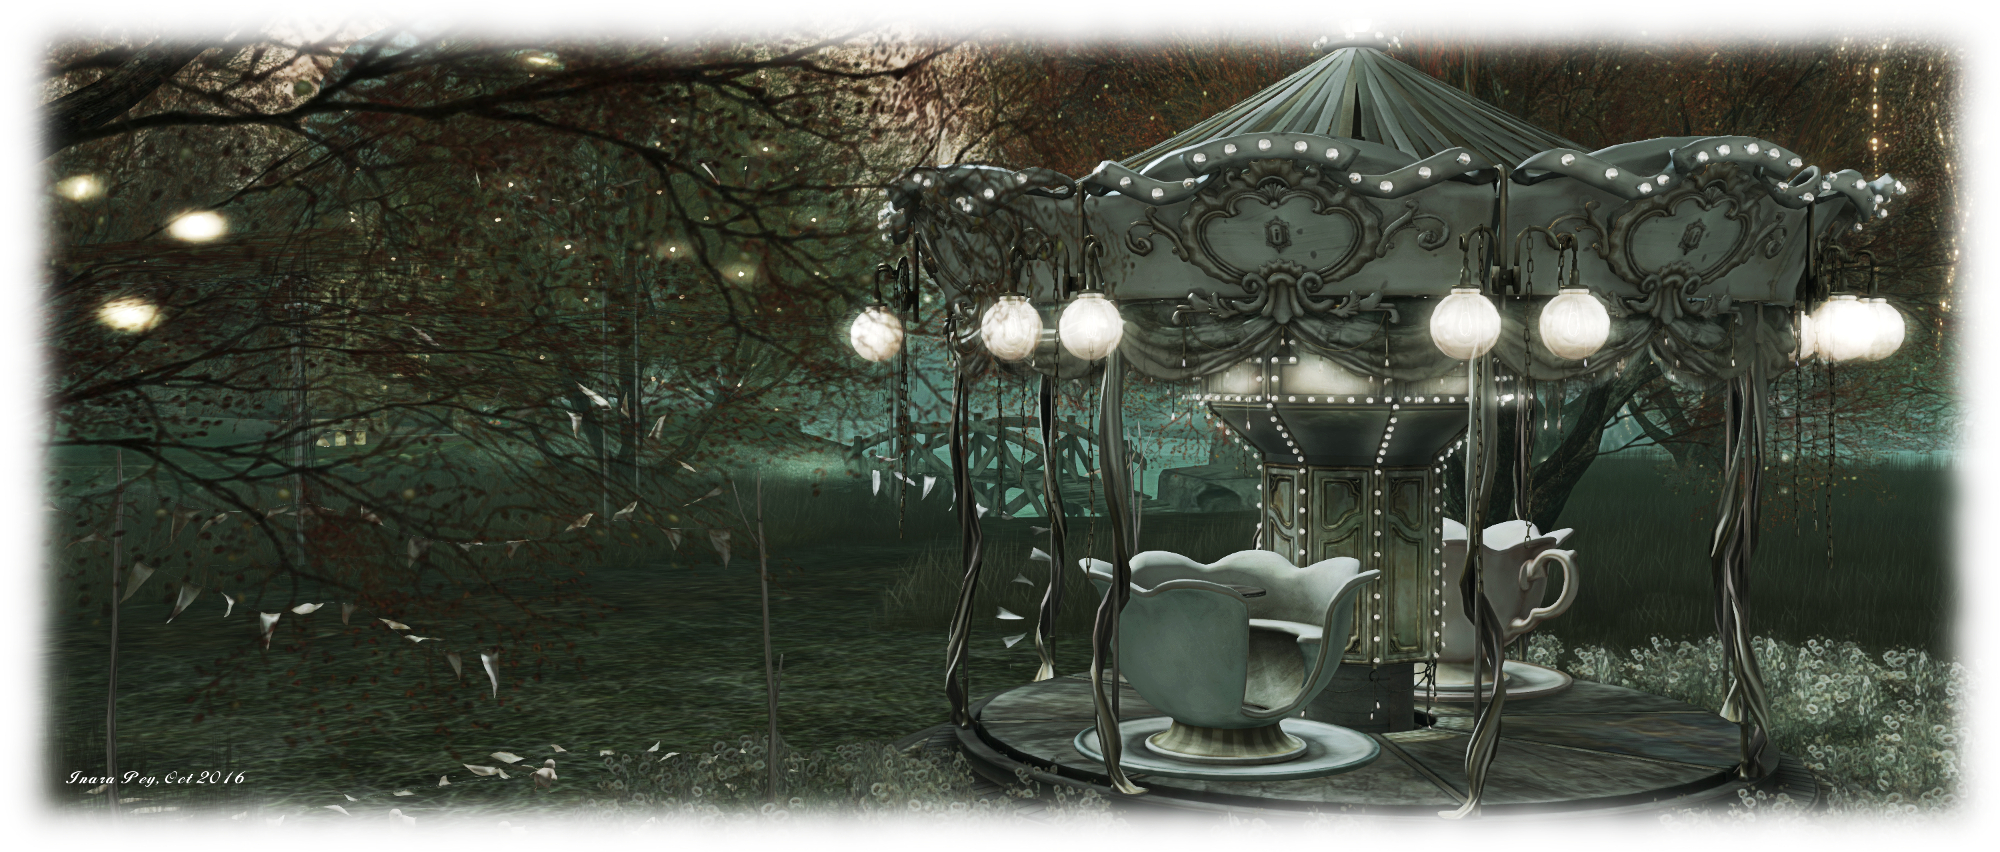
A visit starts towards the south of the region, beneath the roof of a circular gazebo. menacing sounds grumble and reverberate through the air, echoing hollowly as mist wraps its way around shadowy trees. to the left, the leaded panes of church windows glow strangely, while to the right, rotting piers point broken fingers out to sea. The strains of Speak Softly Love, seemingly played on a trumpet, drift through the air, drawing one along a path to where modern buildings reveal themselves in the darkness.

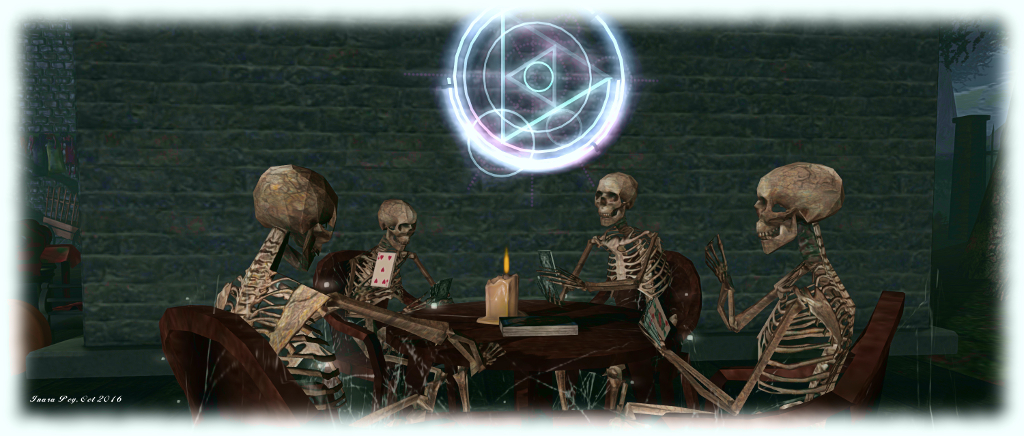
As one might expect, this is no ordinary town; pentagrams and mystical signs glow on the ground before the entrances to establishments and homes, bats flit and fly, and the locals are somewhat bony in looks. This is a place where you might want to tread carefully as ghouls are prone to rising from the ground, and even some of the plants have an interest in the taste of human flesh; even the local nuns appear to be up to a certain amount of mischief.

The Fallen City
The Fallen

Beyond the town, over a rickety wooden bridge, the road plunges underground before emerging into daylight, the great mass of a castle rising from amidst the densely wooded landscape. Does it offer greeting or more ghoulishness for those who step through the heavy front doors? I’ll leave that to you to decide as you explore, and simply say fangs for allowing the visit, to the castle’s occupant.

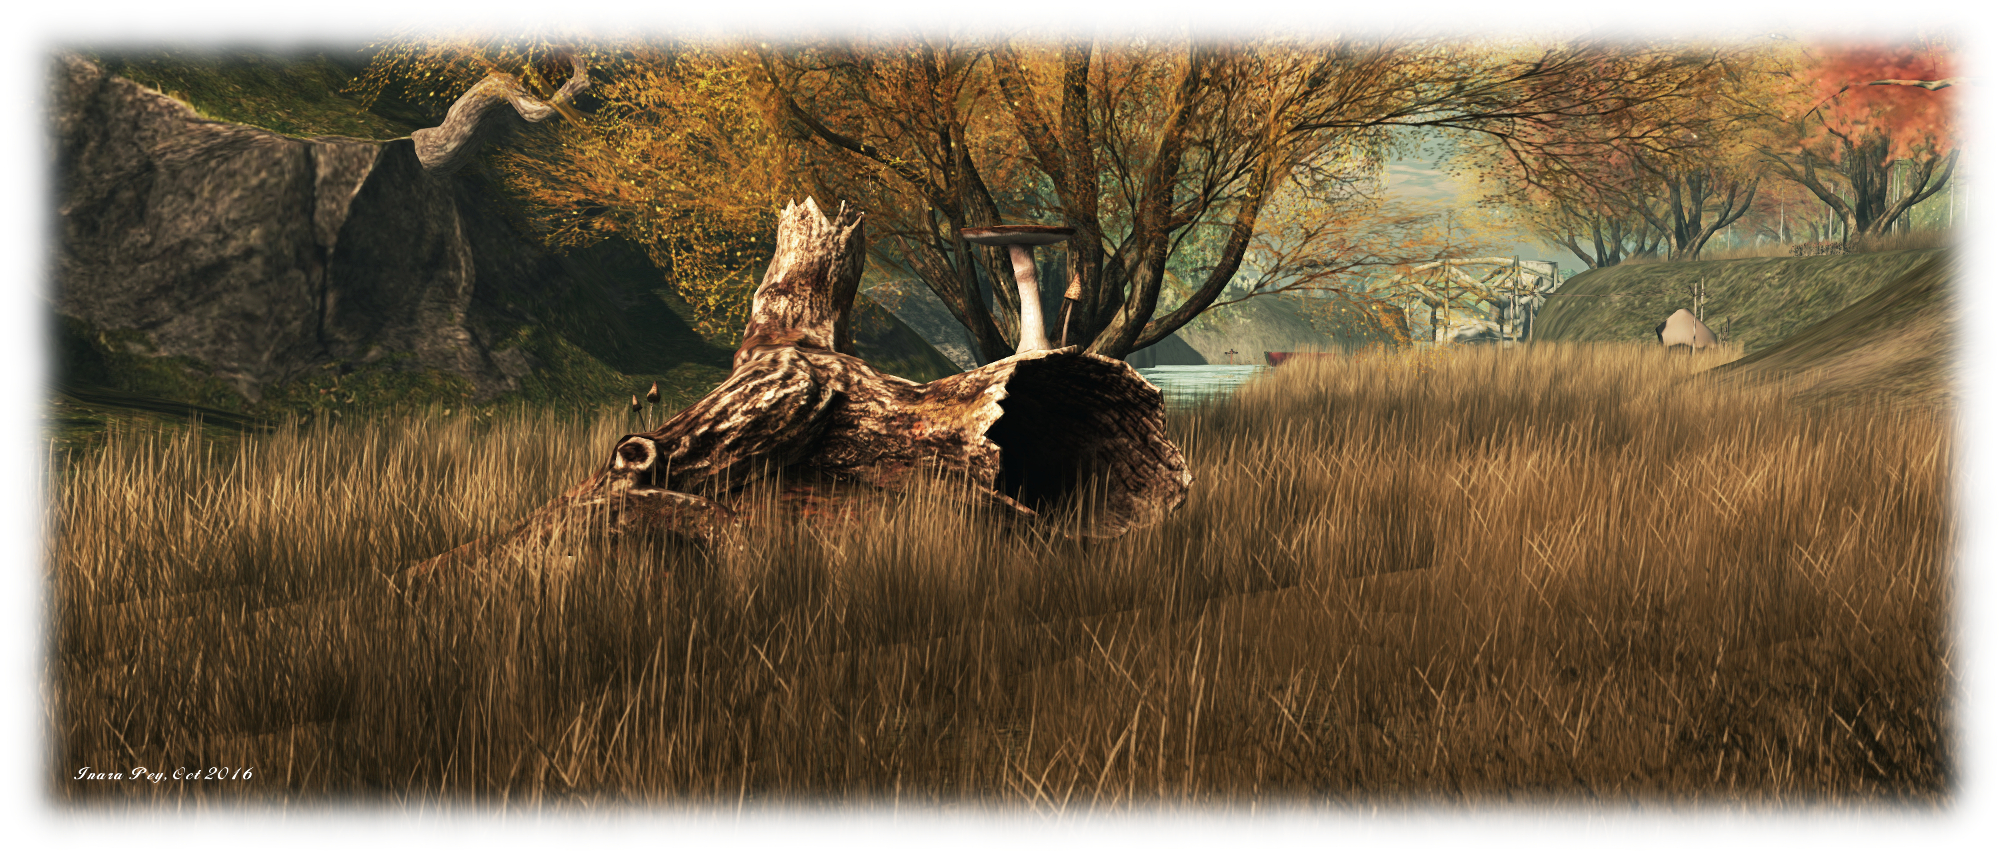
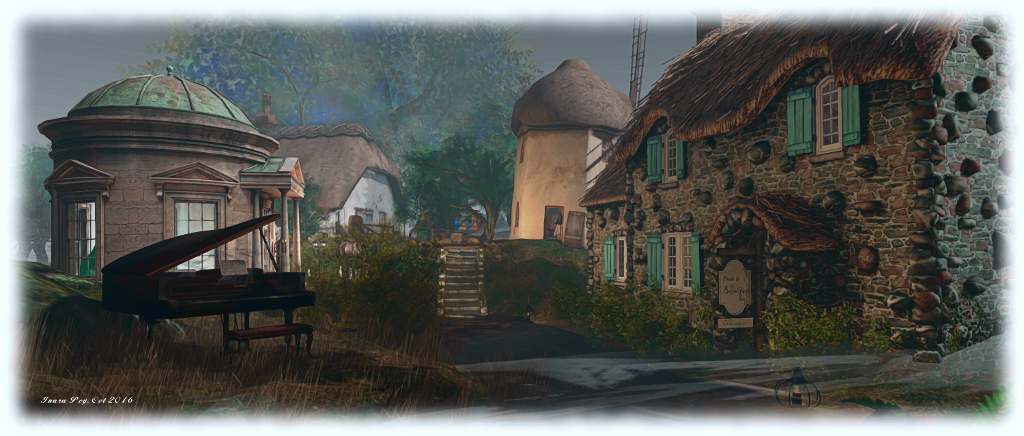
Back across the river, the castle is overlooked by a mouldering mansion up on a hill above the town, while a path running north and east leads visitors to an apparently sleepy little hamlet, complete with thatched cottages, creaking windmill and farm animals. All seems normal and safe – until a faded proclamation on a sign reveals you are somewhere near a latter-day Salem, or perhaps Sleepy Hollow. Elsewhere, an old mine plunges underground, begging to be explored by the brave, and stone steps wind their way around a cliff to a small Japanese resting house protected by three Kokeshi dolls.

The Fallen City
The Fallen

Designed by Lily Poptart Kazagumi (iheart Wonder) and #TeamLazy (who style themselves as The Pirates Who Don’t Do Anything, although this region suggests they actually do!), The Fallen City is an interesting place to visit with lots of little touches throughout, although given all that is going on means it can be a little taxing on systems, particularly when things are rezzing. However, if haunts and Halloween are your thing, why not hop over and take a look?

SLurl Details

Revisiting Invictus in Second Life

Invictus
Invictus

In August, I wrote at length about Invictus, the stunning full region interpretation of William Ernest Henley’s famous 1875 poem which was given that name in 1900, when it appeared in the The Oxford Book of English Verse.

The installation is a marvellous work of art, deeply reflective of the thoughts expressed within the poem, and of Storm’s own circumstance and the trials she has faced. If you haven’t visited the installation, I urge you to do so before in closes in December, and while it may sound somewhat self-serving, I also offer my thoughts on the installation as well.

I have been drawn back to Invictus a number of times since then, wanting to produce a video of it for posterity. But what form should such a video take? Should it feature music, or the words of the poem itself? And if the words, should they be spoken, or presented on-screen? And if spoken, who should I look to recite them?

At the end of August, and having been reminded by several people that Morgan Freeman recited the poem in the film Invictus (and has done so elsewhere, it being a personal favourite of his), I opted to turn to the marvellous talent of Charlie Hopkinson, who is Morgan Freeman’s voice. And so it is that I offer a short film of Storm’s installation I hope you enjoy, and which encourages you to visit or re-visit Invictus in-world.


Scare Me Silly in Second Life

Scare Me Silly 2016
Scare Me Silly 2016

Scare Me Silly, the first of the 2016 fund-raising season for the American Diabetes Association (ADA) opened its doors on October 13th, 2016, and will remain open through until the end of the month.

The event, organised by Team Diabetes of Second Life, features live performances. DJ parties, a 30+ prize hunt, tricks and treats, a house of horrors, a haunted mansion, ghostly rides and – of course – shopping!

scare-me-silly-posterParticipating merchants include:

AZUL, alme. Ghee, BYRNE, Spyralle, Zuri Jewelry, Feyline Fashions, TASHI, KL Couture, Windlight Workz, IC From Within Presents Autumn-unique art & Artistic Decor, Artwork by Sandi Benelli, Mahlberg Tailors, Romance Couture, EED Exquisite Eye Decorations, [Co’motion], Marquesse, Miss Darcy, Facepalm, TRS Designs, Emerald Couture, Sin Original, Thunder Fashion for Men, Fair Weather Fashion, Stone’s Works, by Chiana Oh, Sweet E’s Designs, Potomac Signature Homes, Lillou Merlin Designs, Park Place Home Decor, Sonatta Morales, [:Rad Design], Chop Zuey, Gee, Abstract Soul, .:Jullytobe:., Pink Ice Boutique, Lady Dragon’s Design, Designs by Soosy, Whimsical Happenings, BORN IN 19921, Art by Euca, Divine Ink Tattoo Parlour, PinUp Tattoo Style, and Cosmo Botique-Plants For Homes.

Performances and events will feature storytelling by Seanchai Library, audience participation cabaret by Whymsee, tribute concerts by Bad Amp Tribute Bands, DJ parties by Veruca Tammas, Sandi Loxingly, Johannes1977 Resident, and Mia Deluca. Other activities include haunted rides, 7Seas Fishing, a photo contest, and the Great Pumpkin Hunt.

See the Scare Me Silly event page for the schedule of events through the month.

About the American Diabetes Association

 Established in 1940, the American Diabetes Association is working to both prevent and cure diabetes in all it forms, and to help improve the lives of all those affected by diabetes. It does this by providing objective and credible information and resources about diabetes to communities, and funding research into ways and means of both managing and curing the illness. In addition, the Association gives voice to those denied their rights as a consequence of being affected by diabetes.

About Team Diabetes of Second life

Team Diabetes of Second Life is an official and authorised fund-raiser for the American Diabetes Association in Second Life. Established with the aim of raising funds in support of diabetes treatment and to raise awareness of the disease in SL, Team Diabetes of Second Life was founded by Jessi2009 Warrhol and John Brianna (Johannes1977 Resident), and is served by an advisory board comprising Eleseren Brianna, Veruca Tammas, Sandie Loxingly, Rob Fenwitch, Earth Nirvana and Dawnbeam Dreamscape, with Saiyge Lotus serving as a special advisor.

Project Bento User Group update 30 with audio

Bento: extending the avatar skeleton

The following notes and audio were taken from the weekly Bento User Group meeting, held on Thursday, October 13th at 13:00 SLT at the the Hippotropolis Campfire Circle. and chaired by Vir Linden. For details on the meeting agenda, please refer to the Bento User Group wiki page.

Note that this update is not intended to offer a full transcript of the meeting, nor does it present the discussion points in chronological order. Rather, it represents the core points of discussion, grouped together by subject matter were relevant / possible, whilst maintaining the overall context of the meeting.

RC Viewer

The Bento viewer is now on its third version as a release candidate (version 5.0.0.320160 at the time of writing). It is performing well crash-wise in comparison with the current release viewer, so the hope is – bugs allowing – it might not be too long before the viewer moves up to release status.

The first of the bugs mentioned by Vir in the audio is that the scale locking capability recently added to disable shape sliders from having any influence over joint positions has been reported as working intermittently at times. Vir is still looking into this.

The second is a report instance of pre-Bento content being deformed when viewed on the Bento viewer – see BUG-40672.

The problem appears when a sub-mesh contains bad joint position overrides for various joints that the model is rigged to. Prior to Bento, these joint position overrides were not applied, because the Lab was enforcing a 20-joint minimum: if a sub-mesh was rigged to fewer than 20 joints, then it was not treated as rigged, and the joint positions were ignored.

The BUG-40672 issue as seen in the Bento viewer, and apparently the result of "bad" joint overrides defined in the pre-Bento model, and changes made to how overrides are handled in the Bento viewer
The BUG-40672 issue as seen in the Bento viewer, and apparently the result of “bad” joint overrides defined in the pre-Bento model, and changes made to how overrides are handled in the Bento viewer

For Bento, this restriction has been relaxed to make it easier to produce meshes only affecting part of the avatar (wings affecting wing joints positions, head that affects only head join positions, etc.), making it possible to “mix and match” different meshes. Unfortunately, it also means that any model with “bad” (but previously “invisible”) joint positions defined may now appear deformed.

Reverting the viewer to its previous behaviour is not seen as optimal, because of the potential to break some Bento models and make the extended skeleton less useful (no more mix and match of meshes). Similarly, it is currently unclear as to how much content might be affected if the updated behaviour is retained, so the Lab is still considering what to do.

Makers of pre-Bento mesh avatars are asked to check BUG-40672 and then test their avatars using the current Bento viewer to see if similar issues manifest themselves. The most direct way to “fix” things is for affected content being re-uploaded with the bad joint positions removed, or by adding an animation to fix the joint positions after the fact (assuming said animation doesn’t conflict with others the model is using). Of course, if the model does not require joint positions at all then the option could also simply be unchecked at upload time.

Animating Hands

A complex discussion has been unfolding on the discussion forum concerning animating hands (from around page 122 onwards), and which also encompassed a part of the user group meeting (in text). It’s a convoluted subject involving several elements, of which perhaps the most important thing is understanding how best to animate hands.

To try to address this, Cathy Foil has produced a comprehensive video on hand animations, which anyone developing mesh hands for Bento may find informative and helpful, and so is embedded below.

Cathy also provided some hints and tips during the meeting.

Feet

There has also been forum discussion on feet. Bento doesn’t add and further joints to feet, and there are no plans to change the rig specifically to a support for animating feet. However, as Vir pointed out, there are more joints than the system avatar does not use – mToe and possibly mFoot – which might offer a degree of flexibility for mesh creators. If these are used, a point to keep in mind is that they are not used in the avatar height calculations, so some unexpected results my occur.

Other Items

Bounding Box Clipping / LODs

A non-Bento issue which can be frequently seen at Bento meetings due to the number of meshes being worn is that of bounding box clipping – part of the avatar appears to vanish as a camera is pulled back.

This generally occurs when the viewer is operating at the limit of its imposter avatars setting, and a conflict occurs trying to both display the avatar mesh (which the viewer will try to render at a united LOD (level of detail) whilst also trying to switch to displaying an avatar as an imposter. It can be overcome by setting the imposter slider to No Limit in Preference > Graphics.

While fixing this issue is not part of Bento, it raised the subject of why LODs aren’t used rather than the imposter setting. Vir explained that one reason is this idea that the viewer will try to render avatars and their attachments at a high LOD, rather than stepping down through LOD models, as is the case with in-world mesh objects. Another isse us that many creators tend to only use high LOD models, and incentivising people to use the LOD system correctly isn’t easy, although there are tools (e.g. Decimator in Blender) which help in the creation of LODs for models.

As the whole issue of rendering and associated costs and calculations is now being looked at by the Lab, changes might be forthcoming to help with matters – time will tell on that.

Additional Links

TaKe Heart in Second Life

TaKe Heart; Inara Pey, October 2016, on Flickr TaKe Heart – click any image for full size

Years ago on the BBC there was a kids TV series called Take Hart, featuring artist Tony Hart. intended to encourage children to get involved in art of almost any form – drawing. painting, 2D, 3D. It took over from an earlier show called Vision On, and both  featured a piece of music called Left Bank Two by the Noveltones, which became an iconic part of British culture in the 1980s (and still is among those who went through there early years back then).

I mention this, because when Caitlyn and I explored TaKe Heart, the homestead region Kess Krystal and spazz Tackett have opened to the public, I was immediately put in mind of the show and the music – and once the theme had lodged in my head, I could shift it. Kess told me I’m not alone – there was apparently a lot of humming and singing the theme during the work of designing the region. even to the point of thought being given to adding a little Morph somewhere.

TaKe Heart; Inara Pey, October 2016, on Flickr TaKe Heart

While there is a similarity between the region’s name and the show, the former is not directly tied to the latter – the TaKe in the region’s name is a combination of TAckett and KEss. Nevertheless, it does contain an echo of Tony Hart’s passion for art: it is so photogenic, it brings out the artist in anyone who visits.

Surrounded by rugged island peaks rising from the sea, TaKe Heart is a rugged, rural place, with steep cliffs, undulating swathes of grass, long and short, where trees are misted by glowing points of light twinkling like fireflies in the gathering dusk. It’s a tranquil place which can be enjoyed whether exploring on your own or with friends. There’s even a couple’s walking animation. allowing romantics to  walk hand-in-hand.

TaKe Heart; Inara Pey, October 2016, on Flickr TaKe Heart

Split into three islands, the region offers plenty of space to explore, starting from the west side of the largest island, where sits the landing point.  From here visitors, can wander around the large lake of main island – and try the swan boat or the precarious-looking Ferris wheel cars floating on the water. A picnic table between lake and sea offers the chance for lantern lit refreshments, while further away, and up a sharp rise, an arched circle offers the chance for a twilight dance.

Two bridges connect this island with its smaller siblings. The first and larger of these is home to a tall lighthouse, sitting on a headland, a floating house in its lee and a church sitting on a low hill not far away, spire vying for height with the surrounding trees. The other, and smallest of the island is home to the TaKe Two Gallery featuring some excellent photography by friends Kess invited to display there, and which I highly recommended visiting.

TaKe Heart; Inara Pey, October 2016, on Flickr TaKe Heart

Elsewhere can be found more places to sit indoors or out, with opportunities to snuggle. Old barns hide cars – one of which has seen better days, while, for the month of October at least, there are suitable macabre elements to be found.

However, rather than write reams about TaKe Heart, I’m going to encourage you to pay a visit and enjoy it for yourself. Instead, I’m going to sign-off with a little trip into childhood days, those of us of a certain age from the UK will remember with a smile.

SLurl Details

The Camera Panoramic: 360 photo fun in Second Life

Camera Panorama 360 demonstration via Flickr; Inara Pey, October 2016,Camera Panoramic 360o spherical demonstration via Flickr – click to view with 360o scrolling

Following my look at the Illiastra Panoramic Camera HUD, Lalwende Leakey invited me to try the HUD system she has been developing for 360o cylindrical and spherical images from within Second Life.

Called Camera Panoramic , the system is a comprehensive package for producing cylindrical (rectangular) images, full 360o spherical images suitable for upload to Facebook, VRchive, Flickr and other platforms or uploading as 360o videos on YouTube,  as well as planar images and 360olittle planet” images. A set of image presets are coded into the HUD to make taking shots easier – including the ability to take “selfies” of your avatar in 360o views.

Full documentation for the HUD is available on the web and via a downloadable PDF file file. In this article I’ll be looking at some of the core aspects of the system and running through how to produce a 360o image for uploading to Flickr.

The HUD

The Camera Panoramic HUD comprises 8 buttons, summarised below and described in detail in the supporting documentation.

Camera Panoramic HUD

Note that some of the camera placement buttons may appear greyed-out; this is because they are toggle activated; clicking one shows it in blue (active), while the others turn grey – as is the case with the camera placement options in the image above. The camera image options are only available when the HUD is capturing images.

All of the options can be accessed by gesture-driven hot keys and chat commands on channel /3, as detailed in the camera documentation. I’ll be referring to the HUD buttons throughout this article.

hud-textWhen worn, the HUD also displays information in text. Again, full details on this information can be found in the camera documentation, but in brief, the information comprises: the image type you’re using (cylindrical or 360o) with the selected preset; the number of pictures to be captured: whether you are using a camera offset (X,Y,Z axis), and the required camera defaults.

Note that FOV and Focal Length are determined by the preset, but you must manually set the Camera Angle within your viewer (you may also need to remember the Focal Length value for stitching your shots together into a single image during post-processing).

To set the camera angle, use either the debug setting – use CTRL-ALT-SHIFT-S to open the debug floater and type CameraAngle – or use the Cam tab in Phototools.

Setting the camera angle via debug or Phototools (if you use a TPV other than Firestorm, you may be able to use any shortcut to camera options that viewer provides to set the required value)
Setting the camera angle via debug or Phototools

Before starting to take shots with the HUD, there are a some things you’ll need to do:

  • Set your preferred windlight and daytime settings.
  • Make sure you freeze the clouds – you’ll be taking up to 26 images which will need to be stitched together, and moving clouds could make that a bit of a bugger to do. Use Menu > World > Environment Editor >Sky Presets > Edit Presets or PhotoTools > Clouds and check the scroll lock check boxes
  • If you are using the At Avatar position, hide yourself from view  – used the supplied alpha mask after removing all attachments or use something like a Vanish gesture. Otherwise, parts of your avatar will appear in some of the shots.

Taking Your Shots

Important Notes:

If you want to upload your images to something like Flickr, VRchive or Facebook, you should use the 360o spherical image type, as this will produce an image in the required 2:1 (width:height) pixel aspect ratio (PAR).

Setting your viewer window size for 360 spherical shots

When using the 360o spherical image type, you must set your viewer’s window size to a square aspect ratio. Use Advanced > Set Window Size (click CTRL-ALT-D to display the Advanced menu option, if required) or if you have Phototools, click on Aids > Set Window Size.

Either option will display the Window Size floater (right) – type 1024×1024 in the text box and click Set. Your viewer window will resize itself.

Image Capture Basic Steps

Detailed instructions on taking shots with the HUD can be found in the documentation. The following is a summary of key steps:

  • Prepare your viewer windlight, freeze the clouds and, for 360o spherical images, set the viewer window size.
  • Wear the camera HUD and select your desired preset.
  • Make sure the preset’s Camera Angle is set for the viewer’s camera (see above)
  • Select the require camera position in the HUD (remembering to hide yourself if using At Avatar)
  • Tap ESC to free your camera, then click the Start button on the HUD to position the camera for your first shot, and pressing CTRL-‘ (tilde) to capture your first frame to disk.
    • The first time the camera is used, you’ll be asked for a file name and location for the shot & all subsequent shots will be automatically saved to this location
    • Subsequent uses of the HUD will automatically save shots to the last location you used to save snapshots to disk when using the snapshot floater.
  • Click the Right arrow on the HUD to advance the camera and use CTRL-‘ (tilde) to save all remaining shots. After saving the last shot, the camera will automatically exit the capture mode.

You should now have a set of images ready for stitching together.

Selfies / Camera Offsets

Camera Panoramic has a set of presets for “selfies”, allowing you to include your avatar in your images. The process for capturing is the same as above, and the presets are selected by clicking the Offset button on the HUD, then selecting Preset from the dialogue box. The presets are defined by starting position.

Remember, as well, the offset option also allows you to offset the camera in increments of 0.1, 1.0 or 10 metres in the X, Y and Z axis’s – refer to the camera’s documentation for more on this.

Continue reading “The Camera Panoramic: 360 photo fun in Second Life”