House changing with a scene rezzer in Second Life

A rezzing system makes it easy to swap between house designs and furnishings, and the Multi Scene Rezzer & Multi Scene Erazer Pro V5 makes it an exceptionally low-cost option

While hardly new to SL, rezzing systems are something I’ve written about on a few occasions as a means of making convenient use of space, and being quickly able to swap between house interiors with things like Linden Homes (see: Saving your Bellisseria house designs for re-use with a rezzing system) and / or being able to swap back and forth between vehicles within taking up too much in the way of LI by keeping them rezzed all the time (see: Adding a little vehicle space with a rezzing system).

I’ve used such systems extensively throughout my SL time, particularly with reference to house / landscape designs, where I’ve tended to lay out house and landscape and then drop everything into a rezzer so that we’ve always been able to swap back and forth with house and garden options relatively easily – with the usual caveat that anything placed in a rezzer must have Copy  / Modify capabilities.

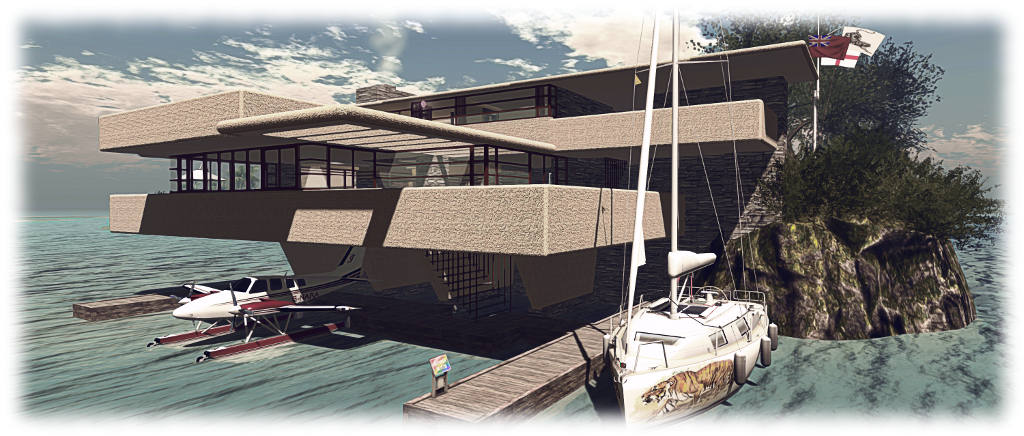
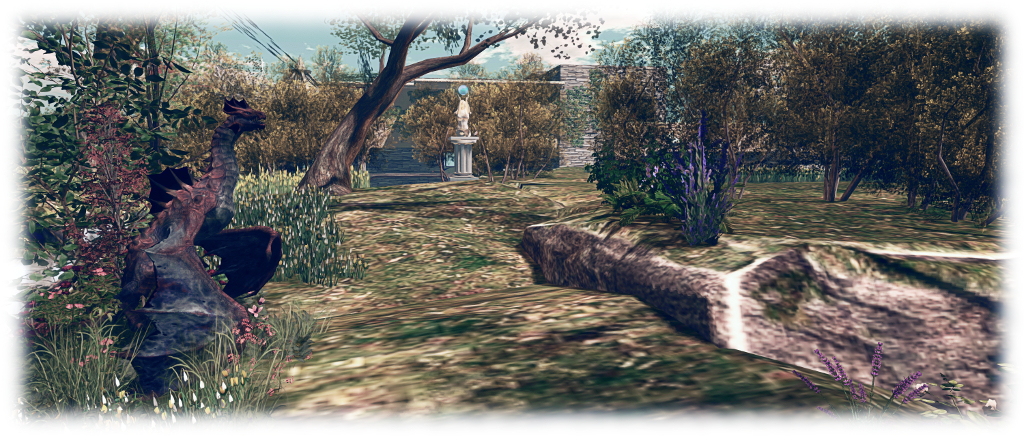
With our recent move to Second Norway (see: Farewell, Isla Pey, hello, Isla Caitinara), I again wanted us to have the freedom to swap between houses, but not quite to the same extent as with our old island. The latter was totally based on mesh landforms (due to limitations of terrain texturing available to us), so it was easy to have house designs, furnishings and landscaping placed within individual rezzers. With the new island, the layout is such that given we may want to change the house and some of the grounds from time-to-time, the gardens are pretty much as we want to keep them. Therefore, using a single rezzing system containing multiple house options makes a lot more sense. However, while the RF Scene Rezzer I’ve previously used does support this kind of approach could be used, it does rely of on coalesced objects to create a scene, and these can be tricky to manage when they comprise a lot of objects.

The broad design of the islands in Second Norway make them very amenable to tucking away houses, be they a relatively large design like our “skytower” …

So, whilst looking for a further alternative, I came across Ydille’s Multi Scene Rezzer & Multi Scene Erazer Pro V5. I’ll confess that when I saw the price – just L$49 – I was sceptical as to how well it would work. For that I owe Ydille an apology, as this is actually one of the most capable personal rezzing systems I’ve yet used, offering the kind of capabilities normally reserved for systems costing ten times the fee.

In short, the system provides the following capabilities:

  • Storing and rezzing up to eleven individual scenes (e.g. house, furnishings, gardens, etc.).
  • Auto-clearing a currently rezzed scene before rezzing another.
  • Rezzing multiple scenes side-by-side.
  • Easy updating of individual scenes, or adding further scenes to a rezzer up to the maximum of 11.
  • Using one than one rezzer in a single location.
  • Options to:
    • Manually clear all currently rezzed scenes.
    • Relocate the rezzer without impacting object placement.
    • Set access to the rezzer to one of owner, group or public.

In addition, the Pro V5 rezzer includes the ability to configure the rezzing options menu with unique names via note card.

For our purposes – easily swapping between different house options – the system is absolutely perfect, and set-up couldn’t be easier, comprising two main steps: creating your scene(s) and then updating the rezzing menu.

….Or something a little more cosy, like a stone cottage – note the change to the grounds in front of the house as well

Creating A Scene

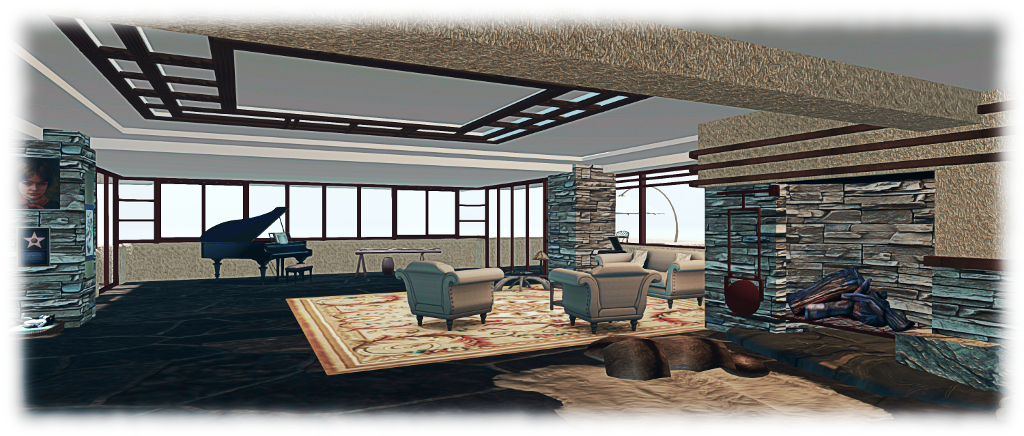
  • Lay out the items to form a scene (in our case, the house, its furnishings and fittings, and the immediate surrounding plants).
  • Edit each object in turn and:
    • Rename it in accordance with the system’s object naming convention (see below).
    • Drop the system’s Position / Eraser script into it.
    • Allow the script to record the object’s position (region X,Y,Z co-ordinates and rotation).
  • When the Item is ready – the script’s hover text will flash in yellow – Take the object back to inventory.
  • Drop the updated object into the scene rezzer’s contents.
  • Repeat for all remaining objects in the scene.

Object Naming Convention

Items for a scene must use the correct naming convention. For the first 9 scenes in a unit, this takes the form of “S1_[name]”, “S2_name”, etc.

  • So items for the first scene might be: called “S1_house”, “S1_sofa”, “S1_chair”, etc.
  • While items for the second scene might be “S2_house”, “S2_sofa”, “S2_chair”, etc.

Items for the 10th and 11th scenes follow a similar convention, but without the underscore (so S10House, S10Sofa, etc.).

Updating the Rezzing Menu

Ydille’s Multi Scene Rezzer & Multi Scene Erazer Pro V5 provides a customisable scene rezzing menu.

By default, the Pro V5 rezzing system has a pre-configuring scene rezzing menu (“Skybox”, “Pool”, “Clouds”, Plants”, etc.). These names can be updated to more meaningful terms by editing a note card contained in the rezzer itself. To change them:

  • Edit the note card in the rezzer.
  • Delete the 11 single-line entries in the top portion of the card (“Skybox”, “Pool”, “Clouds”, Plants”, etc.).
  • Replace them with your own names, one per line.
  • If you have less than eleven scenes, you must add additional lines (use a space or period), so the list is always 11 items long.
  • Save the note card.

Note that you can update the note card as you add further scenes to your rezzer.

Using the System

When you’ve loaded one or more scenes:

  • Click the rezzer.
  • Click the Rez Scenes button to display your available scenes.
  • Click the button of the scene to be rezzed.
  • Allow the scene to rez.

By default, any current scene that is rezzed will be deleted. This can be toggled off / on via the Pre Erase button on the the rezzer’s main menu. Access options can similarly be set by clicking the Access button to toggle between Owner, Group and Public. Please refer to the system’s documentation for further notes.

Another look at the cottage – a design from Domineaux Prospero we’ve not used in a few years

Observations

Considering it is only L$49, the Multi Scene Rezzer & Multi Scene Erazer Pro V5 packs in a lot, as noted, and is extremely easy to use. Given I didn’t really want to dramatically change the overall layout of our new island home, but wanted a quick means of changing the house space, it has already proven to be absolutely ideal for our needs on Isla Caitinara, Certainly, if you’re looking for a low-cost personal rezzing system – if you’re looking for a system to sell items, you’ll need to look elsewhere – this system really cannot be beaten – and it is capable of packing in a lot large scene areas than we”re using.

Adding a little vehicle space with a rezzing system

Having room to moor / park all your boats and planes at home can be a problem (if you have room at all!) – so why not use a rezzing system?

Being into planes and boats in SL can be a little taxing. Not just on the purse / wallet, but also in where to park things. Even if, like us, you have a place near water where you can moor your boats and seaplanes, providing space for all of them can be a little hard – every LI given over to vehicles, moorings and so on, is one less for the house, furnishings and garden. Sure, you can always putt things out of your inventory when you want them – but where’s the fun in that? Having at least something out on your docks or slipway is part of the pleasure in owning vehicles.

In our case, we have numerous vehicles, some of which get considerable use – notably our two DSA G58 Barons and M33 Debonair, plus the Little Bee and FoilStream by Ape Piaggio, and the Bandit 210. Having all of these rezzed at any one time along with our Loonetta 31, which tends to be permanently rezzed, gobbles up 263 LI – and quite a lot of space. Add to that some of the vehicles have multiple finishes to them (different registrations or colour schemes), and of which we might want to use at any given time, even more LI can get eaten in trying to have all of them out at once.

Of course, hauling some of them of inventory when needed is always an option, it’s still a little boring and negates the idea of having “home space” for vehicles. So is there a compromise that allows for a quick swapping between vehicles while allowing some to be parked / moored and ready to go? If your vehicles have both copy and modify permissions, there is: a simple scene rezzing system.

A system like the RF Device / Multi-Scene Rezzer lets you quickly choose which (and how many) of your copy / modify vehicles you have rezzed and parked at home, and lets you swap between different types – note how I can swap between the two different ‘planes occupying the same mooring. Thus, you don’t have to keep everything rezzed at the same time, saving LI, and you don’t have to bother with manually hauling things out of inventory when you want to use them.

This is pretty much what we’ve had at Isla Pey for a good while – and note I am not talking any kind of temp rezzer here; they are a blight that should really be avoided. There are several scene rezzing systems available that fit the bill for vehicle rezzing, and I’ve been using a couple for the last few years. However, my unit of choice at the moment is the RF Device / Multi-Scene Rezzer.

Priced at just L$250, this is a low-cost, very easy-to-use system, comprising a “control panel” object and a single script. Simply rez the “control panel” object, rez and position your copy / modify vehicle(s) where you want it / them to be parked / moored when rezzed, drop the script inside the contents, then take the vehicle(s) and drop it / them into the contents of the “control panel”, and you’re done. Touching the “control panel” then displays a list of objects within it, with a corresponding set of buttons used for rezzing the vehicle(s) of your choice. You can even move the control panel around within your parcel / region and the vehicles will still rez correctly in their original places.

We have various vehicles stored in the rezzer (shown on the left with a custom finish) – including different variants of the same vehicle (indicated by the small arrows on the menu), any of which can be rezzed at the click of a button whenever it is required. Those rezzed can then remain parked / moored until needed or replaced by an alternative

Thus, using this system, we have direct access to a fair number of my boats and planes (some of which are copies with different registrations / paint finishes) which we can swap between quickly and easily, and without messing around with inventory and positioning things manually (particularly handy if you can’t use RTLP on your parcel).

The RF system, like many others, includes an “auto clear” function. So, if you only have space to rez one vehicle at a time, this will remove any currently rezzed vehicle before rezzing the next. But if, like us, you have room to have several (but not all) of your vehicles out at one time, the “auto clear” can be disabled, and you can manually delete any individual vehicle before  using the rezzing system to display another that might occupy the same spot when rezzed.

Easily use a single mooring / parking space to swap between vehicles or between different versions of a vehicle with different finishes (as seen above, where I’m swapping between two versions of my Little Bee), all without any tedious mucking about with inventory. 

Obviously, using rezzing systems like this isn’t a new idea – it’s actually as old as the hills in some respects. But, if you haven’t considered it before, and do have limited space for your vehicles and would like a more convenient way of displaying them / swapping between them in-world than having to refer back to your inventory – trying out something like the RF Device / Multi-Scene rezzer might be worth considering.

Bringing Fallingwater to Isla Pey

A modified Fallingwater at Isla Pey

As friends know, I have something of an obsession with Fallingwater, the rural south-western Pennsylvania house designed by architect Frank Lloyd Wright in 1935 for Edgar J. Kaufmann, Sr. and his family. For several years I worked on a reproduction here in Second Life. I’m not the first to do so – although while most tend to only focus on the “main” house, I opted to try for the whole thing: house, guest house, servant’s quarters and garages. Unfortunately, it’s the kind of build that requires a region in size to properly lay out, so since 2015, when it last appeared as the setting for an art display, it has tended to sit in its rezzing system in my inventory.

However, I recently suggested to Caitlyn that given the lie of our island home, it might be interesting to build a house that is built against one of the cliffs, rather than on top of it. Problem was: what style of house? The Internet offered plenty of images that might serve as inspiration, but in the end I came back to Fallingwater. There was no way the entire house would fit on our island, but I wondered if the main house could be made to fit – if not as a “cliff house”, then at least as a house built out over the water.

I’ve taken a few liberties in removing the upper floor, the scullery and shortening both terrace wings, but overall, the house retains its distinctive shape

Turns out, it could – with a little modification.

Fallingwater is a big house – far too big for just two of us, and a little bigger than makes for a comfortable fit with the island. To make it more manageable, I removed the upper floor bedrooms, reducing the overall height, and shortened the two wing terraces,  dropping the height of one just a little. The back of the house needed a little re-working – a new “front door” on the ground level, the removal of the bridge spanning the driveway in the real house, and slight alterations to allow the house form one side of the island’s pond.

The Great Room is a big space to fill.. and yet, once you get started, it isn’t…

What particularly got me to use Fallingwater  – as well as a nagging desire to see the house in some form again – was an idea from Caitlyn. My thinking was to have the house at the south end of the island, overlooking the boating lanes. Caitlyn suggested using the north end of the island instead, and on trying it, I saw that the buttresses supporting the house as it stands out over Bear River actually makes a convenient covered mooring area for our motorboats and ‘plane, with room for our faithful Loonetta to one side.

A little tweaking of the grounds and garden was required to fit everything, but nothing too excessive. I admit to being rather pleased with the way the house revels itself when walking up from the southern end of the island; this wasn’t intentional, the lay of the path and the trees already there just leant themselves to a gradual reveal.

Walking up the track from the south end of the garden as the house gradually reveals itself.

It’s not the “house backing into the cliffs” I’d originally thought about, but it is nice to have my Fallingwater back in-world, even modified as it is.

Isla Pey: all change

The Maven Eco IV, with mods, and part of the updated island

So, yeah. Last time I wrote about the pet project of Isla Pey, I passed comment that unless it went through a major make-over, it likely would not be changing too much. Well, guess what? We’ve just had a major make-over 😀 . It wasn’t intentional; we happened to visit Cerys’ magnificent Collins Land (see here), which got me reconsidering island designs; then I discovered the Maven Homes Eco IV house (available in either unfurnished or furnished variations), which became a “must have”.

The House particularly caught my eye for a number of reasons. The unfurnished variant offers  very flexible living space (a large open plan front area which can be easily made into two rooms and a separate room to the rear, alongside of a comfortably sized wooden deck) neatly fitted into a 25m by 27m footprint and 99 Land Impact. However, the attraction for me is the soft echo of Frank Lloyd Wright in the design and styling: the cool stone walls, the pseudo cantilever angling of the roofs, the use of glass. All of these made it pretty irresistible. So really, I had no option but the consign the cottage and ruins design to a rezzing system and start over…

The Maven Eco IV with Trompe Loeil Keliana pool (left foreground) and steps down the cliff to the boat moorings

Of the two variants of the Eco IV, I opted for the unfurnished since furniture is something we’re hardly lacking. As noted, the large space to the front of the house offers two open plan room spaces, either side of the front door. I borrowed an idea from Leaf and Birdy Moone, adding some low-level stone “room dividers” to further break up the space, putting a lounge on one side and a study / music / cosy on the other.

There are one or two things about the Eco (as with any house design) which didn’t quite suit our preferences. The Eco’s fireplace, for example came across as a little too modern, while the lighting in part comprises fluorescent style strip lights which frankly aren’t that attractive. The old cottage came to the rescue here, providing me with both a replace fireplace and chimney, and a pair of suspended candle lights. The former did require a retexturing of all of the stone walls in the house to blend the chimney into the design, while the later required a little script tinkering and lighting prim placement to both get the candles to work with the built-in house controls and give a decent lighting effect both above and below, but none of this was in any way onerous work.

The modified day space in the Eco IV: the fireplace, dividing walls, ceiling fan and lighting candles are all additions to the basic house, and the stonework is not the original texturing

The use of several large base sections in the house makes it relatively easy to add to the structure and avoid bumping the LI too much. In this case, I added the fireplace, room dividers, additional lighting, rugs, carpets, wall hangings, paintings, photos, and ornaments totalling 38 LI individually for just an additional 14 LI on the house. Controls for the house a pretty good as well. The main panel includes a security /access system, controls for the lights (which can be set to turn on / off at region dusk / dawn and have a colour options), door controls (including setting them to auto-open) and a window opacity / tinting system.

Of course, a new house required a re-working of the island as a whole, and I opted for the Fantik Lofoten Summer rock kit for this, as it offered the best flexibility for the look I wanted to achieve. There are nine basic rock formations in the kit, all with physics. This can limit resizing opportunities due to increased LI; however, if you have rocks you won’t be walking on directly, use the old trick of flicking the physics over from Prim to Convex Hull (Build / Edit floater > Features tab), and you’ll find they are a lot more friendly to resizing.

Looking down on the new house. The chimney actually came from the “old” cottage, with a retexturing of the stone on it and the house to blend the two together. Some of the wood and cement beams on the house have also been tinted to darken them

Those who have used this kit will know just how flexible it is, and it allowed me to easily design the new island around the house and a new water feature of two rocky pools linked by a series of small falls (courtesy of Alex Bader’s Waterfall kit) stepping their way down the rocks, together with a final fall to the sea (with a sluice to prevent the ducks, geese and fishes from being swept away! Kriss Lehmann’s excellent Botanical Edge Brick Park Path kit came out of retirement to provide the paths and steps winding down the rocks, including down the the new boat moorings below the back of the house.

The southern end of the island has been a little truncated – we really didn’t need all the space – and redesigned using elements from the Fanatik kit. Some of the old castle ruins have been retained here – not about to get rid of them entirely! This provides a nice home for our MSD Dragon Garden and offers a shaded little seating spot, while the Trompe Loeil Outcrop Hut is also retained from the last design, giving us a place to watch the boat races go by.

The view from the front of the house looking south over the pond and water to the old ruins

So, that’s what’s been keeping me occupied for the last couple of days, and one (among several) of the reasons the blogging output has slowed of late. But as we’re both happy with the result, I’d say the effort has been worth it 🙂 .

If you’re interested in seeing Eco IV in-world, you can fint it at Cain Maven’s main store.

Isla Pey: happiness is getting things *just* so …

The cottage and gardens on the plateau

We’re into another quarter, so it must be time for me to fiddle with the island home 🙂 .

In January, we reverted back to using the Fanatik Rocky Island to give a little elevation to our island home, and while happy with the results, I couldn’t help but feel tweaks were necessary. For one thing, the rotation of that huge rock made the walk from house to boat house something of a trek. It had ended up this way because I thought that was the only way the Rocky island would decently fit the north end of the parcel, where we wanted it. Turned out, I’d measured things a little inaccurately, so if we sacrificed the ‘plane docks, it would actually just fit.

So, around went the 118 LI slab of land by 90-degrees, moving the footpath winding down the side so that it descends directly to the “field” at the foot of the cliffs. So far, so good, other than the loss of the ‘plane docks – and the burying of half the duck pond (which was not looked upon too kindly by our TLC ducks!). Cue a reshuffle of the landscape 🙂 .

The Botanical Enchanted Forest Tower and MSD Among the ruins – Isolde tower can be nicely merged to form a single ruin, and as both are mod, the stonework can be textured to they match. The upper platform on the Enchanted Forest Tower makes for a perfect setting for our MSD Dragon Garden piece.

I won’t bore you with a huge delve into things. Suffice it to say that the reshuffle actually improved things no end. For one thing, moving the pond helped me realise that with a little bit of re-texturing of the stonework, Kriss Lehmann’s Botanical Forest Ruins Tower could be combined with the MSD Among the Ruins – Isolde tower to produce a nicely expanded ruin on the west side of the island. This in turn provided a new home for our MSD Dragon Garden  (which is (reviewed here alongside the Among The Ruins Tower), with a cosy little snuggle beneath it, overlooking the relocated pond.

Looking across the pond from the sitting nook under one of the ruined towers

Moving the Rocky Island around also presented a much more flexible space in which to set the house and  gardens, with a little bit of terracing to break things up a bit. Everything is now much more conveniently located, and finally provided just the right post for out old well (a genuine steal from DIVAs Design at L$25), accessed via a gate (from Cube Republic’s Meadow Farm Fence kit, another recommendation) opening off the back of the garden.

And the ‘planes? Well, moving the pond made room for a smaller set of moorings, and a quick raid of my inventory produced an old Smith Fizz scene rezzing system. Nicely customisable, this now lets us rez whichever float ‘plane or helicopter we fancy using, whilst keeping the dock otherwise clear for friends to use when visiting, whether they come by air or water.

The towers lit at night, and the cottage in its new cliff-top location

So, are we happy with things – finally? Believe it or not, we both are. Will there be more changes in the future? Obviously, as there will always be nips and tucks, tweaks and additions. But unless we decide on a total make-over of the island for something completely new, I think that this time Isla Pey with its walks, ruins and house, is exactly how we both like it.

The dragon, the rune stone and the ruin in Second Life

Three composite creations by Morgan Sim Designs with me alongside to give a sense of scale with each one. From the left: the Dragon Garden, the Rune Stone Garden and Among the Ruins – Isolde

Whilst visiting Spring Spirit recently (see: A Spring Spirit in Second Life), Caitlyn and I were both taken by a magnificent red dragon seated upon a rock amidst a spray of grass and flowers. Taking a peek at it, via the Edit floater, we were led to the Marketplace store of Morgan Sim Designs (MSD). While the name may be familiar to some, it was a new and virtual treasure trove for us – as it is likely to be for anyone looking to add some special touches to their landscape and / or garden.

Operated by Chandra Pelazzi, Morgan Sim Designs is a Marketplace-only store specialising in composite designs. That is, designs which bring together the full permission works of other creators to design and present a unique finished product.

Buying from the Marketplace without the means to check creations in-world can at times be a hit-and-miss affair: will the item really live up to the photos? Is there perhaps some unseen flaw or issue which might others dissuade a purchase? We’ve all likely had such feelings. From what we’ve seen (and purchased!) so far from Morgan Sim Designs there is absolutely no need to worry. The elements used in MSD creations are all good quality pieces from established creators, with the completed pieces by the MSD demonstrating a keen eye for colour, design and detail.

The MSD Dragon Garden on our home island

Take the dragon mentioned above, for example. Called the Dragon Garden, it combines a full perm dragon with plants by Better Gnomes and Cauldrons / Krikket Blackheart, and additional plants and flowers by Decor Depot / Styx Maven and Daffy’s Gadgetmania / Daffy Proto. Offered as Modify / Copy for just L$190, it is a marvellous feature for any garden, weighing in a 22 LI in its default size (as a Modify item it can be resized, which will reduce the LI if downsizing, or increase it if upsizing). We now have one, slightly reduced in size and LI (16), sitting in the “wilder” part of out gardens, keeping an eye on the lower lawns nearby.

Another MSD item now included at home is the Rune Stone Garden. This combines a central full perm version of a rune stone from Otherworld / AnnabelleApocalypse with flowers and plants again by Styx Maven and by Mesh Plants / Reid Parkin (a creator I’ve used in a number of builds), What A Mesh / Dennie Ling, and T-Spot Mesh / Teresa Matfield. At 21 LI in its default size, it is also supplied Copy / Modify, and we now have one sitting on the trail winding through the wooded part of the island, where (if I may say so), it looks superb 🙂 .

The MSD Rune Stone Garden in place on our island home

Another composite from MSD which sits well in out overall design is Among the Ruins – Isolde. A much larger piece, featuring the square tower of a castle by S&M Designs / Mikael Blogger, plants and flowers again by Reid Parkin and Teresa Matfield, together with Bad Katz / Katz Republic. It comes with a 40 LI impact in its default size, and includes a statue by DMC Creations / x1XDanteX4x, which stands amidst a spray of flower inside the tower.

Taken complete, these MSD designs and the others in the range, add a great amount of character and depth to a scene. As most are supplied Modify, not only can they be resized to deal with LI concerns, if required, they can be tweaked better suit specific needs. For example, we have an ancient stone wall running across part of the land which has needed something to bring a little more colour to it. Enter one of MSD’s Medieval Wall Ruins Cottage Garden sets. It was a simple matter to pull out the supplied wall section, slip in a section from the existing wall, and job done. Colour where it is needed, and everything nicely integrated. Even had some base rocks I could re-purpose!

The MSD Among the Ruins – Isolde tower at home on our island

If you are looking for little scenes and pieces to add colour  or interest to a part of your garden, parcel or region, and you’ve not come across Morgan Sim Designs, then the Marketplace store is well worth a perusal. Everything is very modestly priced; everything mentioned here was just L$190, which is something of an average price for the store. Even as I finish this article, another kit from MSD has slipped into my inventory, and will shortly appear in the garden 🙂 .