Back in August 2015, I blogged about Reshade, a post-processing injector for games and video software available for Windows. When installed and associated with a game or application like Second Life, it can be used to overlay the screen with a wide range of shader-based effects. These can them be used in screen captures or when recording machinima, to provide “real-time” visual effects.
Since that time, Reshade has been through a couple of iterations, with version 3.0.3 appearing on October 21st. As I’ve not revisited Reshade since that 2015 article, I thought I’d provide a short overview of installation and general use of this latest version.
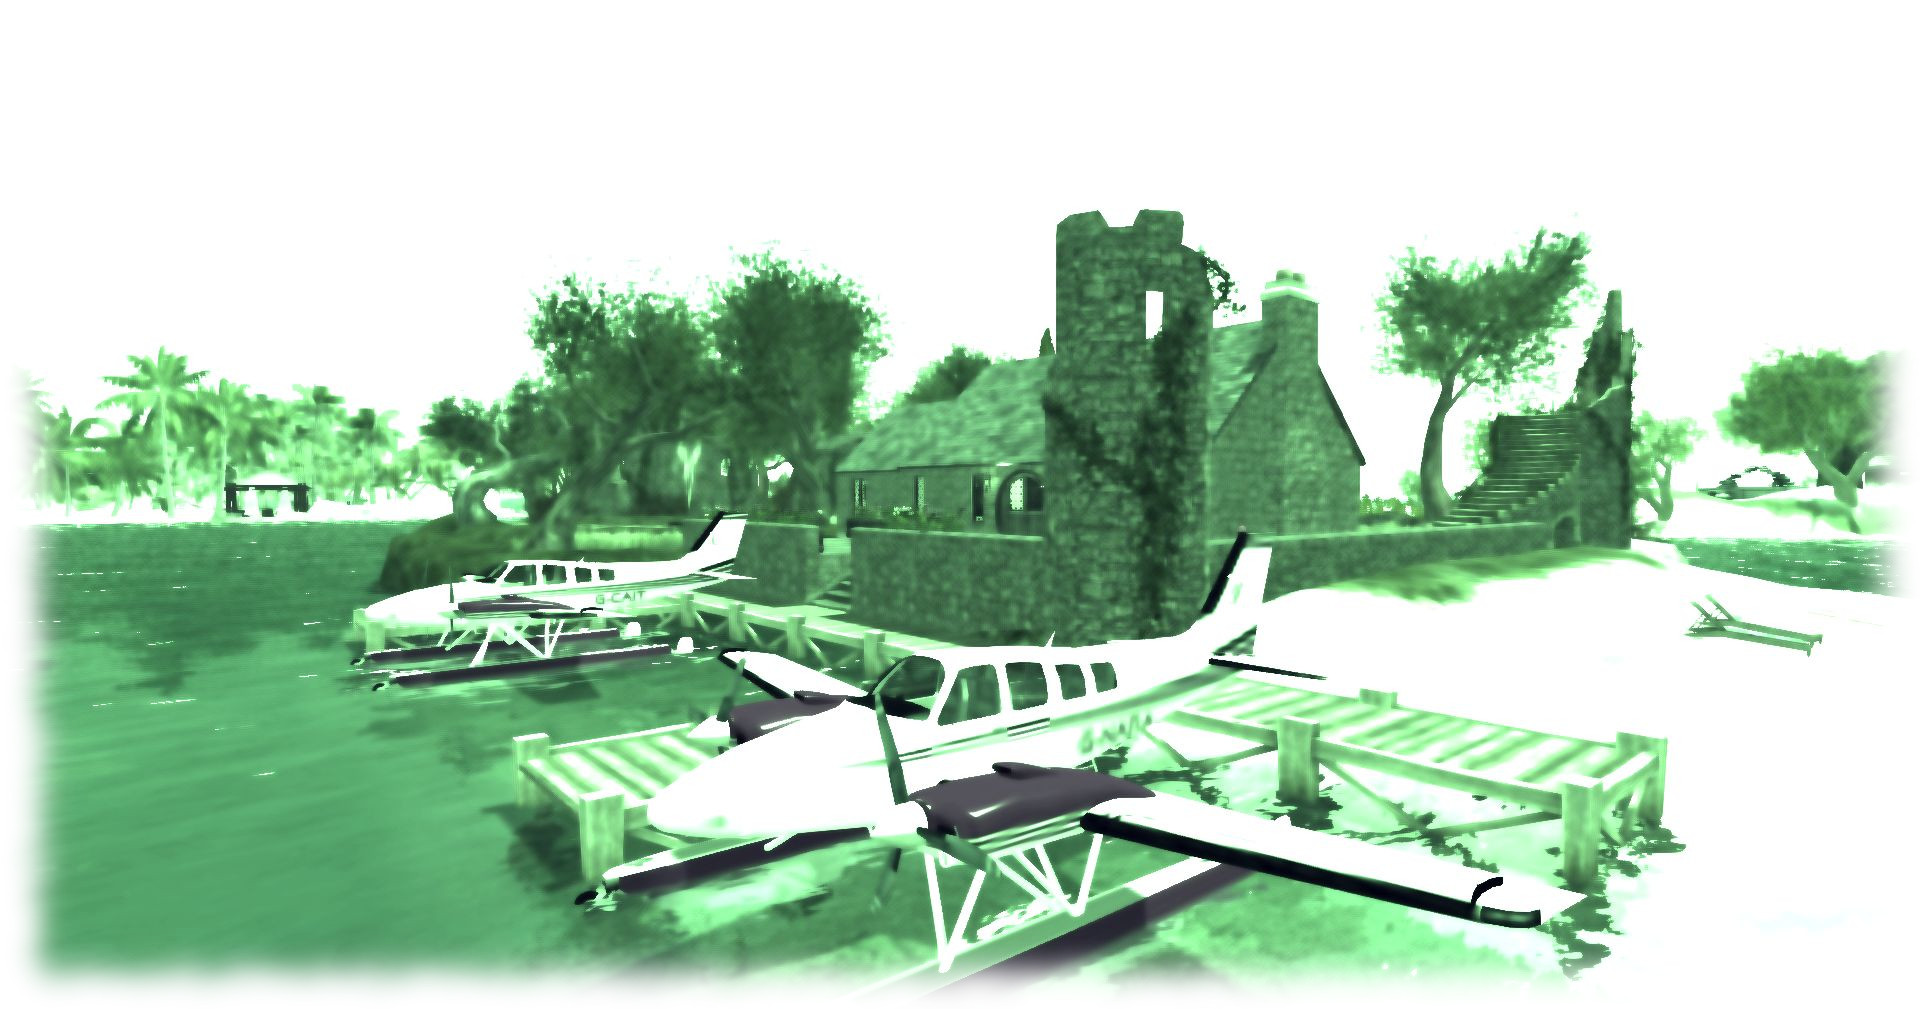
A quick and dirty demo video I made with Reshade 1.0, showing how it can be used used in Second Life machinima filming
Installation
Please ensure you’re logged out of Second Life when setting-up ReShade.
- Go to the Reshade website and download the installer, double-click to run it.
- You will be prompted to select a programme for association with Reshade:
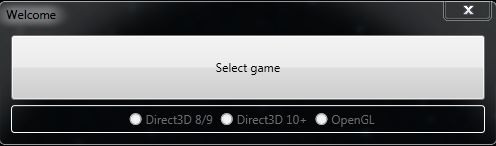
- Click Select Game and navigate to the installed folder of the viewer with which you want to use Reshade and click on the viewer EXE file.
- You will be prompted to Select Rendering API:
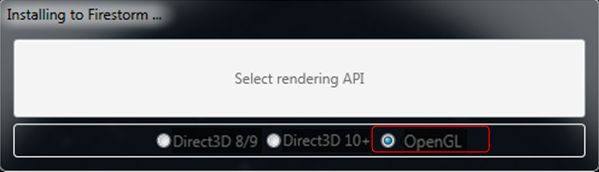
- Click on OpenGL (note this may already appear to be selected – click on it anyway). You will be asked if you want to install the shaders- make sure you do.
- The shaders will be downloaded and installed in a folder in your viewer’s installation location on your computer.
- The Reshade installer will report Done, and can be closed.
To associate Reshade with any other viewer you have installed on your PC, you will have to follow these instructions again. You do not necessarily have to install the shaders again (although this is easiest) – you can set any additional versions of Reshade to point to shaders already installed.
Using Reshade
Note: the following is not intended to be an exhaustive guide to using Reshade. It is intended to get you started. The best way to gain familiarity with Reshade is to use it; should you need additional assistance, please refer to the Reshade forums. I don’t profess to be an expert in the applications, and will probably not be able to help with detailed technical support!
Reshade is available whenever you launch the viewer with which it has been associated. To access it, press SHIFT-F2. This will display the UI panel which may enter Tutorial mode, if you haven’t saved any presets.
- Click the Continue button in the Reshade panel.
- The preset selection bar will be highlighted. Click on the + button to the right of it to open the Name bar, and type in anything you like – this will become the name of a preset INI file, which yo can save and then select at a later date, loading all the sahder settings you have established in it.
- The available shaders are loaded (and highlighted in red in the tutorial). Read the explanatory text and click continue.
- The settings panel is highlighted and briefly explained. Read and click Finish.
- The full Home tab will be displayed.
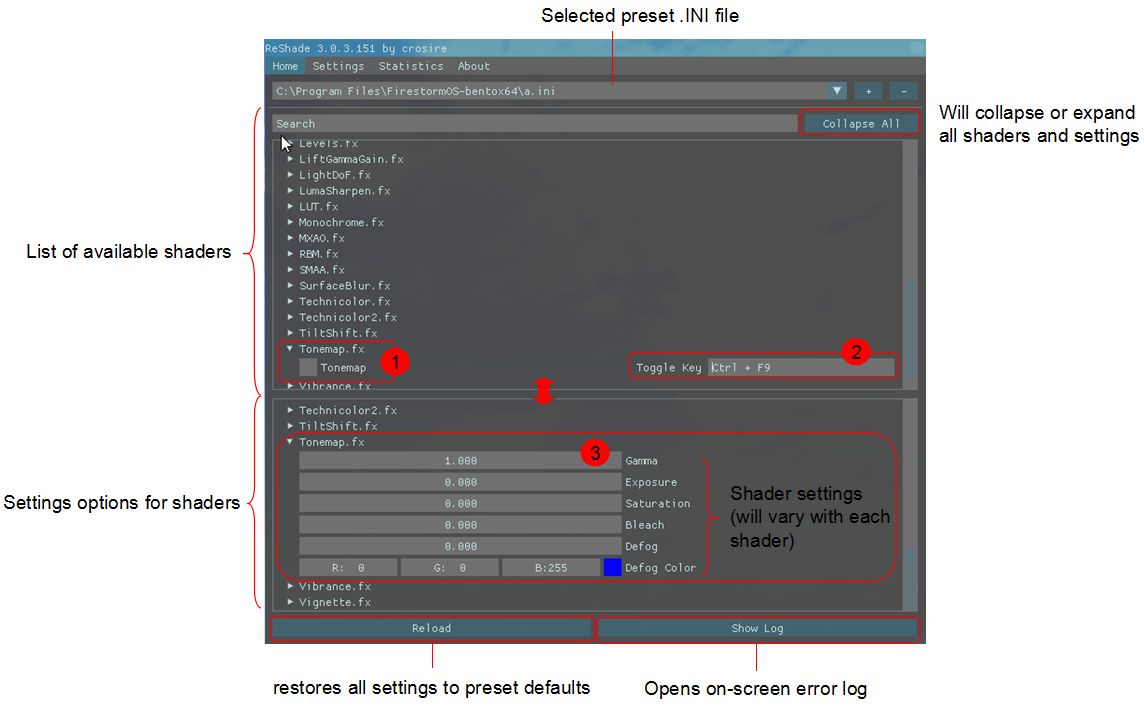
This comprises 5 sections:
- Preset selection area (top), with + (create a new preset INI) and – (delete selected preset INI)
- The shader search bar – type in all or part of a shader to display just that shader and its settings options. This also includes the Collapse / Expand toggle for opening / collapsing all shaders in the upper and lower panes of the tab
- A scrollable list of available shaders. Clicking on any one of these will open it to display the activation button (1), above, and the hotkey toggle option (2), above – you can type-in any key combination you like here to automatically select the shader.
- A scrollable list of settings, by shader (3), above).
- The Reload button (reset everything to defaults) and Show error log buttons.
The two main panes in the tab – shader list and settings – can be adjusted by clicking on the divider between them and moving it up or down.
Continue reading “Revisiting the Reshade injector with Second Life”