House changing with a scene rezzer in Second Life

A rezzing system makes it easy to swap between house designs and furnishings, and the Multi Scene Rezzer & Multi Scene Erazer Pro V5 makes it an exceptionally low-cost option

While hardly new to SL, rezzing systems are something I’ve written about on a few occasions as a means of making convenient use of space, and being quickly able to swap between house interiors with things like Linden Homes (see: Saving your Bellisseria house designs for re-use with a rezzing system) and / or being able to swap back and forth between vehicles within taking up too much in the way of LI by keeping them rezzed all the time (see: Adding a little vehicle space with a rezzing system).

I’ve used such systems extensively throughout my SL time, particularly with reference to house / landscape designs, where I’ve tended to lay out house and landscape and then drop everything into a rezzer so that we’ve always been able to swap back and forth with house and garden options relatively easily – with the usual caveat that anything placed in a rezzer must have Copy  / Modify capabilities.

With our recent move to Second Norway (see: Farewell, Isla Pey, hello, Isla Caitinara), I again wanted us to have the freedom to swap between houses, but not quite to the same extent as with our old island. The latter was totally based on mesh landforms (due to limitations of terrain texturing available to us), so it was easy to have house designs, furnishings and landscaping placed within individual rezzers. With the new island, the layout is such that given we may want to change the house and some of the grounds from time-to-time, the gardens are pretty much as we want to keep them. Therefore, using a single rezzing system containing multiple house options makes a lot more sense. However, while the RF Scene Rezzer I’ve previously used does support this kind of approach could be used, it does rely of on coalesced objects to create a scene, and these can be tricky to manage when they comprise a lot of objects.

The broad design of the islands in Second Norway make them very amenable to tucking away houses, be they a relatively large design like our “skytower” …

So, whilst looking for a further alternative, I came across Ydille’s Multi Scene Rezzer & Multi Scene Erazer Pro V5. I’ll confess that when I saw the price – just L$49 – I was sceptical as to how well it would work. For that I owe Ydille an apology, as this is actually one of the most capable personal rezzing systems I’ve yet used, offering the kind of capabilities normally reserved for systems costing ten times the fee.

In short, the system provides the following capabilities:

  • Storing and rezzing up to eleven individual scenes (e.g. house, furnishings, gardens, etc.).
  • Auto-clearing a currently rezzed scene before rezzing another.
  • Rezzing multiple scenes side-by-side.
  • Easy updating of individual scenes, or adding further scenes to a rezzer up to the maximum of 11.
  • Using one than one rezzer in a single location.
  • Options to:
    • Manually clear all currently rezzed scenes.
    • Relocate the rezzer without impacting object placement.
    • Set access to the rezzer to one of owner, group or public.

In addition, the Pro V5 rezzer includes the ability to configure the rezzing options menu with unique names via note card.

For our purposes – easily swapping between different house options – the system is absolutely perfect, and set-up couldn’t be easier, comprising two main steps: creating your scene(s) and then updating the rezzing menu.

….Or something a little more cosy, like a stone cottage – note the change to the grounds in front of the house as well

Creating A Scene

  • Lay out the items to form a scene (in our case, the house, its furnishings and fittings, and the immediate surrounding plants).
  • Edit each object in turn and:
    • Rename it in accordance with the system’s object naming convention (see below).
    • Drop the system’s Position / Eraser script into it.
    • Allow the script to record the object’s position (region X,Y,Z co-ordinates and rotation).
  • When the Item is ready – the script’s hover text will flash in yellow – Take the object back to inventory.
  • Drop the updated object into the scene rezzer’s contents.
  • Repeat for all remaining objects in the scene.

Object Naming Convention

Items for a scene must use the correct naming convention. For the first 9 scenes in a unit, this takes the form of “S1_[name]”, “S2_name”, etc.

  • So items for the first scene might be: called “S1_house”, “S1_sofa”, “S1_chair”, etc.
  • While items for the second scene might be “S2_house”, “S2_sofa”, “S2_chair”, etc.

Items for the 10th and 11th scenes follow a similar convention, but without the underscore (so S10House, S10Sofa, etc.).

Updating the Rezzing Menu

Ydille’s Multi Scene Rezzer & Multi Scene Erazer Pro V5 provides a customisable scene rezzing menu.

By default, the Pro V5 rezzing system has a pre-configuring scene rezzing menu (“Skybox”, “Pool”, “Clouds”, Plants”, etc.). These names can be updated to more meaningful terms by editing a note card contained in the rezzer itself. To change them:

  • Edit the note card in the rezzer.
  • Delete the 11 single-line entries in the top portion of the card (“Skybox”, “Pool”, “Clouds”, Plants”, etc.).
  • Replace them with your own names, one per line.
  • If you have less than eleven scenes, you must add additional lines (use a space or period), so the list is always 11 items long.
  • Save the note card.

Note that you can update the note card as you add further scenes to your rezzer.

Using the System

When you’ve loaded one or more scenes:

  • Click the rezzer.
  • Click the Rez Scenes button to display your available scenes.
  • Click the button of the scene to be rezzed.
  • Allow the scene to rez.

By default, any current scene that is rezzed will be deleted. This can be toggled off / on via the Pre Erase button on the the rezzer’s main menu. Access options can similarly be set by clicking the Access button to toggle between Owner, Group and Public. Please refer to the system’s documentation for further notes.

Another look at the cottage – a design from Domineaux Prospero we’ve not used in a few years

Observations

Considering it is only L$49, the Multi Scene Rezzer & Multi Scene Erazer Pro V5 packs in a lot, as noted, and is extremely easy to use. Given I didn’t really want to dramatically change the overall layout of our new island home, but wanted a quick means of changing the house space, it has already proven to be absolutely ideal for our needs on Isla Caitinara, Certainly, if you’re looking for a low-cost personal rezzing system – if you’re looking for a system to sell items, you’ll need to look elsewhere – this system really cannot be beaten – and it is capable of packing in a lot large scene areas than we”re using.

Shippe & Saille Harbor Master in Second Life

The Shippe and Saille Harbor Master (Bimini and fishing rods deployed)

As a rule of thumb, I tend not to seek copies of items for review in these pages; those I do produce tend towards items I have purchased. The reason for this is because I feel I can give a fairer review if I’m writing about something I’ve purchased. That said, there are a couple of of exceptions to the rule, and I’m about to make a third in this case.

LadyJane Shippe sent me the latest from her Shippe and Saille brand, the Harbor Master, a slightly rescaled model of the Harbor Master 19, a dory style hulled cruiser with a forward cabin space, and itself based on the classic open Outboard Dory 18. It’s a small, fairly nimble craft driven (in the case of this version) by a 50 horse power outboard motor.

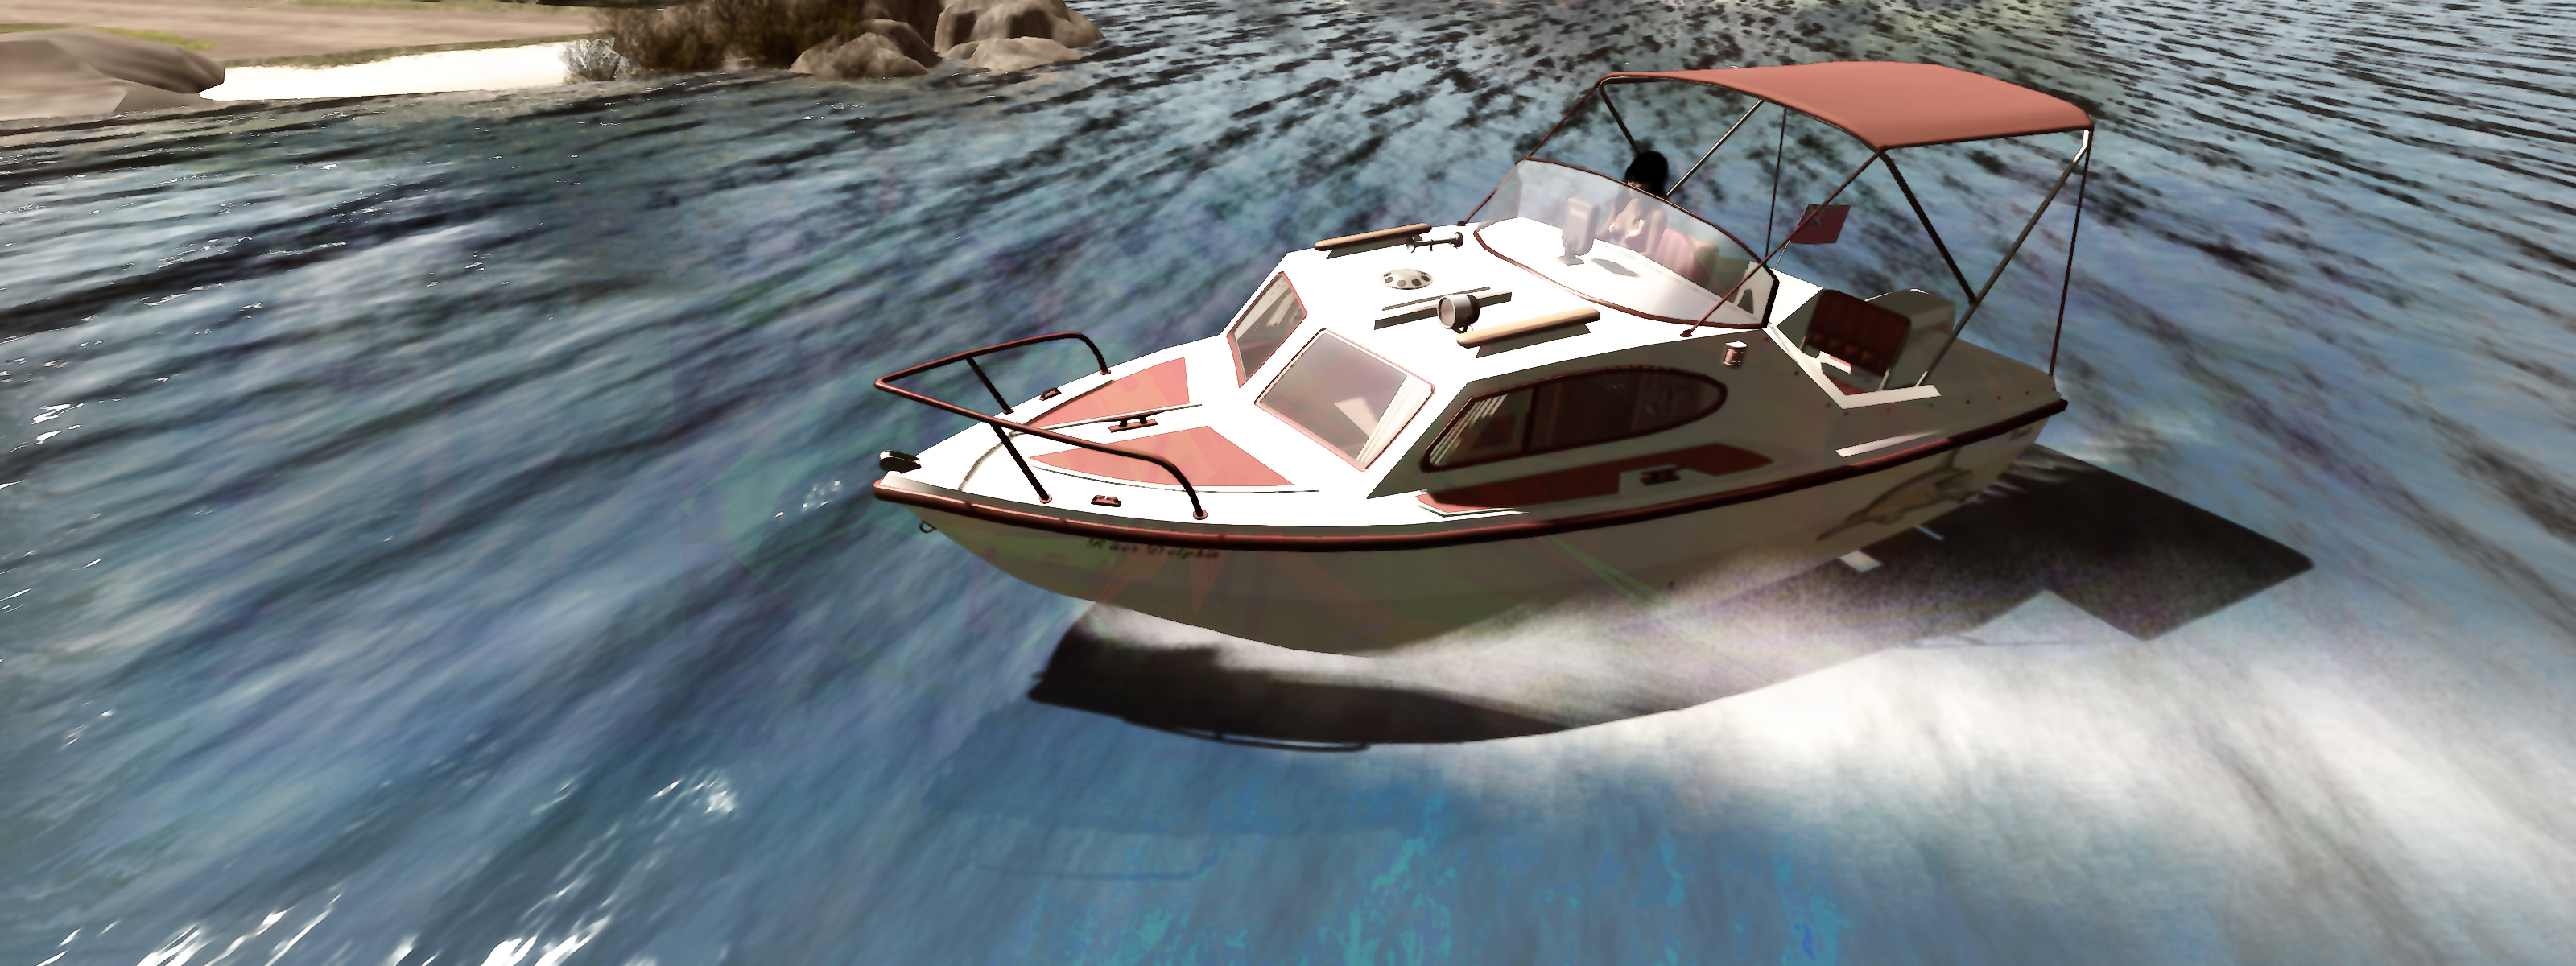
The Shippe and Saille (r) moored alongside the Bandit 170 at home, with the Bandit 580 behind them both

The S&S Harbor Master is reportedly 15% larger that its physical world equivalent, so as to present enough space for all sizes of human  avatars within the cabin and the covered pilot house. It is not, at first glance, a particularly elegant boat when compared to other cabin cruisers; the snub bow, forward placement of the cabin and high roof to the pilot house tend to give it something of an ungainly look. But looks, as the hoary old saying goes, can be deceptive.

Outside of the increase in size – which given it is proportional, isn’t that noticeable – this is a faithful reproduction of the Harbor Master 19, fully capturing the shape of the dory hull, the cabin and pilot house. The latter offers bench seating for two, and the cabin basic sleeping space for two – although the boat will carry up to three.  Behind the benches, the open cockpit offers room for equipment stowage, etc. A cooler box sits at the back of the cockpit, which might be considered at keeping drinks on ice or used to hold any fish caught when out and about.

Fishing aboard the Shippe & Saille Harbor Master

Fishing, because the boat is compatible with a number of Second Life fishing systems – WZW fishing, 7 Seas, and Goldtokens rod. Two rods can be rezzed in the holders towards the stern of the hull, and the pose system also include fishing poses that will auto-rez (temp) fishing rods. In addition, the user manual provides instructions on swapping the latter out for any preferred rods an owner might have.

Rezzing the two rods on the boat increases the LI from 31 to 34, which still leaves the boat a modest count in terms of LI. Other options that are included with it are a cockpit Bimini “raised” and “lowered” by the pilot’s chat command of “Bimini”, an opening /closing cabin skylight or door, and an anchor that can be raised / lowered, as can the outboard motor (the latter of which is raised by default on a fresh rezzing of the boat)., and the boat’s fenders. All of these, bar the cabin skylight and door, are activated via chat commands (the skylight by touch).

If rezzed out of Linden Water, the boat will raise itself and rez a 6 LI trailer underneath to support it

Handling-wise the boat follows the usual lines: the majority of commands are chat based, although some  – such as the lights – use the switches in the pilot house. the arrow / WASD keys handle steering and the throttle. The latter has four forward and four reverse settings (dead slow, slow, half, and full) sitting either side of the idle setting. Additionally, the Page keys can be used to rapidly toggled between idle and half speed (forward or reverse). In terms of driving, the boat is extremely responsive and the chat command for the camera can be used to help recover the camera position should things go sideways on a region crossing (including the “cc” command for any passenger – a nice touch).

Painting the boat can be handled in one of two ways. Those wishing to just change their Harbor Master’s name can use the hull texture included in the user guide. Those wishing to make more extensive changes can find a link to download a comprehensive set of texture and UV maps. As a copy / mod vehicle, this boat is also open to a degree of physical customisation – general guidelines are provided in the user guide for those wishing to do so.

The Shippe & Saille Harbor Master

Those who enjoy Get The Freight Out will find a GTFO option in the the Habor Master package. Once unpacked, simply add the script and GTFO item it contains to the boat’s contents, and your ready to use it with the game.

I’ve not used the Harbor Master extensively, having made fewer than a dozen runs in it – although three have been reasonably long distance across and around Blake Sea and along the coast of Nautilus. Throughout, I found the boat to be responsive, made good recoveries on region crossings and generally presented no real handling problems.  At L$1,900, it’s very well priced, and just the job for those looking for a modestly-priced, small-sized motor cruiser for open water or river cruising.

Related Links

Bandit 170: a pocket cruiser that’s coming Second Life

Bandit 170

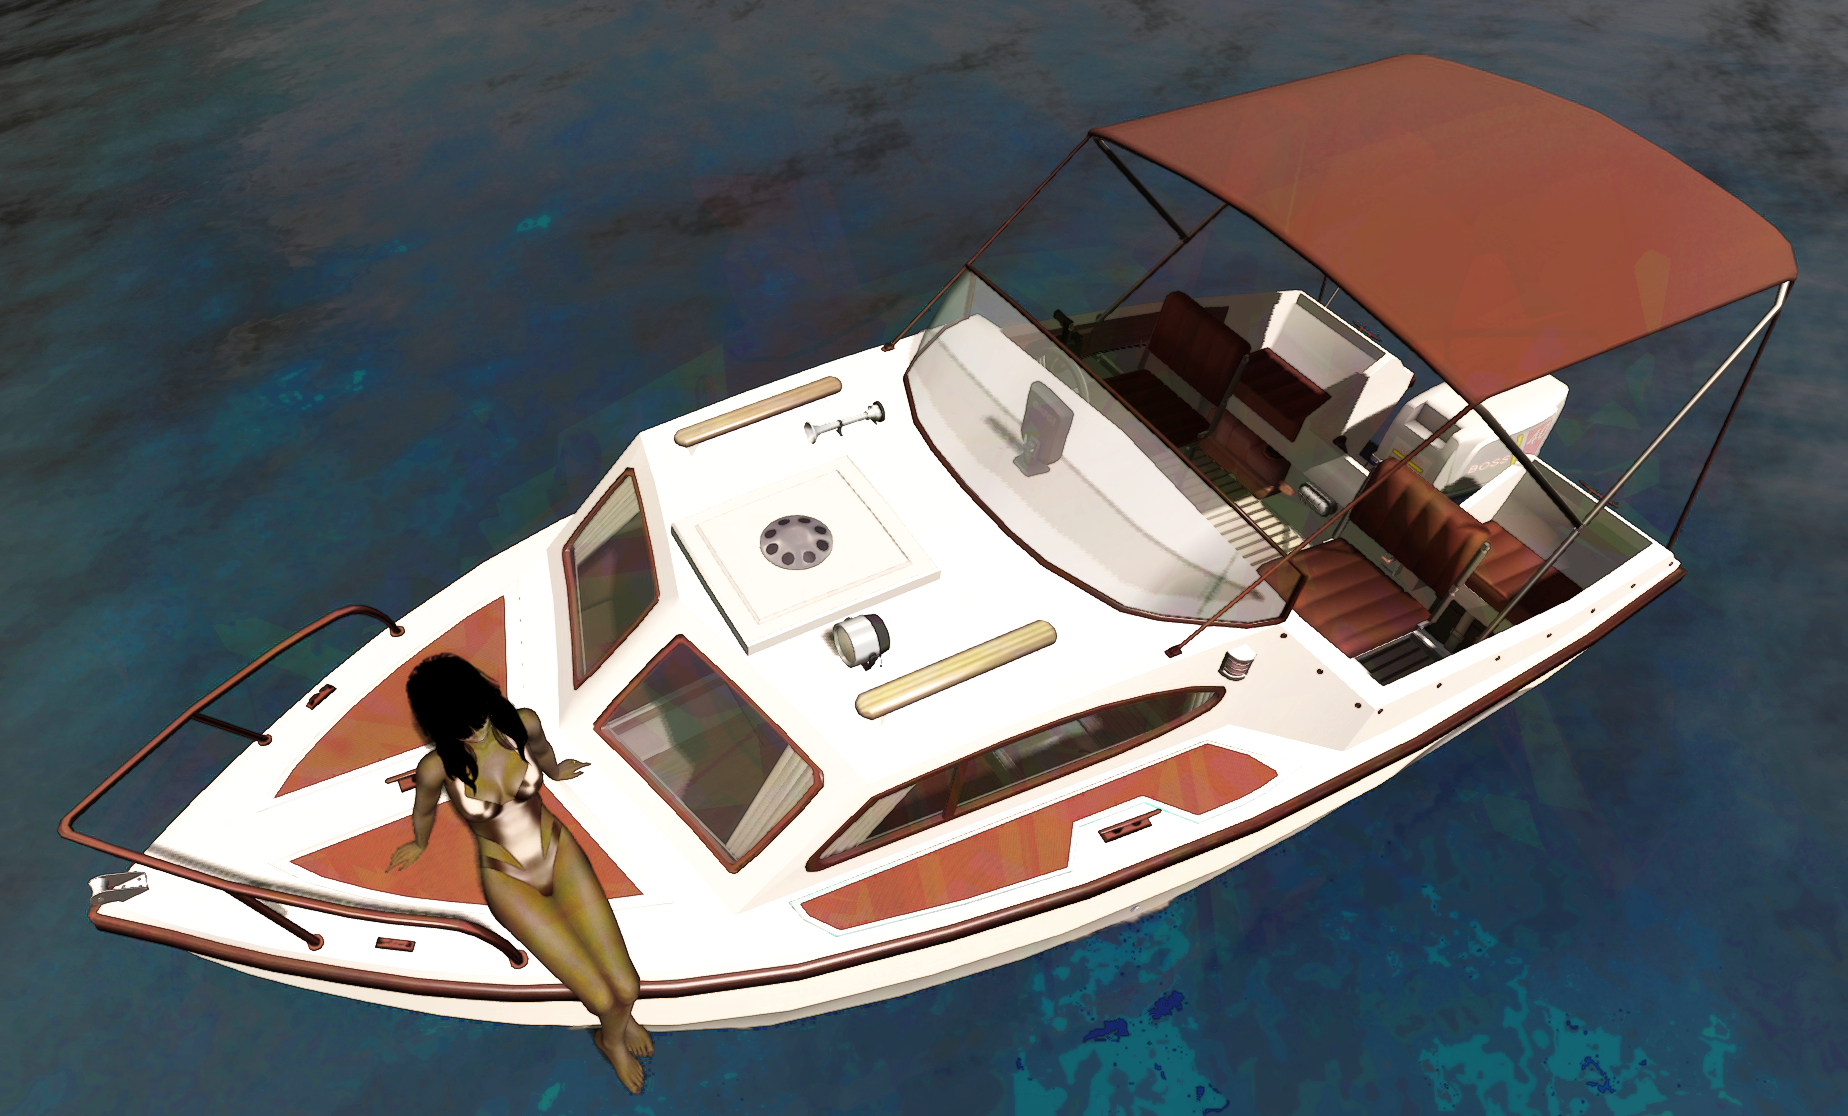
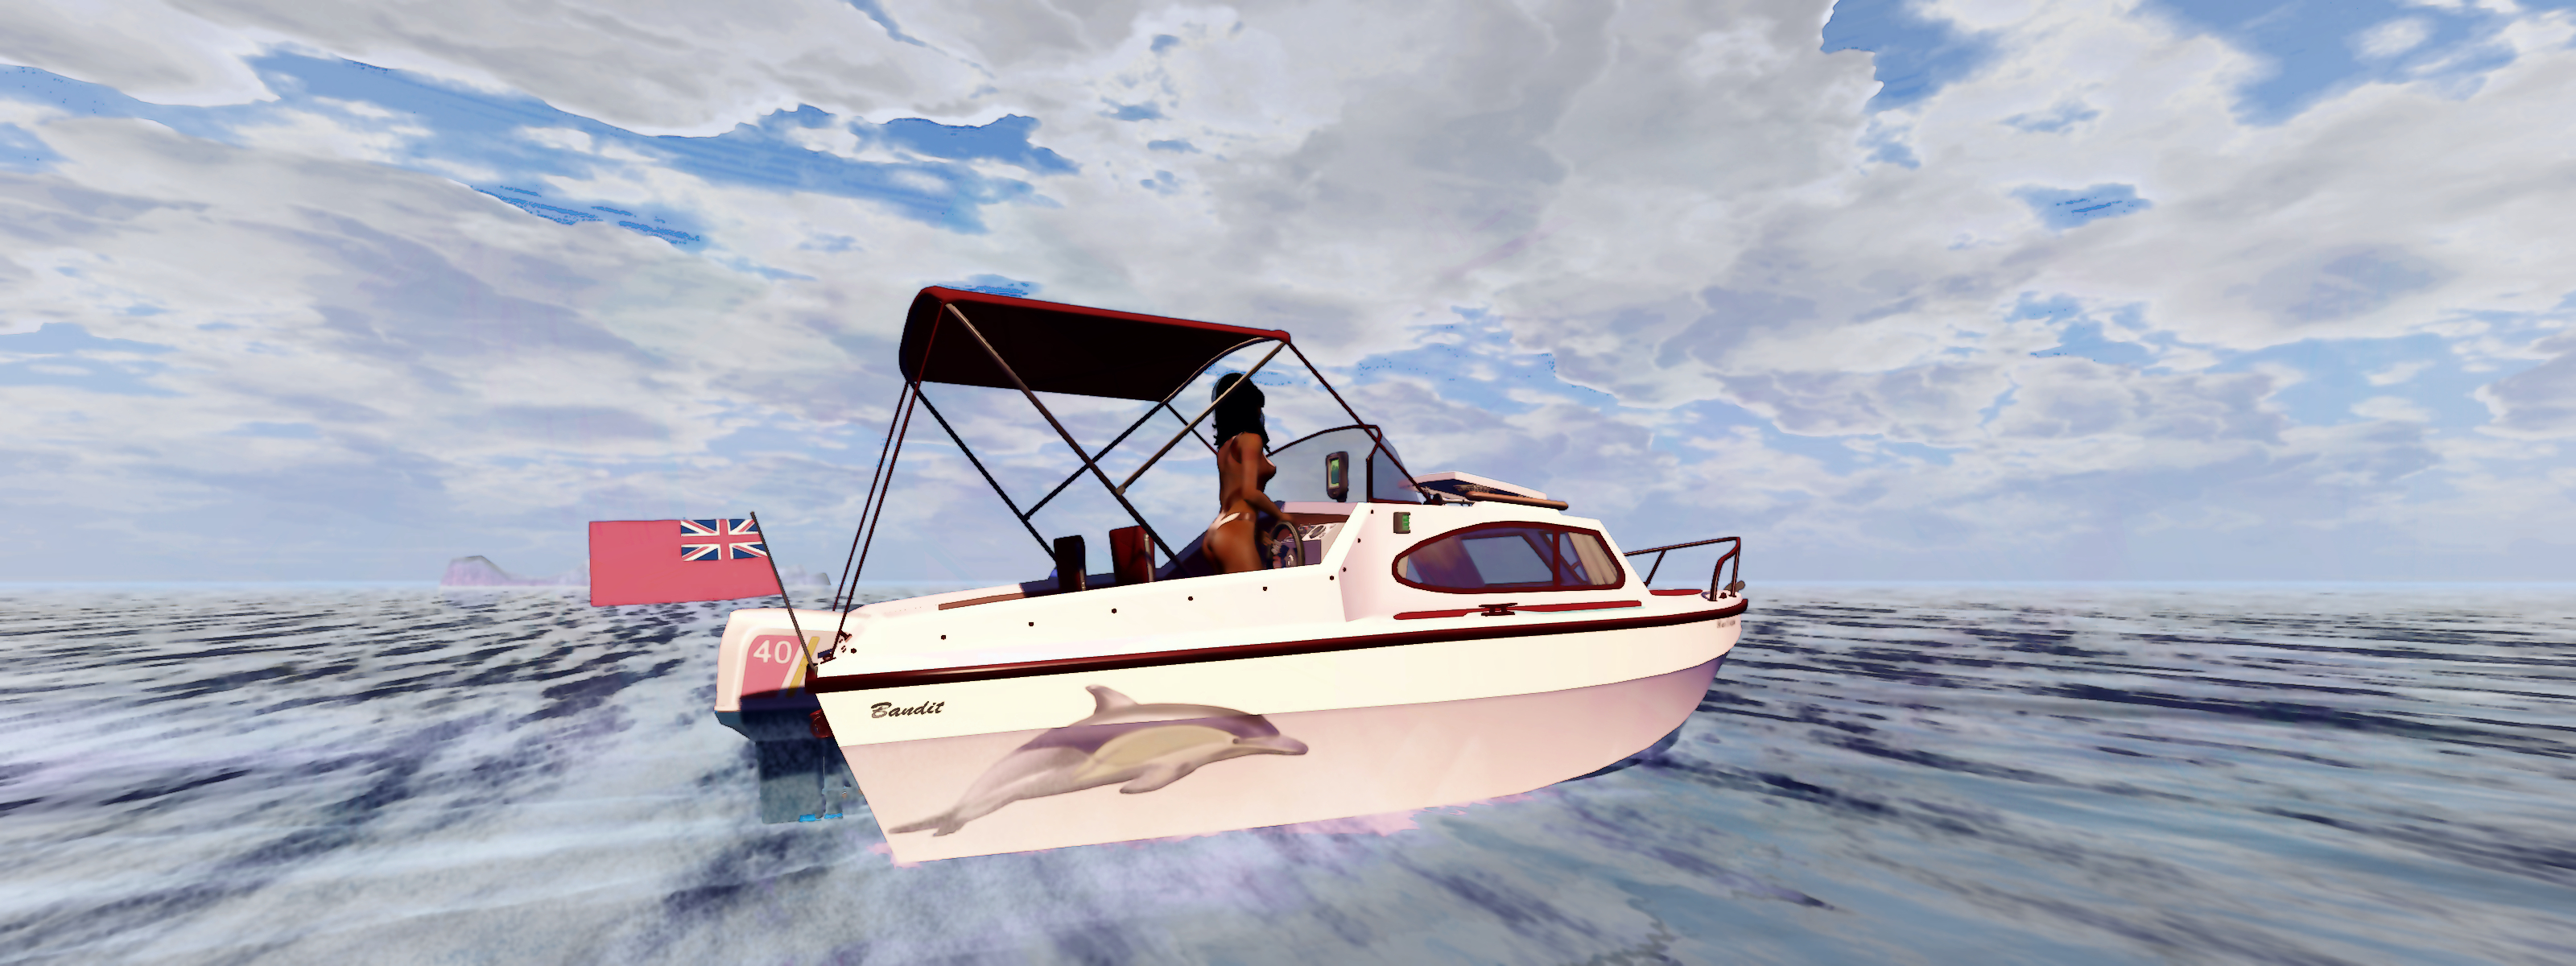
I logged in to Second Life to find I had an unexpected gift waiting for me: a preview version of the Bandit 170, the latest motor boat by Analyse Dean. It’s a cute little craft modelled, as Ana’s boats are, after a physical world boat, as is noted in the 170’s user guide.

The Bandit 170 DeLuxe is modelled after the small recreational pocket cruisers of the 1970’s, like the Inter 500 and the Marina M17, they were popular then, and are still popular now.

Due to the small size they are easily stored, can be pulled on a trailer behind a compact car, they are fuel efficient when puttering around, but fast and fun to drive when you open up the throttle, and you can camp out in the cosy cabin for a weekend fishing trip.

At 6.6 metres in overall deck length, this really is a small boat – smaller than the Bandit SRV-210 speedboat, which I reviewed two years ago, when it was first released. Nevertheless, it come packed with details: a range of cabin and deck sits, the ability to tow a passenger carrying tube or and optional wakeboard (the 170 is compatible with Ape Piaggio’s wakeboards, which can be purchased at Ape’s store at Dutch Harbor).

Bandit 170

The 170 is very much a faithful reproduction of the Inter 500 / Marina M17 (Ana provides a pair of photos of the Inter 500 so you can see for yourself). The stern well provides room for four, while the compact cabin offers sleeping / sitting space for  in reasonable comfort. It is powered by 40 hp outboard motor that may not have a huge turn of speed in the physical world when compared to speed boats and larger cruisers, but which is for Second Life more than adequate, and at the upper end of its speed scale, makes this a manoeuvrable, nippy little craft.

The controls for the boat follow the usual layout: when seated, the pilot types “start” (no quotes) to start the engine and “stop” to turn it off, while the Left / Right keys will turn the boat in the appropriate direction, and the Up / Down keys increase / decrease the throttle. From start, a tap on Page Up will fully open the throttle while tapping the Down Key when in motion will drop the throttle back to idle. If Page Down is tapped when the throttle is idling, it will drop the boat into full reverse, and Page Up will bring the throttle back up to idle.

A range of chat commands unlock other features, including deploying the Bimini (Sun shade over the open boat well) or the tent (completely encloses the boat well), setting the camera position, turning the hover text HUD on / off, dropping / raise the anchor, deploy the fenders – and more, as detailed in the the user guide. Touching the boat can either access the range of sit / pose options (of which there are a fair few, singles, couples and fun) or activate various controls  / options – such the the ventilation hatch in the cabin roof, boil the kettle, (and give you a mug of a hot beverage), toggle the control panel switches for the boat’s lights, stow / unstow the forward seats in the boat’s well or the table in the cabin, put out a larger bed, etc.

Bandit 170

Like many of Ana’s boats, the Bandit 170 is a very physical craft: it really will bounce through waves when at speed; as a consequence, you can suffer a fair amount of camera juddering. This can be lessened by using the mouse scroll wheel to push your camera back a little from the boat. And talking of the camera, for those times when it skews and locks at a weird position on a region crossing, the pilot can generally recover by toggling between the two camera modes (cam 1 and cam 2). It may not always work – but such is the nature of SL.

For those who like first-person driving, the Bandit 170 is a capable craft, the dashboard has a single instrument – the speedometer. When driving in third-person mode, a little practice will show there’s no need for the hover text HUD.

The boat’s package includes a range of extras: a dock with scripted auto-mooring, a trailer for towing the boat, a complete texture pack for producing custom paint finishes (and which includes a couple of pre set paint options; textures are applied by right-clicking the boat and selecting the required face – just refer to the texture currently in place on the boat to confirm which texture goes where). A pack of flag textures are also included, together with the aforementioned towable tube – see the user manual for details on this.

The Bandit 170 on its trailer

An interesting twist with the Bandit 170 is that it comes ready for a new game Ana is working on with Ape Piaggio, Rez Grey (the originator of Get The Freight out) and Dutch Mainsail. Called OMFG (that’s One More Fishing Game before you jump other conclusions!), it is a grid-wide fishing game that Ana describes thus:

It’s 100% database driven, so all the water in SL is mapped out, meaning you’d really have to go out with your boat, look at the fish finder to see if there is fish, and then stop and cast a line, what you catch depends on what gear/bait you use, and where you are (also, how much you had to drink, if that’s a lot, you start catching really weird things…

The game has yet to be finalised, which means the eventual retail price of the Bandit 170 is still TBC. However, those who would like early access to the boat (without the game option) can obtain it from the Bandit stall at Uber. Those buying the boat from there will receive a free game update once the latter is available.

Bandit 170 o the rivers of Bellisseria

One of the things I like about this little cruiser is that its small size, shallow draft and low speeds make it ideal for navigating inland waterways around SL – I had a lot of fun (low bridges allowing) pootling around the rivers of Bellisseria.

All told, a great addition to the Bandit ranged of power boats, one that could well be a popular item among boating enthusiasts, bringing with it a land impact of 35. If you don’t fancy trying to fight your way into Uber to grab one, you can hop to Dutch Harbor and at least take the demo version for a run.

Bringing a little (Studio Skye) Zen to your SL garden

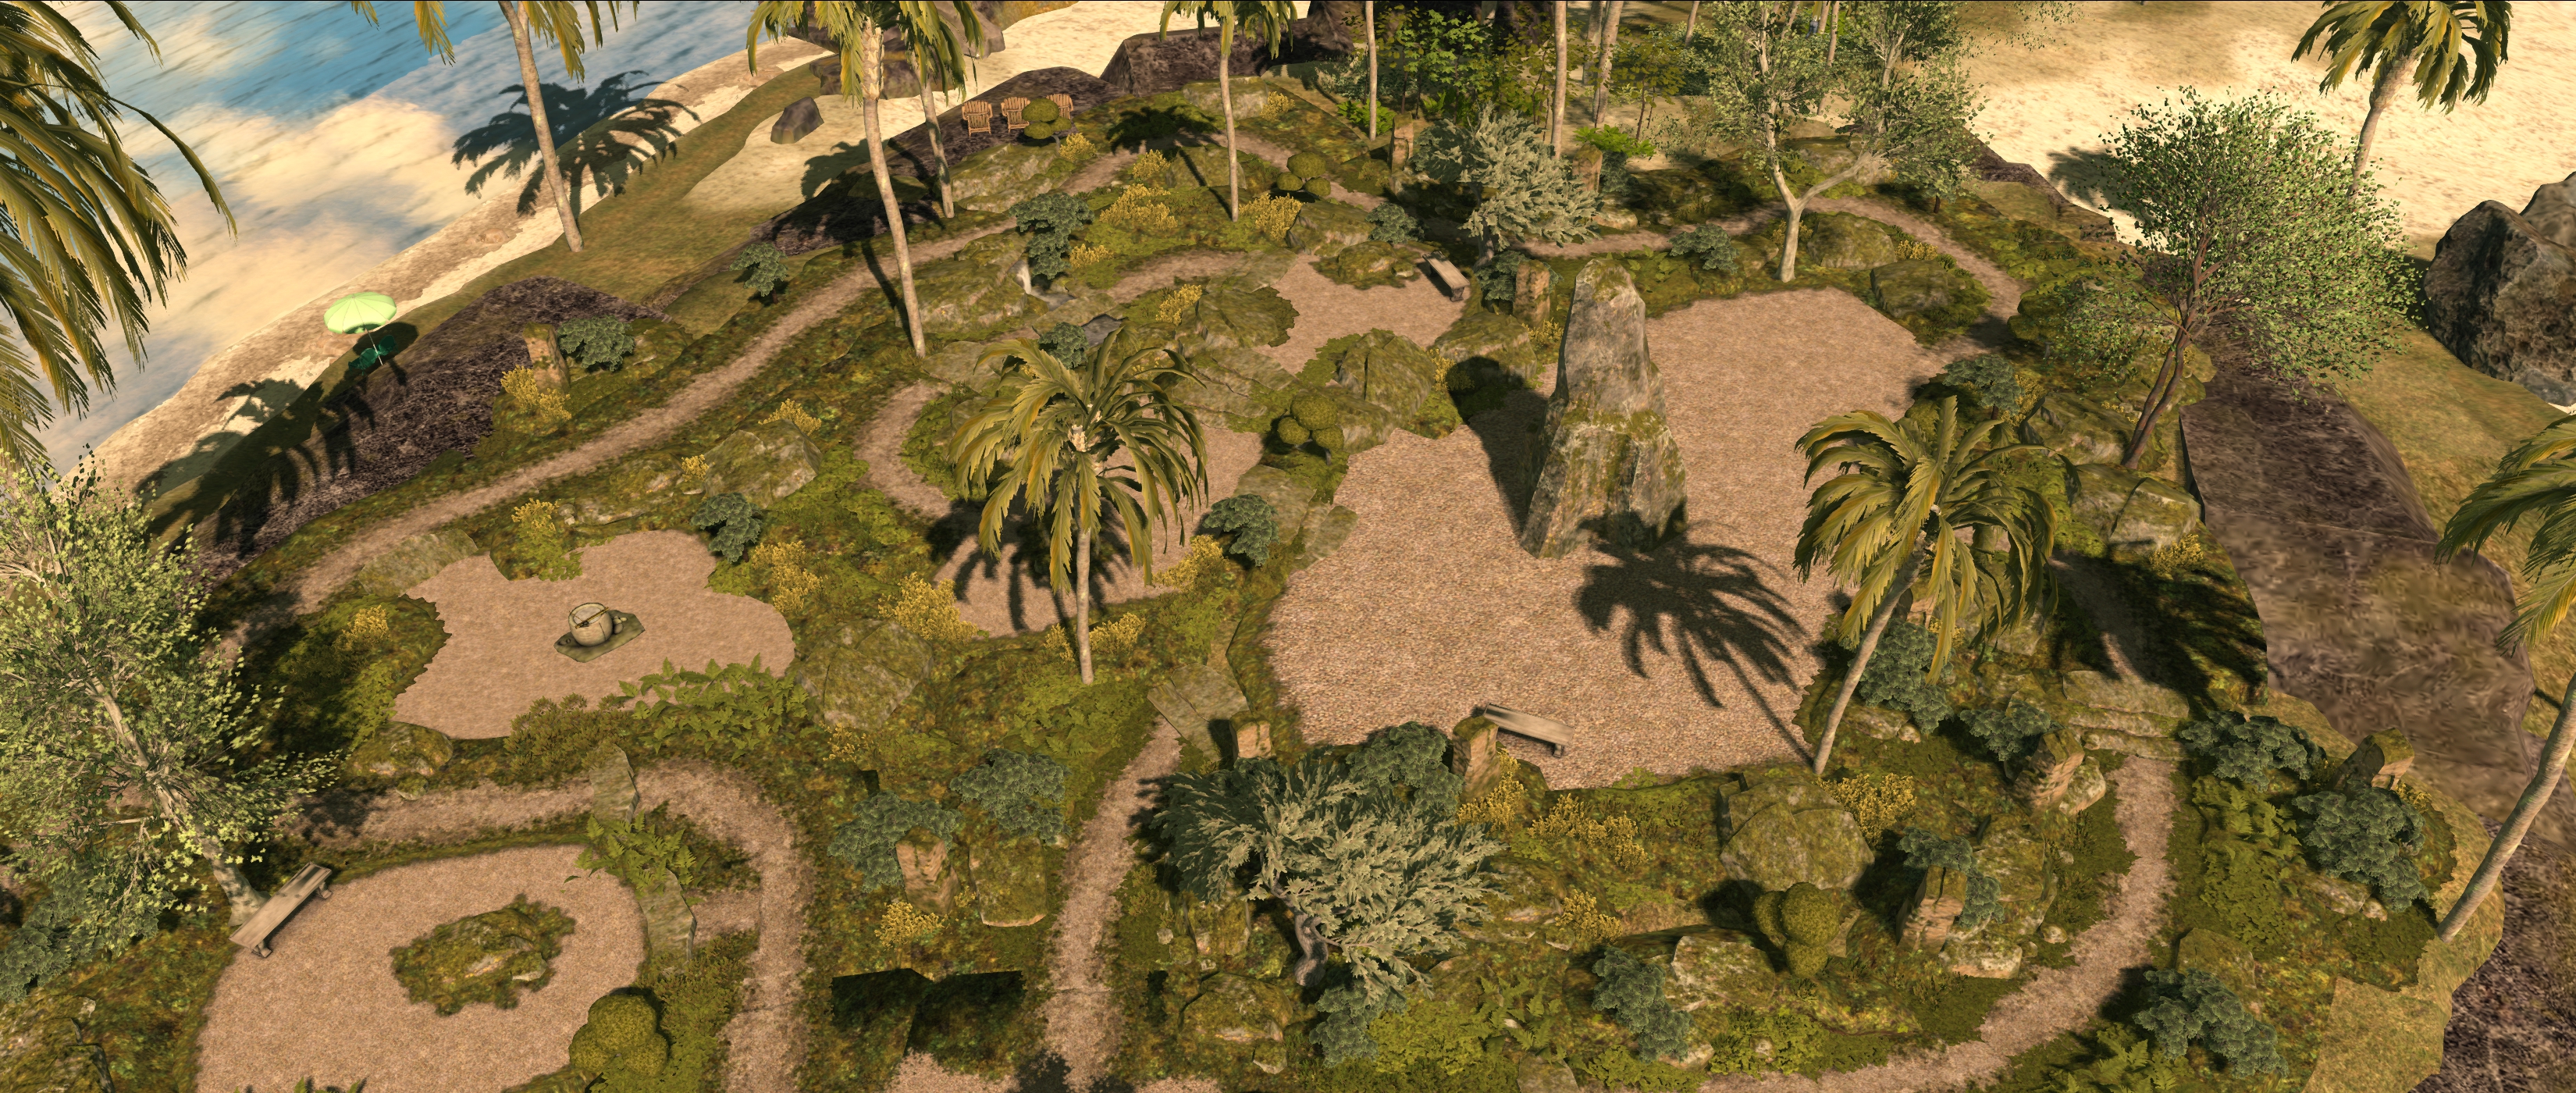
The zen garden at Isla Pey

While visiting JimGarand’s Grauland in January 2020 (see: Grauland’s touch of Japanese Zen in Second Life), I was struck by the zen garden included within the region design. An examination of the core elements in the design revealed them to be from the Zen Garden Building Set by Alex Bader, sold under his Studio Skye brand.

Alex has a reputation for producing excellent landscape building kits – and I’ve used several in constructing places like Holy Kai, although there are admittedly some that while mouth-watering in terms of my desire to put them to good use, such as his stream building sets, I simply haven’t (thus far) had the space in which to do them real justice. However, the Zen Garden kit was one that I immediately had a familiar “me want!” itch about, so that after a couple of days of pondering how it might work within Isla Pey, I snagged a copy from the Marketplace. And I have to say, it is simply superb.

The zen garden at Isla Pey  viewed from the house balcony

At L$899, the kit includes some 24 individual elements: rocks, gravel surfaces, gravel path sections, plants, shrubs, ground cover, ground pieces, stone steps, edging pieces (combinations of rocks and plants), and so on. All of this offers a comprehensive means to build a garden network of paths, plants and open spaces, which can both be used to provide places to sit or include additional features as well as being easily integrated into a broader landscape.

In addition, for those who might be daunted at the thought of trying to glue everything together themselves, Alex provides two “pre-built” and rezzer based examples of gardens: one 32m on a side (96 LI when rezzed) and the other 26x18m (46 LI). Also, a couple of textures are also provided for the purposes of blending any additional items – fillers and the like – that might be required to ensure a good pairing of garden to surrounding landscape elements.

The zen garden display at Studio Skye

Given they are “ready to go”, so to speak, the two example gardens are a good place to start with a design. As they are supplied in rezzers, also that’s required is a couple of clicks with the rezzers, and they can be put together in moments and the rezzer then used to position them as required. Just click the Finish option once placed, remove the rez box and then modify or extend the garden or blend it with a broader landscape using both the additional components in the kit and whatever else you have that you feel might work with it.

I opted to take this approach myself, using the 32mx32m garden as my starting point. To this I added some of the base, path and edge pieces to provide a basic design (one which currently uses the garden’s featured rock monolith seen in the photos here, although I’m debating swapping that out and creating a “formal” element common to zen gardens: an area of sand raked to resemble ripples on water). To this I added our selection of sculptures by Ciottolina Xue and Silas Merlin, plus trees by AzaleaBluebell originally offered as a Fantasy Faire hunt gift, together with a selection of shrubs to provide more of a garden feel.

The more extensive zen garden at Grauland

There are some additional nice touches with the set, together with a couple of “does” and “don’ts”. For example, the water elements include a volume control for adjusting / changing the sound being generated by their little falls. The edges of the individual paths are nicely “feathered” so that path sections can be more easily placed together and blended. Also, the kit is compatible with the Studio Skye 4-Seasons bolt on – although this is where the “don’t” comes into play. If you do plan to use season changing bolt-on, don’t link elements of the garden together, as doing so will adversely affect how textures get applied when changing the seasons.

Also, do take care should you vertically resize elements (e.g. so the base better connects with whatever is under it): many of the pieces have horizontal faces painted as edge cover, and resizing can leave these “floating” above the rocks / pathway section on which they are supposed to be growing, or no longer aligning with edges they are supposed to be draped over.

The zen garden at Isla Pey with the house behind

But, as noted at the top of this piece, this is a minor niggle. For those looking for a different look to their garden – one that can be unique to them whilst leveraging other plants and garden items they have, the Studio Skye Zen Garden Building Kit makes for a excellent purchase.

Links

Note: the statuary, trees, large bushes and benches seen in the images here do not form a part of the Zen Garden Building Kit, but have been purchased separately.

Product review: the WALT Sea Roo in Second Life

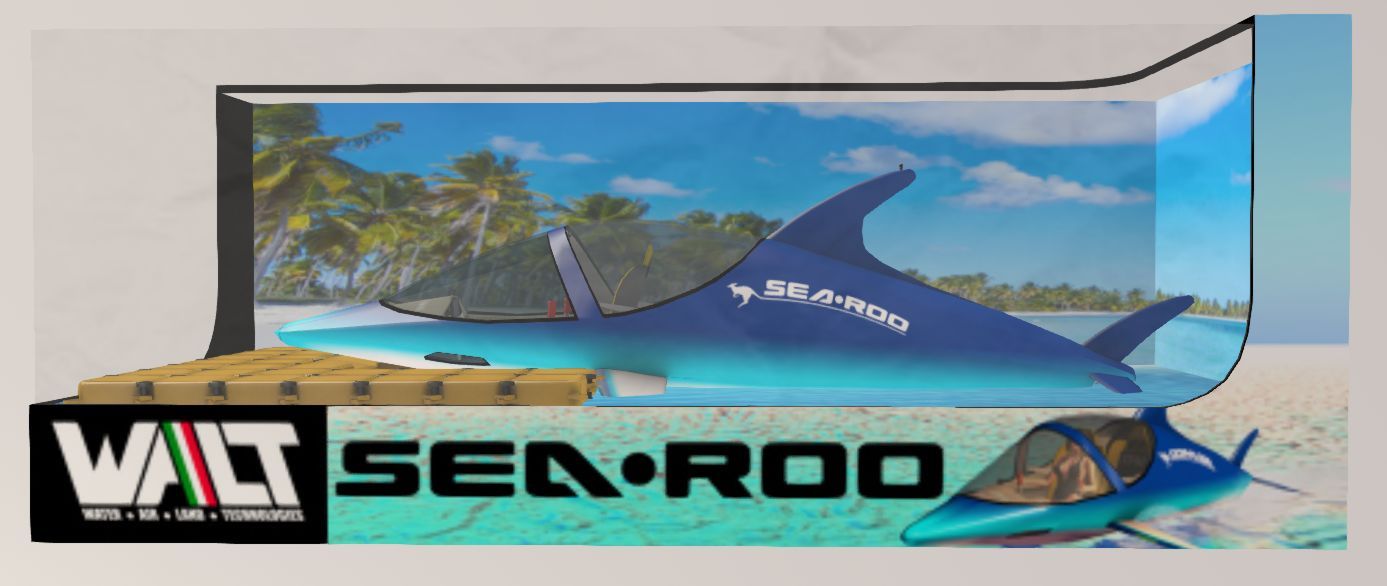
The Piaggio WALT Sea Roo in its box

It’s taken a while to reach the market place since I first wrote about it under the prototype name of WaveHopper (see Previewing a little wave hopping in Second Life), but Ape Piaggio’s WALT (Walter, Air Land, Technologies) branded SeaRoo has reached the market. The delays in the release have been due to some final fine-tuning of the vehicle and its scripting – and have also allowed Ape to add further animations as well as a number of further options for the vehicle.

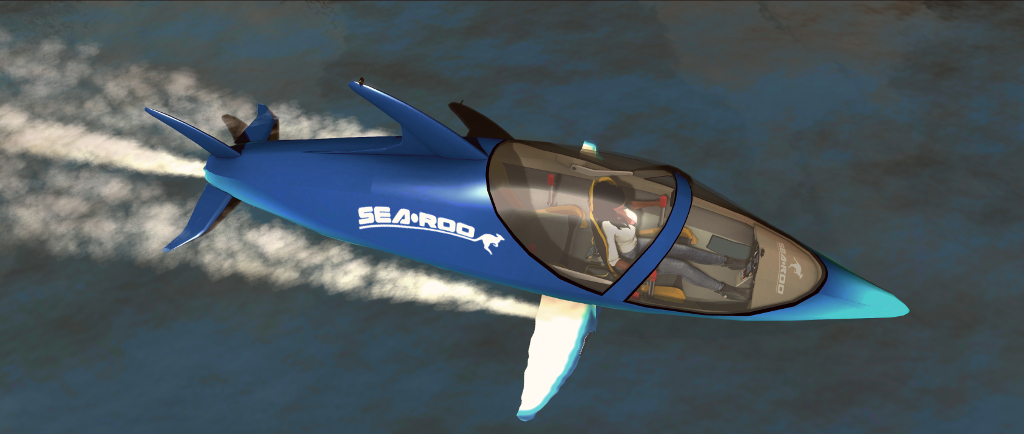
Based on the physical world Innespace Seabreacher, a two-seat semi-submersible personal watercraft that is shaped like a Dolphin and mimics its movement on and under the water, the SeaRoo behaves like a speedboat and can make short dives (up to 60 seconds at a time) underwater. It can be piloted in both Mouselook (the dashboard has working instruments) and third-person views, making it an all-around leisure craft.

Priced at L$3,000, the SeaRoo is delivered in a package that comprises the vehicle, a system to build one or more SeaRoo mooring points (and which includes a fuelling station), an obstacle / race course building set, the SeaRoo Key (described below), a tool kit for adding custom animations (it comes with a range of single and couple animations for when it is not being piloted) and a comprehensive set of manuals, the main user guide of which includes a link for downloading a set of .PST files should you wish to create paint schemes for the vehicle.

The SeaRoo can be touched for a menu system. If touched when outside the vehicle, the menu is more limited in scope (l) than when seated in the vehicle (r). When seated, the full menu is displayed, providing access to all of the vehicle’s options and settings. Refer to the SeaRoo’s user manual for full details

I’m not going to run through absolutely everything with the SeaRoo – the user guide is comprehensive in that regard, but it is worth covering come of the highlights.

SeaRoo Controls and Operation

By default, the SeaRoo’s controls match those of an aircraft:

  • The ◀ and ▶ or A and D keys turn the SeaRoo left or right when in motion.
  • The ▲ and ▼ or W and S keys pitch the nose down (dive) or up (surface / jump)
  • The PAGE UP and PAGE DOWN keys or E and C increase and decrease the throttle respectively, with PAGE DOWN / C putting the vehicle into reverse from 0% throttle.
    • A double tap on PAGE UP / W will set the throttle to 100%.
    • Pressing PAGE UP and PAGE DOWN (or E and C) simultaneously will cut the throttle to 0%.

Those who prefer a boat-style layout for the main controls, with the ▲ and ▼ (W and S) keys controlling the throttle, can switch to this mode of operation via the menu → Settings → Tuning → CTRL Style. In this mode, the PAGE keys and E/C will control the SeaRoo’s pitch down/up.

To sit in the vehicle, right click on it and select Sit Here from the context / pie menu. Once seated, and as with most vehicles, the SeaRoo’s engine can be turned on / off using “s” in local chat, or “start” / “stop” – note that all of the SeaRoo’s chat commands are entered in lower case.

Zipping along above the waves

Key Vehicle Features

“Keyless Activation”

Enabled by default, this causes the canopy to open and the dashboard to engage when you are with a few metres of your SeaRoo. Similarly, when moving away from the vehicle, the dashboard will turn off and the canopy canopy automatically close. This option can be disabled / enabled via the menu: Settings → Keyless.

The HUD

The Sea Roo HUD

By default, those sitting in a SeaRoo (pilot or passenger) get offered a HUD. It is not vital to piloting the SeaRoo, but provides an informational display (shown on the right) for fuel, speed, heading, engine temperature and power settings. It also includes three buttons:

  • Resize: increase / decrease the HUD’s size via a dialogue box.
  • Menu: access the main menu.
  • Colors: set the colours for the SeaRoo’s dashboard.

Note that the HUD is inactive whenever the SeaRoo’s engine is not running, and further details can be found in the user guide.

Hovertext Information

When the SeaRoo’s engine is on, information on the vehicle’s speed, engine power level and temperature, and the fuel level is displayed over the SeaRoo’s tail. It can be disabled / enabled by typing “hud” in local chat.

General Handling Notes

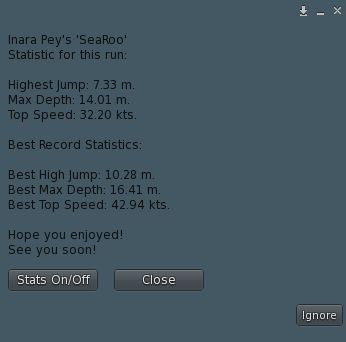
After any trip, the SeaRoo can report a set of statistics for you. Toggle off via the button, if required

Like many vehicles, the faster the SeaRoo goes, the more responsive it becomes. As such, I recommend handling it at low to mid-range speeds to get familiar with it, rather than leaping in and going flat out; but keep in mind some capabilities work best at mid to higher speeds, such as diving / staying underwater, and performing jumps and acrobatics.

As speed is increased, the SeaRoo also takes on a nice Dolphin-like movement as if responding to the waves as it moves. Also, like a real boat, if it is moving at speed and you press both throttle keys to drop the throttle to 0%, it may take time to come to a complete stop.

The vehicle’s time underwater is – as noted – limited to 60 seconds. This is because the air intakes must be closed when submerged. A timer is displayed with the stern hovertext to help keep track of submerged time, and an audible alarm will sound when 20 seconds of submerged time remains. Try to stay underwater beyond 60 seconds, and the engine will cut out to prevent damage, and the SeaRoo  automatically surfaces. Once there, and providing the AutoRestart option has not been disabled, the engine will automatically restart.

Jumps are achieved from underwater by making sure you have sufficient speed, then pitching the nose up by about 30-45°. As you clear the water, gently pitch the nose forward to re-enter the water. Note that if you are moving too slow or pitch the nose up too high, the SeaRoo might either stand on its tail and fall backwards into the water, or perform a belly flop. You can also use SHIFT+ ◀ or A to roll left or SHIFT+ ▶ or D = roll right for both underwater acrobatics and to help level the SeaRoo after turning.

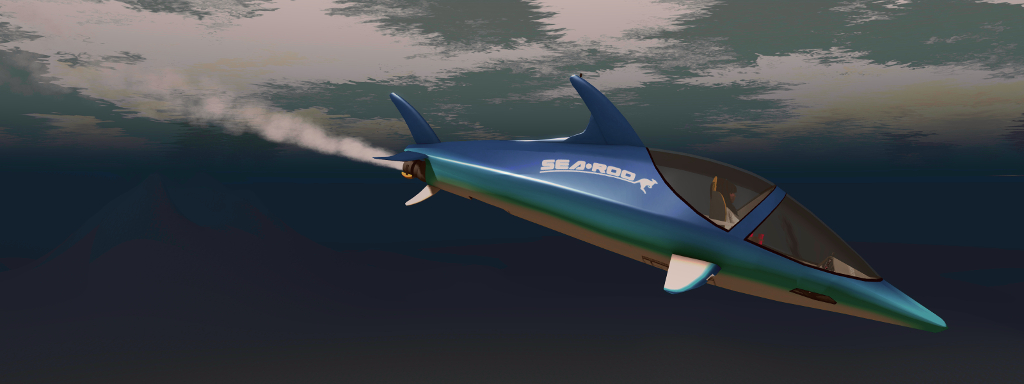
Taking a dive under the sea – note the bow light will, be default, come on automatically when underwater and turn off when on the surface

Refuelling

The SeaRoo has a limited fuel supply, and can be refuelled in a couple of ways:

  • Using the fuel pump supplied with the SeaRoo dock system or any Bandit / TMS compatible gas station – see the user guide for details.
  • Using the SeaRoo’s fuel canister when at sea: with the engine stopped and type “f” in local chat (no quotes) to trigger the refuelling animation. Note you may have to repeat this to completely fill the tank.

Continue reading “Product review: the WALT Sea Roo in Second Life” →

A vehicle transportation system in Second Life

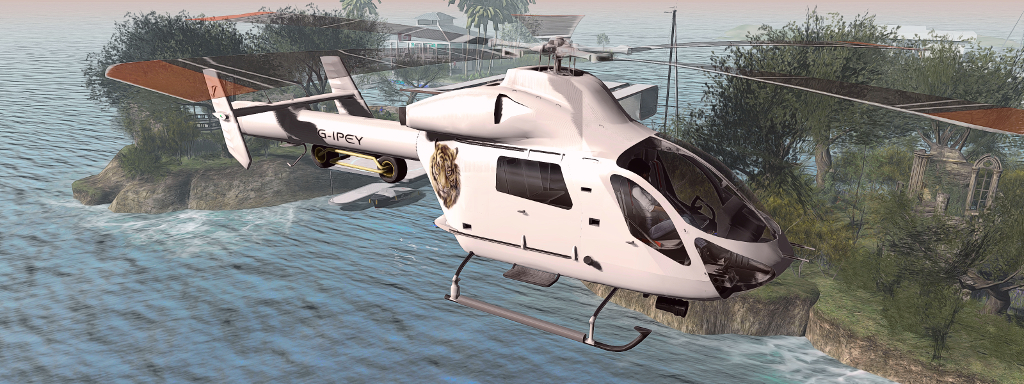
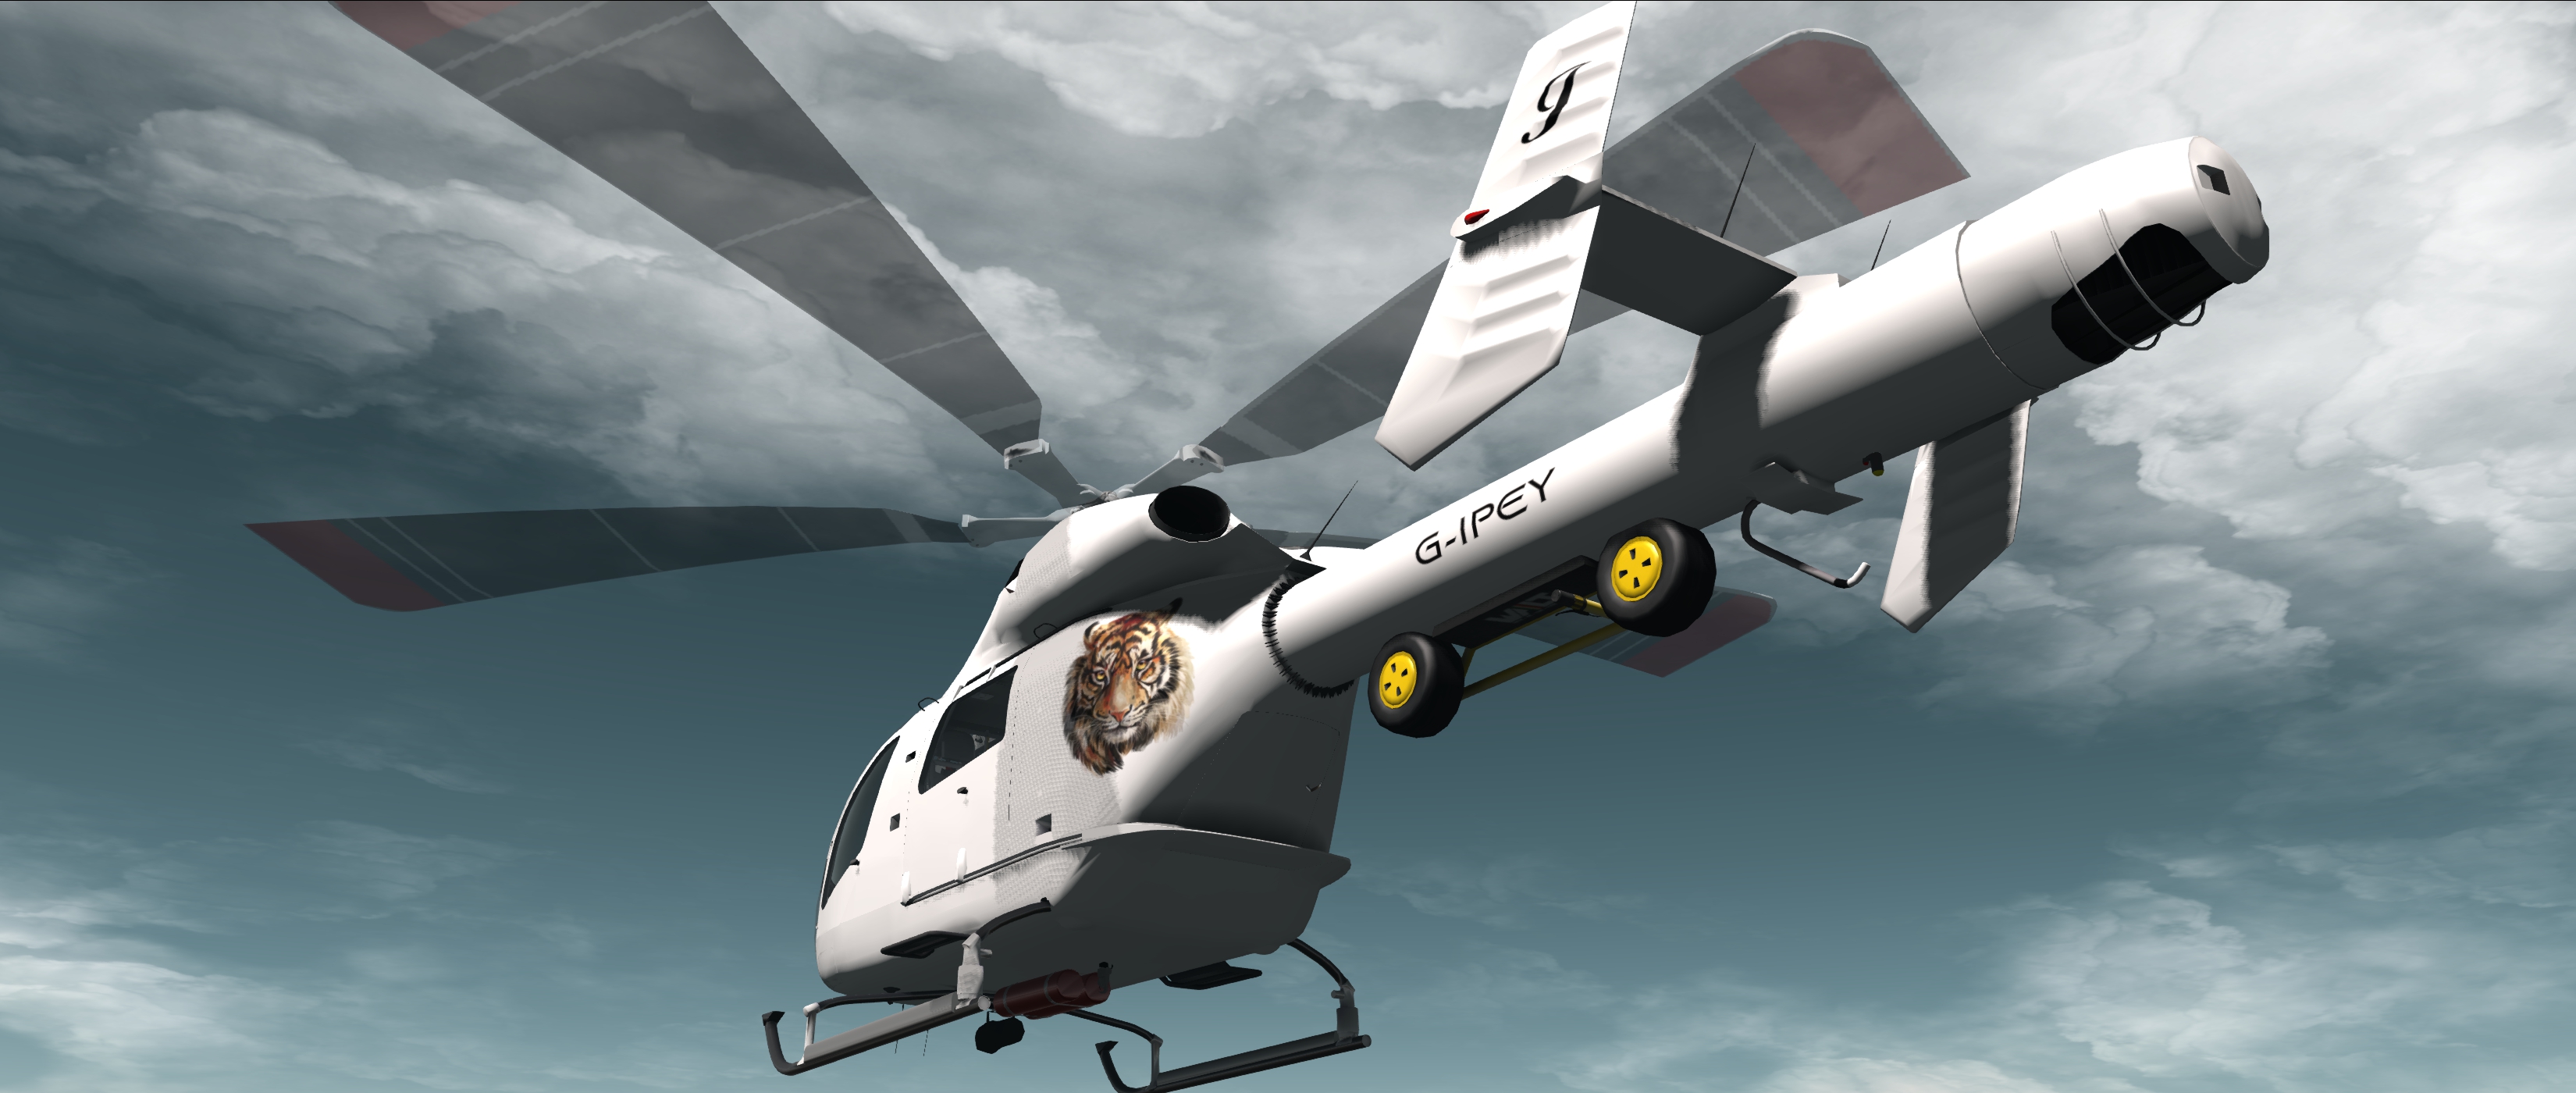
Using the Piaggio Transportation System with my MD-900 helicopter and Piaggio RoadRunner scooter: note the scooter sitting under the helicopter’s tail boom

So you have a luxury yacht with a helipad and been annoyed that you can’t sail it with your favourite helicopter rezzed on the deck? Or you have a landing craft and would like to be able to have a driveable vehicle it can carry and you can drive straight off? Or a cargo plane you’d like to fly around with your favourite car inside ready to drive? Well, Ape Piaggio might have the answer.

While working to complete the SeaRoo aquatic vehicle (formerly the WaveHopper – see: Previewing a little wave hopping in Second Life – and still very much “coming soon” as the final bugs are ironed out), she’s developed a neat little script set called the Vehicle Transportation System that allows two Modify / Copy vehicles to be combined so that one can be carried by the other, so that the “one” can be used when desired / as the local region settings allow.

As usual, I’ve been able to take the system for a test-run and thought I’d offer a piece on it for those who might be interested.

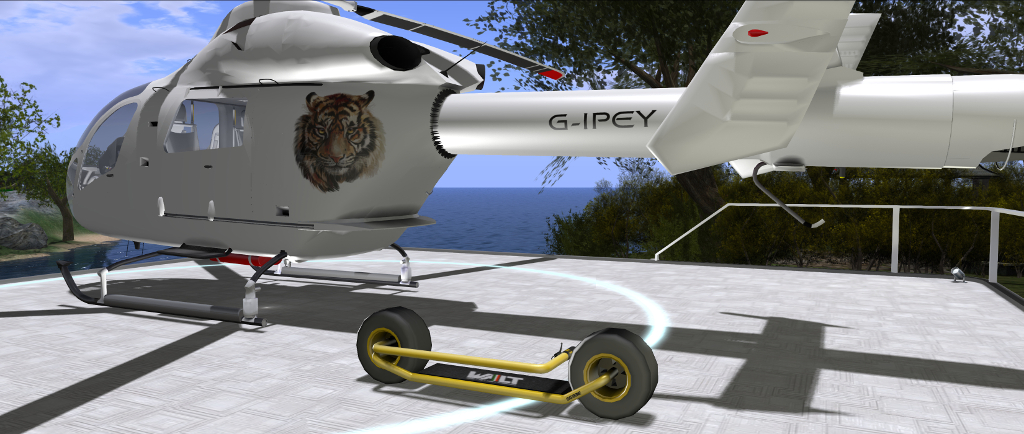
The Piaggio Vehicle Transportation system classifies the vehicle to be carried (in my case, the Piaggio RoadRunner, foreground and shown with handlebars folded) as the “secondary vehicle”, while the carrier (in this case, my MD-900 helicopter) as the “primary vehicle”

The system does require a careful amount of setting-up. In particular, it requires the unlinking and re-linking of one vehicle. This is something that can create issues, because vehicles often use a defined linkset numbering system which, if altered, can stop the vehicle function correctly. For this reason, there are scripted tools available to manage linksets. It’s also why Ape provides two versions of the Vehicle Transportation System:

  • The Vehicle Transportation System, containing only the scripts needed to allow one vehicle carry another, and suitable for those already have a re-link / unlink tool, or are confident in their own ability to edit linksets.
  • A Combo pack, offering both the Vehicle Transportation System and Ape’s own Relinker Kit, suitable for those who are not confident in editing linksets or who do not have a suitable script set for linkset editing.

Both kits are available on the Marketplace and will deliver the scripts to your inventory in two different folders.

In addition, the following points should be noted:

  • Both vehicles must be Copy / Modify.
  • The system uses a pair of defined terms:
    • Primary vehicle – refers to the vehicle that will transport another vehicle (e.g. a yacht you want to carry a helicopter or jet ski or something; or an aircraft carrying a car or tank or other vehicle, etc.).
    • Secondary vehicle – refers to the vehicle that is being transported.
  • A primary vehicle can only carry one other secondary vehicle.
  • When in use, the system will only work in regions / parcels where rezzing is enabled.
  • If you are the only person on your primary vehicle, note that it may be auto-returned if you swap to your secondary vehicle and are away from the primary longer than the local auto-return time.

Setting The System Up

Note: for the purposes of this article, I’m using my Spijkers & Wingtips MD900 Explorer helicopter and Piaggio SG33E RoadRunner scooter as, respectively, my primary and secondary vehicles, ans they happen to be the two of my vehicles that offer a reasonably logical pairing. As noted above, the system can be used with any suitable pair of Copy / Modify vehicles.

Setting the system up comprises three steps:

  • Preparing a static version of the secondary to be carried by the primary.
  • Linking that version of the secondary to the primary.
  • Preparing a version of the secondary that can be rezzed from the primary when it is to be used.
The “static” version of the secondary vehicle ready to be linked to the primary – the idea here being my RoadRunner is “slung” under the helicopter’s tail boom

Preparing a Static Version of the Secondary Vehicle

  • Rez your primary vehicle.
  • Rez a copy of your secondary vehicle and place it on your primary where you wish it to be positioned when the primary is in use (e.g. put a helicopter on the helipad of a yacht, or a car in the cargo hold of a plane).
  • Edit the secondary and open the Contents tab.
  • From the Vehicle Transportation System folder in your inventory, drag and drop the script called CONVERT INTO STATIC OBJECT into the Contents tab of the secondary vehicle.

WARNING: this script will DELETE all contents from the secondary and render it unuseable, so again, you should only do this if the vehicle is COPY and you retain a working version in your inventory.

  • Wait for the local chat message –> CONVERSION FINISHED <–.
  • Leave the converted vehicle in place.

Linking the Static Version of Secondary to the Primary

Note, the following references using the Piaggio Relinker kit; if you are using another scripted means of unlinking / relinking an object, then please refer to the instructions available with that tool.

  • Edit the static version of the secondary vehicle and open the Contents tab.
  • From the Piaggio Systems Relinker System folder, drag and drop ONE of the ADD scripts into the Contents tab:
    • Use ADD (CONVEX) if the root of the secondary is mesh.
    • Use ADD (PRIM) if the root of the secondary is a prim.
    • If you are unsure of the root of your secondary vehicle, use ADD (NONE).
  • Close the Edit floater of the secondary vehicle.
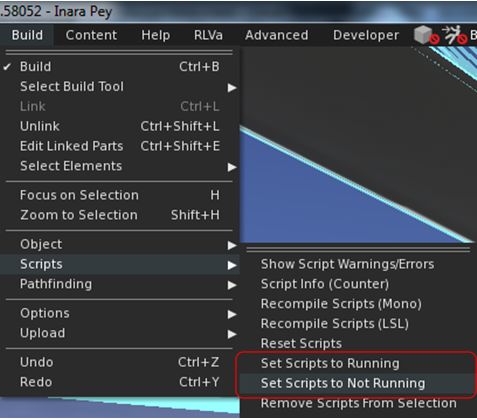
  • Edit the primary vehicle, and then from the Build menu, select Scripts → Set Scripts to Not Running.
When linking your secondary vehicle to your primary, you must ensure you set the primary’s scripts to Not Running before doing so, and then set them to Running afterwards
  • From the Piaggio Systems Relinker folder in your inventory, drag and drop the RELINKER – MAIN script into the primary.
    • A series of dialogues will be displayed, requesting permission to de-link and re-link he primary vehicle.
    • You must reply YES to each in turn.
  • When the process has finished, local chat will display the message: DONE: REMOVING SCRIPT.
  • Edit the primary vehicle again Scripts → Set Scripts to Running.

Preparing a Rezzable Version of the Secondary for use with the Primary

  • Rez a new copy of the secondary vehicle and edit it.
  • From the Vehicle Transportation System folder, drag and drop the script SECONDARY VEHICLE SYSTEM into the Contents tab of the secondary vehicle.
  • From the General tab of the Build / Edit floater, highlight and Copy (CTRL-C) the name of the secondary vehicle.
  • Take the updated copy of the secondary vehicle back to inventory.
  • Edit the primary and open the Contents tab, then:
    • From the Vehicle Transportation System kit folder, drag and drop the script PRIMARY VEHICLE SYSTEM.
    • Then drag and drop the updated secondary vehicle from inventory into the Contents of the primary.
  • In chat, type NAME, followed by the name of the secondary vehicle as in appears in the primary’s contents. For example:

name SG33E RoadRunner

Note: you can use Paste (CTRL-V) to paste the vehicle name accurately. Also, note this is only required if the primary has other objects in its contents.

Your vehicles should now be set-up and ready to go. Take a copy of the completed pairing back to inventory so you always have a “master” copy.

Using the Vehicle Transportation System

Notes:

  • As per the notes above, the system will only work in regions / parcels where rezzing is enabled.
  • The engine systems of both the primary and the secondary vehicle must be OFF in order for the system to work correctly.

Use the primary vehicle as you usually would. It should perform exactly as it did before you added the secondary vehicle.

Flying my MD-900 with the RoadRunner “slung” under the tail boom

When you reach a point where you want to use the secondary vehicle, stop the primary and make sure the engine script is not running, then in local chat type RELEASE.:

The version of the secondary vehicle will be removed from the primary and a copy of the driveable version contained in the primary vehicles inventory will be rezzed in its place. You can then sit in the secondary and use it as normal.

Preparing the “driveable” version of my Roadrunner secondary after “detaching” it from my helicopter

When you have finished using the secondary, return to the primary and dismount from it. Make sure the engines of both are turned off, then in local chat type CONNECT.

The rezzed version of the secondary will be removed, and the “static” version will reappear connected to the primary.

Note: if the primary has been auto-returned  to your Lost and Found folder, you can re-rez it to complete the above operation  and continue travelling with the primary. Or you can delete the copy of the secondary and simply pull a fresh version of the primary from inventory the next time you want to use it.

This is an elegant solution for an issue many have found to be annoying. Those interested in trying it for themselves can obtain it as follows: