Working on the island

Overhead view of the revised island layout with the new beach location and moorings for our two 'planes. Also visible is the more watery mid-level of the island
Overhead view of the revised island layout with the new beach location and moorings for our two ‘planes. Also visible is the more watery mid-level of the island

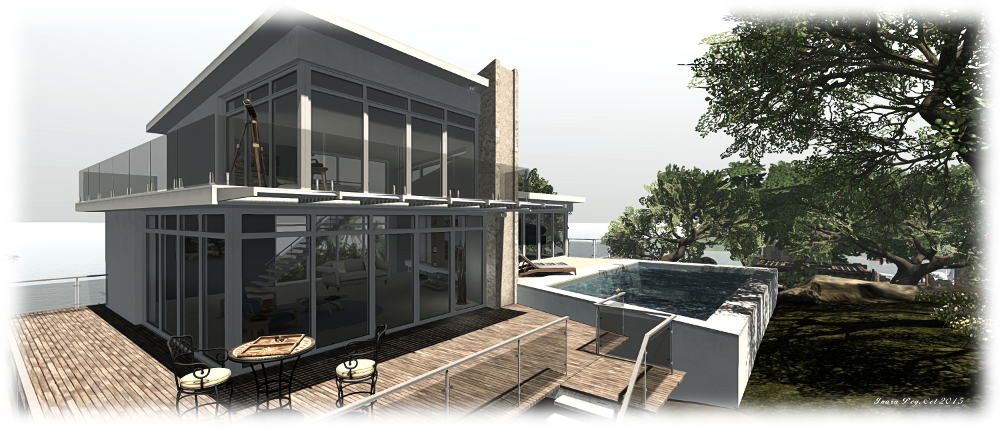
I’m always fiddling around with the island home – as regulars to these pages know only too well! While the changes made in December left us happy with the overall look and feel to the place, I still found one or two things niggling me. Fortunately, Caitlyn is very understanding of my need to fiddle, twiddle and generally play around with mesh and prims, so when the niggles reached a point where I wanted to start doing the fiddling and twiddling, she handed me the prim glue and loads of encouragement 🙂 .

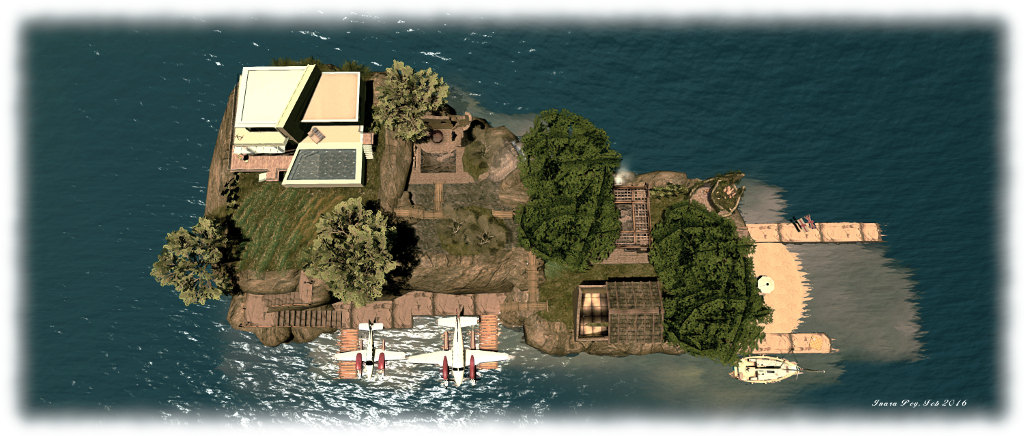
Three things in particular had been playing on my mind: the boat and plane slips, which still looked a bit excessive to my eyes. So over the past few weeks as time has allowed, I’ve been introducing changes, adding new (and novel) moorings for our two motorboats (no, I’m not saying how the moorings are novel; we have to have some secrets!) and re-working the west and southern sides of the island, as well as the “mid level” part of the garden.

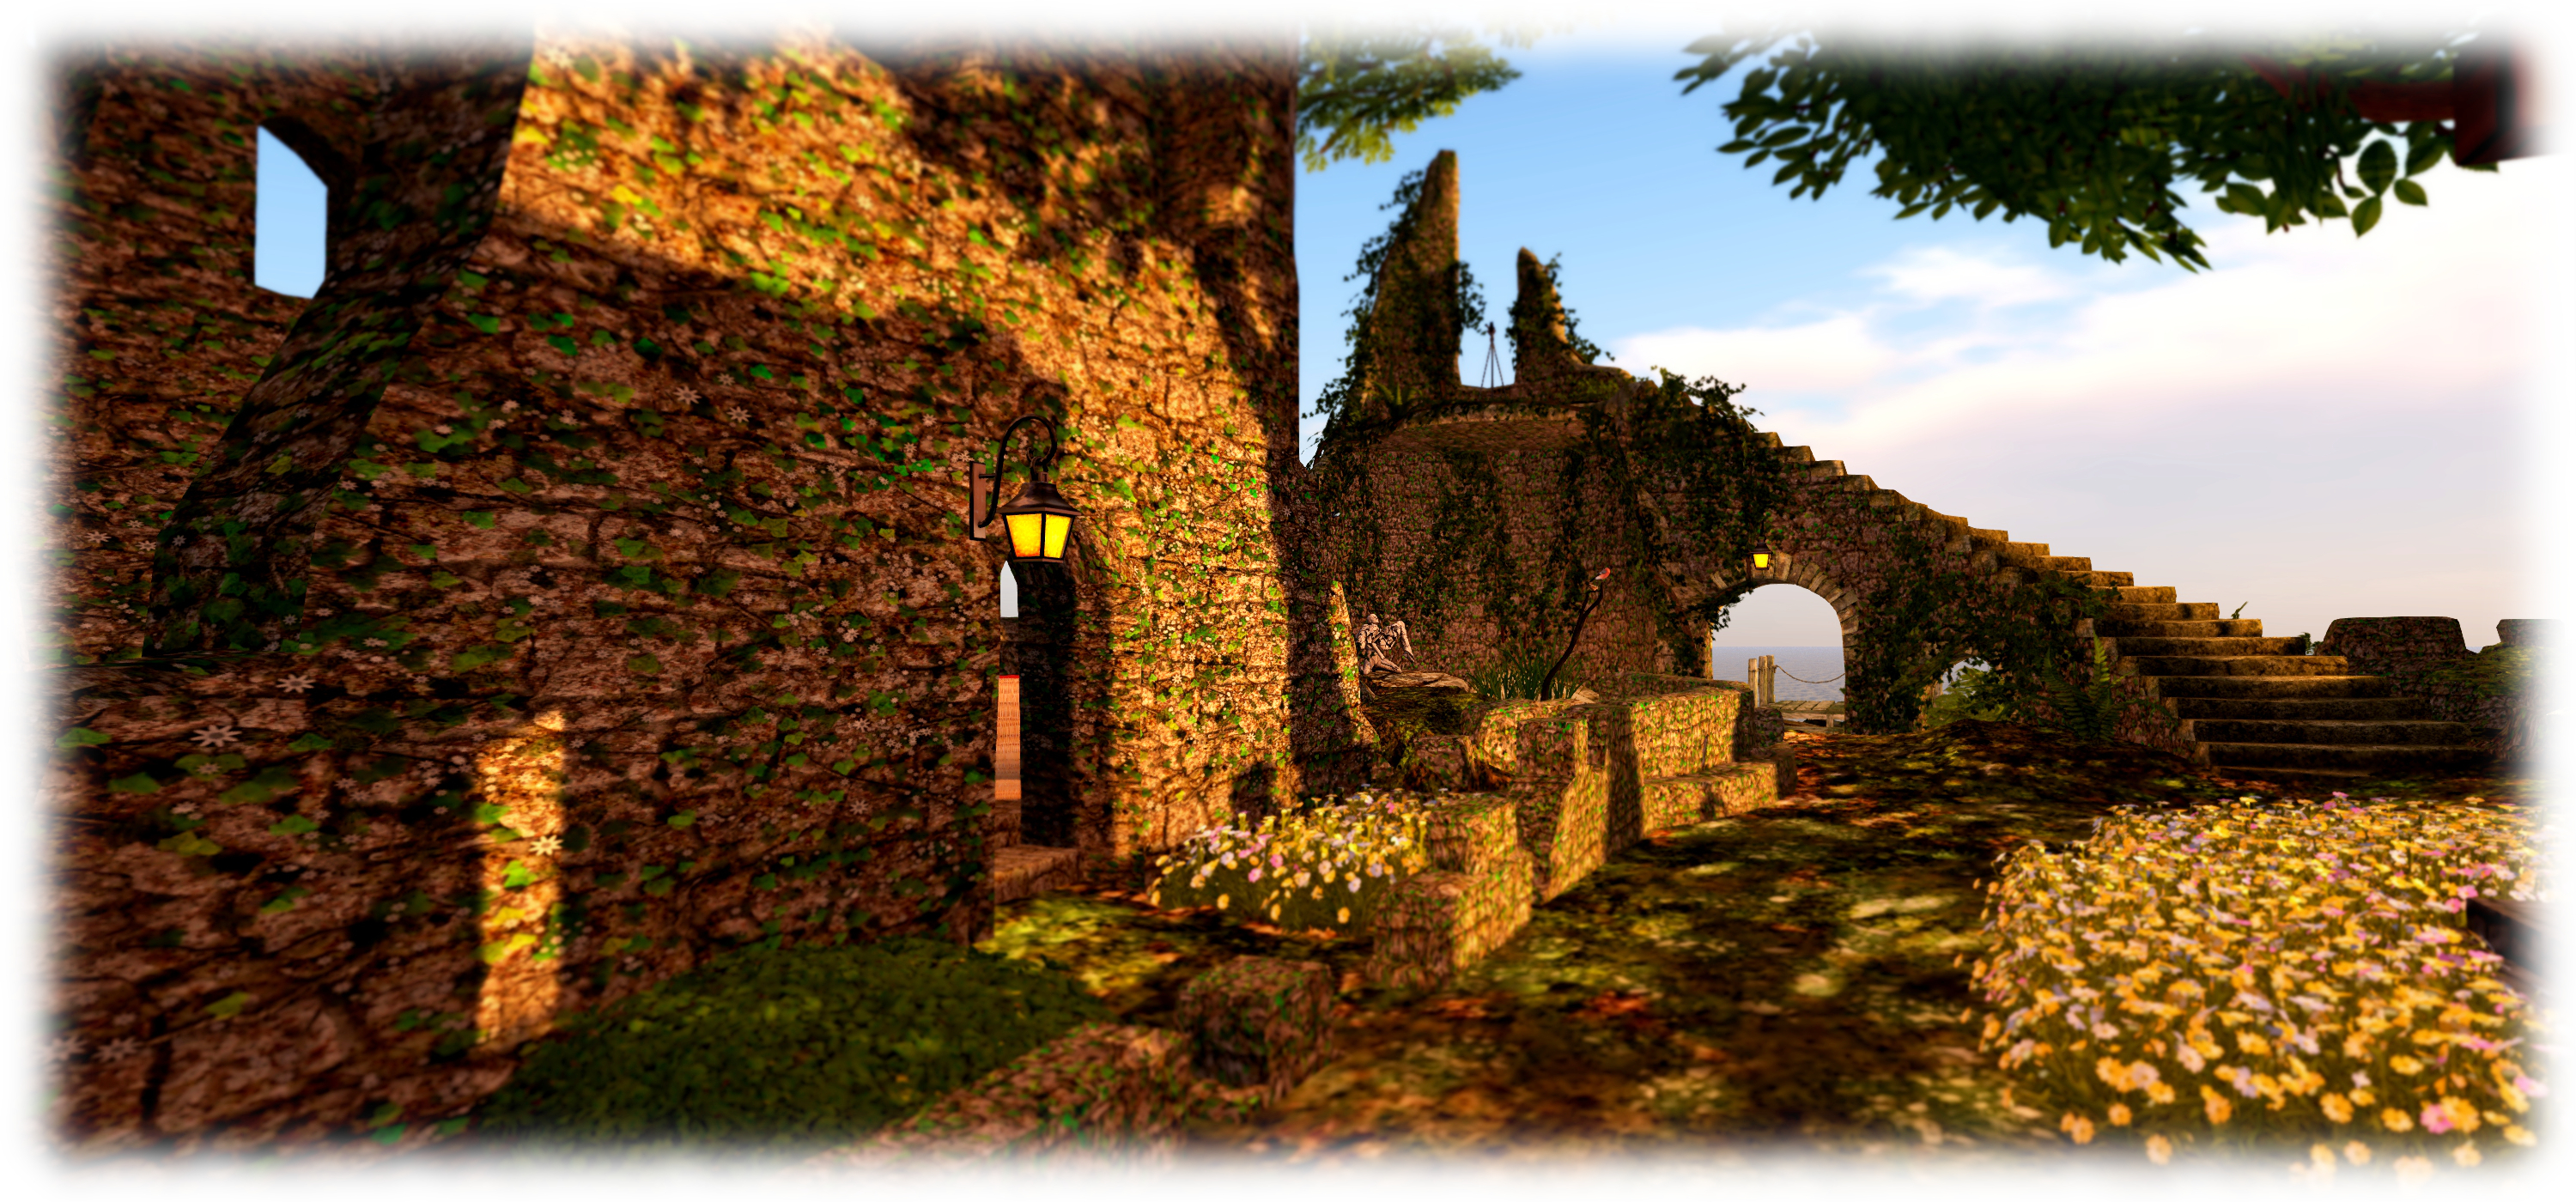
In particular, the west side of the island has had the beach and the winding rock path leading down to it from the house removed. While the path looked good, the physics on it also made ascents and descents along it look a bit awkward in my eyes, avatars often seeming to walk on air. It also, when all is said and down, took up a lot of space.

The 'planes at their new mooring below the house
The ‘planes at their new mooring below the house

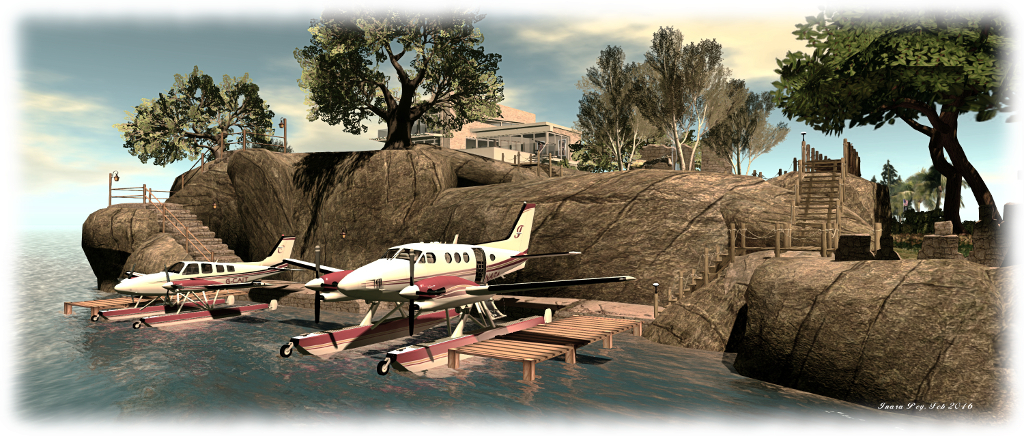
The path has now been replaced by a set of stone steps leading down the cliff in a switch back, while the beach has been replaced by a stone jetty and moorings for our two DSA aeroplanes. The TUFF stone steps kit proved very handy for all this, providing the means to add the steps and made the jetties. A mesh system, it is nicely modifiable, parts easily resized and re-textured. The latter being handy for us, as it allowed the steps and jetties to be textured to match the stonework of the rest of the island’s ruins (those interested in the kit can also see it at Rya Nitely’s in-world store).

Moving the ‘planes has allowed the southern end of the island to be tided-up, with the mass of moorings there replaced by a couple of stone jetties (courtesy of the TUFF stone steps kit again). These provide both moorings for our Loonetta 31 and the boats or seaplanes belonging to visiting friends, and protects our relocated beach from the tide.

The revised mid-level part of the island, partially flooded, but retaining the "bathhouse" and now with a little pot for the garden hammock
The revised mid-level part of the island, partially flooded, but retaining the “bathhouse” and now with a little pot for the garden hammock

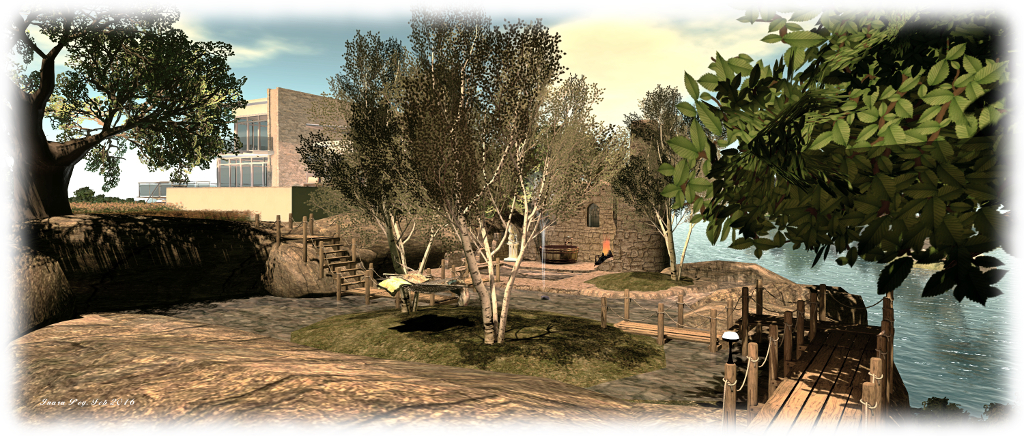
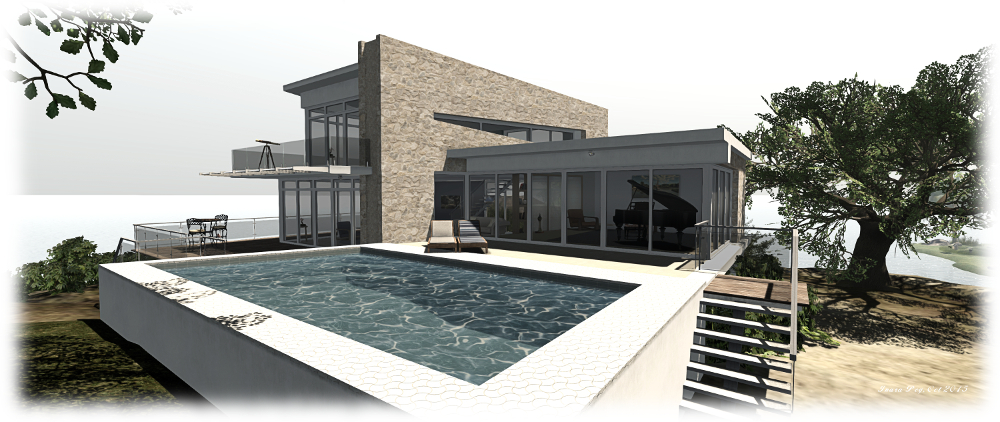
The other change we’ve made is to make the mid-level of the island a little more watery. After installing the outdoor bathing area, the falls and their source pond looked a little unnatural. Solution: “flood” the level with water from a smaller fall exiting from the upper cliffs, and provide a sense of it flowing down to the falls. Stone foundations have been added to the “bathhouse”, increasing the feel of it being part of the island’s old ruins, and board walks now  provide passage over the water channels.

Overall, I think the tweaks suit the island, as does Caitlyn. Certainly, having an uncluttered southern end to the place, where we can sit on sun loungers and watch the passing vessels and occasional race through the regions, gives the place a much nicer appearance. And that now really does seem to be job done – so if you’re very lucky, this might be the last time I witter on about the island 🙂 .

Of rocks and chapels


The new outdoor bath on the new level of the island, with the steps up to the house

It’s the start of a new month, so must be time to fiddle with house and home 🙂 .

Back in August, I wrote about re-arranging things at home to make use of some of the bits and bobs purchased for the Impressions installation at LEA 6. particular making use of the Fanatik Rocky Island. At that time I noted a minor niggle with the texturing of the rock, which suffers from blurred / stretched textures which become particularly noticeable if the rock is resized even a little. Due to its design, it doesn’t take too well to being re-textured, either.

While of itself a small niggle, this is the kind of thing which can easily grow into a nag once noticed. And that’s what happened when we moved things around to made space for the Skye Beach House. Something Had To Be Done.

The house, ramp and expanded beach
The house, ramp and expanded beach, and new chapel ruins

So, it was off back to Fanatik to pick up their Cliff Cover Mountain set of rocks, which were used to replace the Rocky Island.  This gave us some immediate benefits: more room for the house itself, an additional level in the design of the island, and a bigger beach area, which can still be reach via a rocky ramp from the house. Most importantly of all though, were the reclaimed LI gained; at 118LI, the Rocky Island can eat into a budget, and replacing it gave us over half the LI back.

The additional capacity has allowed us to add to the “old ruins” feel to the place. On the new middle part of the island, for example, we now have section of wall and a tower overlooking the waterfalls and offering a sheltered place for an outdoor rustic bath courtesy of Cory Edo. I’ve always loved the idea of outdoor baths and showers since my time in Sri Lanka, so sort-of replicating something of that in-world has been a delight.

The chapel - offering something a little different to broken walls for the ruins
The chapel – offering something a little different to broken walls for the ruins

to further add to the ruins, a medieval chapel has now been added to  the lower section of the island, replacing one of the larger wall sections and a tower. At 26 LI, this partial mesh build is not heavy, but it is big; fortunately, it’s also Mod, so resizing and re-texturing it was simple enough; with a quick shearing away of unnecessary parts, the LI came down to 12 without losing any character, and it fitted it nicely. By rights, the windows should perhaps be turned inwards rather than looking out over the sea, but we’re happy with the look and the chapel makes for a nice snuggle, particularly as it is lit by one of CioTToLiNa Xue’s beautiful sculptures.

So, that’s it for another month – or possibly longer! We’re happy with the way things look now,  so it’s unlikely too much will be changing in the future 🙂 .


From a forest cabin to a beach house in Second Life

The Skye Beach House - superb accommodation for Second Life
The Skye Beach House – superb accommodation for Second Life

It’s no secret that I’m an admirer of Alex Bader’s creations in Second Life. I’ve loved his castles since I first encountered one by chance during my travels, and I have a fair few of his landscape and texture sets stuffed into my purse (aka inventory) as well as making a fair amount of use of them on the home island.

One of my favourite items obtained from Alex earlier in the year was his Luxury Forest Cabin, which has been my home since April 2015. It’s an outstanding and stylish design presenting a spacious 2-room living space, fully furnished and packed with detail (and animations) for a land impact of just 55, and a tidy footprint of 23.5 x 21.5 metres. However, as is the way of things in Second Life, it has now been retired to make way for a new house. And guess what? It’s again from Alex.

The Sky Beach House (steps by the pool my addition, using a copy of the original steps supplied)
The Skye Beach House (steps by the pool my addition, using a copy of the original steps supplied)

Truth be told, I’ve been quite taken by the Skye Beach House for a while now, but haven’t had reason to invest in it as I have been very comfortable with the Forest Cabin. However, As a recent encounter has come to be something rather more, the desire to have a new home has grown.

This is a contemporary design with a similar footprint to the Luxury Cabin (24 x 19.5 metres), but benefiting an upper floor to provide a third room. Fully furnished and complete with a swimming pool, the house has an overall land impact of 61, and offers a lot of living space in a compact layout.

Plenty of interior space (sofa, cat and piano not supplied!)

To cater for beach locations, where the terrain can be uneven, the house and its deck are raised up on legs. This can leave the pool, located at the front of the house, looking like a bit of a brick, but overall, the approach works well and certainly overcame the unevenness of the rock-top location on our little island. Access is via a set of steps leading up to the deck, which has glass railings to two sides and offers a fair amount of space for additional outdoor seating.

Indoors, there is a large lounge which is pre-furnished with armchairs, tables, a dining table and 4 chairs, paintings on the walls, etc. Alongside of this, and up a set of three steps is the second ground floor room which is nominally the bedroom and opens-out onto the pool patio. The third room sits over the lounge and by default comes with armchairs, table and telescope. There are lots of other touches – lighting, picture frames (just drag and drop your own photos), books, etc., which make this a complete out-of-the-rezzer home, while allowing anything to be swapped out as required. A pose system allows for various poses (single and couple) to be used on the deck and on and in the pool

The house atop the island, replacing the Skye Luxury Forest Cabin

The house is copy / modify, making any necessary small changes relatively simple. For me, that meant a slight resizing of the pool and the addition of an extra set of steps alongside it to make access to the house easier. Convenience of use also meant shifting the bedroom upstairs, where the balcony also gives a great views of the setting sun :).

As with all of Alex’s work, the attention to detail is exemplary, and the use of materials exquisite; one of the most attractive things about both the Beach House and Forest Cabin is the manner in which the windows naturally “reflect” light, be it sunlight or from a scripted source.

Home sweet home (and note the sunlight reflected in the upper floor windows... I do so like that!)
Home sweet home (and note the sunlight reflected in the upper floor windows… I do so like that!)

All told, this is another fabulous product from Alex Bader, and one we have absolutely no hesitation in recommending.

Related Links

More ruins on the the rock


The new island layout. Like the previous island layout, only different :)
The new island layout. Like the previous island layout, but different 🙂

Back in May I wrote about the (then) latest changes on my little island home. At the time, I indicated that I was satisfied with the overall results, but couldn’t entirely rule out changing things again.

Well, guess what?

As a result of a recent project, I’ve ended up with an Inventory containing quite a few things I never expected to own, and which  – truth be told – are unlikely to see much use in the future. However, it seemed a shame that all of them should end up boxed away once more, consigned to the darkness of an inventory folder; and one in particular, the Fanatik Rocky Island, has been  nagging me.

The house sits rather nicely atop the Fanatik rock island, and the footpatth and other flat areas on the plateau mean I have room for garden paces and a nice walk either down to the moorings or to the ruins
The house sits rather nicely atop the Fanatik Rocky Island, and the footpath and other flat areas on the plateau mean I have room for garden spaces and a nice walk either down to the moorings or to the ruins

At 64×61 (ish) metres and 39.5 metes in overall height, this is a piece widely used around Second Life, both for shoreline scenes and inshore, which can blend easily with a landscape to present a dramatic plateau or rocky outcrop, complete with a path winding up one side. If I’m honest, the textures do suffer from being a tad blurry / stretched, but not enough to prevent its use. Fortuitously for me, width and length wise, it fitted into the north end of my parcel with only a little bit of resizing (although I admittedly also reduced the height so as not to completely terrify the neighbours into thinking I was building some Sekrit Island Lair 🙂 ).

The ruins are still there, complete with my pavilion and piano, all now on a slightly lower plateau. The ruins retain Kriss Lehmann’s Forest Tower, still one of my all-time favourite pieces of atmospheric architecture, as the main feature, the archway providing access down to the main quay, as before. I’ve also used Alex Bader’s excellent waterfall kit, to add,well, a waterfall, as hopefully a nice finish.

Couldn't resist adding a waterfall
Couldn’t resist adding a waterfall

I’ve fiddled a bit with the moorings as well, making them smaller, and reducing the number of things moored / parked there, so hopefully the neighbours now feel less like they’re living next door to some kind of air taxi service. There’s a second dock at the foot of the house plateau, but already that spot is nagging me to turn it into a beach; time will tell on that.

But sand and waves aside, am I happy now? Yup. Absolutely. That’s it. Done. Finished. time to relax and enjoy.

Well, for now 🙂 .

Aug-5a_001

Ruins on the rock

Remodelling the home island so that it gives the impression of a modern home sited in an ancient coastal ruin

In the latter half of April I wrote about the most recent changes to my little island home, which followed the purchase of Alex Bader’s wonderful Skye Luxury Forest Cabin. As I noted at the time, the cabin was an accidental find – I was looking for good mesh trees when I happened across it.

Over the weekend, I resumed my quest for the “right” style of trees for the island. I’m clearly not very good in the tree buying department, because this time I eventually came home with … the Forest Ruins Tower by Kriss Lehmann.

Kriss Lehmann's Forest Tower (to the right of the picture) forms the entrance to my "gardens" above the pier and moorings
Kriss Lehmann’s Forest Tower (to the right of the picture) forms the entrance to my “gardens” above the pier and moorings

Truth be told, I’ve admired the tower since Kriss first introduced it, having seen it in many regions around the grid. More particularly, I’ve been wanting to give the impression my home has been established in the ruins of an older structure or at least on the foundations of one. Seeing Kriss’ tower at his store gave me the push to realise the former.

So for the last couple of days I’ve been reworking the island (yet again), which has involved incorporating not only Kriss’ tower, but various elements of mesh ruined walls by Reid Parkin, and medieval ruins sections I picked-up from Rya Nightly’s in-world store.

The mesh parts from Nya Nighty and Reid Parkin work well together and are good low LI items

Alongside the Forest Tower the land now sports some additional, strategically placed towers, the ruins of a couple of buildings and various ruined or broken walls. As I didn’t want everything to be in a tumbledown state, I’ve kept most of the boundary walls near the house whole, to suggest they’ve been re-built as a part of the modern occupancy of the island, while those bordering the cliff edges further from the house have been made to look a little more decrepit.  To help blend the various items together, I used Alex Bader’s stone textures to re-face all the stone work, and it seems to work quite effectively.

The re-texturing of the stone meant I could return Cory Edo’s Rustic Pavilion to almost it’s original state, although I dispensed with the larger lamps and engaged in a little retexturing. As a final part of the remodelling, I picked up IvanBenjammin’s modular wooden pier set, which I’ve had my eye on for a while, and rebuilt the moorings at the north end of the island, again hopefully suggests a modern occupancy on an old island…

I've restored Cory Edo's Rustic Pavilion it its original state, as it fits the overall design pretty well
I’ve restored Cory Edo’s Rustic Pavilion it its original state, as it fits the overall design pretty well

The re-working has led to an overall increase in used land capacity, but it’s pretty modest, all things considered. In April I had the house and gardens, etc., hovering at the 880 LI mark, and the total is now 906; when you consider the Forest Tower alone is 41 LI in its modified state (it is 45 in its default state), that’s not bad, if I say so myself. Ah, the magic of mesh and convex hull physics!

Does this mean I’m finally satisfied? Well… yes.

At least for now 🙂 .

Home again

The Skye Forest Cabin located at home

In February, I wrote about the most recent changes on the home front – raising house and garden to the top of a rocky, water-bound plateau. Since then, I’ve been allowing one or two little niggles nag at me, leaving me feeling things still weren’t entirely right.

Part of this is because of my slightly insane desire to keep multiple boats and ‘planes rezzed at all times (insane, as I’ve got sufficient space to pull things out of inventory whenever I want to use them, so I don’t actually need them rezzed all the time but hey-ho); and while the re-worked moorings for them gave me the space I wanted, things were still a tad ugly. Another niggle has been with the two large expanses of billiard table smooth grass on the island, which just haven’t sat right with me.

So it was that I set about fiddling with things,  starting with the moorings, which got completely re-arranged, and then raising a part of the island  so I could extend the garden and remove some of the expanse of flat grass. The new moorings are along a single pier, with a new helipad at the far end. It still looks a bit like a marina at that end of the island, but it’s a tidier marina 🙂 .

The revised mooring and the new helipad
The revised moorings and the new helipad

As I’d extended the amount of space available for my clifftop garden, I set out to get some new plants.. and managed to come home with … a new house…  *cough*.

The house in question Alex Bader’s Skye Luxury Forest Cabin, an eye-catching mesh design, the main structure of which weighs-in at a remarkable 18 LI, and the entire place, furnishings and fittings included tops-out at just 55 LI. And I have to say, it is simply gorgeous.

With very modern lines, a wood exterior finish and a pastel interior that suggests the latest in eco-friendly insulation, the cabin is ideal for rural settings, and with a total footprint of 23.5 metres by 21.5 metres, it doesn’t gobble up a huge amount of land. For that you get two good-sized furnished rooms (lounge and bedroom) complete with interior and exterior lighting, and an excellent feeling of space.

The Skye Luxury Cabin offers  excellent living space
The Skye Luxury Cabin offers excellent living space

The fixtures and fittings in the house are all removable, offering plenty of scope for those wishing to use their own furniture; however the range of animations on the chairs and bed are impressive, making them more than suitable for everyday use. There are some nice touches as well, such as the provided wall paintings and picture frames, all of which will take your own images and snapshots.

Obviously, the cabin has replaced the stone house I put up in February, and I have to admit, it is more in keeping with the theme of the island. I’ve modded it slightly, removing some exterior features (including the terrace rails and steps, which also meant losing some outdoor poses), and added a few others (the textures are supplied, which makes adding elements easy. As the bed and chairs have animations, I’ve kept those, but added a few items of decor from the “old” house. The overall style encouraged me to re-work the part of the island the “old” house stood upon, making better use of mesh to give a more natural feel (although I’ve retained a “lawn” to one side of the house so I’ve somewhere to put the sun loungers 🙂 ) .

The lounge provides plenty of space, although I swapped the dining table and chairs for my Trompe Loeil sofa and a side table from Sara Lok. Stitch, my cat, seems to approve of the new house!

These rearrangements have led to an overall fall in LI – 885 to 880 (at the moment, still looking to add more plants!) which, considering I’ve actually increased the number of plants on the land already and added another boat (32 LI) and a pond, really says a lot for the economy of Alex Bader’s mesh builds.

Overall, for an unexpected find / purchase, the Skye Luxury Forest Cabin is, in my opinion, superb if you’re looking for compact living space, and makes a great addition to his range. You can find it on the Marketplace and in-world as well.

Another view of the Skye Luxury Forest Cabin, which now forms my latest home in SL

Austin Tate opted to pick-up a copy of the Cabin and covers the snowy scene add-on for those into winter scenes. He also offers some super pictures of the Cabin in-situ – check his notes here.