Flying the CLSA Fairey Gannet in Second Life

The CLSA Fairey Gannet over Blake Sea Half Hitch

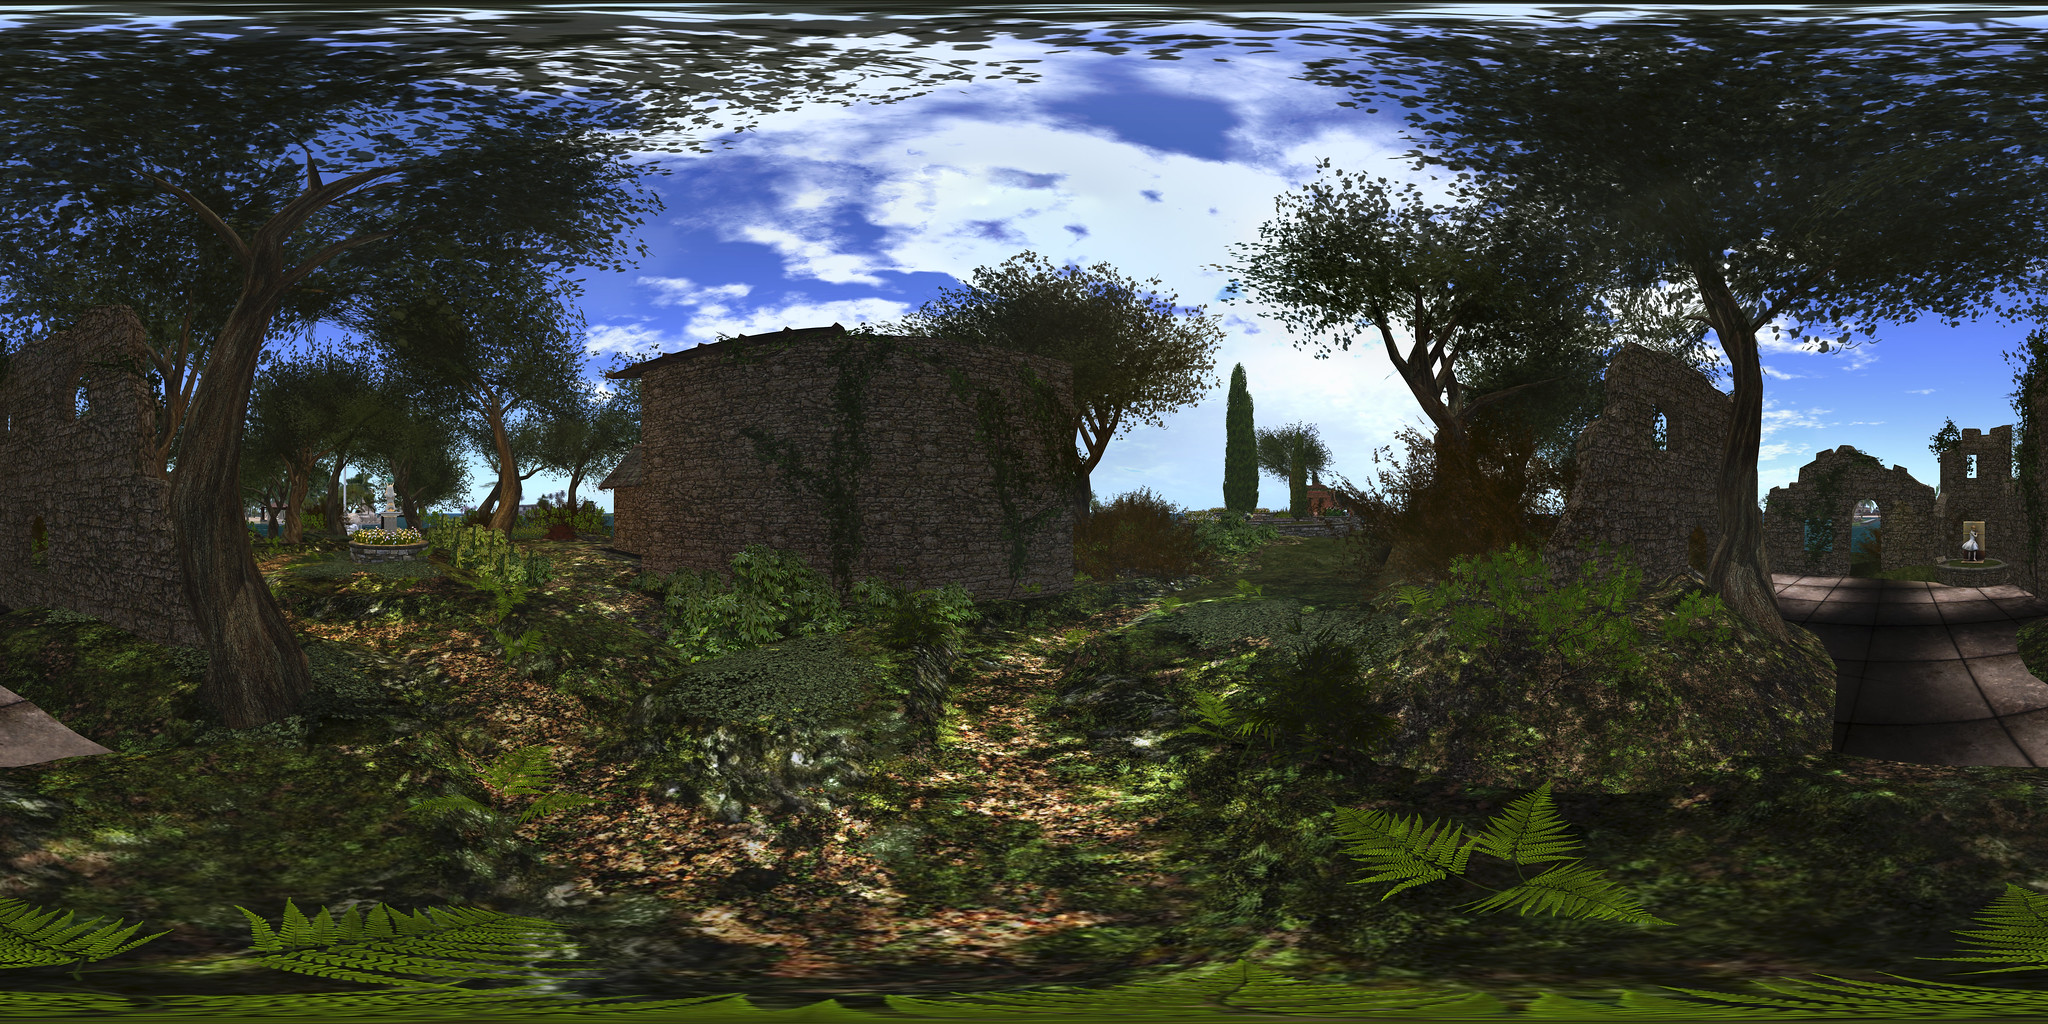
I’m not that into military aviation outside of airshows, and in SL, all my flying is restricted to civilian light aircraft with the exception of a Supermarine Spitfire, which was a thank you gift from its creator, Eric Gregan, and a civilian version of the PBY6A Catalina. So I’m a little surprised to be writing about a veteran military ‘plane, the Fairey Gannet.

I confess to having known next to nothing about the Gannet prior to obtaining this particular model – but wikipedia was once again my friend, helping me fill-in the blanks about this post-World War Two Royal Navy aircraft. I came across the model in question after learning through Whirly Fizzle that CLS Aviation, owned by CaithLynnSayes were being sold at L$10 per aircraft on an unsupported basis. At the time, I picked up a couple (see here for more). A subsequent chat about the CLSA range with friend Jodi Serenity led me to an impulse buy of CLSA’s Fairey Gannet – it’s not as if L$10 is going to break anyone’s bank!

The CLSA Fairey Gannet on rezzing

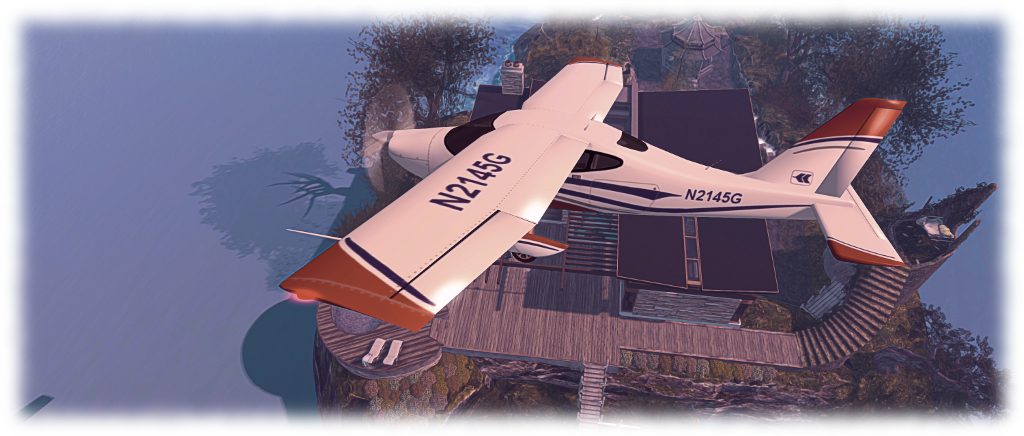
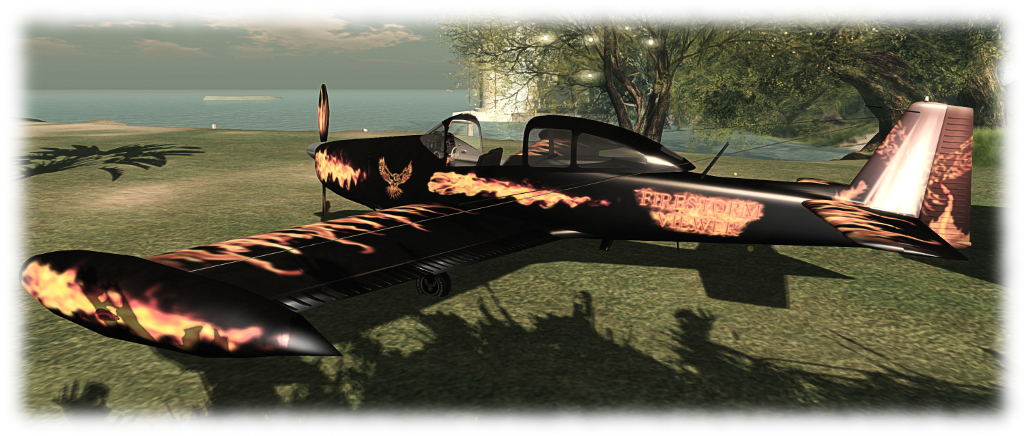
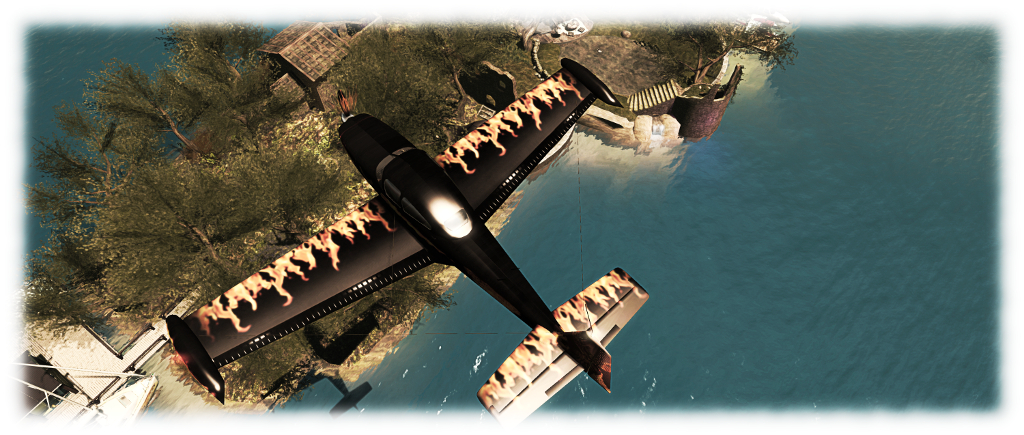
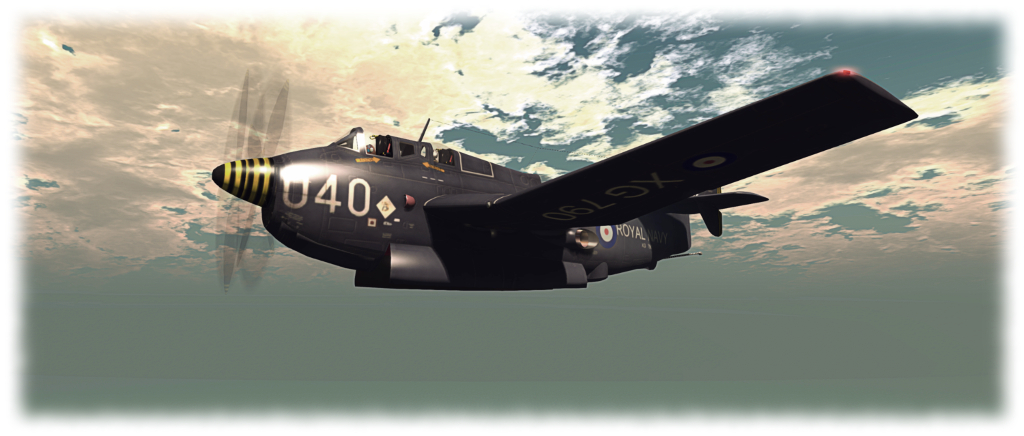
The first thing that struck me is that it is a comparatively big aeroplane (by the standards of the aircraft I generally fly, at least!). It is also something a very faithful reproduction by Helijah Bailey (sold under a licence agreement by CLSA) with a lot packed into it – more, it would seem, then the instruction manual explains. The complete package comprises the aircraft, a minimal but acceptable flight HUD for those who like them, a pilot’s headset and two manuals. By default, the aircraft rezzes with wings folded – these can be deployed when sat in the pilot’s cockpit by typing w(ing) or wings in chat. They unfold quite satisfactorily, and the twin turboprop engines can be started at the same time via the Engine button on the HUD if you use it, or by typing s(tart) or engine in chat – note chat commands are not case-sensitive.

Starting the engines will also do a couple of other things – activate the Gannet’s strobe and nav lights, and cause the other two crew members pop-up in their respective cockpits (the plane is a single avatar seater).  With the exhausts under the rearmost cockpit spewing fumes and heat, the ‘plane is ready to fly. This is achieved by releasing the parking brake (p) and then using the conventional controls: PAGE UP / PAGE DOWN for the throttle (5% increments or nX – where X is a number between 1 and 100, for quickly setting), UP / DOWN for nose pitch, LEFT / RIGHT for banking.

The CLSA Fairey Gannet: the two observers appear when the engines are started

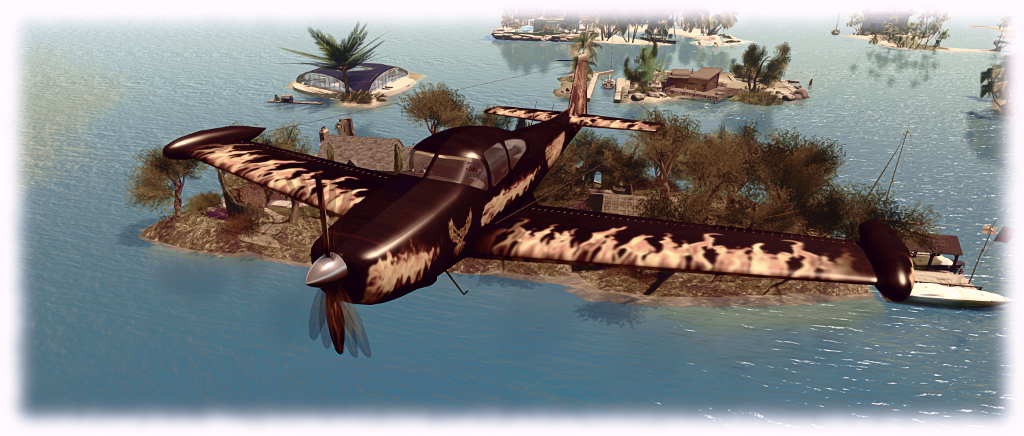
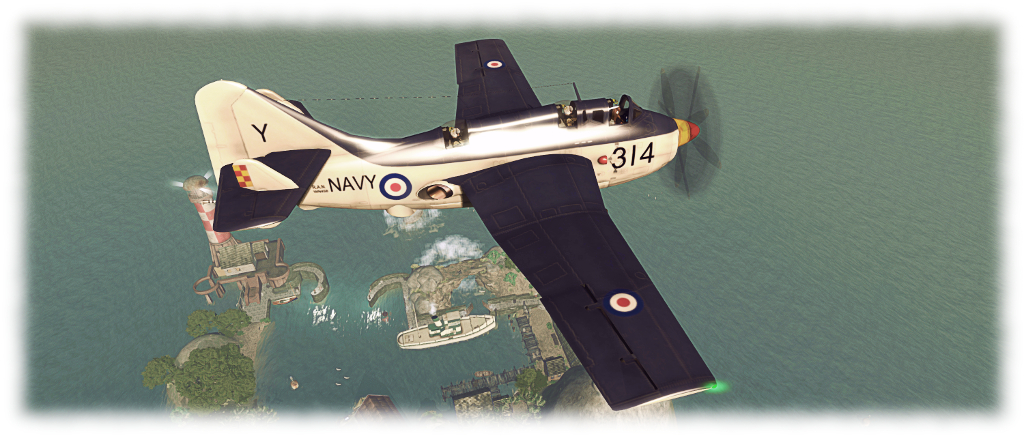
In flight, the Gannet handles well – I’d rate it the best of the CLSA aircraft I’ve flown to date.  Being a beast, it does require constant pressure on the controls with banking or it’ll simply try to rapidly straighten out, but this adds a level of realism in flying. Airspeeds are given in metres per second, and when landing, you’ll need around 8-15 m/s to both avoid stalling on approach or coming in too fast and having to force it onto the ground.

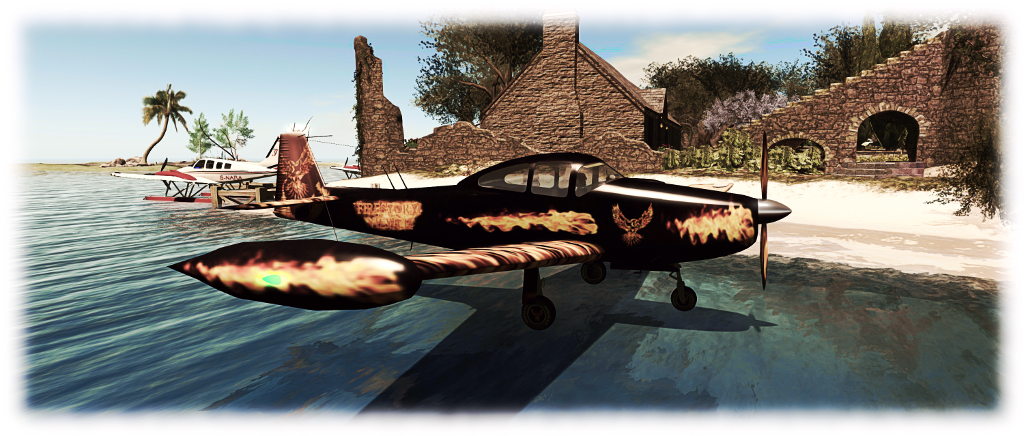
As noted the ‘plane comes with plenty of features: the aforementioned folding / unfolding wings; a deplyable radar dome for anti-submarine warfare (ASW), the Gannet’s primary role in this variant and an extensible arrestor hook for deck landings (would that there were a Royal Navy carrier steaming around Blake Sea!). There are no fewer than 10 default camera positions and 11 preset paint schemes (5 Royal Navy Air Squadrons, one Royal Australian Navy Air Squadron (albeit it with UK roundels), one Indonesian Navy Aviation Squadron, 3 Marineflieger (German Navy) options, and one simply labelled “FAA” (Fleet Air Arm). There is also a custom option. There’s also a fuel system, a sliding pilot’s cockpit canopy, and a park / unpark mode (only use the latter with the wings folded, as it includes the stays to hold the wings in that position).

The CLSA Fairey Gannet: weapons bay doors open – flying in a region with rezzing rights will drop a torpedo

The Gannet is also fully VICE enabled for combat operations – although this is missing from the flight manual. I’m not into combat flying and so blindly fiddled around until some things worked. Enabling VICE via the menu prims the weapons bay, and typing b in flight will open the bay doors and drop a torpedo (providing you have rezzing rights in the region you’re flying through). There is a cycle delay limiting the frequency at which torpedoes can be released. There are also weapons hard points under the wings with depth charges (I assume) and missiles attached. These are alpha’d by default, and appear to be unscripted. I’ve no idea if they can be accessed by this particular variant of the Gannet, or if they an hold-over from another design, and confess I didn’t spend too much time trying to figure them out.

Overall, I found this a nice aircraft to fly – and one that is certainly nippy at high throttle settings, which offers some fun in flying. While it is not something I’d use with any frequency – only curiosity and the price caused my to buy it, as noted -, for those who like their military aircraft, it potentially offers a pretty good value for money, particularly given the preset finishes.

Additional Links

CLS Aviation on the Marketplace

CLSA: flying in Second Life at L$10 a plane

Flying over the home island in the CLS Aviation P2010

Whirly Fizzle pointed me in the direction of CLS Aviation on the Marketplace after owner CaithLynnSayes introduced an across-the-board price drop for all aircraft in this modest collection to just L$10 per vehicle – the catch being that the aircraft are now sold completely unsupported. As such, they make a bargain basement opportunity for those curious about SL flying to kick-start their exposure.

There are only nine aircraft in the CLSA range, and these form a mix of vintage and light aircraft. The models are built by Helijah Bailey and scripted by Reconx86, the scripts being based on those originally developed by Cubey Terra.

Both the P2010 (shown) and the P92 have acceptable default paint options (in theory changeable via the menu), and support custom finishes. Each features touch-to-open doors

I have previously flown the Firestorm limited edition of the CLSA Ryan Navion and found it acceptable, if not exceptional. For this test, I grabbed the “Tec-N” (aka Tecnam of Italy) P92 and the P2010 on the basis I haven’t got any high-wing monoplanes in my collection. Each aircraft is supplied with at least one variant of the plane itself (the P92 has a version with fixed wheel undercarriage, suffixed “T”, and a version with floats, suffixed “W”), a detailed manual, a quick start guide, a basic HUD, and a set of set of basic texture templates for creating custom paint finishes.

The flight system is the same for both aircraft, offering the usual control options: PAGE UP and PAGE DOWN for the throttle, UP / DOWN; arrow keys for pitching the nose down / up; the LEFT / RIGHT keys for banking (or WASD, if you use them). Other control surfaces (flaps, air brakes) are accessed via text. The HUD for each is fairly basic, and includes a button option for accessing the menu system (also accessible via chat command when sitting in the aircraft).

The P92-W(ater) version flying past a familiar (to this blog!) landmark

As with all CLSA aircraft, both models reflect their physical namesakes with reasonable accuracy. Each comes with a number of menu-accessible paint finishes, and slots within the menu for adding custom paint finishes (instructions for use in the user manual) – or that’s the theory. Both aircraft are also Shergood Aviation N-Number Registration compatible, meaning that when first rezzed, it will have a unique N (United States) registration number, which is also registered at the Shergood Aviation Aircraft Database.

Handling-wise I found the P92 and P2010 acceptable, although the P92 suffered the same issue I had with the CLSA Ryan Navion: banking tends to be flat, with the first part feeling like the aircraft is slewing into a turn. The P2010 felt a lot more responsive by comparison, rolling rather tightly in turns, but having the feel of a small, well-powered aircraft, and was definitely a lot more fun to fly. Airspeed is measured in metres per second, and it’s advisable to read the manual to get things like rotation and stall speeds fixed in your head.

The P92 float and wheeled variants, showing off two of the supplied pain finishes

I did have some issues with each plane – the aforementioned lack of initial banking when turning the P92, for example, together with a visual niggle that the main struts supporting the floats don’t actually meet the fuselage. There’s also no means to retract the wheels on the floats, giving the ‘plane an odd look when landing on water with wheels extended before and under the floats. As with the Ryan Navion, both the P92 and the P2010 will happily land on Linden water, taxi on it and take-off again, even when sans floats – which is a trifle odd, and possibly part of their Cubey Terra scripted heritage – as I noted in my review of the Ryan Navion, there is a degree of similarity in the handling of the Navion / P92 and Cubey’s Stingray in particular. However, these are relatively minor niggles.

A more annoying issue lies with the P2010. For me, this repeatedly gave a scripted texture call error when first sitting in the aircraft and on making region crossings, becoming quite the distraction at times. The menu option to access the paint controls was also non-functional, even after a full reset of scripts. However, I don’t believe the latter prevents the manual application of textures, if handled with care.

All CLSA aircraft seem to share the common trait of being able to operate on Linden water, regardless of whether they have floats! This is the P2010 “parked” on Blake Sea following a successful landing

If I’m totally honest, a CLSA ‘plane is unlikely to become a favourite with me; I’m simply too attached to my DSA aircraft (although the camera management on CLSA planes during regions crossings is admittedly far better than DSA). However, even allowing for the issues and niggles mentioned above, at L$10 per ‘plane, they really cannot be sneezed at for those wishing to join the world of SL aviation flying a fairly reasonable aircraft with a decent flight control system, and are a far better introduction to SL flying than many of the low-cost / freebie alternatives to be found on the MP.

Additional Links

CLS Aviation on the Marketplace

The dragon, the rune stone and the ruin in Second Life

Three composite creations by Morgan Sim Designs with me alongside to give a sense of scale with each one. From the left: the Dragon Garden, the Rune Stone Garden and Among the Ruins – Isolde

Whilst visiting Spring Spirit recently (see: A Spring Spirit in Second Life), Caitlyn and I were both taken by a magnificent red dragon seated upon a rock amidst a spray of grass and flowers. Taking a peek at it, via the Edit floater, we were led to the Marketplace store of Morgan Sim Designs (MSD). While the name may be familiar to some, it was a new and virtual treasure trove for us – as it is likely to be for anyone looking to add some special touches to their landscape and / or garden.

Operated by Chandra Pelazzi, Morgan Sim Designs is a Marketplace-only store specialising in composite designs. That is, designs which bring together the full permission works of other creators to design and present a unique finished product.

Buying from the Marketplace without the means to check creations in-world can at times be a hit-and-miss affair: will the item really live up to the photos? Is there perhaps some unseen flaw or issue which might others dissuade a purchase? We’ve all likely had such feelings. From what we’ve seen (and purchased!) so far from Morgan Sim Designs there is absolutely no need to worry. The elements used in MSD creations are all good quality pieces from established creators, with the completed pieces by the MSD demonstrating a keen eye for colour, design and detail.

The MSD Dragon Garden on our home island

Take the dragon mentioned above, for example. Called the Dragon Garden, it combines a full perm dragon with plants by Better Gnomes and Cauldrons / Krikket Blackheart, and additional plants and flowers by Decor Depot / Styx Maven and Daffy’s Gadgetmania / Daffy Proto. Offered as Modify / Copy for just L$190, it is a marvellous feature for any garden, weighing in a 22 LI in its default size (as a Modify item it can be resized, which will reduce the LI if downsizing, or increase it if upsizing). We now have one, slightly reduced in size and LI (16), sitting in the “wilder” part of out gardens, keeping an eye on the lower lawns nearby.

Another MSD item now included at home is the Rune Stone Garden. This combines a central full perm version of a rune stone from Otherworld / AnnabelleApocalypse with flowers and plants again by Styx Maven and by Mesh Plants / Reid Parkin (a creator I’ve used in a number of builds), What A Mesh / Dennie Ling, and T-Spot Mesh / Teresa Matfield. At 21 LI in its default size, it is also supplied Copy / Modify, and we now have one sitting on the trail winding through the wooded part of the island, where (if I may say so), it looks superb 🙂 .

The MSD Rune Stone Garden in place on our island home

Another composite from MSD which sits well in out overall design is Among the Ruins – Isolde. A much larger piece, featuring the square tower of a castle by S&M Designs / Mikael Blogger, plants and flowers again by Reid Parkin and Teresa Matfield, together with Bad Katz / Katz Republic. It comes with a 40 LI impact in its default size, and includes a statue by DMC Creations / x1XDanteX4x, which stands amidst a spray of flower inside the tower.

Taken complete, these MSD designs and the others in the range, add a great amount of character and depth to a scene. As most are supplied Modify, not only can they be resized to deal with LI concerns, if required, they can be tweaked better suit specific needs. For example, we have an ancient stone wall running across part of the land which has needed something to bring a little more colour to it. Enter one of MSD’s Medieval Wall Ruins Cottage Garden sets. It was a simple matter to pull out the supplied wall section, slip in a section from the existing wall, and job done. Colour where it is needed, and everything nicely integrated. Even had some base rocks I could re-purpose!

The MSD Among the Ruins – Isolde tower at home on our island

If you are looking for little scenes and pieces to add colour  or interest to a part of your garden, parcel or region, and you’ve not come across Morgan Sim Designs, then the Marketplace store is well worth a perusal. Everything is very modestly priced; everything mentioned here was just L$190, which is something of an average price for the store. Even as I finish this article, another kit from MSD has slipped into my inventory, and will shortly appear in the garden 🙂 .

Flying the CLS Ryan Navion (via Firestorm) in Second Life

The Firestorm CLSA Ryan Navion

Firestorm recently held their Christmas Party, and as a part of it, they’ offered Firestorm users holiday goodies in the form of a pet leopard and a CLS Aviation Ryan Navion aeroplane in the Firestorm colours.

I’m a bit of a flying fan in Second life (albeit not necessarily looking for full realism, just the fun of getting into the air and pootling around), and as I’d never actually come across CLS Aviation before, I cheekily saw the opportunity snag the gift and see what the plane was all about.

The Firestorm CLSA Ryan Navion

The retail variant of the plane is prices at  L$1,099 at the time of writing, and is supplied Copy / Mod – the accompanying photos showing it can be re-painted (although I have no idea if templates are supplied – so check before buying). The Firestorm version, for obvious reasons, is supplied No Mod, locking-in the Firestorm paintwork, but otherwise it is the same aircraft model.

The Navion is a post-war single-engined light aircraft with a tricycle undercarriage and seating four, many of which are still in use today. Wikipedia informs me that CLSA model is based on one of the later variants of aircraft, which had wing-tip fuel tanks.  The model weighs-in with a Land Impact of 77, a physics weight of 2.2, and a render weight of 49072.

CLSA Navion instruments: legible and reflect aircraft's operation
CLSA Navion instruments: legible and reflect aircraft’s operation

The Firestorm finish is pretty good, with the exterior of the ‘plane looking quite eye-catching. Elements of the finish continue inside the sliding canopy cockpit, where the trim on the seats and instrument panel includes colour nods to Firestorm. The instrument panel is fully readable and the instruments  respond to flight movements, making it perfectly possible to fly and navigate in Mouselook and using keyboard / chat commands.  For those who like HUD-based flying, one is also supplied, offering access to essential controls and instruments and gives access to the plane’s menu, which can also be used when flying.

Usage-wise, touch the canopy to open it and hop in (it opens automatically on shutting down the engine). A headset is supplied for those who like that kind of touch, and the “usual” control options apply (“s” / “start” / “stop” for the engine, WASD / arrow keys for turn / climb / dive; PAGE keys for throttle, etc). Multiple camera pre-sets are offered as well, accessible via chat (“c0” through “c9”, which can also be selected by menu (accessed through the HUD) or cycled through via the HUD.

The Firestorm CLSA Ryan Navion

I found the plane handled reasonably well in the air, although turns felt a little “flat” and lacking roll at times while acrobatics such as looping felt a little on the “tight” side (albeit with nice camera motion). Allowing for the current state of region crossings, the Navion handled things reasonably well, although recovery did at times seem a little sluggish. Camera scripting in particular seemed to try to handle slewing issues on crossings by giving a forward view of the plane then gently panning around to the over-the-tail default. This mostly avoided instances of finding the camera pointing into the side of the plane after a rough crossing, but when these did occur, cycling through the camera pre-sets generally cleared it.

Flying in Mouselook  / via instruments was more than acceptable, although I need to practice my landings in this mode! And on the subject of landings, a novel aspect of this plane is that while it senses Linden Water as water (listen for the splash), it will nevertheless quite happily land on it even though devoid of floats – and will also take off from Linden water as if it were a runway, feeling very much like the Terra Stingray in the process.

The Firestorm CLSA Ryan Navion
The Firestorm CLSA Ryan Navion: works on water! 😉

Overall, not a bad ‘plane, particularly if you’re looking for something to start out with. One small word of warning – should you go ahead and buy this plane (any plane?) from CLSA, or get the Firestorm variant (whilst available), make sure you rez the package in an open space. I rezzed mine in the living room and almost squished myself between it and the wall!

And, also, as this one is in Firestorm colours, are we going to see a Firestorm aerobatics team form? 😀 .

Related Links

The DSA Aerohawk in Second Life

The DSA Aerohawk
The DSA Aerohawk with floats and my attempt at a custom finish

I think I’ve established the fact I quite like flying in Second Life, and I particularly enjoy DSA aircraft as they are fun to fly, look good, are nicely customisable, paint-wise,, and many have both wheel and float options – the latter being essential when living on an island. It’s been a while since I’ve actually purchased anything in the aeroplane line; truth be told, I hadn’t intended to get anything beyond what is already sitting in my inventory.

Then I saw the DSA had released the Aerohawk, and for the last week it has been nagging at me, finally reaching a point where I had to just give in and buy it. As it is not (at the time of writing, at least) available on the Marketplace, so in-world store visit is required to see it.

Like most of my aircraft choices, I was drawn to the Aerohawk purely on its looks – in this case, stylishly retro. It was only after talking to my friend Jodi, that I discovered it is modelled after the ERCO Ercoupe, which first flew in 1940 and was designed to be the safest fixed-wing aircraft that aerospace engineering could provide at the time. It is still popular today, and during its time was licensed to manufacturers the world over.

The DSA Aerohawk in its supplied finish

The DSA aircraft faithfully reproduces the look of the original, and is supplied in a silver metal finish with red trim by default. As is the case with all DSA aircraft, the texture files can be downloaded from the DSA website, allowing owners and third parties to produce custom  / alternative paint schemes. In terms of land impact, the aircraft hits 53 LI, which is “heavier” than my DSA G58 Baron (46 LI), but is just over half the Baron’s rendering weight, being something of a simpler design.

I’m not the world’s greatest when it comes to graphics, but in lieu of VetronUK having an Aerohawk kit at present, I took to GIMP and imported the PSD files to produce an initial personalised paint scheme I’m reasonably happy with in about 15-20 minutes. I still need to add materials to give it a decent finish, but it’s enough to keep me happy. Manual application of colour schemes follows the usual route for DSA ‘planes: edit the aircraft, select the face, apply the texture file; repeat as the faces require.

Side-by-side, the floats and wheels are interchangeable via chat commands, as per DSA 'planes offering both
Side-by-side, the floats and wheels are interchangeable via chat commands, as per DSA ‘planes offering both

Handling-wise, the Aerohawk comes with the usual DSA HUD, but it is a little more hands-on (when compared to the likes of Baron and King Air, at least), requiring manual toggling of lights. The engine sound is nicely “veteran”. In the air, I found it to be nicely responsive and  – while it may simply have been a placebo effect or down to conditions being a little different – I encountered no significant issues region crossing issues when only a few days ago, I was finding myself climbing out of Blake Sea and digging my Baron out of Lost and Found sufficiently often enough to have me packing up and going home.

Interior-wise, the Aerohawk is in keeping with its looks: it’s all vinyl and cloth. The instrument panel as reasonably well detailed; DSA aircraft can sometimes suffer from blurred textures of the instruments, but there is little of that here. On the ground and in flight, it handles pretty much like any other DSA ‘plane, making it an ideal easy flier for those who simply want to get out and in the air without getting overly close to trying to fly like “the real thing”.

The Aerohawk at home, alongside Caitlyn's Baron
The Aerohawk at home, alongside Caitlyn’s Baron

A very minor niggle with the plane is the sliding cockpit doors can be a tad tricky: click on one and the other can sometimes go down when “opening” them; I now click the white bar marking their edges rather than clicking from the side to avoid this (not that you need to have them open to get into the ‘plane, of course, hence this being a minor niggle).

If I’m totally honest, I’m hoping that VetronUK (if she is still active in SL) will bring out support kits – painting, float rocking and enhanced lighting. In part because my graphics skills do sucketh the proverbial lemon,  but mostly because her kits really bring aircraft in SL to life. Until then, however, I’ll make do with my own painting efforts, and at least the Aerohawk looks at home alongside Caitlyn’s Baron 🙂 .

Related Links

VR Photosphere: a further Second Life 360 photo HUD

VR Creations 360 Photosphere demonstration; Inara Pey, October 2016,VR Creations 360 Photosphere demonstration  – click image to view in Flickr with 360o scrolling

Following my reviews of the Illiastra Panoramic HUD and the Camera Panoramic system (see links below), I was handed a further HUD system to look at.

The VR Creations 360o Photosphere HUD is a system that does exactly what it says on the packet: produces a set of images (26 in all) suitable for stitching together into a 360o spherical images suitable for uploading to the likes of Facebook, VRchive and Flickr. It falls between the Camera Panoramic and the Illiastra HUD in price, and is quite possibly the easiest of the three to use to take a set of shots.

The system comes in a basic package of the HUD, sufficient notes to get you going, and a link to a video overview.

The HUD

The VR Photosphere HUD comprises ten buttons, as shown below, with the key buttons highlighted.

The VR Creations 360 Photosphere HUD

The HUD cannot be minimised, but can be positioned off to one side or the other of the screen to keep it out-of-the-way.

Of particular note with the HUD is the top set of six buttons, which are related to positioning your camera to capture images. You can effectively position your camera anywhere you like using ALT-zoom or flycamming, and use the Add button to save the camera’s location as the centre of your sphere of photographs.This also allows you to take “seflies” through careful positioning of the camera close to you.

Saved camera positions can then be paged through using the left and right arrow buttons either side of the Release Camera button – so if you return to a location and wish to re-capture a set of images, you can do so easily, while the Delete button will delete the current camera position from the HUD.

Taking Your Shots

This is very much a point-and-shoot HUD system, requiring minimal set-up.  However, prior to taking your shots, there are some things you need to do:

  • Set your preferred windlight and daytime settings.
  • Make sure you freeze the clouds – you’ll be taking up to 26 images which will need to be stitched together, and moving clouds could make that a bit of a bugger to do. Use Menu > World > Environment Editor >Sky Presets > Edit Presets or PhotoTools > Clouds and check the scroll lock check boxes
  • Make sure the viewer’s camera is set to the default view  angle, FOV and focal length.

Once you’ve done this:

  • Position your camera at the centre point for your image capture – remember, you will be capturing 26 images in a sphere around this point, so you should have the camera view set to about a couple of metres off the ground.
  • Click Add on the HUD to set the camera position.
  • Press Esc on your keyboard to set your camera under HUD control.
  • Click on Begin Photosphere. Your camera will move to the nadir (lowest point) of the image set (generally pointing at the ground) ready for you to start capturing frames.
  • Press CTRL-~ (tilde), the snapshot shortcut, on your keyboard. You will be prompted for a location where you wish to save your first image. Select the folder and give a file name for the image.
  • Click the right arrow next to Done on the HUD to advance the camera to the next frame. Press CTRL-~ to save this shot automatically to the same location as the first.
  • Continue on round the photo a frame at a time using the right arrow button at the bottom of the HUD, saving each shot in turn via CTRL-~.
  • When you have captured all 26 frames, the camera will once more be pointing to the nadir point (generally the ground). Click Done to return the camera to the start position.
  • If you are satisfied with your frame captures, click Release Camera on the HUD to free the camera back to default control.

Producing your Image

Once you have taken your shots in-world, you need to “stitch” them together to produce your final image. There are several software tools you can use for this. My preferred choice is the Hugin Panorama Stitcher available through Sourceforge.net, as I’ve found it to be fast and efficient.

With Hugin installed and launched, proceed as follows:

  • In the Assistant tab, click on Load Images… Navigate to where your images are locally saved and select all 26 in the set, then click Open.
Loading and aligning your images in Hugin
  • The Camera and Lens Data dialogue box is displayed. Enter 90 in the HFOV field and click OK. You images will load in the editing panel.
  • Once your images are loaded, use the Align button to arrange them. This may take a few minutes, just keep an eye on the processing window that opens.
  • When Align has completed, click on the Move/Drag tab and click Straighten. If your shots are displayed upside down, enter 180 in the Roll text box and click Apply to flick them the right way up.
Straighten and correct inverted image, if required
Straighten and correct an inverted image (if required)
  • Click on the Crop tab in Hugin and adjust the values to ensure your entire images is selected – set Left and Top to 0; Right and Bottom to 9999 – note the latter two will snap to the maximum size of your image.
  • Click on the Assistant tab once more and click Create Panorama. A dialogue box will open:
    • Set the image format to JPG and set the quality to 100%
    • Click OK to run the output process.
  • You’ll be asked to give a file name for the Hugin .PTO batch process file and the rendered image file. Enter a name for both, confirming each in turn.
  • Image processing will start, and could take several minutes.

Once completed, you’ll have an image ready to upload to Facebook, VRchive, Flickr, etc.

Do be aware that Hugin can be sensitive in handling images, particularly those with poor contrast / brightness, or which feature a lot of water, and this can lead to problems during the alignment process or in production of the finished image.

Continue reading “VR Photosphere: a further Second Life 360 photo HUD”