The PrimPossible mesh piano in Second Life

The new PrimPossible mesh piano

I’ve previously written about my passion for pianos, both in the physical world and the virtual (where I can indulge my fantasy of owning a concert grand). Over the years I’ve shifted from the Musical Alchemy grand by Persephone Milk, through Ample Clarity’s 1 prim / LI PrimPossible sculpted grand, to the current piano gracing the music room at home, the 8 LI Lisp mesh grand.

On March 12th, 2016, Ample launched his latest piano. It’s again a model with just a single LI, but this time it is presented in mesh, and he was kind enough to pass over models for me to take a look at.

The new piano offers a far more natural grand piano form then the earlier sculpted model, with a much higher level of detail
The new piano offers a far more natural grand piano form then the earlier sculpted model, with a much higher level of detail, including a 3D cast iron plate in the harp assembly (which can be substituted by a texture of the entire visible harp: plate, strings and soundboard, if preferred)

The new piano is s collaborative piece, Ample tells me, and on rezzing it is certainly striking. Not only is it unsurprisingly less taxing, rendering-wise, than its sculpted predecessor, the details and style are a lot more refined. The keyboard is one of the best I’ve seen in terms of attention to detail, and there is a nice little touch with a reflection of the keys in the open lid.

Controls are straightforward: touch (left-click) the piano once to initiate it. This presents the  menu controlling the music selection (15 classical pieces, although a further 9 are included in a separate book which can be mounted on the music stand), the piano’s appearance (change the textures and / or shine and also switch between either a 3D cast iron plate for the harp, or one of 9 different soundboard / strings / plate textures), set general access permissions for the piano, etc.

They keyboard is beautifully detailed and includes and interesting "reflection" in the lacquer of the lid)
They keyboard is beautifully detailed and includes and interesting “reflection” in the lacquer of the lid)

Left-clicking a second time will seat you (and add a 1LI invisible “pose shell” around the piano to allow the pose system to work). When seated, the animation / pose menu is opened, with the PG version offering some 400+ individual and couples animations, while the Adult version offers a further 400 “XXX” rated animations (again, individual and couple). A permissions option can also be used to limit access to this menu.

The playing poses are split between male and female and offer several playing styles, and all poses can be adjusted, as one would expect. Music playback is as good as any other high-end piano available in SL, although there is on occasion a slight distortion during intense passages – but again, this can be found in other models as well. When seated,  the top boards automatically close to facilitate the animation system (which makes use of the top of the piano). To open it for playing again, type “open lid” (sans quotes) in local chat (you’ll have to STOP the system via the menu and then re-sit if you later wish to use the animations as part of the same session).

Some of the detailing, such as the top board props and music stand are a little heavy compared to the rest of the piano, probably due to the fact the entire instrument is a single mesh

Given this is a 1 LI item (2 with the pose shell, as noted above, and which is required for the piano to work in SL), the amount of detail and capabilities packed into this piano is remarkable. However, the fact that the piano is just a single mesh has led to one or two minor compromises in detailing which for me had the annoying habit of attracting my eye once noticed, leaving me feeling that perhaps the use of a second mesh (the 1 prim approach of PrimPossible notwithstanding) might have avoided them.

But that said, the PrimPossible mesh piano is a stylish, ultra-low LI design. The L$950 price tag for both No Copy models equates to that of most Copy versions of other upmarket SL grand pianos, but few others have the range of animations associated with this model. The Copy versions, meanwhile are priced at L$2,400 (PG) or L$2,800 (Adult).

The PrimPossible mesh piano at Caitinara Bar
The PrimPossible mesh piano at our Caitinara Bar

I’ll be honest and say that the PrimPossible mesh piano hasn’t persuaded me away from the Lisp at home, but it certainly now adds an extra grace at Caitinara Bar. Certainly, those who like their pianos to give something a little extra beyond music will be hard pressed to find a piano to match this one, while those operating on an LI budget who want a really nicely style grand piano simply won’t find better.

The PrimPossible mesh piano is available via the PrimPossible Marketplace furniture store and via the PrimPossible in-world store.


Playing with a hovercraft in Second Life

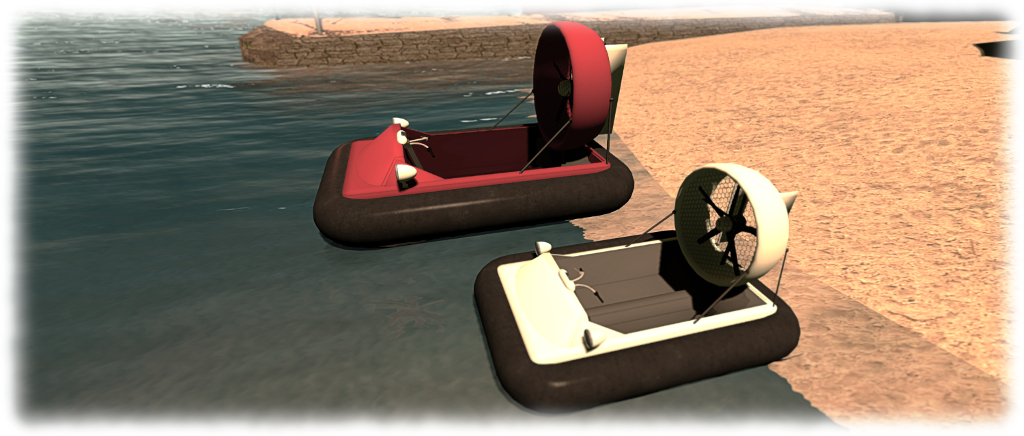
The Hovercraft 1.0 on land
The Hovercraft 1.0 by Kaliska (Yetius) on land

Every so often it happens: you’re hunting for something specific on the Marketplace or in-world, when something else grabs your attention. It’s not what you’re looking for and it may even be something you’re not sure you want – but it’s there and it gets your attention just enough for you to think, “why not?”

Such is the case with the all mesh Hovercraft 1.0 by Kaliska (Yetius), which I happened across on the MP whilst looking for mooring buoys. Despite being into my tenth year in Second Life, I’ve not really seen that many hovercraft around, so the idea of a little single-seater (and which is offered free to boot) proved to be a little too distracting.

... and over water ...
… and over water …

Kaliska describes the vehicle thus:

I recently discovered the dinkie avatar (a mesh tiny sized avatar), and just had to do something about the total non-existence of dinkie-friendly vehicles.

So this is primarily a diminutive hovercraft for dinkies.  It’s loosely modelled on pictures of single seat racers and personal/leisure/small utility craft, but based on nothing in particular.

By “dinkie”, I think Kaliska means “petites”; however, and as she notes, this is not a vehicle aimed at a single small market; there is a version included in the package suitable for tinies and one for “normal” sized human avatars (if you’re 7+ feet tall, some adjustment to the sitting pose may be required).

Everything bar the engine script is supplied Mod, offering plenty of opportunities for playing around with the vehicle and texturing / colouring it to suit personal tastes – maps are supplied to assist with both, and can be found in the instructions note card. For the purposes of testing, I simply recoloured parts of mine from white to red. I could well end up playing more extensively with it at some point 🙂 .

The full-size Hovercraft (red) and the "dinkie" / tiny version
The full-size Hovercraft (red) and the “dinkie” / tiny version

At just 12 LI for the human version and 8 LI for the “dinkie” / tiny version, this is a little craft which can easily fit within most land budgets. It is also, I have to say, A lot of fun once the controls are mastered – and these are not exactly taxing. Sitting in the vehicle and typing “start” in chat enables the engine, lifting the vehicle slightly as dust (is on land) our spray (on water) is blown out from under the skirt.

From here, movement is simple: the UP and DOWN arrows are your throttle (faster and slower respectively), LEFT and RIGHT turn you. If you prefer, WASD achieves the same). PAGE DOWN / C acts as quick stop, bringing you immediately to a standing hover. A couple of things to note is steering is only possible when in forward motion, and doesn’t work at all in reverse, which is accessed by coming to a standing hover and then pressing and holding the DOWN key.

In addition to the above, PAGE UP / E will toggle the headlamps on/off – note that these use projected lighting, so ALM needs to be enabled to see them decently. Finally, typing “HUD” in text shows / hides the vehicle’s hovertext info, and typing “stop” shuts down the engine.

The default pose for "normal" sized human avatars is pretty spot-on in terms of handlebar placement
The default pose for “normal” sized human avatars is pretty spot-on in terms of handlebar placement

Overall, the hovercraft handles very well; a quick few taps on the UP key and you’ll be zipping along; both water and terrain are handled well, and mesh terrain doesn’t prove a major challenge. I zapped from home across the waters and to Holly Kai Park in next no time and traversed from mesh beach to water and back to beach with ease at both ends of the ride.

I’d actually be happy paying for this little vehicle, and perhaps see it with group driving were it offered for sale, as it’s the kind of thing that’s fun to rez when friends visit, and then scooting around the sea together. Setting a nominal fee for it would allow it to be gifted, which is something I’d like to do with a few close friends as well, rather than nagging them to go grab it as a freebie.

But these are really minor point.As a freebie, there is absolutely no faulting it – and it really be worth paying for it were it to be offered at a reasonable price. As it is, if you’re looking for a little vehicle to mess around with on land and water, this could certainly be just the ticket. Now, if you’ll just excuse me, I’m off for a little more fun…

Hovercraft 1.0 by Kaliska (Yetius)

Links

Working on the island

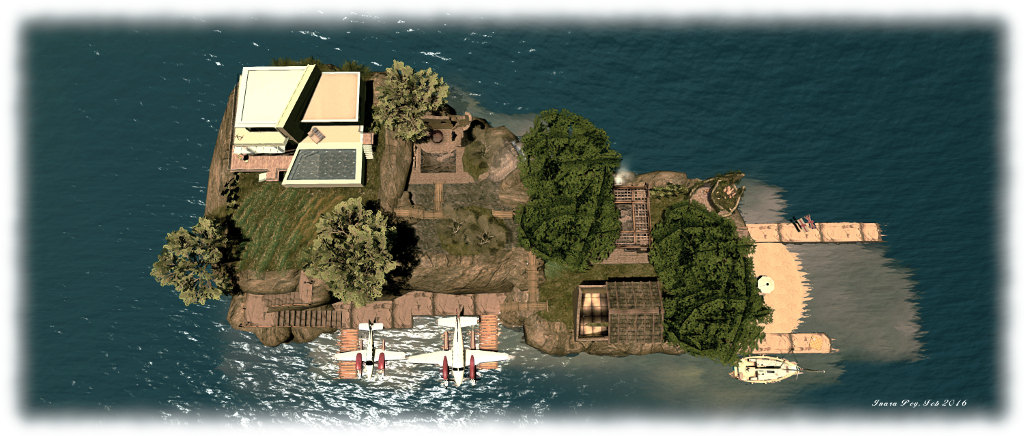
Overhead view of the revised island layout with the new beach location and moorings for our two 'planes. Also visible is the more watery mid-level of the island
Overhead view of the revised island layout with the new beach location and moorings for our two ‘planes. Also visible is the more watery mid-level of the island

I’m always fiddling around with the island home – as regulars to these pages know only too well! While the changes made in December left us happy with the overall look and feel to the place, I still found one or two things niggling me. Fortunately, Caitlyn is very understanding of my need to fiddle, twiddle and generally play around with mesh and prims, so when the niggles reached a point where I wanted to start doing the fiddling and twiddling, she handed me the prim glue and loads of encouragement 🙂 .

Three things in particular had been playing on my mind: the boat and plane slips, which still looked a bit excessive to my eyes. So over the past few weeks as time has allowed, I’ve been introducing changes, adding new (and novel) moorings for our two motorboats (no, I’m not saying how the moorings are novel; we have to have some secrets!) and re-working the west and southern sides of the island, as well as the “mid level” part of the garden.

In particular, the west side of the island has had the beach and the winding rock path leading down to it from the house removed. While the path looked good, the physics on it also made ascents and descents along it look a bit awkward in my eyes, avatars often seeming to walk on air. It also, when all is said and down, took up a lot of space.

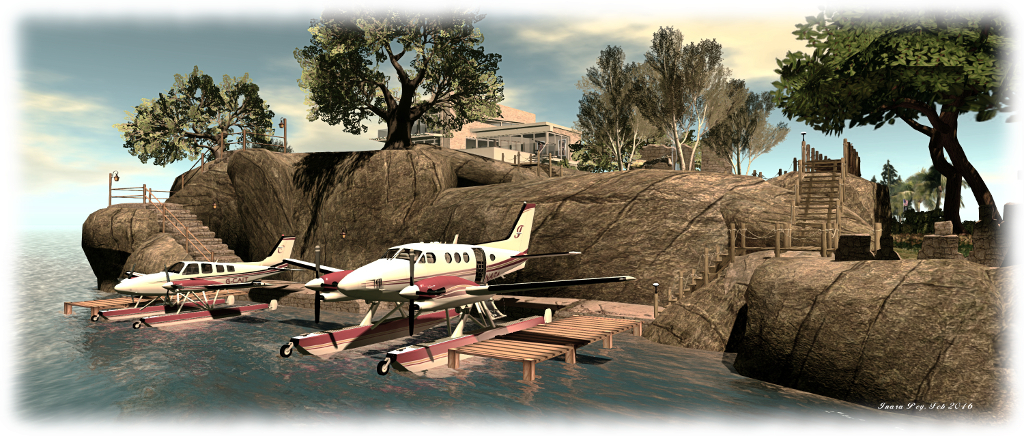
The 'planes at their new mooring below the house
The ‘planes at their new mooring below the house

The path has now been replaced by a set of stone steps leading down the cliff in a switch back, while the beach has been replaced by a stone jetty and moorings for our two DSA aeroplanes. The TUFF stone steps kit proved very handy for all this, providing the means to add the steps and made the jetties. A mesh system, it is nicely modifiable, parts easily resized and re-textured. The latter being handy for us, as it allowed the steps and jetties to be textured to match the stonework of the rest of the island’s ruins (those interested in the kit can also see it at Rya Nitely’s in-world store).

Moving the ‘planes has allowed the southern end of the island to be tided-up, with the mass of moorings there replaced by a couple of stone jetties (courtesy of the TUFF stone steps kit again). These provide both moorings for our Loonetta 31 and the boats or seaplanes belonging to visiting friends, and protects our relocated beach from the tide.

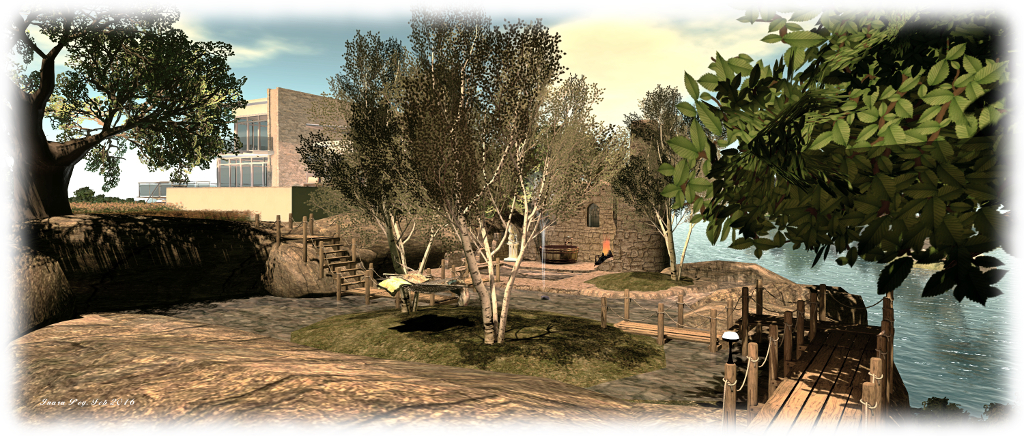
The revised mid-level part of the island, partially flooded, but retaining the "bathhouse" and now with a little pot for the garden hammock
The revised mid-level part of the island, partially flooded, but retaining the “bathhouse” and now with a little pot for the garden hammock

The other change we’ve made is to make the mid-level of the island a little more watery. After installing the outdoor bathing area, the falls and their source pond looked a little unnatural. Solution: “flood” the level with water from a smaller fall exiting from the upper cliffs, and provide a sense of it flowing down to the falls. Stone foundations have been added to the “bathhouse”, increasing the feel of it being part of the island’s old ruins, and board walks now  provide passage over the water channels.

Overall, I think the tweaks suit the island, as does Caitlyn. Certainly, having an uncluttered southern end to the place, where we can sit on sun loungers and watch the passing vessels and occasional race through the regions, gives the place a much nicer appearance. And that now really does seem to be job done – so if you’re very lucky, this might be the last time I witter on about the island 🙂 .

A studio in Second Life

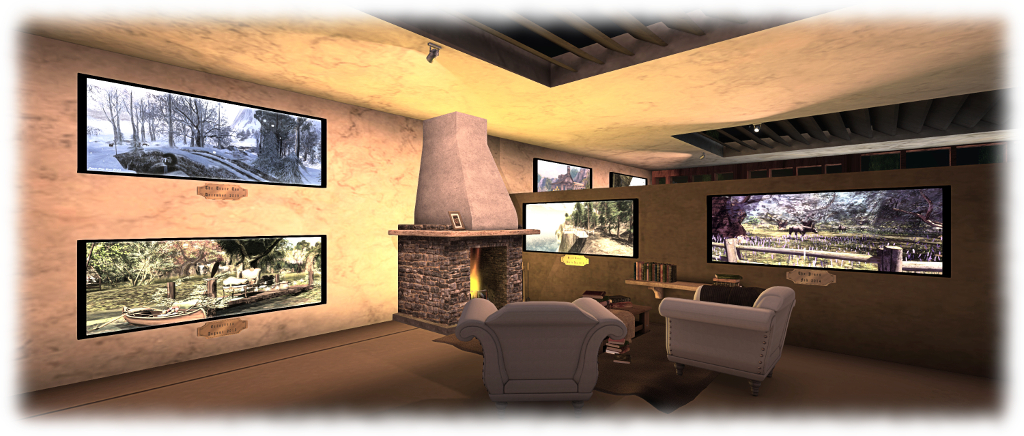
The Studio, Holly Kai Gardens

I’ve often said that I don’t classify myself a photographer or artist. While I do travel far and wide across Second Life visiting regions and art installations and taking photos, amassing several thousand images as a result, I do so more for the purposes of illustrating this blog than for any attempt at artistic endeavour on my part.

Similarly, while I do publish to Flickr, and occasionally share images in various groups there, I do so more because Flickr gives me unlimited storage space when compared to the limited space offered by WordPress, which I tend to use more for images and audio used with news, opinion and update pieces.

The Studio, Holly Kai Gardens

Nevertheless, all that said, in taking up curating art exhibitions at Holly Kai Park and Holly Kai Garden, I was given the opportunity to establish my own studio at Holly Kai Garden for displaying my work for those who might like to see it in-world.

Located between the koi carp pond and the public terrace at the garden, and facing the two art terraces, it provides me with room to display 26 images, and I plan to rotate those on display on a fairly regular basis.  The split level design offers what I hope will be a cosy little seating area on the upper level, with armchairs places before a warming fire. A coffee machine on the shelf dispenses hot beverages for those in need of some caffeine 🙂 .

The Studio, Holly Kai Garden

I’ve also added lighting to the studio to add a little atmosphere, so having advanced lighting enabled when visiting may add to any visit you might make, but you don’t need to necessarily have shadows enabled, so hopefully this won’t be much of a performance hit if your system does find shadows hard to handle.

The studio will be open alongside of art exhibitions on the Holly Kai Garden terraces, and while I can’t promise to always be there myself, I hope that those of you who do drop in to Holly Kai Park and / or the garden to enjoy the exhibitions staged in either, might also enjoy a visit to the studio as well.

The Studio, Holly Kai Gardens

And in terms of the park and garden, don’t forget Holly Kai Park features an outstanding group of artists in the first of the renewed Art at the Park series, which runs through until February 7th; while just opened at Holly Kai Garden is Paintings of the Dutch Masters, beautifully curated by Drw. There will be a celebratory party for the latter at the garden on Friday, January 29th   starting at 16:00 SLT, featuring the music of DJ Anthony Wesburn.

You can follow all the latest updates concerning Holly Kai Park and its facilities via the Holly Kai website.

SLurl Details

Nine years in Second Life

2015 saw me invited to build a full sim installation at the LEA in which to display my SL images. I opted to recreate my interpretation of Fallingwater, the famous Kaufmann residence, now under the care and ownership of the Western Pennsylvania Conservancy

On December 5th, 2015, I reached my ninth anniversary of continuous activity in Second Life. That’s 3,287 days.  On my eighth anniversary, I was able to note a lot of significant events having occurred between it and my 7th. This year things have been a little quieter of late, although the first half of the year saw a lot going on SL-wise, which kept me busy with the blog. We’ve also seen more news emerge about the Lab’s new virtual spaces / worlds / experiences platform, including its code-name. The latter has led to understandable doubt, uncertainty and concern for many, although some of the accompanying levels of vitriol and accusations have been a tad OTT.

My own rate of blogging has also slowed somewhat when I compare 2015 with 2014. There are a fair few reasons for this, both outside and inside of my virtual worlds time. Even so, I’ve tried to keep abreast of all that’s been going on, particularly within Second Life, and I’d again like to thank everyone who takes the time to come here and read the articles, reports and reviews.

I'm honoured to be a part of the Windlight Magazine team
I’m honoured to be a part of the Windlight Magazine team

The year has seen me become more deeply immersed in virtual world art. Most notably, I was invited to become an contributing writer for Windlight Magazine, and I’ve been asked to show my SL images in a number of art events, including developing a full sim installation at the LEA.

The latter was exceptionally daunting, given it was something well outside my comfort zone; I don’t for a minute consider myself an artist or creator in any capacity. But it was also fun – and more to the point, allowed me to bring the work of CioTToLiNa Xue, through her beautiful mesh sculptures and her art, more fully into the public eye. She has tremendous talent, and I genuinely hope more galleries will seek her out.

I’ve also recently taken up the post (and challenge!) of curating art at Holly Kai Park. Again, I’m not familiar with running art exhibition spaces, so there has been a rapid learning curve for me, coupled with putting together a supporting website, as well as the need to gently re-work elements of the park and build a new venue. All of this has been keeping me fairly busy of late!

Of course, I’ve kept up with flying and boating in SL. I’ve become particularly attached to my little AD25H Little Bee tender-style speedboat, developed by Ape Piaggio, and which I personally feel is the best SL boat in its class. I’ve also become a firm fan of DSA aircraft, with three either in my inventory or moored at home. The ability to swap these ‘planes between conventional wheels and floats makes them ideal for island living.  VetronUK also does some superb materials paint kits and script options which really bring DSA aircraft to life.

I'm still having a lot of fun flying, sailing, and boating around Second Life -with the DSA G58 Baron being my latest aeroplane acquisition!
I’m still having a lot of fun flying, sailing, and boating around Second Life, with the DSA G58 Baron being my latest aeroplane acquisition!

But it is the area of friendships and relationships where 2015 has been most rewarding. I’ve met a host of people through the year, and while it is somewhat unfair to single out just one or two, I can’t write about 2015 without mentioning John, who not only offered me the opportunity to write for Windlight Magazine, but who has also been hugely encouraging and supportive through the year, and is himself a powerhouse of talent and generosity. He and his partner Emma have brought together some remarkable talent through both Windlight Magazine and Team Diabetes of SL, and I’m honoured to be a small part of things, and greatly appreciative of their friendship.

Most of all, however, I cannot let this article pass without mention of Caitlyn. The past few months have been a whirlwind of  renewed pleasure in my time in-world, and an opportunity to share time in so many special ways, be it exploring together, re-working the island and house together, loitering in galleries together or simply spending the time sitting and chatting together. I’m not sure quite when I’ve smiled so much; thank you, Caitlyn.

Looking forward to 2016!

Of rocks and chapels


The new outdoor bath on the new level of the island, with the steps up to the house

It’s the start of a new month, so must be time to fiddle with house and home 🙂 .

Back in August, I wrote about re-arranging things at home to make use of some of the bits and bobs purchased for the Impressions installation at LEA 6. particular making use of the Fanatik Rocky Island. At that time I noted a minor niggle with the texturing of the rock, which suffers from blurred / stretched textures which become particularly noticeable if the rock is resized even a little. Due to its design, it doesn’t take too well to being re-textured, either.

While of itself a small niggle, this is the kind of thing which can easily grow into a nag once noticed. And that’s what happened when we moved things around to made space for the Skye Beach House. Something Had To Be Done.

The house, ramp and expanded beach
The house, ramp and expanded beach, and new chapel ruins

So, it was off back to Fanatik to pick up their Cliff Cover Mountain set of rocks, which were used to replace the Rocky Island.  This gave us some immediate benefits: more room for the house itself, an additional level in the design of the island, and a bigger beach area, which can still be reach via a rocky ramp from the house. Most importantly of all though, were the reclaimed LI gained; at 118LI, the Rocky Island can eat into a budget, and replacing it gave us over half the LI back.

The additional capacity has allowed us to add to the “old ruins” feel to the place. On the new middle part of the island, for example, we now have section of wall and a tower overlooking the waterfalls and offering a sheltered place for an outdoor rustic bath courtesy of Cory Edo. I’ve always loved the idea of outdoor baths and showers since my time in Sri Lanka, so sort-of replicating something of that in-world has been a delight.

The chapel - offering something a little different to broken walls for the ruins
The chapel – offering something a little different to broken walls for the ruins

to further add to the ruins, a medieval chapel has now been added to  the lower section of the island, replacing one of the larger wall sections and a tower. At 26 LI, this partial mesh build is not heavy, but it is big; fortunately, it’s also Mod, so resizing and re-texturing it was simple enough; with a quick shearing away of unnecessary parts, the LI came down to 12 without losing any character, and it fitted it nicely. By rights, the windows should perhaps be turned inwards rather than looking out over the sea, but we’re happy with the look and the chapel makes for a nice snuggle, particularly as it is lit by one of CioTToLiNa Xue’s beautiful sculptures.

So, that’s it for another month – or possibly longer! We’re happy with the way things look now,  so it’s unlikely too much will be changing in the future 🙂 .