Tutorial: raising Abuse Reports in Second Life

Griefing, be it through word, action, noise, or object (as seen here), etc., is one of the items covered by the Abuse Report
The following notes are drawn from a presentation Governance Team manager Tommy Linden and team member Corky Linden are making to various communities within Second Life as part of an initiative to better disseminate information about the Governance Team, and on filing Abuse Reports (ARs). The hope is that the information provided will give users a better understanding of what the Governance Team hope to see provided in an Abuse Report in order to fully investigate it.

Note that  official information on Abuse Reports can also be found in the Knowledge Base.

Table of Contents


Governance Team: Quick Facts

  • The team is relatively small – under a dozen in size – but handles an average of 400-500 Abuse Reports per day
  • All Abuse Reports get reviewed as the first stage of an investigation, with priority given to those seen as critical (such as an in-progress griefing attack).
  • All ARs that can be investigated are investigated. However:
    • How far the investigation goes largely depends on whether the AR is filed against something Governance is empowered to investigate, and how much meaningful information is supplied in it.
    • The Governance Team intentionally does not report back on the outcome of their investigations for a number of reasons. Just because the outcome might not be visible to the reporter / match their expectations when filing an AR, does not mean the report was ignored.
  • One of the biggest issues with incoming Abuse Reports is that they often lack the basic information required in order for an investigation to be properly carried out.

What is an Abuse Report?

The Abuse Report (AR) is for reporting any individual or group of avatars or any in-world object engaged in an activity deemed inappropriate under the Second Life Terms of Service  / Community Standards and/or is in contraction to the maturity rating for a region.

ARs apply to: griefing, spamming, age play, assault / pushing / disturbing the peace, disclosure of personal information, fraud, harassment, indecency and Skill Gaming violations. In addition, there are Welcome Area Guidelines governing places like Infohubs, which contain restrictions on what should not be done in those areas with any violations also subject to ARs. Report.

There are also certain things that do not apply to ARs. For example, being banned from a particular group or region or parcel, or a dispute over rental payment between residents are not actionable via AR.

ARs can be filed by anyone suffering abuse, or by those directly witnessing an abusive act. However, this does not mean teleporting multiple people into a location and having them file reports as well. Rather than “speeding up” any investigation, it can actually slow down the entire process by forcing Governance to spend time reviewing dozens of additional (and possibly contradictory) reports.

What Is The Governance Team Looking for in a Report?

The Governance Team is looking for clear, concise and consistent information in an Abuse Report, as summaries in the image below and expanded upon in the following sections.

A “good” Abuse Report, presenting all the information and making good use of a screen shot – click to open the slide in a separate tab for easier reading. With thanks to Corky Linden

Accessing the Abuse Report Floater

The AR floater can be accessed via:

  • Menu bar > Help > Report Abuse.
  • By right-clicking on an avatar or object and locating / selecting Report Abuse from the context menu / pie menu.
    • Make sure you have the right avatar / object selected when doing this.
    • Launching the AR floater using either of these two options will auto-complete parts of the form.

The following guidelines are intended to help with filing an AR.

Screen Shots

Where possible, try to include a screen shot of the situation you are reporting. It can be the most effective means of illustrating what is going on, and gives the Governance Team clear visual proof / evidence of what has happened. It can also make up for information missed from the rest of the report.

The slide below outlines some of the key points to remember when using the AR floater to capture a snapshot – click to enlarge it in a separate browser tab for ease of reading.

Abuse Report snapshots: click on the slide to open it in a separate browser tab for easier reading

Note that most viewers do not have a refresh button for the snapshot preview, so try to make sure all the information you wish to capture is on your screen. If you are unable to get a screen shot for whatever reason, it is important you provide clear, accurate information in the Summary and Details section of the report (see below).

Object Picker

The Object Picker allows you to identify an abusive object (e.g. a particle / noise spammer, a weapon, etc.), and include its name and owner in the body of your Abuse Report. Instructions on how to use it are included in the AR floater, and this section will be auto-completed if you launch an AR by right-clicking on an abusive object. Remember you can further verify the item by including it in a snapshot with the Edit floater open to show the object name & owner.

Report Categories

The Abuse Report floater includes a pre-defined, drop-down list of categories which should be used when filing a report. Notes on the *valid* categories can be found here. Note that filing under the wrong category doesn’t prevent a report from being investigated, but it can slow things down, particularly if there is insufficient information provided elsewhere in the report.

Abuser Name

This allows you to grab the name of someone causing abuse from those around you. If you launch an Abuse Report by right-clicking on an object or avatar, this section will auto-complete (make sure you have selected the right avatar), otherwise click the Choose button and follow the on-screen instructions.

Continue reading “Tutorial: raising Abuse Reports in Second Life”
VR Photosphere: a further Second Life 360 photo HUD

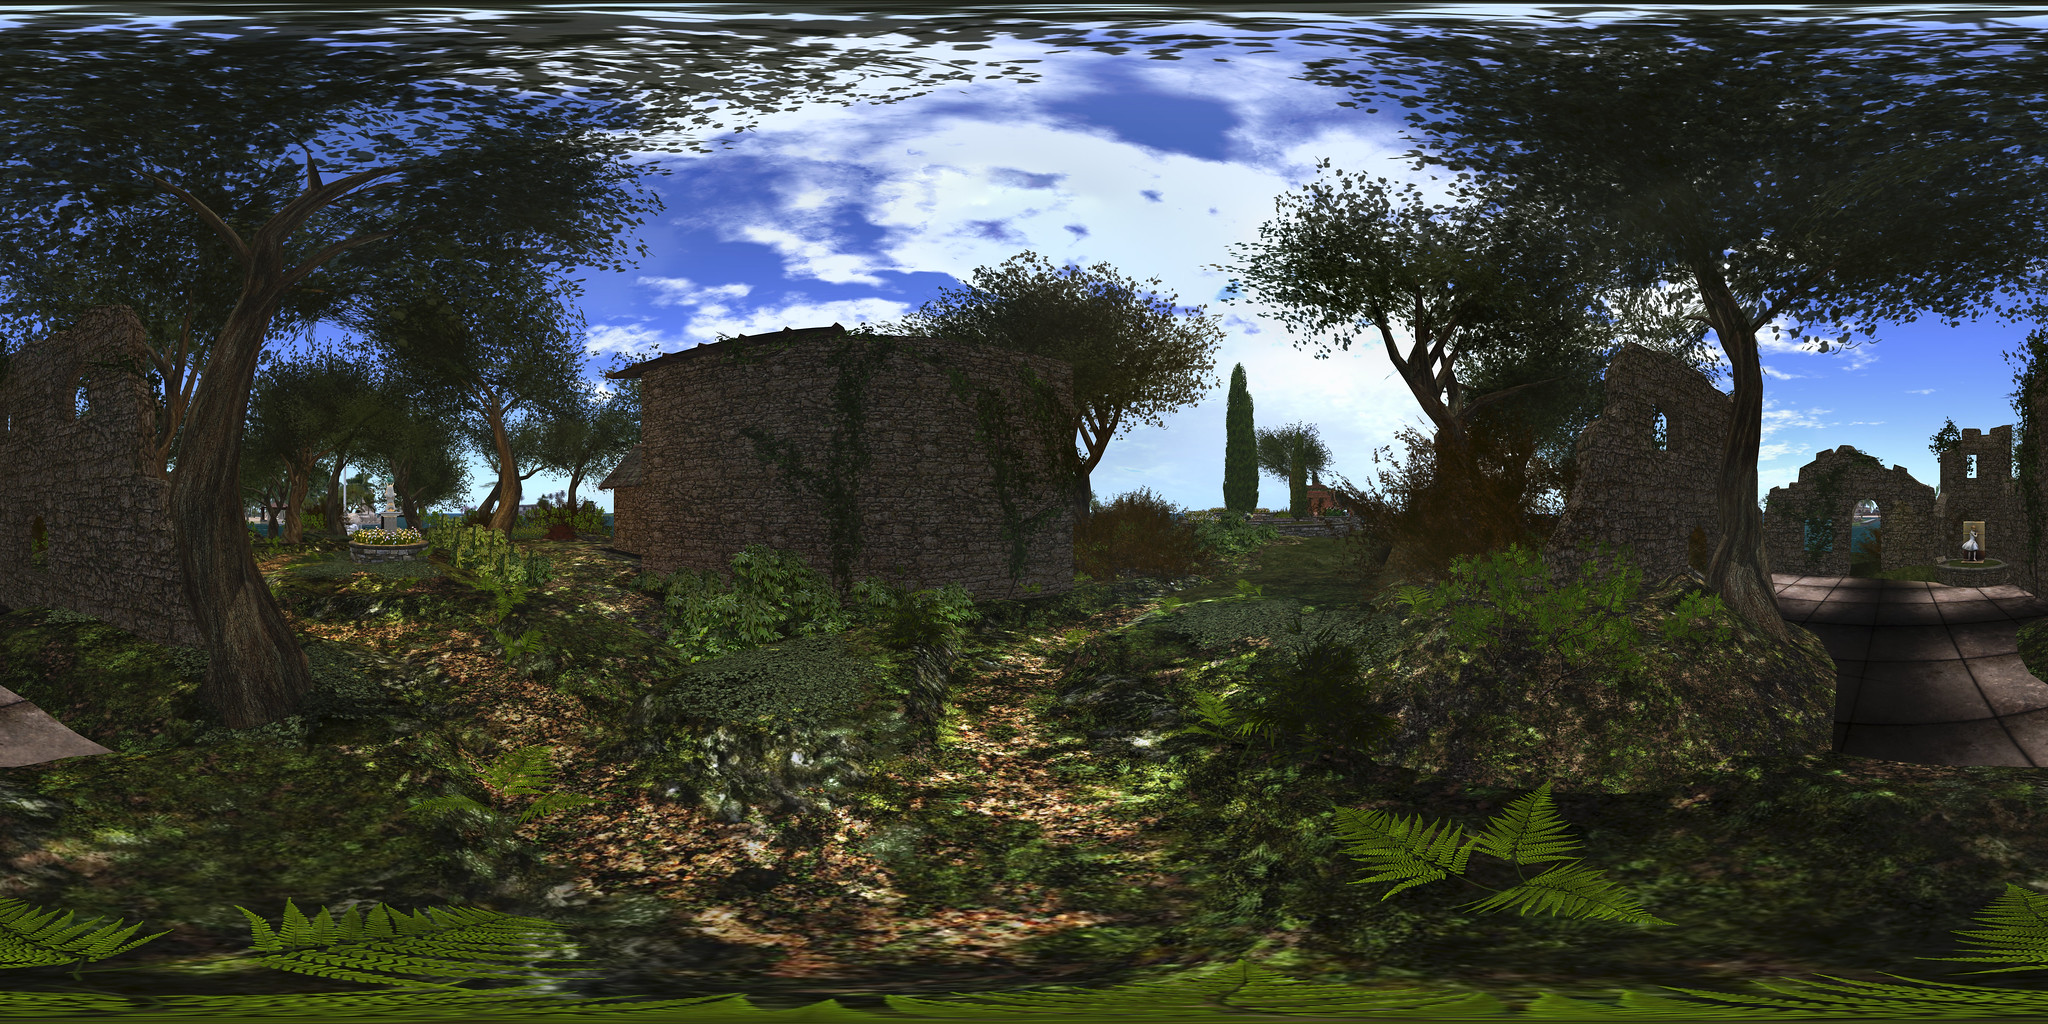
VR Creations 360 Photosphere demonstration; Inara Pey, October 2016,VR Creations 360 Photosphere demonstration  – click image to view in Flickr with 360o scrolling

Following my reviews of the Illiastra Panoramic HUD and the Camera Panoramic system (see links below), I was handed a further HUD system to look at.

The VR Creations 360o Photosphere HUD is a system that does exactly what it says on the packet: produces a set of images (26 in all) suitable for stitching together into a 360o spherical images suitable for uploading to the likes of Facebook, VRchive and Flickr. It falls between the Camera Panoramic and the Illiastra HUD in price, and is quite possibly the easiest of the three to use to take a set of shots.

The system comes in a basic package of the HUD, sufficient notes to get you going, and a link to a video overview.

The HUD

The VR Photosphere HUD comprises ten buttons, as shown below, with the key buttons highlighted.

The VR Creations 360 Photosphere HUD

The HUD cannot be minimised, but can be positioned off to one side or the other of the screen to keep it out-of-the-way.

Of particular note with the HUD is the top set of six buttons, which are related to positioning your camera to capture images. You can effectively position your camera anywhere you like using ALT-zoom or flycamming, and use the Add button to save the camera’s location as the centre of your sphere of photographs.This also allows you to take “seflies” through careful positioning of the camera close to you.

Saved camera positions can then be paged through using the left and right arrow buttons either side of the Release Camera button – so if you return to a location and wish to re-capture a set of images, you can do so easily, while the Delete button will delete the current camera position from the HUD.

Taking Your Shots

This is very much a point-and-shoot HUD system, requiring minimal set-up.  However, prior to taking your shots, there are some things you need to do:

  • Set your preferred windlight and daytime settings.
  • Make sure you freeze the clouds – you’ll be taking up to 26 images which will need to be stitched together, and moving clouds could make that a bit of a bugger to do. Use Menu > World > Environment Editor >Sky Presets > Edit Presets or PhotoTools > Clouds and check the scroll lock check boxes
  • Make sure the viewer’s camera is set to the default view  angle, FOV and focal length.

Once you’ve done this:

  • Position your camera at the centre point for your image capture – remember, you will be capturing 26 images in a sphere around this point, so you should have the camera view set to about a couple of metres off the ground.
  • Click Add on the HUD to set the camera position.
  • Press Esc on your keyboard to set your camera under HUD control.
  • Click on Begin Photosphere. Your camera will move to the nadir (lowest point) of the image set (generally pointing at the ground) ready for you to start capturing frames.
  • Press CTRL-~ (tilde), the snapshot shortcut, on your keyboard. You will be prompted for a location where you wish to save your first image. Select the folder and give a file name for the image.
  • Click the right arrow next to Done on the HUD to advance the camera to the next frame. Press CTRL-~ to save this shot automatically to the same location as the first.
  • Continue on round the photo a frame at a time using the right arrow button at the bottom of the HUD, saving each shot in turn via CTRL-~.
  • When you have captured all 26 frames, the camera will once more be pointing to the nadir point (generally the ground). Click Done to return the camera to the start position.
  • If you are satisfied with your frame captures, click Release Camera on the HUD to free the camera back to default control.

Producing your Image

Once you have taken your shots in-world, you need to “stitch” them together to produce your final image. There are several software tools you can use for this. My preferred choice is the Hugin Panorama Stitcher available through Sourceforge.net, as I’ve found it to be fast and efficient.

With Hugin installed and launched, proceed as follows:

  • In the Assistant tab, click on Load Images… Navigate to where your images are locally saved and select all 26 in the set, then click Open.
Loading and aligning your images in Hugin
  • The Camera and Lens Data dialogue box is displayed. Enter 90 in the HFOV field and click OK. You images will load in the editing panel.
  • Once your images are loaded, use the Align button to arrange them. This may take a few minutes, just keep an eye on the processing window that opens.
  • When Align has completed, click on the Move/Drag tab and click Straighten. If your shots are displayed upside down, enter 180 in the Roll text box and click Apply to flick them the right way up.
Straighten and correct inverted image, if required
Straighten and correct an inverted image (if required)
  • Click on the Crop tab in Hugin and adjust the values to ensure your entire images is selected – set Left and Top to 0; Right and Bottom to 9999 – note the latter two will snap to the maximum size of your image.
  • Click on the Assistant tab once more and click Create Panorama. A dialogue box will open:
    • Set the image format to JPG and set the quality to 100%
    • Click OK to run the output process.
  • You’ll be asked to give a file name for the Hugin .PTO batch process file and the rendered image file. Enter a name for both, confirming each in turn.
  • Image processing will start, and could take several minutes.

Once completed, you’ll have an image ready to upload to Facebook, VRchive, Flickr, etc.

Do be aware that Hugin can be sensitive in handling images, particularly those with poor contrast / brightness, or which feature a lot of water, and this can lead to problems during the alignment process or in production of the finished image.

Continue reading “VR Photosphere: a further Second Life 360 photo HUD”

The Illiastra Panoramic Camera: 360-degree images of Second Life

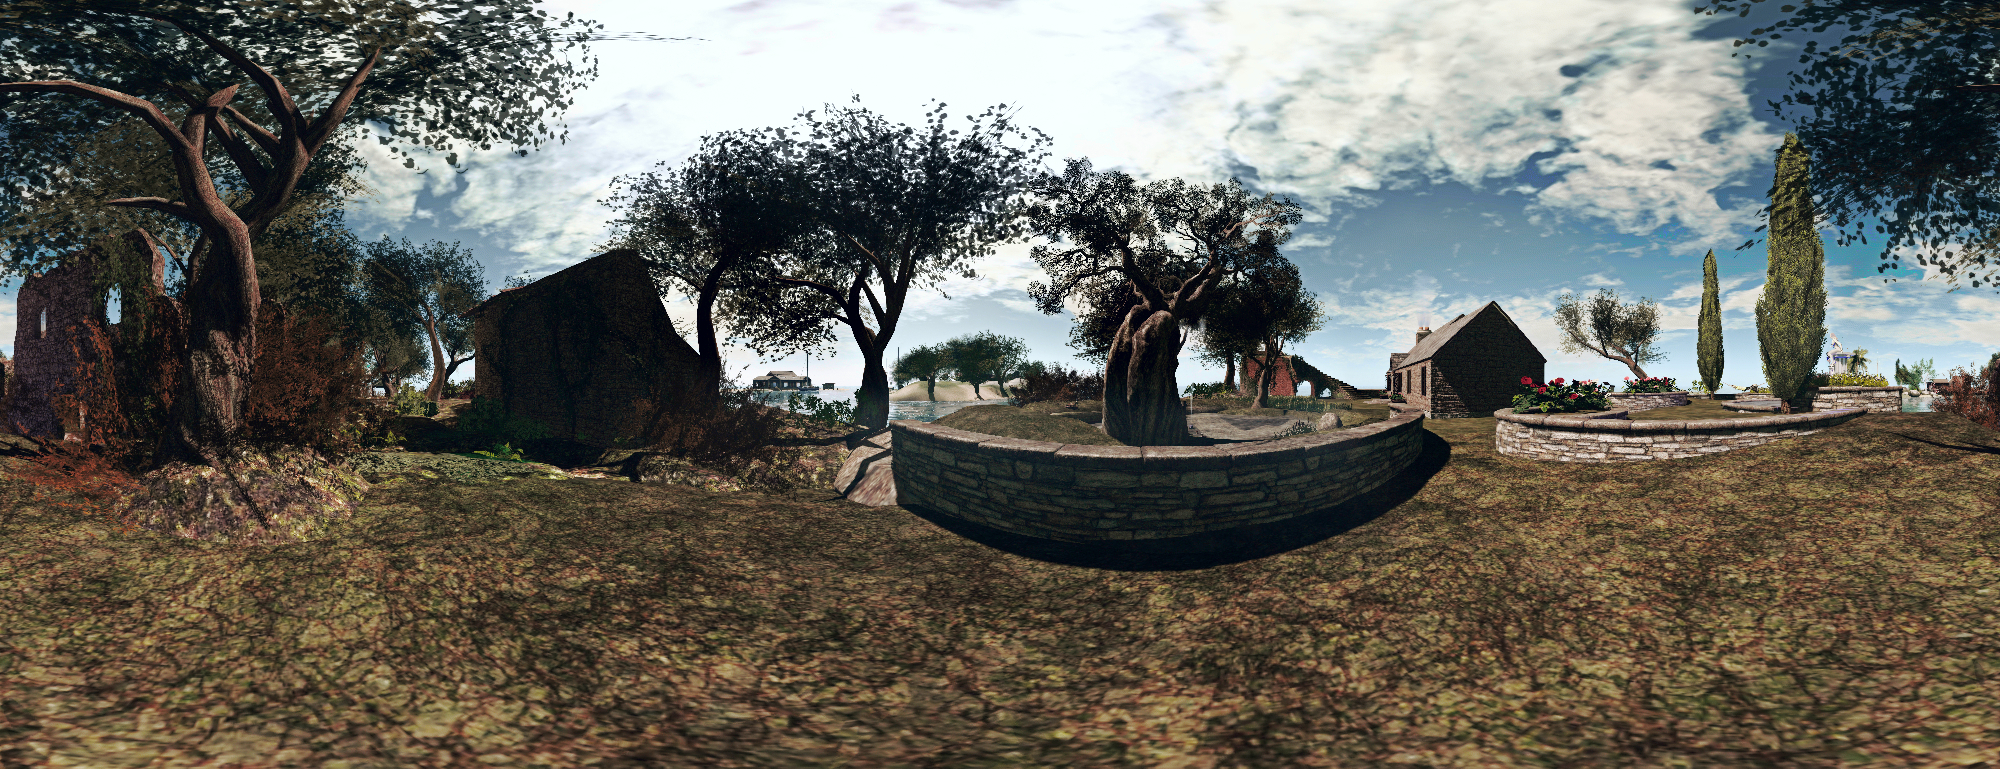
Illiastra Camera Test; Inara Pey, October 2016, on Flickr A static panoramic view of our home island produced using the Illiastra Panoramic Camera and the Hugin Software.

I received a generous gift from Illiastra Ascendent (NVZN, aka James Reichert in the physical world) over the weekend, who sent me the Illiastra Panoramic Camera (MP link) to try-out in Second Life.

This is a HUD-based system which can be used to produce set of images of an in-world scene which can be stitched together using suitable software to create a static 360-degree view. These can in turn be uploaded to Facebook or websites such as VRchive and YouTube, as scrollable, 360-degree views of a location.

The system comprises two camera HUDs, “basic” and Pro, together with a photosphere for viewing captured images in-world. The difference between the two cameras being that the “basic” model uses 8 images to create a 360-degree panorama, while the Pro version takes a total of 26 (including directly above and below you) to produce either a panoramic view using 24 images, or a spherical view using all 26 images.

Producing your static panoramic image is a 2-step process:

  • Capturing your in-world shots using the camera
  • Stitching them into a panoramic mosaic using a suitable software application.

Once this is done, you can proceed to prepare them for 360-degree viewing on Facebook, VRchive, etc. Illiastra provides comprehensive set of videos on producing your panoramic shots, stitching them together and uploading them to Facebook, which I highly recommend.

For the rest of this article, I’ll take you through producing a panoramic shot and then uploading it to VRchive and converting it to a 360-degree video for You Tube.

Taking the Shots

There are some basic steps to follow when preparing to take shots using the system:

  • Position yourself at the centre of the location you want to capture in a 360-degree image. Be careful of where you select – too close to building or trees, etc., could have them dominating a part of the view.
  • Set your preferred windlight and daytime settings.
  • Make sure you freeze the clouds – you’ll be taking up to 26 images which will need to be stitched together, and moving clouds could make that a bit of a bugger to do. Use Menu > World > Environment Editor >Sky Presets > Edit Presets or PhotoTools > Clouds and check the scroll lock check boxes.
  • Make sure the viewer’s camera is set to the default view  angle, FOV and focal length
  • Hide yourself from view  – used the supplied alpha mask after removing all attachments or use something like a Vanish gesture. Otherwise, the top of your head will be in every shot.
  • Tap ESC on your keyboard to free your camera (and free it from any other influences acting upon it).

Once you’re set, click the camera HUD your camera will rotate and position itself for the first shot. Use the Snapshot shortcut CTRL-‘ (tilde) to save the image – you’ll be prompted for a file name and location on your computer for the very first short after the HUD is attached.

The Pro version of the camera produces 24 shots using the left / right keys (+ CTRL-' for image capture), the chevrons denoting the progress through upper / lower sets of 8 images apiece. The up and down buttons position the camera for taking sky / ground shots respectively, which can be used to create spherical views
The Pro version of the camera produces 24 shots using the left / right keys (+ CTRL-‘ for image capture), the chevrons denoting the progress through upper / lower sets of 8 images apiece. The up and down buttons position the camera for taking sky / ground shots respectively, which can be used to create spherical views

When you’ve saved the shot – which is effectively the first frame of your panoramic image – click the right arrow on the HUD to advance the camera to the next point (indicated in green on the HUD), and take another snapshot (CTRL-‘). You won’t be prompted for a file name for this and the remaining frames – simply progress on around the HUD, capturing a snapshot at each of the highlighted views in turn.

If you are using the “Basic” camera, you’ll be taking a total of 8 shots – once around the HUD. If you are using the Pro camera, you will be taking 24 shots around you – that’s 3 times around the HUD clicking the right button, giving you 8 horizontal shots, 8 angled upwards, and 8 angled downwards – just follow the prompts on the HUD. When you’ve taken all 24, click the UP arrow on the HUD to capture an overhead view, and the DOWN arrow to capture a shot of the ground under your feet. Again – remember to press CTRL-‘ to save each image.

Note that after the very first instance of asking you to select a file location / name for your shot for image ever captured using it, the HUD will automatically save any subsequent set of shots you capture to the last location on your hard drive you used to save images captured using the snapshot floater

Producing your Panoramic Image via Hugin

Once you have taken your shots, you’ll have either 8 (“basic” camera) or 26 (Pro camera) shots of your location. These now need to be stitched together. GIMP or PhotoShop can be used for this for those proficient in using them, otherwise Illiastra recommends using the Hugin Panorama Stitcher available through Sourceforge.net.  I opted to use this.

With Hugin installed and launched, proceed as follows:

  • In the Assistant tab, click on Load Images…
    • If you have been using the “Basic” camera, select all 8 of your shots
    • If you have been using the Pro camera, selected the first 24 shots  – do not include the final overhead sky shot or ground shot – these can be added later, if required.
  • A dialogue box will appear. Enter a value of 90 in the Horizontal Field of View (HFOV).
  • Click OK to load your images into Hugin – things will initially look a mess – don’t worry!
  • Click on the Align button to initially align your shots – this may take a while to process, depending on your system, the image resolution, etc., and then may end-up upside down. Again, don’t worry!
Loading and aligning your images in Hugin
  • When Align has completed, click on the Move/Drag tab and click Straighten. If your shots are upside down, enter 180 in the Roll text box and click Apply. Your images will further align and flip the right way up.
Straighten and correct inverted image, if required

Continue reading “The Illiastra Panoramic Camera: 360-degree images of Second Life”

Lab presents “Tips and Tricks from the Community”

secondlifeA curious blog post appeared on the official blogs on Wednesday, March 9th, 2016.

Entitled [Tips and Tricks from the Community] Video: Lighting Tutorial from Brookston Holiday, it appears in the Tips and Tricks section of the blogs. As the name suggests, it features a video tutorial by Brookston Holiday (aka ProMaterials) in which he provides an introduction to using the viewer’s in-build tools and options for producing lighting effects, including  projectors (which I’ve covered myself). If you’re unfamiliar with using the tools, it’s a handy introduction.

I call this a “curious” post not because of the content – as the author of the post notes, SL users are generally the best placed when it comes to demonstrating capabilities in the viewer and techniques for achieving a desired result. Rather, I find the post curious because it is the first time anything has been posted to Tips and Tricks in almost four years – the last item having appeared back in June 2012; and even that came with just over a year’s gap between it and the preceding post.

So are we seeing a revival of the Tips and Tricks section of the blog in the form of a  new regular / semi-regular series, or just a one-off post? Right now, your guess is as good as mine. That being the case, I’ll leave you with  Brookston’s tutorial.


Cory Edo’s water maps add depth to SL water

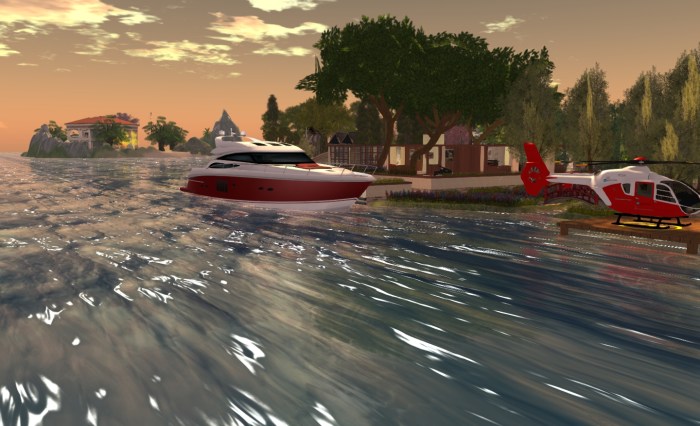
Wave effect using the Trompe Loeil "Cresting" normal water map
Wave effect using the Trompe Loeil “Cresting” normal water map

I’m coming to this via a pointer from Honour, which directed me to Strawberry’s blog entry on the subject.

Cory Edo, of Trompe Loeil fame, has released a pack of 10 free water normal maps for use in Second Life. These present a range of different wave textures which make creating your own custom water windlights for use on Linden Water a breeze. The finished results can, as with other windlight settings, be used purely within your own viewer or, for region / estate owners, can be used a default water setting  for their region / estate.

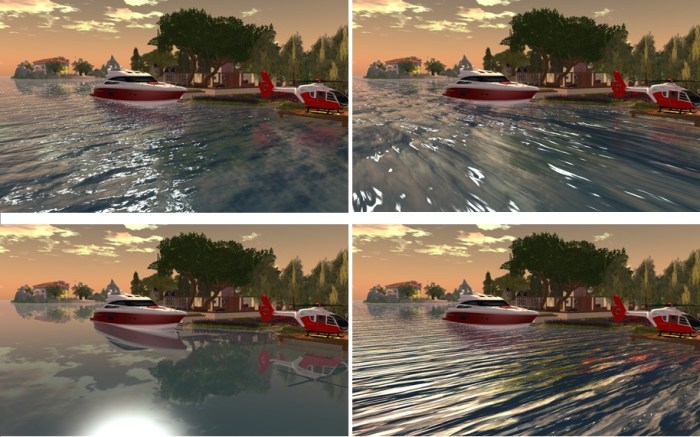
Four presets compared under the same sky settings, clockwork from top left: Linden water default; Trompe Loeil "cresting"; Trompe Loeil "Long Ripple"; Trompe Loeil "Glass" (click for full size image)
Four presets compared under the same sky and water settings, clockwork from top left: Linden water default; Trompe Loeil “cresting”; Trompe Loeil “Long Ripple”; Trompe Loeil “Glass” (click for full size image)

Strawberry has provided a  nice video tutorial on using the maps to create new water presets using the SL viewer, which can also be used alongside most v3 TPVs.  Cory also provides some notes on using the maps with Firestorm, but I thought I’d provide an additional overview on using the maps with that viewer and Phototools here as well.

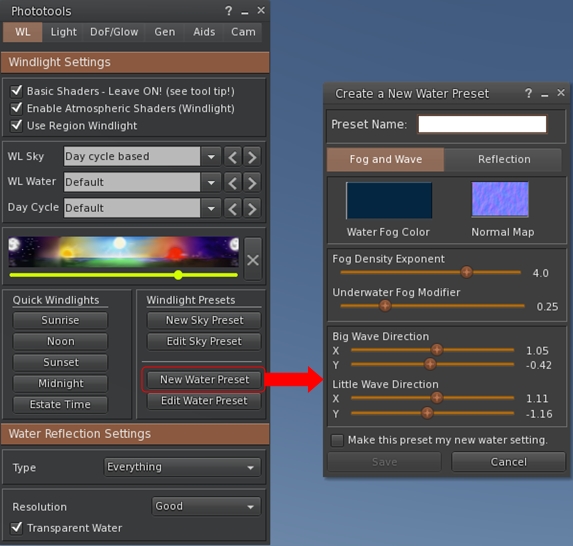
If you use the Phototools button in Firestorm, click it to open the Phototools floater, then click on the New Water Preset button in the WL tab. This will open the Create a Water Preset floater.

Accessing the
Accessing the Create a New Water Preset floater through the Phototools floater

If you’re not using the Phototools button, go to World > Environment Editor > Water Presets > New Preset …

With the Create a New Water Preset floater open, simply drag and drop one of the Trompe Loeil water maps into the Normal Map box, then enter a name for the preset in the text box at the top of the floater.

Creatting a new water preset using the Trompe Loeil maps is a simple matter of drag-and-drop and applying settings and a name
Creating a new water preset using the Trompe Loeil maps is a simple matter of drag-and-drop and applying settings and a name

If you want, you can then adjust the Fog and Wave sliders and the Reflection tab sliders to produce the effect you desire.

When you’re satisfied with the result, click the Save button to save the preset to your hard drive. This will also close the Create a New Water Preset floater, so repeat all the steps above to create further presets using any of the Trompe Loeil normal maps.

You'll need to restart Firestorm after creating your new water presets in order to see them listed in the WL Water drop-down
You’ll need to restart Firestorm after creating your new water presets in order to see them listed in the WL Water drop-down

The new presets will be immediately available via the Edit a Water Preset floater (Pototools > Edit Water Preset or World > Environment Editor > Water Presets > Edit Preset …).

However, to show them in the WL Water drop-down list in the Phototools WL tab (shown on the right), you will need to re-start Firestorm.

Also, remember that Firestorm also backs-up custom windlights for you (make sure you have the options to do so checked in Preferences > Backup), so make sure you take a fresh back-up of your settings after adding any new windlights. That way you avoid having to recreate them once more after a clean install.

Do please note that these normal maps are intended to work with Second Life windlight; they are not “traditional” water textures and they will not work to create prim-bases water effects for pools, hot tubs and so on.

A great addition to the tool box of any sim designer and / or SL photographer – many thanks to Cory for creating them and making them available.

Related Links

New viewer release process implemented

Update, September 15th, 2024: the viewer release process defined below has been replaced:

  • Linden Lab now maintains a single Develop branch for the viewer, into which updates all pass for internal viewer builds, and from which Release Candidate viewers are peeled and made available.
  • This is tied to a “featurettes” approach to new features and capabilities, whereby these may be added to the viewer and deployed within Release Candidates, but place behind debug settings / remain “turned off” until such time as all dependencies on their use (e.g. back-end support) are in place / LL are confident they are ready to be made fully available. 

Update July 23rd, 2013: As release candidate viewers are now available for download on the Alternate Viewers wiki page, I’ve added some notes on manually installing and running multiple release candidates to this article.

secondlifeThe new viewer release process announced by the Lab in May 2013 has officially been implemented.

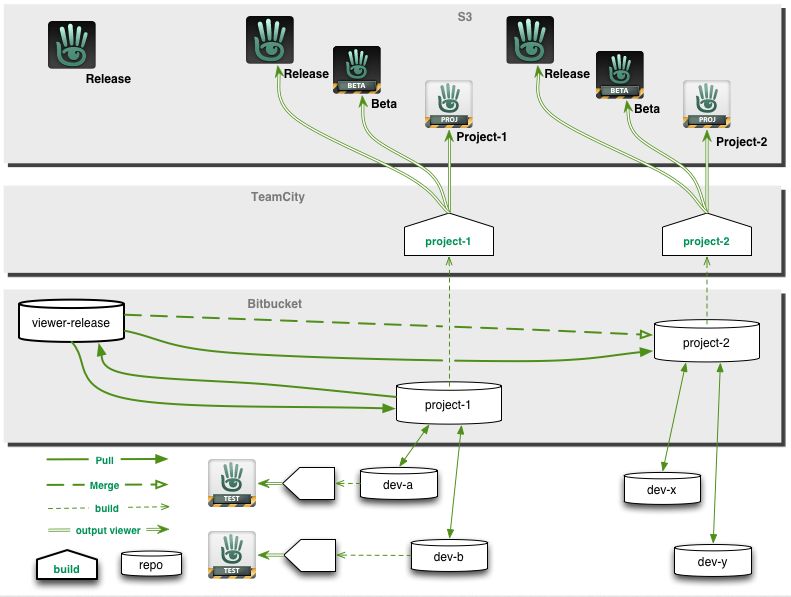
Officially called the Viewer Integration and Release Process, It is designed to improve how the Lab can put new viewers before users and progress them through to a release status while avoiding bottlenecks such as those witnessed in late 2012, when an issue with the Viewer Beta channel effectively stopped any new viewer releases for around a two-month period.

With the new system, early versions of viewers will still be made available through “dedicated” project and beta viewers, all of which will be available for download via the Official Alternate Viewers Page. However, the major change to the process is the use of “release candidates”.

When a viewer is ready for final testing, a release candidate will be readied. Rather than residing in their own dedicated viewer channel, these release candidates will be updates in the regular release channel, residing in a named “cohort” within the channel.

The new Viewer Release and Integration Process means that viewers can be better developed tested and prepared for release in parallel

This means two things. Firstly, release candidates are available for download alongside one another and the default release viewer. Who might receive a given release candidate is a random selection based on a viewer setting (see below) and a pre-determined quota of downloads for the candidate (once the quota has been reached for a given candidate, the system will no longer select it for download).

Secondly, when a specific release candidate is deemed ready for release (based on bug reports filed, issues reported and fixed, stats gathered, etc.), there is no longer any need to rebuild it as a “release” viewer, as it is already in the release channel. It is simply moved from its named cohort to become the default release version on the SL viewer download page. Any remaining release candidates are then rebuilt using the new default release code, and continue with testing until one is deemed ready to become the next release.

From a user perspective, release candidates are largely indistinguishable from one another and the default release viewer (other than their version number and the features they contain), and the chances are that some users will be unaware that they have been selected by the system to run a release candidate; they will simply see it as receiving an automatic / mandatory viewer update, and install it.

“Willing to Update” and Release Candidate Downloads

As mentioned above, users who receive a release candidate viewer are selected at random, based on a defined quota of downloads for a given release candidate. However, whether or not a user might be selected to receive a release candidate viewer depends on whether or not they have left the “willing to update” option enabled in their current viewer.

Located in Preferences > Setup, “willing to update to release candidates” (to give the option its full name) is enabled by default. But just because it is, does not automatically mean someone will be selected to test a release candidate viewer. This is because the download quota defined for any given release candidate will always be relatively small when compared to the SL user base as whole.

However, if you don’t wish to run any release candidate viewers at all, you can disable this option, and only receive viewer updates when the default release viewer is updated.

Another point to remember with release candidates is that users won’t be moved between release candidates as a result of updates. So if you leave the “willing to update” option enabled and you happen to be selected for testing “release candidate A”, you won’t suddenly start receiving updates for “release candidate B”; you’ll stay with the updates for “release candidate A” until such time as it becomes the default release viewer. Only then might you be selected to receive another release candidate download at some point in the future.

Download Page and Alternate Viewers Page updates

As a result of the move to the new release process, the SL viewer download page has been updated, and there is no longer any link to download the “Beta Viewer”. Instead, there is a link which takes you to the Official Alternative Viewer wiki page, which instead lists all available beta and project viewers.

The Beta Viewer section of the viewer download page now takes you to the Official Alternate Viewer wiki page
The Beta Viewer section of the viewer download page now takes you to the Official Alternate Viewers Page

The Importance of Version Numbers

An important aspect of viewer bug reporting has been to give details of the viewer you’re running, including the version number. This information is requested in the “Environment” section of the bug report form. Given that the new viewer release process means there can be a number of release candidates in use at any given time, as well as various beta and project viewers, it is even more important that this information is given when raising a bug report.

Displaying details of the viewer you are using, including its version number

Viewer information can be found in the About Second Life floater (Help > About Second Life), if you’re not already familiar with it. Further, the information on this floater can be copied directly to your clipboard ready to be pasted in a bug report to save you having to manually enter it.

Notes on Manually Installing Release Candidates

Viewer release candidates are now listed on the Alternative Viewers wiki page, and can be downloaded and installed, if so desired. If you do opt to do so, please note that release candidates are contained in “cohorts” within the viewer release channel, and are designed to overwrite any release candidate viewer you have installed. Therefore, if you wish to manually install multiple release candidate viewers side-by-side and with the de facto release viewer, you much ensure, in accordance with your operating system, that:

  • Any shortcuts / start menu links (e.g. Windows) you have for the viewer are renamed before you install any release candidates
  • Each release candidate is installed into a unique folder
  • Any shortcuts / start menu links (e.g. Windows) which are created as a part of the installation process are given unique names before installing the next release candidate

Notes:

  • If you provide unique destinations for each release candidate installation thorugh the installer package (e.g. Windows), make sure the installer is listing the correct destination folder when manually downloading and installing a subsequent release / update
  • The Windows auto-updater will automatically install into the last folder defined in the viewer installer (so if you have manually installed “Release Candidate A” and then “Release Candidate B” into separate folders, then get an update for “Release Candidate A” via the auto-updater, it will install into the folder for “Release Candidate B”)
    • Disabling the auto-updater in Preferences may not stop this from happening.
    • Instead, go to  viewer install folder/app_settings, then edit settings.xml, and find the entry UpdaterServiceURL and change  https://update.secondlife.com to https://secondlife.com/no-thanks (or similar) and save. You may need Admin privileges to do this.

Changes to this Blog

I maintain a list of viewers recognised as being used with Second Life (predominantly, but not exclusively, based on the Third-party Viewer Directory), which is updated as a when I become aware of new viewer releases being made. The section of this page which deals with the SL viewer has been updated to reflect the new viewer release process, and now includes all SL viewers currently listed in the SL viewer download page and the Official Alternate Viewer wiki page (with the exception of the Amazon channel viewer, which is the version of the viewer offered through Amazon.com).

Related Links