A return to the Kondor Art Museum in Second Life

Kondor Art Museum, June 2024: Scylla Rhiadra

It was back to the Kondor Art Centre, operated and curated by Hermes Kondor, for my second visit to the Kondor Art Museum, which saw the opening of its second four-month exhibition of 2D and 3D art; one which features 2D artist-photographers who are, in my opinion, some of the most expressive in the of field presenting work in Second Life.

The exhibition opened on June 23rd, 2024, the exhibition answers a question I cogitated during my first visit in February (see: The Kondor Art Museum in Second Life): would the Museum feature just the one set of exhibitions, or offer a rotating series of exhibits? For this four-month run, the Museum features pieces by Mihailsk, Monique Beebe, Hermes Kondor, Selen Minotaur and Scylla Rhiadra, with a selection of Ilyra Chardin’s charming 3D figures awaiting discovery at the entrance and in the main foyer.

To the left of the museum (as you enter the foyer), Scylla presents La Danse Des Petits Rats. However, this is not a celebration of small rodents jiving (or performing other dances), as the name might suggest; rather it is a celebration of the work of French artist Edgar Degas (July 1834 – September 1717). Often referred to as an impressionist painter, despite the fact he often despised the impressionist movement with its focus on “bright” colours and use of artificial light, Degas is probably best known for a series of paintings he produced  from the late 1860 through the 1880s focused on the young dancers studying at the School of Dance at the Paris Opera who were referenced as the Little Rats.

Kondor Art Museum, June 2024: Scylla Rhiadra

No-one knows exactly where the name originated, although the likes of Balzac claim that the romantics saw the rat as a creature to be held dear – small and inquisitive, but able to mature into a “tiger” or “panther”, powerful and lithe – just as the young students at the School of Dance started out urchin-like, maturing into a lithe dancers, their moves fluid and graceful.

Whatever the origins of the term, Degas’ paintings of the Little Rats stand as a history of the students at the School of Dance – from painting the dancers during a performance, he moved to producing “behind the scenes” paintings showing the dancers backstage, in rehearsal or being taught. In doing so, he provided insight into the secrets of ballet training, the paintings becoming extremely popular. At the same time, the series also helps to mark the artist’s own evolving style as a painter. Within her exhibit, Scylla offers A celebration of Degas’ style – his use of colour and light (both of which do stand him aside from his impressionist peers) and, like his original studies of the Little Rats, pay homage to them and their growing mastery of the art of ballet.

Kondor Art Museum, June 2024: Mihailsk

Connecting to Scylla’s exhibition and running around the back of the museum is that of Mihailsk, who is one of the most expressive single-frame storytellers in Second Life. Emotive, often rich in metaphor as well as shooting straight from the hip, Mihailsk’s work spans both colour and monochrome, the stories wrapped within them.

On the upper floor, Monique presents something of a retrospective of her avatar-focused photography, which – as with Mihailsk – is generally centred on her own avatar and marvellously expressive and rich on both narrative and, frequently, a degree of subtext. Her exhibitions tend to be thematically driven and often highly sensual in nature, and the latter is clearly observable in several of the pieces in this collection – and should potentially be regarded as NSFW.

Kondor Art Museum, June 2024: Monique Beebe

At the risk of repeating myself, Selen is also a richly expressive artist, often working to a theme or idea, the pieces she produces richly layered both in terms of their use of colour and elements and in terms of their meaning / interpretation. As with Moni, the items presented in this collect form a retrospective of her work from 2020 through 2024.

Rounding out the exhibition, and located at the front of the museum and to the right of the entrance is Beach Time, a quite marvellous collection of monochrome photographs by Hermes, celebrating summer at the beach.

Kondor Art Museum, June 2024: Selen Minotaur

Engaging, beautifully presented and ideal for appreciating / purchasing, these 2D exhibitions make for a worthy visit, with Ilrya’s characters bringing the charm of their own visit to the museum. Those visiting can also wander the Kondor Art Garden outside of the museum, which is again hosting an exhibition of AI art by Milena Carbone.

Kondor Art Museum, June 2024: Hermes Kondor

SLurl Details

Journey to Endless: Antipodes in Second Life

Endless: Antipodes, June 2024 – click any image for full size

I received an invitation to visit a further iteration of Endless: the Full private region featuring designs by Sombre Nyx and Jackson Cruyff – my thanks to Jackson for said invitation.

The last time I visited, Sombre had used a physical world location in New Zealand as an inspiration for her design (see: An Endless: Birdlings Flat in Second Life). This time around, she sticks with the idea of an antipodean location, but where it might be relative to you in the world is a matter of choice; the setting sits equally well in most northern / southern latitudes as thus could also be west or east as well, depending on your place in the world.

Endless: Antipodes, June 2024
An island at the end of the world, where seething seas break against the rocks of the coast. Where craggy and low, rugged hills offer views to forever. Where rural life is quiet, but full, and nothing really matters but the moment.

– Endless: Antipodes About Land

As the About Land description indicates, this is a craggy, rugged location, one island among a small group. The flora on the island – mostly scrub and grasses, interrupted here and there by lonely trees – the one close-knit grouping of trees being mangroves sprouting up from the wetlands on the island’s eastern side. Such is the lie of the land and its blanket of flora, it gives no clue as to its possible latitude or longitude, although it is not unfair to say it is probably outside of tropical and most sub-tropical climes.

Endless: Antipodes, June 2024

The arrival point lies toward the western side of the island, sitting on a shoulder of land separating two shallow bays with sandy beaches, one of which appears suitable for bathing, sheltered as it is from northern winds by a further high-shouldered promontory extending out into the sea. A footpath runs out along this headland, and also forms a track running eastward along the bluffs above the north coastline. As it does so, it crosses what appears to be the former course of a stream that once tumbled to the sea from higher ground, then descends towards the eastern coastal lowlands.

A wall has been build over the rocks of the coastline here, helping to ensure the sea and land remain separated and allowing the former to become a level setting for a homestead farm, complete with an orchard alongside it. The farmhouse has the look of  having been long since been converted into more of a cosy retreat than a place of work (although the apples from the orchard are very clearly being cultivated / harvested); the integral barn is now a bedroom and outdoor decks provide additional living space – their presence suggesting the island perhaps does not suffer from too much in the way of really inclement weather.

Endless: Antipodes, June 2024

This house is one of three on the island, the spines of hills separating it from its neighbours one of which lies on island’s far side, the other more directly to the south. A small, rough beach sits to one side of the farm, and the path continues from close bay, this time following the east coast as curves around a bay cutting deeply into the island, home to the wetland and mangroves mentioned above, and its mouth guarded by a small isle. Whether the studio is used by whoever occupies the little farmhouse or not is open to question, as the path continues on to the house on the south side of the bay, putting it within easy reach of the studio isle, whilst its design and décor perhaps suggest the aesthetic of an artist has been at work inside.

The remaining house is very much a place of work – a barn with tractor and feed for livestock, etc., lying just up the hill from it and a chicken coop betwixt the two. Whoever lives here likely owns the sheep found scattered across the island. As well as the sheep, the island is something of a home for birds, including herons and kingfishers as they carefully keep an eye on all the comings and goings across the land.

Endless: Jack’s Canyon, June 2024

Such is the design of the setting, it is easy to arrive and just wander; however, there is also a ground-level teleport system (starting at the arrival point) to help guide people around the major points of interest for those who prefer. Rezzing is open for photography props, with auto-return set to 30 minutes – but do please clean up yourself if you use the option.

Jackson’s location – as with his past joint designs with Sombre – occupies a sky platform overhead. It takes the form of another rugged setting – perhaps part of one of the island seen off the coast of Sombre’s setting. A short walk from the landing point the land is cut through by a deep gorge, clearly formed by the erosion of the water pouring into it from one end, before making its way seaward but not quite entering open waters. Instead, a natural rocky breakwater block overland progress – but given the water simply hasn’t risen to overcome the barrier, one might assume there are submerged routes passing under the rock that allow it to escape.

Endless: Jack’s Canyon, June 2024

This gorge gives the setting its name: Jack’s Canyon, and forms the focal-point for explorations. Invisible from ground level, it is a little like Rivendell, only opening to view when practically on top of it. Unlike Rivendell, the gorge has a man-made path in the form of a wooden board walk and ladder descending into it, the top of this walk forming a deck close to the one building in the setting: a small wooden cabin.

This route down into the gorge is overlooked by a further deck extending out from the west cliffs, whilst the seaward end is watched over by two tall  rock formations, one of which also looks down on a small camp site sitting on a broad lip of rock and grass forming a step in the cliffs on the west side of the canyon (another little camp area occupies a further lip close to the bottom of the canyon as well). Wildlife in the form of bears, boars, wolves, foxes, cranes and eagles are to be found throughout the setting, all of which perhaps suggest this is a location more in the northern hemisphere – but wherever you choose to place it (if at all), there is no doubting its natural beauty. So much so, that even a time-traveller appears to have dropped in for a bit of a look around!

Endless: Jack’s Canyon, June 2024

Like Antipodes, Jack’s Canyon includes a local teleport for hoping between the local arrival point and the canyon floor. However, this is not directly connected to Sombre’s Endless: Antipodes; both the ground level setting and the canyon are only linked via the common landing point in the region – hence why no SLurl earlier in this article – which must be pass through when moving between the two.

With both locations offering local sound scape and various opportunities to sit and relax and / or take photographs, they can be enjoyed individually or jointly – and my thanks again to Jackson for the invite!

Endless: Antipodes, June 2024

SLurl Details

SL21B: your completely unofficial pocket guide to the celebrations

via Linden Lab

Second Life marks its 2st anniversary in 2024, with a month of activity kicking-off through until Sunday, July 21st. Celebrations will be taking place across the Birthday regions in Second Life, and and with previous years includes live music, DJ sets, art, shopping (via the dedicated Shop and Hop event), exhibits by Linden Lab and – particularly – exhibits by Second Life residents and communities.

The following is intended to provide a general overview of the celebrations and provide calendars, SLurls and anything else that might be useful to you when visiting the regions.

IMPORTANT NOTE: many of the builds at SL21B, particularly the stages, etc. have been built using PBR materials, and the skies are rendered as HDR. Therefore, to see the regions at their best, you should preferably be running a viewer that is “PBR enabled.”

SL21B Welcome Area

Theme

This theme for Second Life’s 21st birthday (SL21B) has been given as Elements, which the Lab describes thus:

This theme invites us to explore the fundamental components that make up our vast virtual landscape and the diverse communities within it. From the fiery passion of creators and artists to the fluid adaptability of our social environments, from the solid bonds within our communities to the fresh breezes of innovation that propel us forward, “Elements” is a celebration of the core forces that shape our experiences in Second Life.

– From the official SL21B announcement blog post

SL Birthday Calendar

The best way the stay abreast of all that’s going on is via the official calendar of events, which I’ve embedded below.

  • Use the Week / Month options, top right to change the calendar view.
  • Click on any given line item on any given day of festivities to view more information, including teleport SLurls.
Stonehold Stage

Key Events

Shop and Hop

The SL21B Shop And Hop event is taking place across 20 regions, and features 400+ creators and merchants. The best way to find out about this event is via the Shop and Hop Destination Guide entry and via the SL21B Shop and Hop Participating Merchants list.

Linden Lab Town Halls and Community Round Table

As per usual, SL21B will feature a series of events featuring various members of the Lab’s Board, management team and advisors. These will be a mix of live and pre-recorded sessions, per the schedule below.

The Aquatorium

Event SLurl: Aquatorium

Day (Times SLT) and Event Featuring
Tuesday June 25th 13:30
Product and Engineering Town Hall
Senior VP of Product & Engineering Grumpity Linden; Director of Engineering Second Life Server & Viewer Signal Linden; Director of Engineering Web & Platform Kali Linden; Senior Product Manager Sntax Linden; Product Manager Kyle Linden.
Wednesday June 26th 13:30
Product Operations Town Hall
Senior VP of Product Operations & Marketing Patch Linden; Support Operations Manager Keira Linden; Product Operations Manager Derrick Linden; Creative Producer Izzy Linden.
Thursday June 27th 13:30
Town Hall
Philip Rosedale, interviewed by Brett Linden.
Friday June 28th 13:30
Town Hall
Meet the Moles of the Linden Department of Public Works.
Monday, July 1st 11:30
Community Round Table
Linden Lab Executive Chairman Oberwolf Linden and Senior VP of Product Operations & Marketing Patch Linden.

Entertainment and Performances

Over 500 live performers are lined-up to perform across  four stages at SL21B between Friday, June 21st and July 1st. The complete schedule can be seen below.

The Nimbus Stage

The Welcome Area

Never been to an SLB event before – try starting at the Welcome Area where you’ll find lost of help, things like the SL21B Hunt HUD, and more!

The Tapestry of Time and Gift Area.

First presented in 2018, the region-wide Tapestry of Time presents visitor with a walk-through of Second Life’s history from 2003 through to the present day using images, text and videos. True, not everything has been recorded, but there’s enough within the region to be of interest to the historically minded.

within the Tapestry of Time can be found the SL21B Gift Area, offering gifts from the Birthday exhibitors and from merchants participating in the Shop & Hop event.

Exhibitor Regions

via Linden Lab. Click for exhibitor list

As is common for SLB events, the mix of content is varied, and the representation of interests broad. Role-play groups, arts, communities, are represented across the nine regions open to exhibitors; some are static, others are interactive in nature.

  • Direct links to the exhibitor regions can be found in the SLurls lists at the end of this piece.
  • Information / SLurls for individual exhibitors can be found in the SL21B Exhibitor Showcase.

Note that teleport boards are available at the centre of all Exhibitor regions for easy of moving between them.

Adult Exhibitor Regions And Adult Shop and Hop

2024 sees the Adult content and groups exhibitor regions combined with the Adult Shop and Hop regions and the  Once again, the celebrations include Adult content and groups, with exhibits at the event, with four dedicated regions  – separate to the main exhibitor regions – open to visit. These have a dedicated Teleport Hub sitting kitty-corner admits the four regions, and I’ve also included individual region SLurls at the end of this article.

SL21B Last Names and Physical World Merchandise

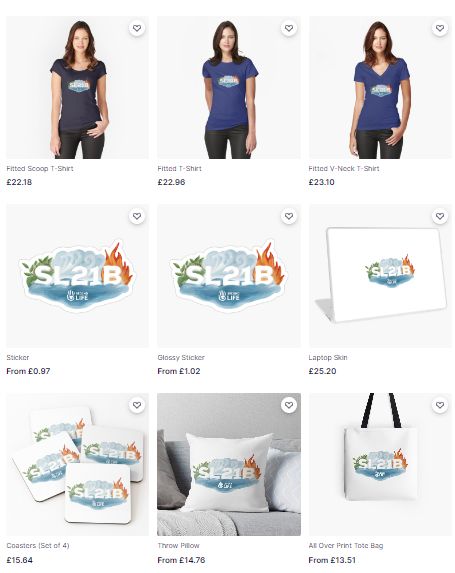
To mark the event, Linden name available a special series of SL21B themed last names focused on the theme of “elements”. Also launched to mark the event is a range of SL21B merchandise for the physical world, including t-shirts, baseball caps, tote bags, laptop sleeves, pins, mug note books and more.

sL21B Elements Last Names for Avatars SL21B Physical World Merchandise available via the SL Redbubble Store
  • Cirrus
  • Blowhard
  • Windyfloofs
  • Cinder
  • Hotman
  • Pyroclaw
  • Boulder
  • Soil
  • Pebblepaws
  • Ocean
  • Torrent
  • Frostfangs

These are, as usual available via your secondlife.com dashboard, under the Account drop-down

Advice on a Better Experience

The SL21B regions can get exceptionally busy. To help ease the pain for you:

  • If you have a high draw distance, reduce it to  as low as is comfortable for your enjoyment.
  • Turn off shadows in your viewer if you usually have them enabled.
  • Go to Preferences → Graphics and reduce the slider Max # Non-Imposter Avatars to a minimum and dial-down your Complexity slider.
  • Remove texture-heavy HUDs to free-up more texture memory.
  • To assist the simulator, remove unnecessary scripted attachments.
  • Dress lightly, avoid accessories of high complexity.
Firestone Keep – Adult region music and entertainment stage

SLurls and Destination Guide Links

Core Event Region SLurls

General Rated Exhibitor Region SLurls

SLB Beguile SLB Blissful SLB Breathtaking SLB Captivate SLB Celebrate SLB Delightful
SLB Electrify SLB Enchant SLB Fabulous SLB Glamorous SLB Incredible SLB Marvelous
SLB Outgoing SLB Sparkle SLB Spectacular SLB Stupendous

Adult Rated Regions

Destination Guide and Other Links

2024 week #25: SL CCUG summary

Joyful Gardens, June 2024 – blog post †

The following notes were taken from my audio recording and chat log transcript of the Content Creation User Group (CCUG) meeting held on Thursday, June 20th, 2024.

Meeting Purpose

  • The CCUG meeting is for discussion of work related to content creation in Second Life, including current and upcoming LL projects, and encompasses requests or comments from the community, together with related viewer development work. This meeting is held on alternate Thursdays at Hippotropolis.
  • In regards to meetings:
    • Dates and times are recorded in the SL Public Calendar.
    • Commence at 13:00 SLT on their respective dates.
    • Are conducted in a mix of Voice and text chat.
    • Are open to all with an interest in content creation.
  • The notes herein are a summary of topics discussed and are not intended to be a full transcript of the meeting.

Official Viewers Status

  • Release viewer: version 7.1.8.9375512768, formerly the Graphics Featurettes RC viewer dated June 5 and promoted June 10th.
  • Release channel cohorts:
    • Maintenance C RC (reset skeleton in all viewers), version 7.1.9.9469671545, June 14.
    • Maintenance B RC (usability updates / imposter changes) 7.1.8.9130881608, June 10.
  • Project viewers:

WebRTC Voice Update

Not strictly a Content Creation tool / subject, but of import to SL as a whole.

Summary

  • A project intended to replace the Vivox Voice system with the WebRTC communications protocol (RTC=”real-time communication”).
  • Will see the removal of the SLplugin.EXE from the viewer, to be replaced with a library wrapper within the viewer.
  • Offers much better and more flexible voice support across platforms, with improved capabilities (e.g. automatic echo cancellation, automatic gain control, better noise cancellation) with better audio sampling / quality.
  • Also opens the door to adding new features and capabilities to SL Voice, some of which have been long-requested.
  • Care is being taking to address potential security issues (e.g. preventing eavesdropping, exposing users’ IP address (by using an internal proxy server), etc.).
  • During the transitional period as WebRTC is deployed on the back-end and gradually made available by viewers, support will be provided for both Vivox and WebRTC (i.e. if you are using a viewer using the Vivox plug-in, you will connect to voice via Vivox, and if using a viewer with WebRTC, then that protocol will be used.
  • Both Vivox and WebRTC work together, but their may be some initial limitations / issues until the project is fully deployed and the switch made.
  • Feature requests for WebRTC made via the WebRTC board on the SL Feedback Portal are being evaluated and some are being actioned, together with issues being investigated.

Status

  • There is a Project viewer available on the Alternate Viewers page. Thus is expected to to to Release Candidate status very soon.
  • The server support is currently available on the region WebRTC on the main grid.
  • The focus is currently on getting the viewer code up to release status so it can be adopted by TPVs, with a gradual deployment of the server code, however, it is unlikely the latter will be widely deployed until after the viewer code has been more fully adopted.
  • That said, this is something of a priority project, likely to be fast-tracked as much as possible.

Graphics / glTF

Terrain

  • Cosmic Linden is working on PBR terrain custom repat controls allowing for improved Texel densities to help reduce the “stretching” of textures of elevation changes)  and better support 2K textures.
  • Most of the viewer work for this is now almost complete, but is awaiting simulator-side support on Aditi in order to be offered in a test viewer.
  • There is a more general bug where PBR terrain does not render in planar mirrors, and Cosmic is also working on trying to resolve this issue.
  • PBR Terrain painting: depending on how the above progress, Cosmic hopes to be able to start looking into the potential for PBR terrain painting in the near future. Currently the tentative plan is:
    • To allow land owners to control the mix of the four PBR materials on terrain, rather than the current situation where it’s determined by some elevation weights plus some noise added on top.
    • This capability will potentially be allowed for whoever can edit the terrain heights in a given parcel.

glTF Scene Import

  • Runitai Linden is continuing to work on glTF scene import. The focus remains on the viewer-side code.
    • As previously noted, this allows glTF scenes to be uploaded, tied to an in-world object and previewed in the viewer.
    • The support for this is available on the Rumpus Room regions on Aditi (the Beta Grid).
  • Actual simulator / back-end support for glTF scene will not start to be implemented until after the viewer side of the code is in better shape.
  • The overall goal is to get scene import working with Blender (and in accordance with the glTF specification), and mee the requirements /  guidelines outline in the Blender glTF Imort / Export documentation. The plan is to:
    • Support all of the animation data defined in the document.
    • Support “most” of the materials data in additional to the already supported  metallic roughness & emissive unlit.
  • As this work is still in the prototype phase no decisions have been made regarding the potential Land Impact for scenes or how LI will be calculated. This will come later in the project, once LL have more of a handle on things (upload, streaming, download, runtime cost, etc.).
  • There are also a lot of additional decisions yet to be made regarding this work – the LSL API, avatar limits (which can be attached to an avatar within a scene), all of which mean it will sill be a while before glTF scene imports are ready for any form of testing on the main grid (Agni).

General Notes

  • Runitai Linden is looking at the render pipe and possible optimisations and the potential to improve things like rendering objects, etc. Some of this work is likely to find its way back into production viewers in time.
    • This work also includes refinements to mirrors (e.g. so they get occluded, improvements to the update rate, etc).
  • Geenz Linden continues to work on Transmission and Index of Reflection (IOR), however, as they were out of the office for this meeting, no update was available.
  • Proper support for HDRI skies is being increasingly requested as a result of the Graphics Featurette viewer, and this work may  be accelerated. However, they will require a new asset type.

Next Meeting

† The header images included in these summaries are not intended to represent anything discussed at the meetings; they are simply here to avoid a repeated image of a gathering of people every week. They are taken from my list of region visits, with a link to the post for those interested.

Tutorial: creating a simple (prim) mirror with Firestorm

Background notes: this tutorial is provided as a *basic* guide to making a simple mirror in-world using prims and the Firestorm PBR release (7.1.9.74746), reviewed here. As such:

  • Is offered alongside my other simple mirror tutorial, which more directly applies to the official viewer and other TPVs.
  • Specifically addresses the use of the Firestorm Build / Edit floater, which is substantially different in information presentation compared to the official viewer.
Table of Contents

Please note:

  • If you have never created PBR mirrors before, it is recommended you read the entire tutorial including (Please) Read Me and Setting Viewer Preferences.
  • If you wish to know how to set your viewer so you can see PBR mirror effects, you only need to read  (Please) Read Me and Setting Viewer Preferences.
  • This tutorial assumes the use of the Firestorm Texture layout within the Build / Edit Floater. If you prefer using the the more traditional Texture layout in that floater, then this tutorial might be more appropriate: Creating a simple (prim) mirror in Second Life.

(Please) Read Me

  • Mirrors comprise two elements:
    • The actual object that forms the mirror. The can be a prim, a mesh face, a single object, part of a more complex (e.g. a mirror face in a frame).
    • A PBR reflection probe: a special kind of object new to Second Life under glTF / PBR which, for the purposes of this tutorial, actually generates the “reflections” on the mirror. As such, it is a object linked to the mirror object, above.
    • Creation of both of these is covered in this tutorial.
  • Mirrors:
    • Are planar (or flat surface mirrors), they don’t work particularly well on curved surfaces (like car bodies).
    • Are not designed to be worn as avatar attachments, and will not function correctly if used as such.
    • Come in two forms:
      • Static – meaning they will create reflections of just about everything within their sphere of influence except avatars.
      • Dynamic – meaning they will create reflections of just about everything within their sphere of influence including avatars.
    • Can have a performance impact – so should be used in moderation and with consideration of the effect you are trying to achieve, and the impact it may have on viewers close to them.
      • Example: it might sound cool to have a dynamic mirror as the floor or along one wall of a dance club, reflecting all the dancers – but it will likely kill viewer performance for all the dancers on the floor / dancing close to the wall. So if you must do either, use a Static mirror so avatars are not reflected.
  • To help reduce the performance impact generated by mirrors, only one will ever be active at a time in any given viewer. This will generally be the mirror closest the the viewer’s camera position; all others will simply appear shiny.
    • If you place two mirrors, each with its own reflection probe, too close to one another, you may find you get strange results in both of them.
    • For this reason, if you want to make a wall of mirrors, better to make multiple mirror objects and have a single reflection probe aligned with them to generate reflections in all of them.

This Tutorial

This tutorial breaks mirror creation down into four core steps:

  1. Setting your viewer preferences.
    • Some of these steps may only have to be down once; others may require setting each time you work with PBR reflection probes.
  2. Creating the mirror object using a prim & setting its surface material.
    • The required material can be made using either Blinn-Phong (aka “legacy” or “classic” materials) or the new PBR materials capabilities in the viewer.
    • This tutorial provides guidance on both.
  3. Creating the mirror reflection probe.
  4. Finishing touches – positioning the probe relative to the mirror object, and completing the mirror.

Notes:

  • All of the images in the sections below can be opened in their own tab(s) for greater clarity, if required.
  • Important: be aware that if you place a mirror within a room that contains its own reflection probe already, you may get some very odd results, as the mirror surface can also show “reflections” from the room’s reflection probe.

Step 1: Setting Your Viewer Preferences

Setting your viewer to work with mirrors requires two steps:

  • Ensuring the viewer’s Graphic Preferences is set to view mirrors correctly.
    • This generally only needs to be done once, as the setting will persist between log-in sessions.
    • Must be done by anyone wishing to simply view mirror in-world or who wishes to create them.
  • Enabling the ability to select reflection probes so they can be edited and manipulated.
    • This is intentionally a non-persistent setting, and must be enabled once per log-in session whenever reflection probes are to be directly selected / edited.

Graphics Preferences for Mirrors

Note: as per the notes above, these settings need to be active any in viewer that is to interact with mirrors.

  • Open up Preferences → Graphics and:
    1. Make sure the Mirrors option is checked. (otherwise PBR mirrors will only appear as shiny surfaces).
    2. Reflection Detail:
      • If you wish to view everything a mirror is designed to reflect, whether it is static or dynamic, set this drop-down to Static + Dynamic.
      • If your system struggles with performance as a result of mirrors, set this to Static, so no avatar reflections will be rendered.
    3. Reflection Coverage: make sure this is set to Full Screen.
    4. Mirror Resolution: set the resolution your viewer will use to display mirror reflections. Higher resolutions will obviously be sharper, but may have an increased impact on performance when rendering mirror reflections.
    5. Mirror Update Rate: set the frequency with which you wish you update to update rendered mirror reflections. Again, the more frequent the updates, the more realistic the reflections – and the potential for greater impact on viewer performance.
Setting your viewer’s Graphic Preferences to see / create mirrors

Setting the Viewer so You Can Select Reflection Probes

Reminder: You only need to do this if you are going to be selection and editing / moving any reflection probe. It is a non-persistent setting, so must be performed once each log-in session when you wish to select and edit a reflection probe of any description.

Setting the viewer can be done in one of two ways:

  • Via the Build menu:
    1. Go to the Build menu at the top of the viewer window.
    2. Click the menu to open it, scroll down to Option to open that sub-menu.
    3. Locate the option Select Reflection Probes and click it to check it.
  • Via the Select Reflection Probes in the top section of the Build / Edit floater.
When creating / editing reflection probes, you must ensure you can select them for ease of manipulation, by check the Select Reflection Probes option via the Build → Options sub-menu (l), or directly in the upper section of the build / Edit floater (r)

Step 2: Making the Mirror & Setting the Surface Material

Using Blinn-Phong

If you intend to create a mirror using PBR materials, you can skip to here.

    • Create a cube prim and size it as required. Keep the Build / Edit floater open after creating and sizing your prim.
    • Click the Select Face radio button and click on the side of the object you want to be the mirror surface.
    • Click on the Texture tab in the Edit floater and complete the following steps using the image below as a guide:
      1. Click on the Click on the Blinn-Phong tab (if not already selected). This will display texture / materials options similar to pre-PBR.
      2. Click on the Texture swatch to open the Pick: Texture floater.
      3. In the Pick: Texture floater, click the Blank button.
      4. This will cause the texture swatch in the Texture picker to turn white (and the mirror object itself).
      5. Click OK to close Pick: Texture.
      6. Click on the “empty” Specular swatch to open the Pick: Texture floater. Repeat steps 2 through 5 above.
      7. In the updated Build / Edit floater, locate the Glossiness and Environment spinner and set both to 255.
    • Your mirror object should now have a shiny face (most likely the one facing you).
    • Continue with Creating the Reflection Probe (below).
Creating a mirror object and setting the surface material using Blinn-Phong materials

Using PBR

  • Create a cube prim and size it as required. Keep the Build / Edit floater open after creating and sizing your prim.
  • Click the Select Face radio button and click on the side of the object you want to be the mirror surface.
  • Click on the Texture tab in the Edit floater and complete the following steps using the image below as a guide:
    1. Make sure the PBR tab is selected, or click on it if is is not.
    2. Click the Materials Texture swatch to open the Pick: Texture floater.
    3. Click Blank in the Pick: Texture floater.
    4. This will cause the texture swatch in the Texture picker to turn white (and the mirror object itself).
    5. Click OK to close Pick: Texture.
    6. The Roughness spinner in the Build / Edit floater will now be enabled. Set this to 0.0.
  • Your mirror object should now have a shiny face (most likely the one facing you).
  • Continue with Creating the Reflection Probe (below).
Creating a mirror object and setting the surface material using PBR materials

Step 3: Making the Reflection Probe

Reminder: When creating / editing reflection probes, always make sure you have enabled Build Menu → Options → Select Reflection Probes. Failure to do so will leave you unable to properly edit any reflection probes you create.

  • Create a cube prim.
  • Important:
    • Rotate the prim so that the TOP face of the cube is facing the same direction as the surface of your mirror (that is, the blue arrow of the gizmo tool is pointing away from the face of the mirror object).
    • Make sure it is perfectly at right angles once rotated.
  • Click on the Features tab of the Build / Edit floater:
    1. At the bottom of the tab, check the box labelled Reflection Probe.
    2. A pop-up will generally be displayed, read and understand it.
      • You can check the Don’t Show box if you do not want to see this warning in future
      • Click OK to convert the prim to a reflection probe – this will enable the Probe Update options at the bottom of the Build / Edit floater.
    3. Click on the Static drop down and:
      • If you wish the mirror to only reflect the objects in front of it, and not avatars as well, select Mirror (Environment).
      • If you wish the mirror to reflect avatars as well, select Mirror (Everything).
Setting the reflection probe properties (click to enlarge in new tab, if required)

Step 4: Finishing Touches

Positioning and sizing the mirror probe to give the required reflections on the mirror object.
  • With the reflection probe selected, make sure the Move radio button at the top left of the Edit floater is enabled.
  • Position the reflection probe so it is overlapping the mirror such that the red arrow / line of the gizmo move tool is just in front of the mirror object.
  • Click the Stretch Radio button in the top of the Edit floater and stretch the reflection probe to fit the mirror object, giving you a mirror-like reflection.
    • Note: The exact size of the reflection probe and its position / depth relative to the front of the mirror might require a little juggling to get right.
  • When done correctly, you should have a basic mirror reflecting the space around you.
  • Finally, link the mirror components together as a single object – but make sure the reflection probe is not the root of the linkset for ease of future moving / editing the mirror.
  • Name the mirror and Take it (or a copy) back to inventory for future use (if required) and / or place the original where you wish to use it.

Notes:

  • Because the reflection probe will be deeper than the mirror, anything shiny that is also encompassed by it and in the same plane will also act as a mirrored surface.
  • Similarly, if you have several “mirror” surfaces in the same plane as the reflection probe (e.g. several mirrors on the same wall), you can extend the mirror’s size to encompass all of them, thus use as single reflection probe for multiple mirrors.

Video and Final Words

For those who prefer to watch, the video below – courtesy of Zi Ree from the Firestorm team – goes through all of the above steps for creating a mirror object and its reflection probe.

Again, this is a basic (if wordy!) tutorial. There is a lot more that can be done when creating mirror objects. and I’m not attempting to cover everything here; this is simply to get people started. Remember that mirrors do have limitations imposed, and can impact viewer performance – so use them wisely!

Finally, note that mirrors are a specialised use for reflection probes – the latter can be quite intrinsic to general reflections and lighting in Second Life. To get a feel for how they can be used, I recommend taking a read of Reflection Probes and You by Kristy Aurelia.

Firestorm 7.1.9: PBR, emojis and mirrors, oh my!

On Thursday, June 20th (SLT), Firestorm released version 7.1.9.74746 of their viewer.

As indicated by the change in major version number (7), this is a significant release of Firestorm, one that brings it largely up to parity, in terms of core functionality, with the official Second Life Viewer SLV). Included in this release, as hinted at by the title of this article, are the following:

  • PBR support – including all updates and enhancements released by the Lab.
  • 2K Texture support.
  • PBR Terrain.
  • Mirrors.
  • Emojis support.
  • Assorted preferences, UI and menu updates.
Table of Contents

Update, July 6th 2024: as a result of some of the issues being experienced with the Firestorm PBR release, Runitai Linden is re-visiting memory use (e.g. VRAM use) and its impact on lower specification hardware, and the impact it can have on performance with a viewer to trying to remove some of the bottlenecks.

Note that the following is not a complete review of the 7.1.9 update, but focuses on the major updates, with additional notes as to why they have been made, and which may be helpful for those not familiar with the on-going updates being made the Second Life (glTF – see below). As far as I’m aware, there are no formal release notes accompanying 7.1.9.74746, just a brief timeline summary, so please excuse the lack of reference to same for additional information / credits.

General Notes

Installation

  • Only download Firestorm from the Firestorm website. Do not utilise and other third-party site purporting to offer the Firestorm viewer, and remember Firestorm will never ask for log-in credentials in order to download a release version of their viewer.
  • There is no need to perform a clean install with this release if you do not wish to.
  • Do, however, make sure you back-up all your settings safely so you can restore them after installing 7.1.9.

MacOS and Linux

  • Firestorm 7.1.9.74746 sees the viewer move to MacOS 12 with the deprecation of MacOS 11.
  • The Firestorm team has been working with the Lab and other TPVs to build up the Linden Linux repositories to enable a re-launch of official Linux support. Currently, the Firestorm team is in the process of migrating their Linux support to use the updated Linux build libraries maintained by LL.

Linden Lab Releases Reflected in Firestorm 7.1.9.74746

  • Graphics Featurette Viewer:
    • Viewer version 7.1.8.9375512768, June 2024.
    • Core features:
      •  2K texture uploads (with associated fees – see Possibly Useful Links, below right).
      • PBR materials terrain support.
      • Static and dynamic planar mirrors.
Remove locations from Teleport History
  • Maintenance Y/Z:
    • Viewer version 7.1.6.8745209917, April 2024.
    • Core features:
      • My Outfits folder improvements.
      • Ability to remove entries from landmark history.
  • Maintenance-W:
    • Viewer version 7.1.5.8443591509, March 2024.
    • Core features bug and crash fixes.
  • glTF PBR Materials Maintenance-2 Viewer:
    • Viewer version 7.1.4.8149792635, March 2024.
    • Core features: second round of improvements and bug fixes for the PBR viewer release.
  • Emoji Viewer:
  • glTF PBR Materials Maintenance-1 Viewer:
    • Viewer: version 7.1.2.7215179142, January 2024.
    • Core features: initial round of improvements and bug fixes for the PBR viewer release.
  • Maintenance V(ersatility) Viewer:
    • Viewer: version 7.1.1.7039128750, December 2023
    • Core feature: displaying user-customized keybindings in chat.
  • glTF / PBR Materials Viewer:
    • Viewer: version 7.0.1.6894459864, November 17 2023.
    • Core Feature: glTF PBR release (lighting, reflection probes, materials).

PBR: Physically Based Rendering

This is the most significant update with Firestorm 7.1.9, and represents some of the most clearly visible changes both in the viewer and how Second Life might appear. However, to provide some context on matters for those who may not be aware of all that is going on (and trying to keep things as concise as possible), some background notes.

The Story So Far (aka Skip This if You’ve Heard it Before)

  • Linden Lab has engaged on a project to extensively overhaul Second Life and bring in to parity with modern standards, specifically moving to compliance with the Khronos®  (graphics library Transmission Format) specification, regarded as the leading standard for sharing 3D and related assets (models, scenes, animations, etc.) across multiple tools and platforms.
  • The first phase of this project (November 2023) focused on a shift to support PBR (Physically Based Rendering). This introduced the likes of:
    • PBR materials, offered as an alternative to SL’s existing materials system (referred to as “Blinn-Phong” materials, rather than completely replacing them.
    • Reflection probes (for more realistic lighting / reflections in second life.
    • HDRI rendering for more realistic environmental rendering.
  • This was followed in January and March 2024 with two bug fix updates to PBR.
  • In June, LL released the Graphics Featurettes viewer, comprising:
    • Further bug fixes and improvements.
Possibly Useful Links
    • Support for the upload of 2048×20248 textures and materials without any down-sampling to 1024×1024 resolution.
    • Provision for using PBR textures on terrain.
    • The ability to create static and dynamic mirrors in Second Life.

But What Does it Mean?

Broadly speaking, the move to glTF compliance in Second Life should mean:

  • Deeper, richer environmental effects and lighting, with much improved reflections (including the ability to set reflection probes for better interior lighting and reflections – including planar “mirrors”).
    • However, some EEP settings can look darker due to the use of HDR.
    • Linden water can look very different – this is something Linden Lab will be addressing.
  • Some significant changes to viewer rendering. Perhaps most notably, you will not longer be able to disable Advanced Lighting Model (ALM).
    • This is because PBR sees the removal of the rendering pipe (called the “Forward Renderer” which was used as the “fallback” when ALM was turned off.
  • A potentially smoother, more straightforward workflow for mesh content creators, allowing them to use their tools (notably Substance Painter and, down the road, Blender), more efficiently and make the content they create more directly transferable between platforms.
  • The ability for content creators to:
    • Continue to use the existing materials system (Blinn-Phong) while they get up to speed with PBR.
    • Immediately swap to using PBR materials and leveraging the benefits thereof.
    • The option of, if they wish, providing content using both PBR materials and Blinn-Phong materials as a “fall back”. Note that this is not required, and creators are under no obligation to do so – it is simply possible at present, and a matter of individual choice.
  • However, there are some potential for viewer performance to be impacted, particularly if the settings for some of the new features are ramped-up and over-tax the computer running the viewer..
  • For Firestorm, some significant changes to familiar UI elements, as outlined in this review.

A Note on Reflection Probes

An important element to understand with PBR is that of reflection probes – what they are and what they are intended to do. The following notes are not exhaustive, but will hopefully assist those who might require some explanation.

  • Simply put, a reflection probe is a 360º degree image of the environment / setting within its physical volume which can be used to create approximate reflections of objects on suitably shiny surfaces, and can be used to add highlights or ambient light is defined spaces.
  • Reflection probes only generate images based on what is within their volumes. Similarly, they only affect objects within their volumes.
    • So, if you have a shiny box and a sofa inside a reflection probe, and another box outside of the probe, the reflection of the sofa should be visible on the box inside the probe, but not on the box outside of the probe.
  • Second Life uses two types of reflection probes: automatic and manual:
    • Every region has its own automatic probes – they are simply *there*, and cannot be directly manipulated.
    • Manual probes are users-created and can be used for specific effects (e.g. generating reflections of objects in a room on glossy /shiny surfaces within the same room. 
    • Manual probes always take precedence over automatic probes.   
  • Probes can be one of two forms: Sphere or Box.
    • Sphere probes tend to give the best results and blend better. SL’s automatic probes are of the sphere type. Sphere probes  are generally good enough for most outdoor scenes.
    • Box probes are handy for generating reflections within thins like rooms, due to their shape. They are also ideal for creating mirrors (see below). They can be rotated to adjust their influence.
  • When editing reflection probes:
    • You must enable Select Reflection Probes via the Build menu →  Options or within the Build / Edit floater so that you can right-click on them and select them for editing once created.
      • This is intentionally a non-persistent setting, as having it on all the time could prevent you from selecting objects inside a reflection probe’s volume. Therefore, you must do this once per log-in session when you intend to create / manipulate any reflection probe(s). 
    • The only parameters which can be used with an reflection probe are its position, rotation, scale, and specific settings assigned to it. All other parameters will be ignored. 
When creating / editing reflection probes, you must ensure you can select them for ease of manipulation, by check the Select Reflection Probes option via the Build → Options sub-menu (l), or directly in the upper section of the build / Edit floater (r)
  • Reflection probes use two ambient settings:
    • The EEP ambience set via Atmosphere & Lighting Reflection Probe Ambience (HDR) in the EEP Fixed Sky and Edit Day Cycle floaters. This is the “minimum” probe ambience.
    • The individual Ambience setting for a reflection probe, set via the build floater. This can be made to make the ambience of a probe more intense, if required (sometimes helpless when using probes in interior scenes.
Reflection probe ambience settings the “global minimum” set via the EEP settings (Fixed Sky or Day Cycle), and the per-probe setting within the Build / Edit floater

Again, for a more detailed exploration on reflection probes, see Reflection Probes and You by Kristy Aurelia.

2K Textures, PBR Terrain and Mirrors

2K Textures

  • Until now, texture resolution in Second Life has been limited to 1K (1024×1024) – however, it has been possible to upload 2048×2048 resolution textures but they would automatically be down-sampled to 1024×1024 for display.
  • With this release, it is now possible to upload 2048×2048 texture without any down-sampling.
  • This ability introduces new fees for uploading textures at 2K resolution:
    • Basic / Plus account: L$50 per texture.
    • Premium account: L$40 per texture.
    • Premium Plus: L$0.
  • Important: these fees are currently implied for bulk 2K texture uploads, rather than explicitly warned about. If you are a Basic, Plus or Premium user who routinely uploads 2048×2048 textures to Second Life in the expectation they will be down-sampled to 1024×1024 and only incur the L$10 per texture fee – you will be automatically charged at one of the above rates when doing so.

PBR Terrain

This refers to applying 2K PBR materials directly to Second Life terrain (subject to you having region / estate rights in order for you to do so. It is not PBR terrain painting as seen in engines such as Unity or Unreal, but it should result in considerable improvement in the visual quality of terrain. However, note that currently terrain repeats are fixed, but a future update as a part of the ongoing work will enable custom texture repeats to be set, helping with Texel and reducing stretching when PBR materials are applied over changes in elevation.

PBR terrain. Credit: Linden Lab

Note: there is no provision for any legacy fallback when using PBR materials on Second Life terrain, so if used, those on non-PBR viewers will only see grey ground.

Mirrors

The PBR updates allow the creation of planar (flat) mirrors in SL, using reflection probes

The release of the Graphics Featurette viewer finally allows the long-requested desire for real-time / dynamic mirrors in Second Life which do not require tricks with Linden Water or the user of lighting projectors (which could not reflection avatars anyway) or other sleight-of-hand.

How useful mirrors actually are in SL is a subjective issue, and one outside the scope of this review – as is how to create them. However, the following general points on mirrors should be noted:

  • While there can be multiple mirrors within a scene  / room, only one will be properly active at a time – the one nearest the viewer’s camera. All others will generally only appear as shiny surfaces.
  • Mirrors are limited to planar (that is, flat) mirrors, and the capability is not well suited for use with curved shapes / forms (such as the body of a car).
  • Allowing mirror reflections in the mirror (set via options in Preferences → Graphics (see below) will have a performance impact.
  • Mirrors are not designed to be worn as avatar attachments, and will not function correctly if used as such.

For instructions on creating a mirror, using either the new PBR options or Blinn-Phong materials, please refer to Creating a simple (prim) mirror with Firestorm.

Emoji Support

Emoji support was added to the official viewer courtesy of a code contribution by Kitty Barnett, the lead Catznip developer, and is now adopted by Firestorm with the release of 7.1.9.74746.

  • Emojis are accessed through the Firestorm conversations floater, and are available for local chat, Group chat and IMs.
  • To use them, two new icons have been added to the floater, to the right of the text input field (see image below).
Firestorm’s implementation of Emojis
  • Clicking on the down-pointing arrow button will open a display of frequently-used emojis directly under the text input line (note: this will obviously be empty on first-time use).
    • Click on any of the listed emojis to and have them added at the current cursor position in the text field.
    • If you ish to close the display of emojis, click on the arrow button again.
  • Click on the Smiley icon to open a floater of all the available emojis.
  • The emoji floater includes a series of buttons to help with sorting / displaying emojis, as shown and described below, left-to-right.
Emoji floater button bar
    1. All (“Search”): a scrollable list of all available emojis, split by categories.
    2. Recently / Frequently used: displays those emojis used most recently as well as those you’ve used most frequently.
    3. People and body: smileys, emoticons, “gestures”, human emojis (running, cycling, etc.).
    4. Animals and Nature: as per the label.
    5. Food & Drink: as per the label.
    6. Travel & Places: globes, regions, places, vehicles, time zones, etc.
    7. Activities: as per the label.
    8. Object: light bulbs, books, packages, calendars, locks, etc.
    9. Symbols: symbols, button, etc.
    10. Flags: as per the label.
  • Emojis can be con figured using options on Preferences → User Interface → Fonts.

Firestorm UI Updates

Note: these are in addition to those already mentioned above.

Preferences → Graphics

PBR sees a number of changes to the Graphics tabs in Preferences. The following is intended to provide a brief outline of the changes, not an in-depth breakdown of their functionality.

General Tab
Firestorm 7.1.9.74746 Preferences → Graphics: General updates
  1. Revised shader check boxes, which sees:
    • The addition of a Screen Space Reflections check box (can impact performance when enabled).
    • The Mirror check box, must be checked to see mirrors working as such in Second Life (will impact performance when enabled).
    • The removal of the option to disable Advanced Lighting Model (ALM), as noted earlier in this review.
  2. Reflection Detail: the type of reflections generated by reflection probes. Can be set one of: Static Only – generates reflections for everything except avatars; Static & Dynamic: generates reflections for everything including avatars; and Realtime. Generally speaking, the first two options should be adequate, depending on whether or not you wish to see avatars in things like mirrors  (and Static & Dynamic will have a higher performance hit).
  3. Reflection Coverage: can be set to one of None, Manual, Manual and Terrain or Full Coverage.
  4. Mirror Resolution: the quality of planar mirror reflections rendered by the viewer  – for Firestorm, this can be one of 256×256; 512×512; 1024×1024; 2048×2048. Higher resolutions will have a greater impact on viewer performance.
  5. Mirror Update Rate: how frequently mirror reflections are updated. Higher rates will impact viewer performance.
  6. Exposure slider.
Hardware Settings Tab

Extensive revisions in line with the updated viewer rendering including:

  • Updated anti-aliasing from stepped options to the use of fast approximate anti-aliasing (FXAA).
  • Removal of the dynamic texture memory options and the addition of an option to Override VRAM detection with a slider to set the amount of dedicated GPU VRAM.
    • Generally speaking, these options should not be enabled / altered.
    • They are only intended for situations where VRAM detection is reporting incorrect values.
    • Because altering them, seek the advice of Firestorm Support.
Rendering Tab
  • Maximum texture resolution can now be set to either 512×512 or 1024×1024 rather than just 512×512.

Other Preferences Updates

  • Move & View → View: removal of the option to Disable Minimum Camera Zoom Distance.
  • Preferences → User Interface → Fonts: options to change the style of the Emojis and Emoji button.
  • Firestorm → Build 2: option to toggle the Firestorm Texture tab on the Build / Edit floater  between the Firestorm layout and one close to the official viewer’s layout (and which uses a separate Edit Materials floater) – see Build / Edit floater, below.
  • Firestorm → Uploads: new option to define the inventory folder into which uploaded PBR materials so be filed (default: Materials and altered by right-click on the desired folder in Inventory and using the Use As Default For submenu to select the asset type).

Build / Edit Floater – Texture Tab

  • The Build / Edit floater Texture tab has the most visually extensive updates within Firestorm’s UI, including two layout options:
    1. The Firestorm Layout (default) which presents both PBR materials options and Blinn-Phong (“classic”) materials as two separate sub-tabs. When using this layout, the separate Edit Materials floater found within the official viewer does not have to be used.
    2. A layout closer to the official viewer, which uses a drop-down to select whether Blinn-Phong materials (labelled as “Textures”) or PBR materials (“PBR Metallic”) are to be used, and which updates the rest of the panel based on the selection made. This layout also utilises the separate Edit Materials floater as found in the official viewer.
The Firestorm Build / Edit floater Texture tab: left: in pre-PBR versions of the viewer (for comparison); 1: the default Firestorm Layout; 2: the alternate layout (click image for full size, if required)
  • The two layouts can be switched via unchecking / checking Preferences → Firestorm → Build 2 → Use The New Firestorm Texture Panel in the Tools floater (requires restart).
The option to use either the Firestorm Texture layout in the Build / Edit floater (when checked) or a layout close to that of the official viewer (when unchecked).

Note: the Second Life object content menu will display an option to Edit PBR Material when right-clicking on an object using PBR materials. When selected, this will open both the Build / Edit floater and the Materials Edit floater regardless of which Firestorm Texture tab layout you opt to use.

Menu Updates

The following is a brief list of changes to the viewer menus. For ease of reference, it includes menu updates also mentioned earlier in this review.

  • Avatar:  new option: Remove Selected Attachments. When one or more worn attachments are selected, will be enabled, and clicking will remove those attachments.
  • World → Environment: new Midday (Legacy) day setting, using the non-HDR settings for midday (can make the day look brighter).
    • You can “disable” HDR sky rendering by setting the ambience in the Atmosphere & lighting tab of the EEP Fixed Sky and Day Cycle edit floaters to 0.
  • Build → Options:
    • Select Reflection Probes. When checked, will allow any reflection probes in a scene to be right-clicked selected.
    • Show Reflection Probe Volumes. When check will show the volumes of reflection probes in a yellow tint.
    • Highlight Transparent: use as an alternative for CTRL-ALT-T for highlighting objects using transparency and Include Rigged Transparent – both relocated from Advanced → Highlighting and Visibility.
  • Help → Whitelist Advisor: a list of Firestorm folders / locations that should be whitelisted with anti-virus tools should that latter give problems when trying to run the viewer, together with guidance notes.
  • The following should only be toggled / used if you know what you are doing:
    • Advanced → Rendering Types: addition of the following toggles: Materials (ON), PBR (ON), Glow, Fullbright, Fullbright Alpha Mask (all OFF).
    • Developer → Force an Error: new option Force LLError, Message And Crash.
    • Developer → Render Tests: options for previewing HDRI skies and for glTF scene preview (this option for in-development work by LL).
    • Developer → Render Metadata: addition of toggles for: Reflection Probes, Probe Updates and glTF Nodes (this option for in-development work by LL); removal of Build Queue.
    • Developer → Rendering: removal of: the following toggles: Advanced Lighting Model; Automatic Alpha Mask (non-Deferred); Disable Ambient, Sunlight and Local Lights; Hover Glow Objects.
    • Developer → Rendering: new Dump Font toggles; new Debug Unicode and Camera Control toggles.

OpenSim Updates

  • A new grid selector
  • Improved teleport/hop handling.
  • PBR terrain fallback (as OS support fallback textures).