On Tuesday, April 2nd, Linden Lab announced the roll-out of Improved Region Capacity and Access, which see increases in the default number of avatars able to access a region, and how regions are accessed when approaching the upper limit of avatars allowed into them.
The new limits are being rolled out gradually, so you may find the default for your region may not have changed. It will, however, as the deployment continues.
Overall, the default limits on avatars able to enter each type of region have been increased by between 10% and 25%, depending on the region type, so:
The default for Full regions is increased from 100 to 110 (10%)
The default for Homestead regions is increased from 20 to 25 (25%)
The default for Open Space regions is increased from 10 to 12 (20%)
Note that the percentage bonus remains the same if the region owner changes the maximum number of avatars able to access a region. So, for example, if the owner of a Full region has set a limit of – say – 50 avatars on their region, this is increased by 10% (to 55) under the new limits.
This is straightforward enough – now for the twist: this new bonus capacity is only available for entry purposes to Premium members. As far as Basic users are concerned – and only for the purposes of region access, the limits remain unchanged.
This means that if you’re a Basic user and trying to get into a Full region which has, say, 105 avatars (out of a default total of 110) – you’ll be unable to access the region, and will get the Region Full notification on trying. However, up to 5 more Premium members will be able to still get in.
Note also that once an avatar is in a region, whether they are Premium or not will not matter; they count the same as anyone else. It doesn’t matter what the mix of Premium, Basic, or owner/managers in the region is: they all just each count as one occupant.
As a final piece of the changes, the region occupancy limit does not apply to a region owner or an Estate Manager for the purposes of entry. They will always be able to enter the region, even if it is full. However, once they have accessed the region, then will increase the avatar count for the region. So, if a region is at its limit and the owner enters, then two avatars will have to leave before a non-owner/manager would be able to enter.
Again, do note that the new limits are being rolled out gradually, so you may find the default for your region may not have changed. It will, however, as the deployment continues. If you are unclear on any of the above, please refer to the Lab’s blog post.
Update, April 1st: Vir Linden’s comments on this viewer, offered at the Content Creation User Group meeting, are appended to the end of this article in an audio file.
Some of my recent SL project updates have mentioned that the Lab is working to remove the remaining task of asset fetching away from UDP running through the simulator and to HTTP (avatar baking information, mesh and texture data have been delivered to users via HTTP for the last several years).
This work involves changes to both the simulator and the viewer, both of which have been subject to testing in Aditi, the beta grid for the last few weeks.
However, on Thursday, March 30th, the Lab effectively marked the start of testing on Agni, the main grid, with the release of the AssetHttp project viewer, version 5.0.4.324828.
This viewer enables the remaining asset classes used in Second Life – landmarks, wearables (system layer clothing and body parts), sounds and animations – will now be delivered to users the same way as textures, mesh and avatar baking information: via HTTP over a Content Delivery Network (CDN) rather than through the simulator. This should generally make loading of such content both faster and more reliable.
Hang On! What’s this CDN Thing?
If you’ve followed the HTTP / CDN project, you can skip this part 🙂 .
To keep things extremely brief and simple: a Content Delivery Network is a globally distributed network of servers which can be used to store SL asset information. This means that when you need an asset – say a sound or animation – rather than having to go via UDP to the simulator, then to LL’s asset service, back to the simulator and finally back to you (again via UDP), the asset is fetched over HTTP from whichever CDN node which is closest to you. This should make things faster and smoother, particularly if you are a non-US based user.
A generic CDN diagram: instead of the users in India, Spain, Peru and on the US West coast having to fetch data from a central server (marked in red) they can obtain the data more quickly and reliably from local caches of the data, held by CDN nodes located much closer to them.
There are some caveats around this – one being, for example, if you’re calling for asset information not stored on the local CDN node, then it still has to be fetched from the Lab’s services for delivery to you, where it can be cached by your viewer.
As noted above, the Lab started using CDN providers when they introduced the avatar baking service (called server-side baking) in 2013, and extended the use to the delivery of mesh and texture assets as part of a massive overhaul of Second Life’s communications and asset handling protocols spearheaded by Monty Linden (see my HTTP updates). Moving the remaining asset types to HTTP / CDN delivery effectively completes that work.
OK, So, What’s Next?
Right now, this is only a project viewer, and the Lab are looking to have people try it out and test fetching and loading of landmarks, wearables (system layer clothing and body parts), sounds and animations, so they can examine performance, locate potential issues etc.
However, the code will be progressing through project status to release candidate and ultimately to release status over the next few weeks / months (depending on whether any significant issues show up). Once this happens, TPVs will be given a period of time to integrate the code as a well, after which, all support for UDP asset fetching will be removed from both the viewer code, and from the simulators.
A rough time frame for this latter work is around late summer 2017. When it happens, it will mean that anyone using a viewer that does not have the updated HTTP code for asset handling isn’t going to be able to obtain any new or updated asset data from the Second Life service.
On Thursday, March 29th, Linden Lab announced the official launch of Second Life Place Pages, making the programme available to land holders in-world.
First announced in a beta programme in January 2017 (see here for more), Places essentially allows region and parcel owners to create a web browsable page (hosted by the Lab) for their location(s) in-world. These pages can then be shared through blogs, websites, etc.
Included with each page are buttons to allow visitors to the page to launch their viewer and teleport directly to the location (assuming they are Second Life users – if not, they’ll have to sign-up via the provided link to the main sign-up process).
In order for you to be able to use the Places pages to promote your in-world locations, certain criteria must be met:
You must own the parcel / region in question OR you must be assigned a the group ability to Toggle ‘Show Place in Search’ And Set Category within the group owning the land
About Land > Show Place in Search must be checked (recurring fee of L$30 a week).
Essential links for finding more information on Places pages are:
Note you may have to log-in to Places when you open the page.
Options on the page are controlled via a menu towards the top right corner, which can be seen when you are logged-in ( highlighted in red, below) – providing you have land which meets the requirements to have one or more Places pages.
The menu options – available to those who have locations in-world which meet the criteria for setting-up Associated Places
The options are pretty self-explanatory:
My Places – will take you to a list of locations (regions and parcel in-world) for which you can set-up Places pages. Clicking it will take you to a listing of the pages, and those you can edit will have the Edit option enabled
Upload Spherical – allows you to upload the ZIP file from a 360-degree snapshot you have taken of the location with the Lab’s 360-degree snapshot viewer – of which more below
Logout – logs you out of Places.
A Places listing with the Edit option highlighted
I’ve not had a chance to drive things in detail, but one minor issue I noted was that this listing appears to list Holly Kai Park as Adult, when it is in fact Moderate – which is correctly reporting in the actual page for the region.
The Edit option opens a basic page layout for a Place to which you can add details – text, images, video, etc. Again, see the Knowledge Base article for more details.
As noted above, the Upload Spherical option allows you to upload a 360-degree snapshot of a location captured using the 360-snapshot viewer. However, with this, and at this point in time, it is important to note that:
The 360-snapshot viewer is currently only a project viewer, and is awaiting significant update. You can find it on the Second Life Alternate Viewers listing page.
I have an overview of the 360-degree snapshot viewer available, but please note that it refers to the initial release (the release prior to the one available at the time of writing this article), and functionality in the viewer may have changed. I’ve also not had an opportunity to test the Upload Spherical capability with the current 360-snapshot project viewer, and so offer no guarantee the capability works.
I’ll have a more in-depth look at Places and setting them up in due course, hopefully including the updated 360-snapshot viewer, once it is available.
In December 2016, Linden Lab updated the tier limits placed on trading volumes across the LindeX.
The move was designed to help prevent fraud and to comply with applicable regulations.
On Monday, March 27th, and as part of these ongoing risk management efforts, the Lab blogged about the introduction of new monthly Process Credit limits.
As part of Linden Lab’s continued risk management process, we are now introducing monthly Process Credit limits.We anticipate that few, if any, Residents will be negatively affected by these adjustments, and will persist in monitoring any impact these changes may cause.
You can review your existing limits on this page; your Process Credit limit will be listed there, as well as your Buy and Sell limits.
You can request a tier limit review through our support system. Simply submit a ticket –> Billing –> LindeX Billing and Trading Limits Review Request (for basic accounts) or Billing and L$ -> LindeX Tier Review ticket options (for premium accounts).
Griefing, be it through word, action, noise, or object (as seen here), etc., is one of the items covered by the Abuse Report
The following notes are drawn from a presentation Governance Team manager Tommy Linden and team member Corky Linden are making to various communities within Second Life as part of an initiative to better disseminate information about the Governance Team, and on filing Abuse Reports (ARs). The hope is that the information provided will give users a better understanding of what the Governance Team hope to see provided in an Abuse Report in order to fully investigate it.
Note that official information on Abuse Reports can also be found in the Knowledge Base.
The team is relatively small – under a dozen in size – but handles an average of 400-500 Abuse Reports per day
All Abuse Reports get reviewed as the first stage of an investigation, with priority given to those seen as critical (such as an in-progress griefing attack).
All ARs that can be investigated are investigated. However:
How far the investigation goes largely depends on whether the AR is filed against something Governance is empowered to investigate, and how much meaningful information is supplied in it.
The Governance Team intentionally does not report back on the outcome of their investigations for a number of reasons. Just because the outcome might not be visible to the reporter / match their expectations when filing an AR, does not mean the report was ignored.
One of the biggest issues with incoming Abuse Reports is that they often lack the basic information required in order for an investigation to be properly carried out.
What is an Abuse Report?
The Abuse Report (AR) is for reporting any individual or group of avatars or any in-world object engaged in an activity deemed inappropriate under the Second Life Terms of Service / Community Standards and/or is in contraction to the maturity rating for a region.
ARs apply to: griefing, spamming, age play, assault / pushing / disturbing the peace, disclosure of personal information, fraud, harassment, indecency and Skill Gaming violations. In addition, there are Welcome Area Guidelines governing places like Infohubs, which contain restrictions on what should not be done in those areas with any violations also subject to ARs. Report.
There are also certain things that do not apply to ARs. For example, being banned from a particular group or region or parcel, or a dispute over rental payment between residents are not actionable via AR.
ARs can be filed by anyone suffering abuse, or by those directly witnessing an abusive act. However, this does not mean teleporting multiple people into a location and having them file reports as well. Rather than “speeding up” any investigation, it can actually slow down the entire process by forcing Governance to spend time reviewing dozens of additional (and possibly contradictory) reports.
What Is The Governance Team Looking for in a Report?
The Governance Team is looking for clear, concise and consistent information in an Abuse Report, as summaries in the image below and expanded upon in the following sections.
A “good” Abuse Report, presenting all the information and making good use of a screen shot – click to open the slide in a separate tab for easier reading. With thanks to Corky Linden
Accessing the Abuse Report Floater
The AR floater can be accessed via:
Menu bar > Help > Report Abuse.
By right-clicking on an avatar or object and locating / selecting Report Abuse from the context menu / pie menu.
Make sure you have the right avatar / object selected when doing this.
Launching the AR floater using either of these two options will auto-complete parts of the form.
The following guidelines are intended to help with filing an AR.
Screen Shots
Where possible, try to include a screen shot of the situation you are reporting. It can be the most effective means of illustrating what is going on, and gives the Governance Team clear visual proof / evidence of what has happened. It can also make up for information missed from the rest of the report.
The slide below outlines some of the key points to remember when using the AR floater to capture a snapshot – click to enlarge it in a separate browser tab for ease of reading.
Abuse Report snapshots: click on the slide to open it in a separate browser tab for easier reading
Note that most viewers do not have a refresh button for the snapshot preview, so try to make sure all the information you wish to capture is on your screen. If you are unable to get a screen shot for whatever reason, it is important you provide clear, accurate information in the Summary and Details section of the report (see below).
Object Picker
The Object Picker allows you to identify an abusive object (e.g. a particle / noise spammer, a weapon, etc.), and include its name and owner in the body of your Abuse Report. Instructions on how to use it are included in the AR floater, and this section will be auto-completed if you launch an AR by right-clicking on an abusive object. Remember you can further verify the item by including it in a snapshot with the Edit floater open to show the object name & owner.
Report Categories
The Abuse Report floater includes a pre-defined, drop-down list of categories which should be used when filing a report. Notes on the *valid* categories can be found here. Note that filing under the wrong category doesn’t prevent a report from being investigated, but it can slow things down, particularly if there is insufficient information provided elsewhere in the report.
Abuser Name
This allows you to grab the name of someone causing abuse from those around you. If you launch an Abuse Report by right-clicking on an object or avatar, this section will auto-complete (make sure you have selected the right avatar), otherwise click the Choose button and follow the on-screen instructions.
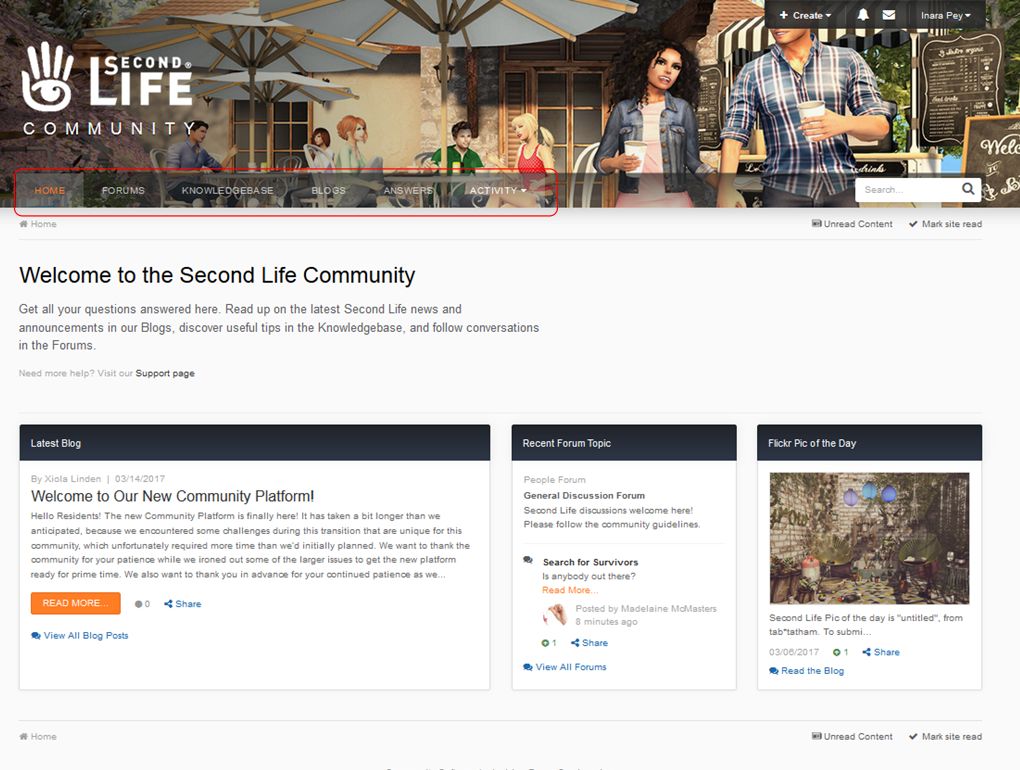
On Tuesday, March 14th, the new community platform for Second Life officially launched.
Powered by Invision Power Services, Inc, it had been hoped the platform would go live at the end of February 2017, but some teething problems coupled with the amount of data which needed to be transferred over from the older Lithium-powered slowed things down somewhat.
The new platform brings with it a new page layout, including a dedicated Community home page, and feeds blog posts to users’ dashboards at secondlife.com/ However, there are still some niggles to be sorted. At the time of writing, for example, going to the dashboard and selecting Community > Forums from the top menu can generate an error message. Clicking on blog links, however, will launch the new format blogs successfully.
The new home page, and the pages beneath it, offers all the familiar community elements: forums, blogs, knowledge base and answers, each with their own top-level page. The knowledge base was actually the first part of the new platform to open its doors, on Friday, March 10th, but at that time certain functionality – such as search – had been disabled on the platform, as it was impeding testing and performance.
The new Community Platform home page with the menu tabs highlighted
In announcing the launch of the new platform, Xiola Linden notes a few things which should be kept in mind at present when using it:
One of the things that we were unfortunately unable to transfer to the new platform was background images on profile pics. If you were using a background image for your profile, you will need to upload a new profile pic. The good news is that uploading a profile image on the new platform is much simpler and more intuitive than before. Just select your profile from under your name, and you can upload an image from there.
We will continue to make improvements, but wanted to get the community platform out as soon as possible, so that the Knowledge Base was back on-line.
Here is a list of known issues, most of which we expect to fix in the coming days/weeks:
Some posts may have missing images. Where possible, we will be fixing and/or updating these.
Some posts may have been slightly reformatted or have a slightly different layout
Previously used emotes may no longer work.
Some old Community URL redirects may be broken.
Some users have lost their account profile images and will need to reset them.
Second Life headers and footers are currently missing from community pages, and we are working to restore those.
The window title needs to be updated.
Clicking on a Help link from the viewer will load the page in mobile layout; this is not optimal, and we are working to correct that.
I’ve not explored the new platform in total, but here is a quick look at two of the more noticeable features.
Options Area
In the top right corner of each page on the community platform is a set of options, comprising a Create button an Alerts button (warning you of & listing replies to your posts and comments, etc), a Messages button (for accessing direct messages), and your name with a drop-down menu.
The Create button pops-up a means to start a new post a one of the existing forums in the platform via an intermediary Topic item. When you have selected the forum you wish to post to and clicked Continue, you’ll be taken to the Create New Topic page where you can write your post and post it directly to the selected forum.
The options area, located in the top right of the Community Platform pages showing both the Create button, which currently offers a short cut to posting topics to the forums, and the drop-down menu accessed by clicking your name.
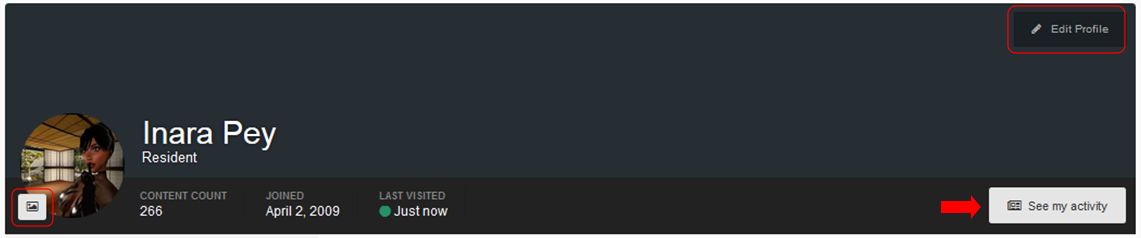
The drop down displayed when clicking your name presents a series of options specific to you. You can, for example, view your Community Platform profile, where you can edit your profile picture or profile information, and you can toggle between seeing your most recent activity in the forums or viewing a complete history of all your activity via the See My Activity / View Profile button. Note this toggle is publicly displayed on your profile, allowing anyone to review your recent and full history of activity on the forums, just as you can when viewing other people’s profiles.
Your profile options: change picture (circled left), edit profile (top right) toggle between most recent activity and all activity (arrowed)
There are two Settings options found within this drop-down menu. The first doesn’t currently appear to do anything; however, the Account Settings option will display your account settings, allowing you to change your forum signature and change the e-mail address / password associated with your account (so use the latter with care!).
The Account Settings option additionally has links to:
Your Community Platform profile (see above)
Your Community Platform notifications options
Your list of Ignored Users.
The Community Platform Notifications Page – when and how you receive platform-related notifications
Finally, this menu has three further options:
The Manage Followed Content option: allows you to access content within the Community Platform by clicking the Follow button in things like blog posts, forum posts, other users (button on their public profile header)
The Ignored User button: allows you to ignore other users, blocking some or all of their content from showing. Users are not notified that you are ignoring them
Logs you out of the Community Platform (but not from secondlife.com).
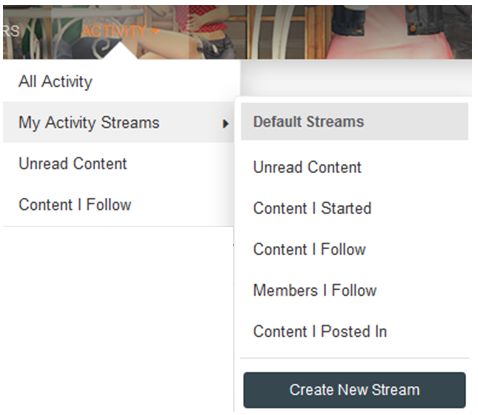
Activity Menu
The Community platform Activity options
Another feature is the Activity option, found in the main menu area. this presents a drop-down menu (shown on the right) offering further means by which you can view content on the Community Platform of particular interest to you.
The options here present multiple means by which you can get to the information you wish to view (for example, you can get to Content I Follow via Activity > Content I Follow and Activity > My Activity Streams > Content I Follow).
Several of the pages accessed through the Activity options – such as Unread Content, Content I Follow and Content I Started – include a series of filter options, allowing you to refine the information they display, making them a flexible means of accessing information you are particularly interested in.
The Activity filters available on some of the Activity options pages allow you to refine the information displayed on those pages, making it easy for you to focus down on items, information from those you follow (shown above), etc.
I’ve not dug too deeply into Streams (when and how they are visible, creating a stream, etc. I leave that to you to play with. There are also other abilities to look at, including the marking options, the toggles for switching between condensed and enhanced views, etc. However, most of these should be pretty self-explanatory, and this isn’t intended as an in-depth review.
Initial Thoughts
Keeping in mind I’ve only played with the new capabilities whilst writing this piece and so may have missed some thing, I have to say that overall I like it. When viewed on a PC, the pages are (other than when interrupted by ongoing work!) fast to load and the information cleanly presented. The ability to more tailor how information can be accessed / followed are all to the good, and I like the overall presentation. Viewing the pages on my Nexus HD 2013 revealed the Community Platform to be pretty mobile-friendly.
One aspect that did concern me was the main menu placement (Home, Forums, Knowledge Base, etc). Even this is set against a background banner image, I did find myself wondering if it might cause problems for users with visual impairments; certainly the orange colour for the currently selected menu header can be a little hard to see. Time will tell on this.
In the meantime, again do not that this is early days for the new platform and as Xiola notes, work is still in progress. If you do come across specific bugs or issues which are not listed in Xiola’s official blog post, and which can be clearly demonstrated / reproduced, please file a report through the JIRA system, using the System type Website and the related Community sub-category.