Me and my pianos in Second Life

Over the years: my three pianos: rear right - the all prim Musical Alchemy; left: the sculpted PrimPossible concert grand; right foreground: the LISP Bazaar mesh concert grand
My three pianos over the years: rear right – the all prim Musical Alchemy; left – the sculpted PrimPossible concert grand; right foreground – the LISP Bazaar mesh concert grand

I love to play the piano, something I’ve mentioned in these pages before. In the physical world, I’m fortunate enough to have a hybrid piano – but Second Life allows me to indulge my little fantasy of having a full concert grand, and I’ve had one in almost every home I’ve had. It’s fair to say I don’t feel at home in SL without one.

Over the years, I’ve upgraded a couple of times – the most recent being to a marvellous mesh creation by Pandora Popstar (aka Lainy Voom) owner of LISP Bazaar I learned about via a Tweet from Skate Foss, and which prompted this article.

Musical Alchemy concert grand by Persephone Milk: still a stunning piano
Musical Alchemy concert grand by Persephone Milk: still a stunning piano some 8 years since it first appeared. Offering a rezzable set of ivory keys plus separate harp and strings inside the cabinet, relegating the texture version of both to the role of soundboard, it is still capable of presenting eye-popping detail

My first SL concert grand was the all-prim Musical Alchemy grand by Persephone Milk (L$999). At the time I first brought it, this was the Rolls-Royce of pianos (and in many respects, it still is). It is beautifully crafted and comes with a host of rezzable extras as well as multiple playing and sitting poses, depending on whether the top is up or down.

What made this piano particularly attractive to me was (and is) the selection of music, which includes a piece composed by Persephone herself, together with the option of rezzing a set of ivory keys and the also the harp and strings, both of which fit the cabinet perfectly. These all enhance the piano beautifully, the only downside being that as the piano has a base LI of 85, rezzing these parts balloons that to 163 LI.  As I gradually downsized my landholdings over the years, this eventually became too big an overhead, driving me into finding a replacement.

The PrimPossible Concert grand (now available in a new model) is a 1-prim wonder
The PrimPossible Concert grand (now available in a newer model) is a 1-prim wonder

In 2011 I purchased the PrimPossible concert grand from Ample Clarity (which has since been replaced by a newer model priced from L$950). A sculpted build, it appeared just as the mesh revolution was about to hit the grid, and offered a very nicely styled concert grand with a good selection of music at just 1 LI.  A further advantage with it lay in the fact that because the design was unconstrained by prim cutting, it could be better scaled for the “average” avatar than could be easily achieved with the prim build, meaning I no longer felt I needed the arms of an orang-utan to reach the full stretch of the keyboard 🙂 .

My only niggle with this piano has always been that as a sculpt, it stresses the rendering system with the attendant wait for it to “pop-out” from the initial spheroid shape. Hence, as the mesh market has steadily expanded, I’ve been seeking a replacement.

My new LISP grand piano - with thanks to Skate Foss!
My new LISP grand piano – with thanks to Skate Foss!

As mentioned towards the top of this piece, I finally found a suitable replacement in the form of the new LISP Bazaar concert grand thanks to Skate Foss. Currently only available through the Collabor88 event, Pandora’s piano is, in a word, beautiful. It weighs-in at just 6 LI, with and additional 2 for the padded bench, it is being offered in a choice of two finishes: traditional black lacquer and teak, all for an amazing L$288.

More to the point, it is exquisitely modelled along ornate grand piano lines, has an interesting selection of music and includes all the little details that attract me: adjustment wheels on the bench, top board prop cups, the soft and sustaining pedals offering a nice outward presentation and so on. In particular, Pandora has foregone the textured harp / strings / soundboard found in so many mesh offerings costing far more, in favour of a mesh harp and strings.

A closer look at the keyboard and sheet music...
A closer look at the keyboard and sheet music…

To be honest, there are a couple of little niggles around these from a purist point-of-view (I modified my piano to double the number of visible strings, for example, as I’m fussy that way), but these are certainly not enough to negate what is a super piano currently available through Collabor88 at a superb price. As it is, I have copies of the black lacquer sitting on the garden terrace of my “main” home, and in the lounge of my Linden Home (for those rare occasions I feel the need to go hide there).

I’m still partial to my Musical Alchemy piano, simply because it was the first piano I purchased in SL; it has stood the test of time exceptionally well, and is still worth considering if you have the land capacity to see it at its fullest advantage. But that said, if you are looking to replace your existing piano because it is a prim or sculpt build, or simply because you fancy a change, you really cannot go wrong with the new LISP Bazaar concert grand, and I have no hesitation in recommending it.

The LISP grand piano's plate and strings (both slightly adjusted by me for a better fit within the cabinet)
The LISP grand piano’s mesh plate and strings add a nice level of detail to the instrument – I later modified this piano to double the number of visible strings (mainly because I’m a fuss pot)

Thank you, Skate, for sharing your discovery!

Playing with a Little Bee

Testing the Foilborne AD25H "Little Bee"
Testing the Foilborne AD25H Little Bee

Back in January 2015, I wrote about my impulse buy of the Kv23H FoilStream power boat, designed and built by Ape Piaggio under her Foilborne Industries brand. At the time, I wasn’t sure how well it would grow on me – although I can now say it is one of my firm favourites.

That review lead to Ape and I making contact in-world, and we’ve discussed boats and vehicles extensively since then (I’ve also had a lot of fun with her tried-out her autogyro). So when she invited me to help beta test her upcoming new release, I leapt at the chance. Ape has been working on the design for at least five months, and it will still be a while before it reaches production status. However, she’s given me permission to preview it here, and I’ll be reviewing it in full once it is available on the market.

The AD25H “Little Bee” is actually a release I’ve been looking forward to for some time – and trying the beta version has only increased my desire to grab one once it is officially released. A tender style speedboat a good deal smaller that the mighty FoilStream, it is no less packed with features.

Fancy taking friends parasailing? The Little Bee will let you!

And when I say packed, I mean packed. Single and couple poses; working instruments; mouselook driving, deployment mooring fenders; canvas weather cover – even a coffee percolator should you need warming-up on a cold morning’s outing! All these and more are included in the boat’s features. You’ll even be able to take friends parasailing or wake boarding on the finished model (no wake boarding on the beta I’ve been testing).

If that’s not enough, Ape has also include her “auto-mooring” system, multiple camera options, a voice messaging system, her fuelling system (complete with a neat animation), ACSS system to assist with region crossings, a racing mode, repainting capability – and more. And for those, like me, like the hydrofoil aspect of the FoilSteam, Little Bee includes its own deployable hydrofoils and an optional camera positioning control which allows you to see them being deployed / retracted.

The Little Bee has working cockpit instrument and is a superb drive in mouselook mode

There’s no time frame on availability (other than “coming soon” 🙂 ), nor is there a price-point. However, testing so far has revealed the Little Bee to be very stable and agile, and it handles region crossings with as much ease as can be expected with one or two passengers – and even with one of them dangling behind the boat in the parasail!

If this is enough to whet your appetite and you’d like to try a basic pre-release version of the boat (options like the hydrofoils, parasail, etc are not enabled on it), you can do so via the Little Bee’s pre-release demo area.

As noted, I’ll be reviewing the boat in full once it is available on the market. In the meantime I’ll leave you with a short video (best played at 720p, if you can) I put together when testing the beta version.

Doing a “Little Nellie”

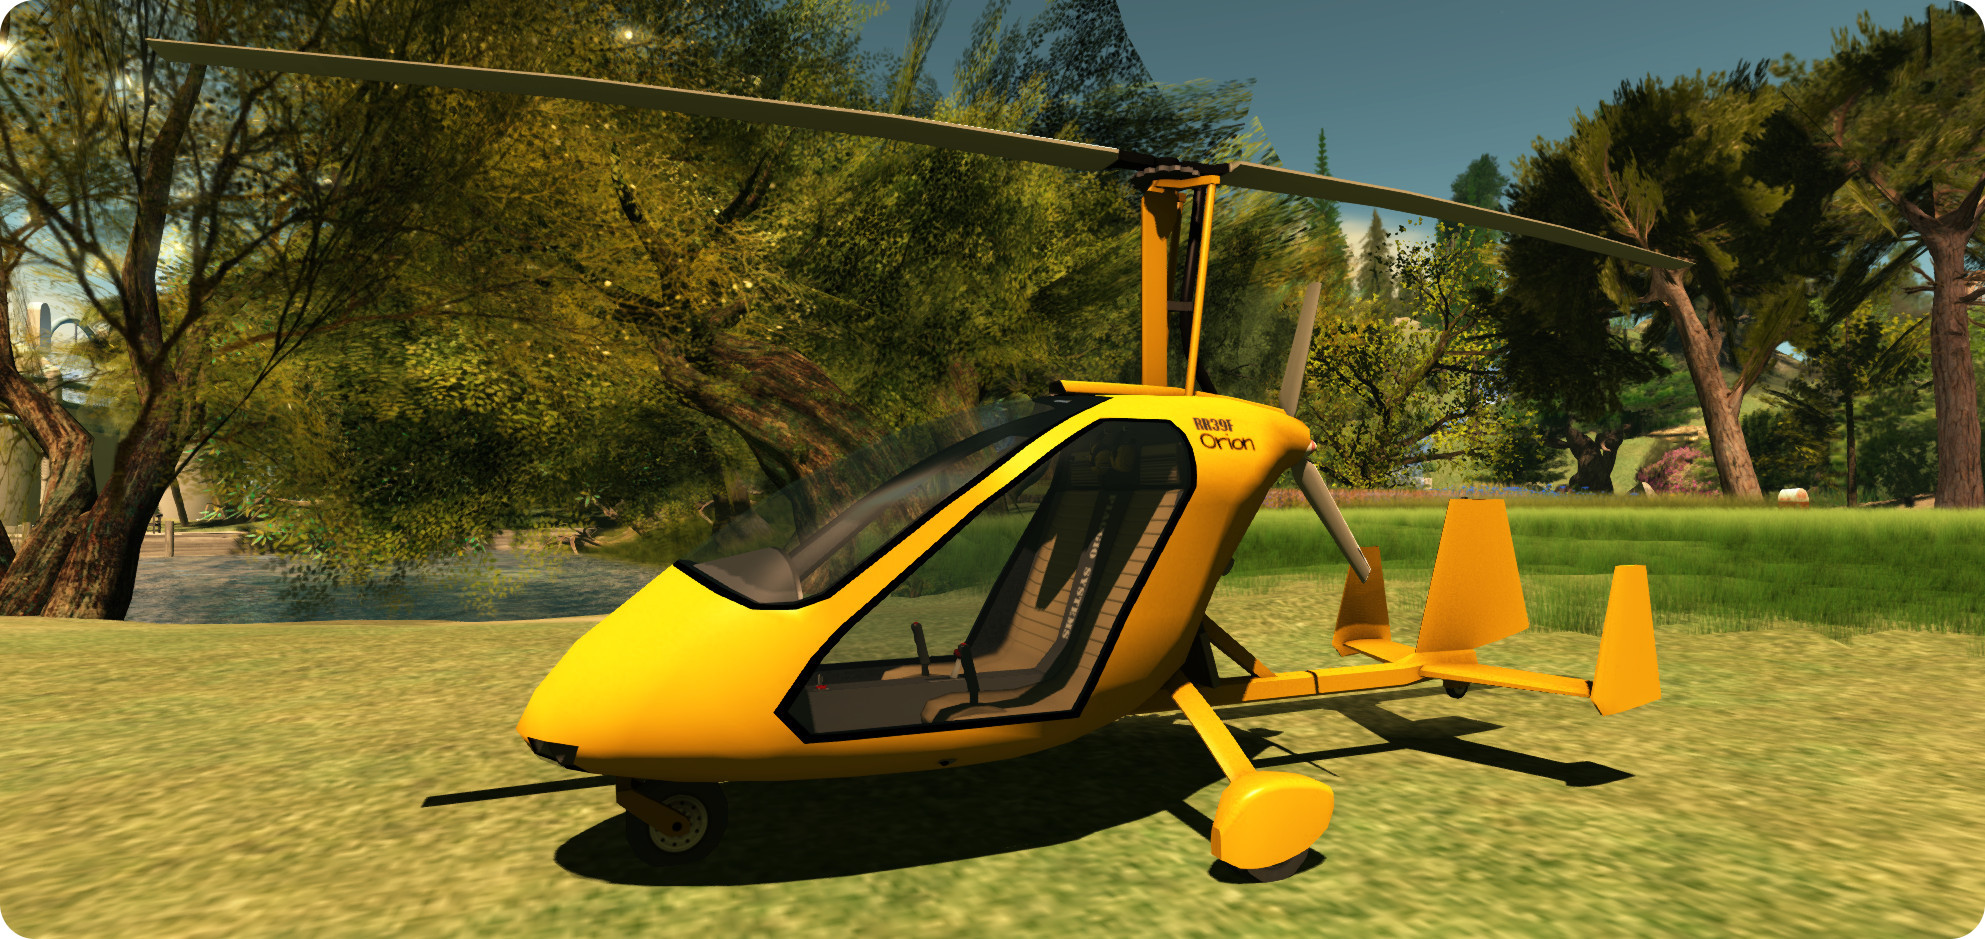
The Piaggio RR39F Orion

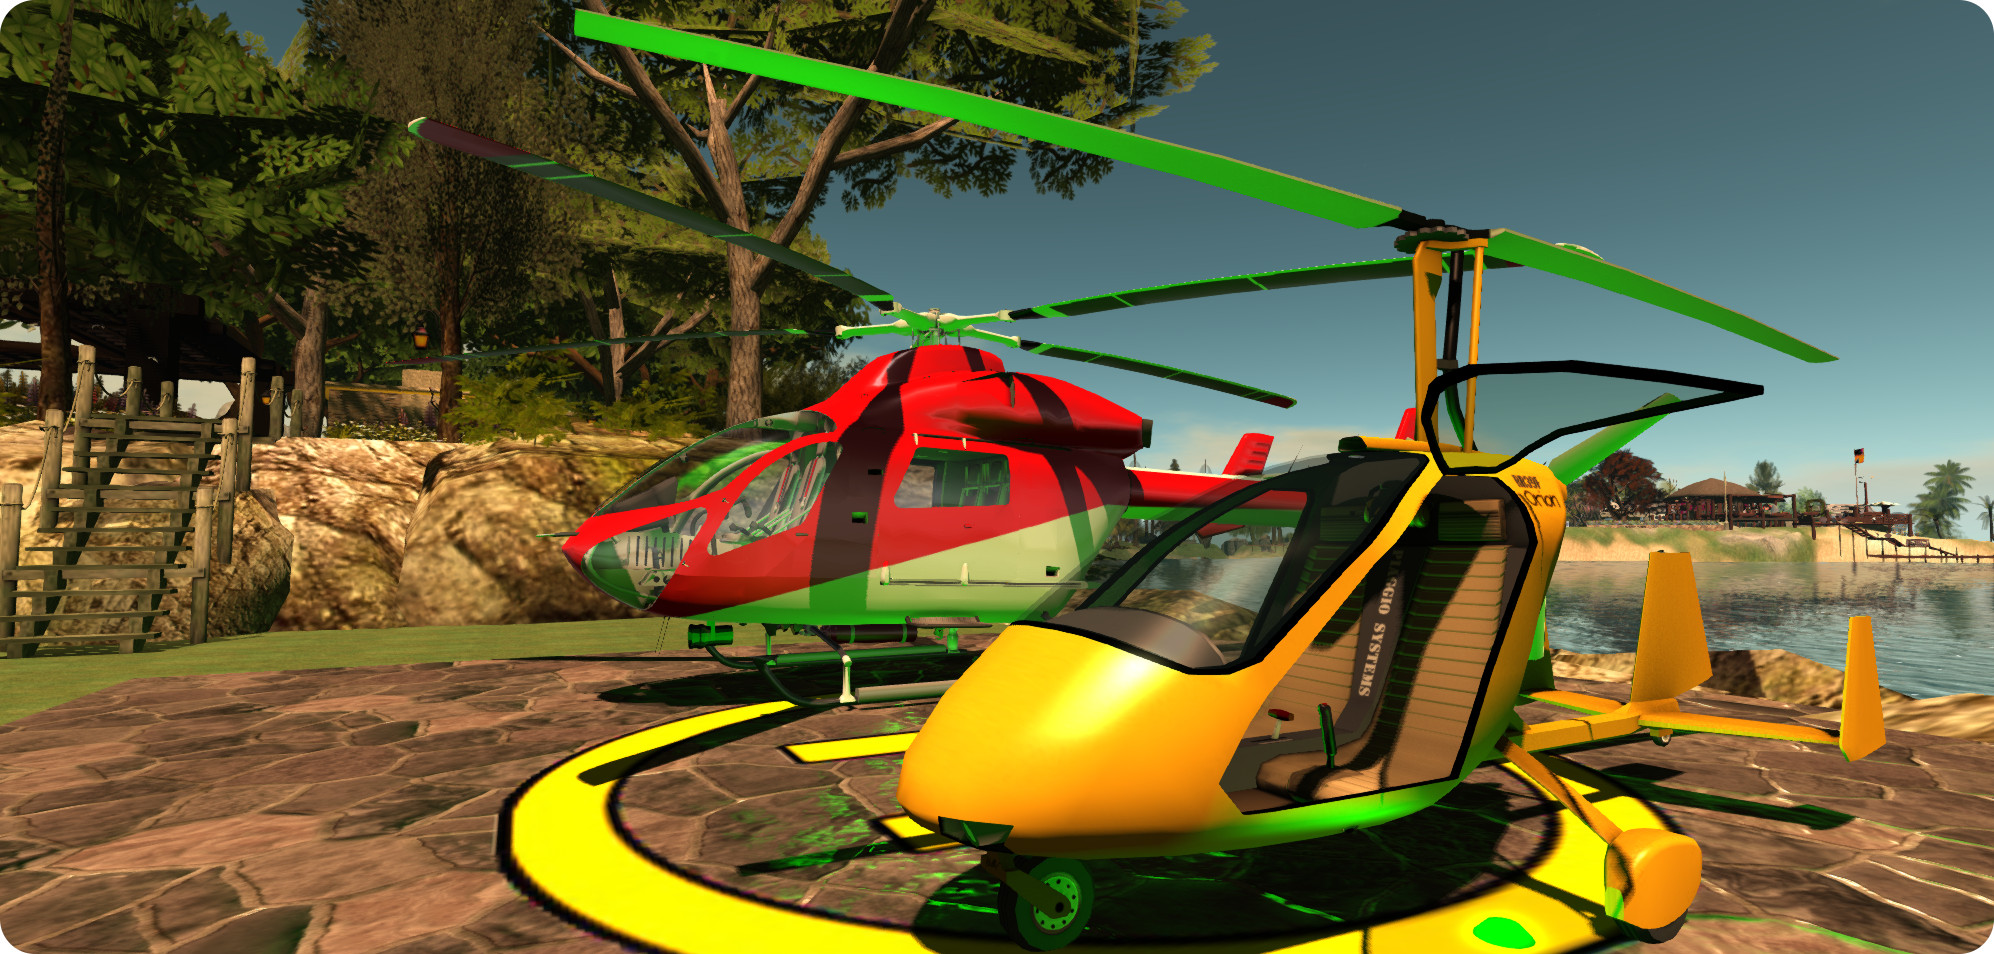
In January 2015, I wrote about my purchase of Ape Piaggio’s Kv23H FoilStream power boat, which I’ve come to really enjoy when in the mood to zap around on the water 🙂 . Since then, Ape has produced a new vehicle in her range. Not a boat, this time – an aircraft. Or more precisely, an autogyro, which I’ve recently had the opportunity to take out and about.

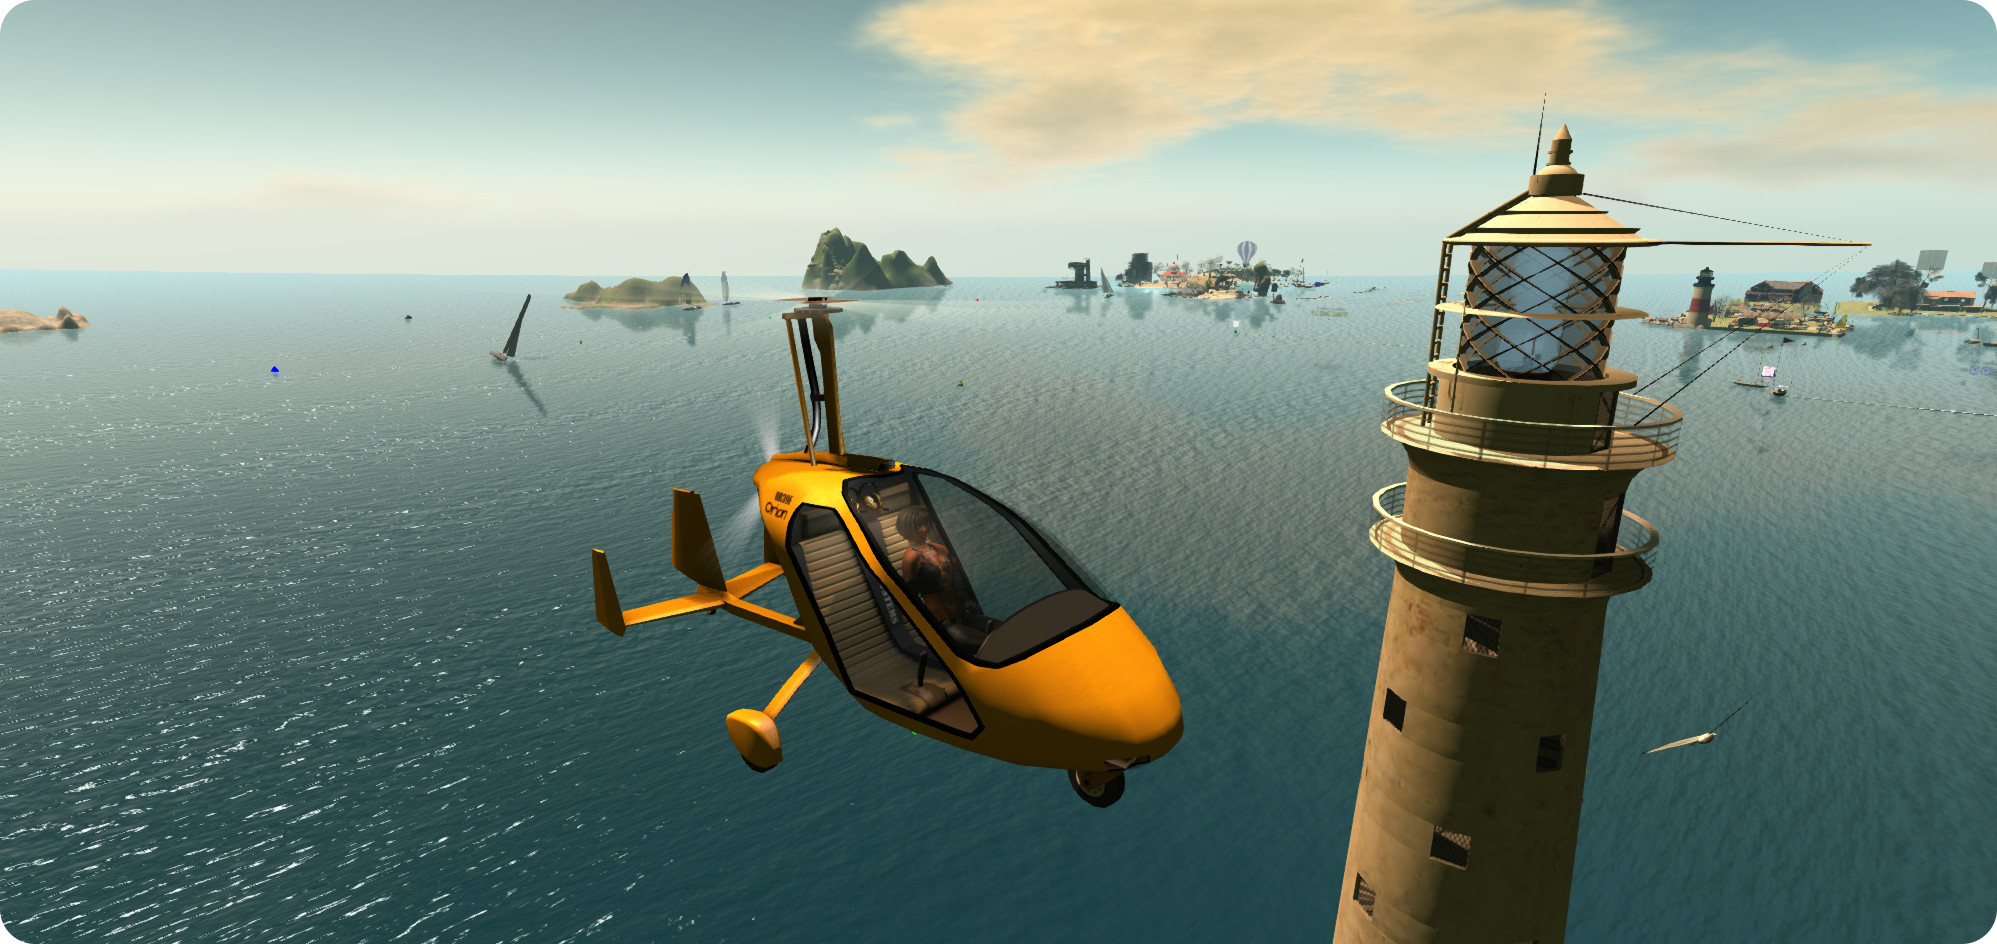
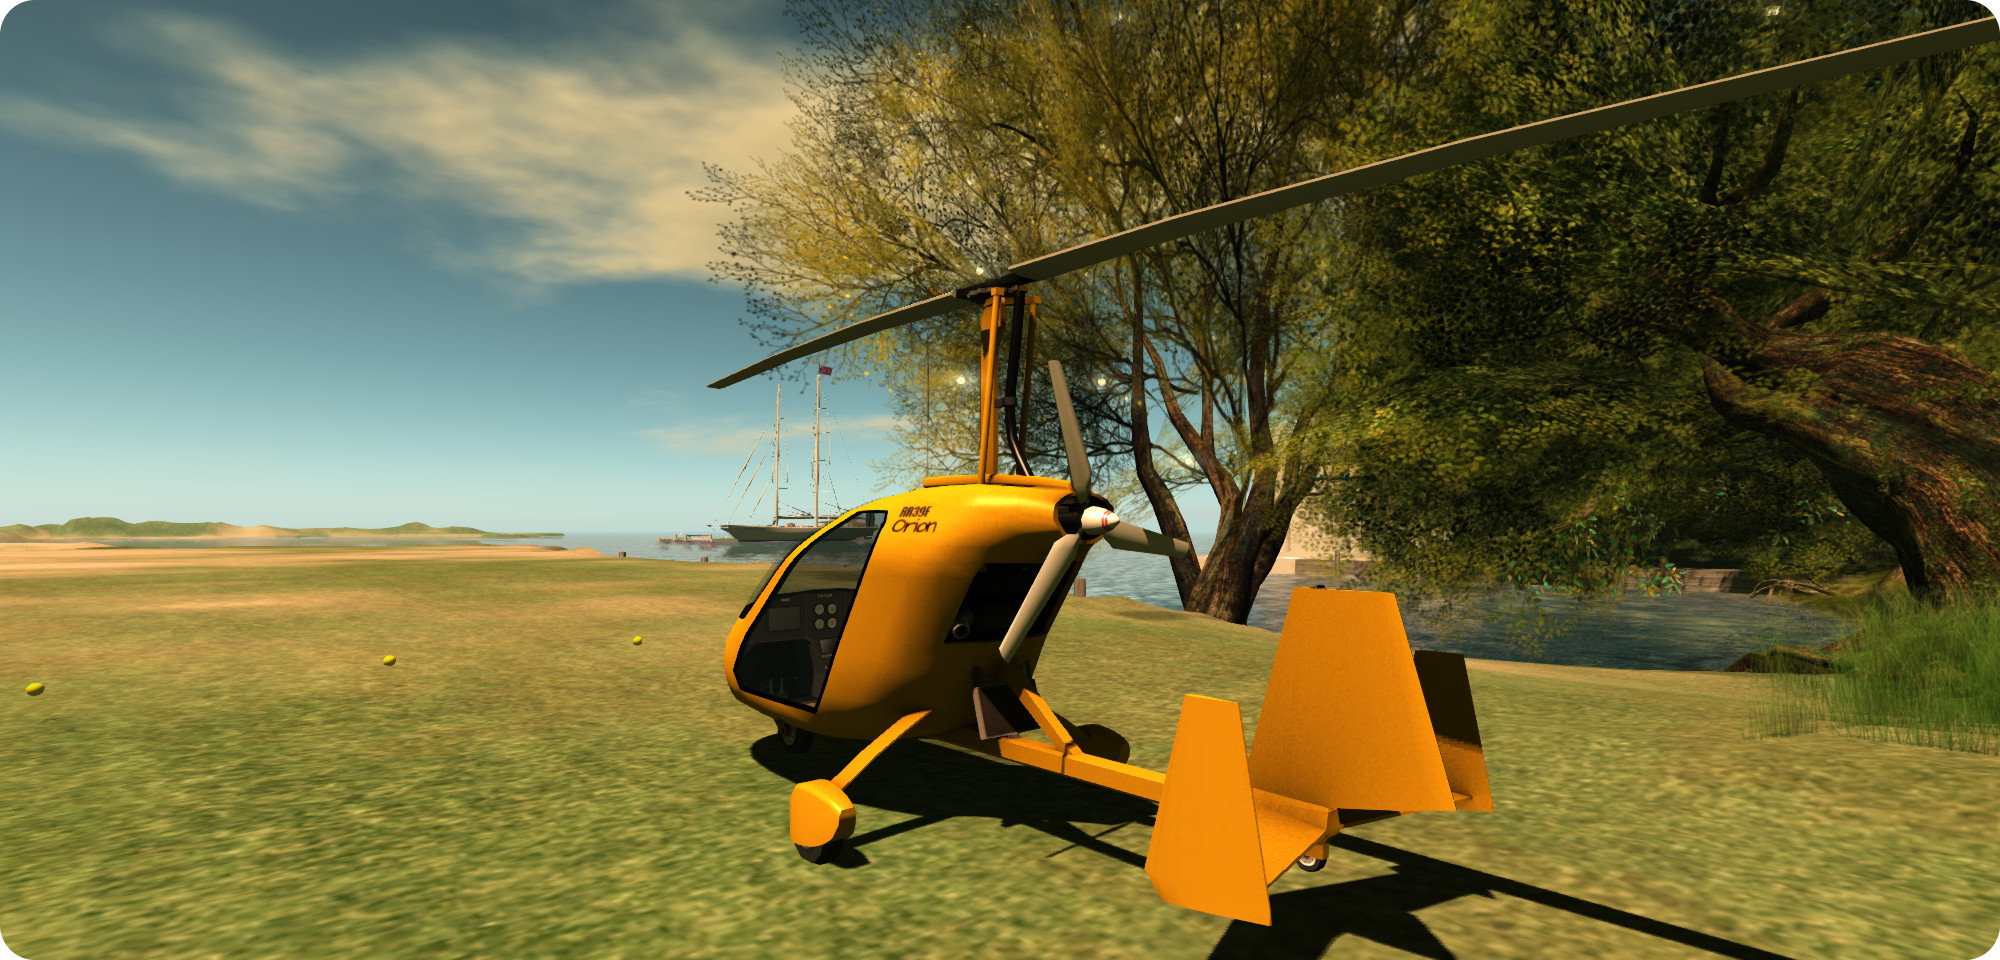
The RR39F Orion is a beautiful little two-seat (side-by-side configuration) autogyro with a fully enclosed cabin. Bright yellow in its default colour, I was immediately put in mind of James Bond’s famous “Little Nellie”, even though the two vehicles are worlds apart, and may even end up calling my Orion “Nellie” when I get around to repainting it!

The Piaggio RR39F Orion - flying past a familiar landmark on Blake Sea
The Piaggio RR39F Orion – flying past a familiar landmark on Blake Sea

For those unfamiliar with the concept, an autogyro is essentially a combination aeroplane and helicopter, using a propeller engine for thrust, and a set of unpowered rotors in autorotation to generate lift and keep the craft airborne. This means it takes-off like a ‘plane, and can hover, descend and land like a helicopter (although it cannot hover and ascend like a helicopter).

This combination of characteristics means an autogyro can take a little time to master – and Ape’s Orion is no exception to this rule. Which should not be taken to mean it cannot be fun to fly; quite the reverse in fact. Half the fun in flying it is mastering it, and once it is properly understood, then it is an absolute joy to fly.

The aircraft comes complete with a HUD, texture maps (for custom painting), an additional paint kit (plain white), and a custom paint applier for your own designs and a manual. Often, when flying aircraft in SL, the instinct is to hop in, start-up and fly. With the Orion, I seriously suggest an appetiser of RTFM (Read The Flippin’ Manual) is the first order of business.

The Piaggio RR39F Orion is a "pusher" autogyro, with the egine mounted bhind the cabin, and facing the rear
The Piaggio RR39F Orion is a “pusher” autogyro, with the engine mounted behind the cabin, and facing the rear

The Orion has three operational modes: automatic, semi-automatic and manual. When flying in the first two modes, everything in terms of getting powered-up and ready to fly is taken care of for you, and you’ll only need the HUD for activating the lights and GPS system (if flying in Mouselook). If you’re flying in manual mode, you will need the HUD and the aforementioned RTFM time; like many real autogyros, the Orion has some very specific steps to getting airborne, including pre-rotating the overhead blades.

In the air, I found the Orion light and responsive, and could handle region crossings very well, both when flying it alone and with a passenger on board (I volunteered my Crash Test Alt for the privilege, rather than risking dunking a friend in Blake Sea 🙂 ). I did find the camera position a little high, giving the Orion the look of being nose-high in level flight, so you may, like me, find yourself using the hover text rate of climb / descent indicator to monitor your horizontal flight, and you may need to keep an eye on the rotor RPM reading as well. So just like real flying, using this autogyro can be a case of learning to trust your instruments over instinct!

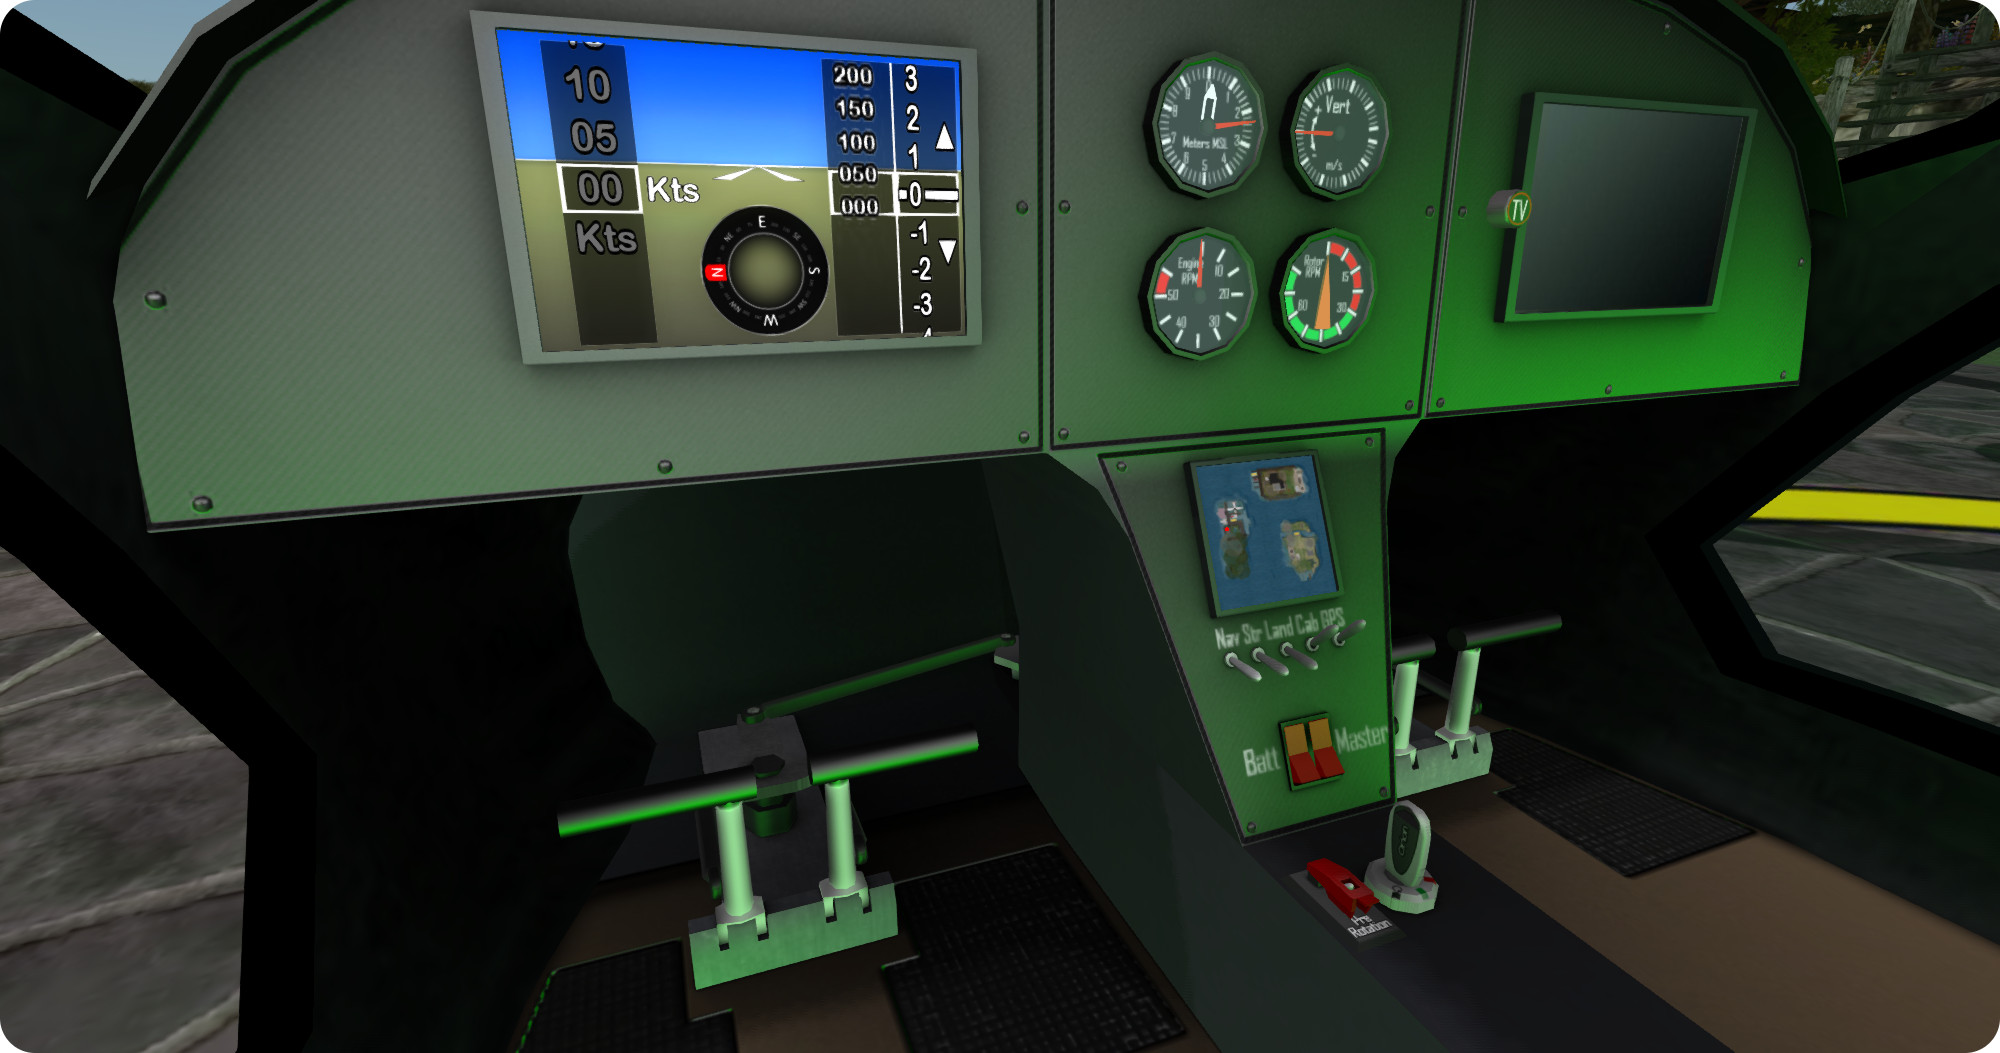
The Orion's cockpit includes fully working switches, CRT, GPS and even a media centre!
The Orion’s cockpit includes fully working switches, CRT, GPS and even a media centre!

The Orion handled well in Mouselook flying and, like the FoilStream, there is a GPS option on the dashboard which tracks your progress across the grid, while the pilot’s CRT will keep you informed of airspeed, etc., as well the hover text, which also re-aligns inside the cabin when using ML. A nice touch is that all the control switches in the cockpit work, although using them in ML will likely required a the use of CTRL-0 and CTRL-9, etc., to flip them. As with Ape’s boats, the cabin also has a built-in TV / media display.

A menu, accessed by touching the aircraft or by clicking on the menu option on the HUD, provides access to various setting – flight mode, throttle mode (digital = increase / decrease throttle by 10% increments; analogue = press and hold PAGE UP or PAGE DOWN to increase / decrease throttle). Digital works great when flying, however, when moving around on the ground, 10% (the minimum setting for the digital throttle) is a tad bit racy and may cause ground controllers (and other pilots at busy airports) to get a little apoplectic as you race along taxiways, so I recommend the analogue setting, which offers a more granular increase / decrease in throttle settings for ground movements. The menu also provides access to the paint controls, added skis for flying from snow, and setting-up the Orion so it can be flown by a friend.

The RR39F Orion alongside my MD900 Explorer

I can’t actually vouch for the painting system; right now I’m without my primary PC and running everything via SL Go, therefore I don’t have the means to download the supplied texture files full-size, so that’s something that will have to wait.

Overall, the Orion is a great little aircraft; fun to master, fun to fly, and with some nice options and touches, as I’d expect, given the creator. I  had fun putting it through its paces – and discovering some of the ways in which you can end up going for an unexpected landing (or if over water – a sudden bath). I found it flies well, handles two avatars on board without too much in the way of camera issues. If there is perhaps one thing it is missing, it’s a brake function for better ground movements control; jiggling the throttle, especially in analogue mode, can be fiddly at times. But, that said, I’m looking forward to flying the Orion again when my “big” PC comes back and can be used, and in getting it set with a custom paint scheme!

Price at the time of writing: L$1750; construction: mesh. LI:  29.

Related Links

Becoming a Vetron aircraft painter

My customisation of a Vetron paint scheme for the DSA C33 Debonair, with the original Vetron colours (centre) and the original DSA paint scheme (furthest from camera)

Update, Thursday, January 29th: following the publication of this review, VetronUK started work updating the ribbing on the elevator textures in her Debonair kits. With some 74 kits to update, this might take a while, but if you do have one of them, you may well be receiving an update soon. Commenting on the update, VetronUK said, “I fly these paints myself and they are some of my favourite works, so if there is something not perfect about them I do get that nagging feeling to fix them :D.” All I can say is – kudos to her for move so swiftly on what is a pretty small thing I only noticed as I fixate on things like that!

Fellow aviator Terag Eshtan, knowing how I like to sort-of customise my boats and aircraft, pointed me towards VetronUK’s Vetron brand of painting kits, and particularly the fat pack of 60+ colour schemes / variations offered for L$1,195 for the DSA C33 Debonair which I recently acquired. As well as the fat pack, Vetron also supply individual colour schemes foe the C33 at L$195 each. The paint kits are provided full perm (subject to an EULA), with the allowance for them to be modified.

While 60+ paint options is a tad excessive for me, I was intrigued to note that Vetron paint kits can include materials options as well. Not only that, but in looking through the catalogue, I found a Red / white colour scheme that I rather liked, so I decided to give it a go. and I’m rather glad I did.

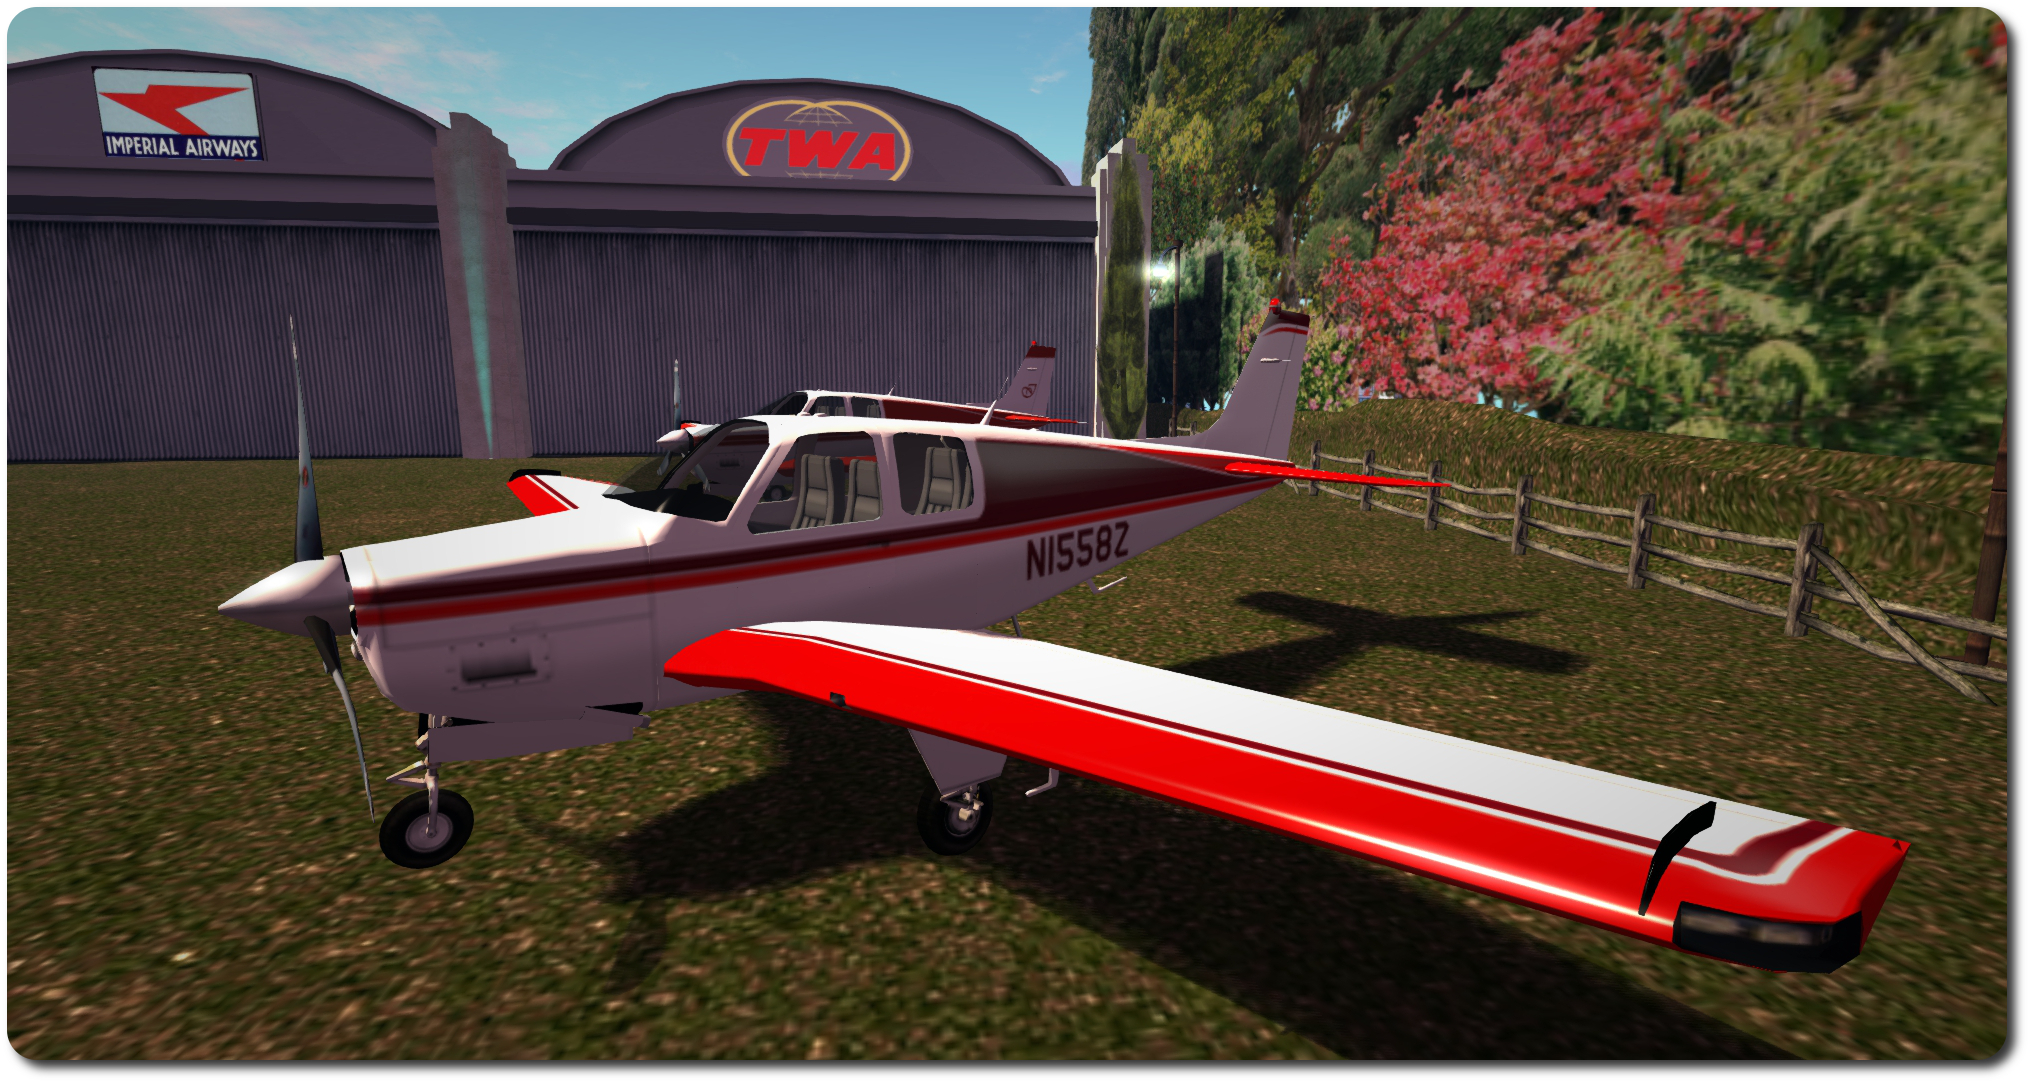
Vetron paint kits utilise materials, which add to the finish, as seen in the way sunlight is reflected in the 'plane's wing, above
Vetron paint kits utilise materials, which add to the finish, as seen in the way sunlight is reflected in the ‘plane’s wing, above (Vetron default scheme shown)

Each kit is supplied with a set of textures corresponding to the aircraft with which the kit is to be used (both with and without aircraft registrations in the case of C33 kits), a control script to be dropped into the ‘plane itself, and a HUD for applying the supplied paint kit / additional options (which may vary from aircraft to aircraft).

If you want to get an idea about how a specific colour scheme might look close-up prior to purchase, try visiting the Vetron store in-world, where you can rez demo models of DSA aircraft with the various paint schemes applied.

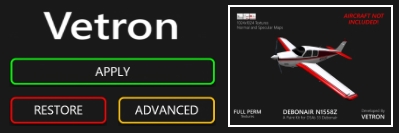
The HUD makes applying a Vetron paint scheme and options a joy

Using one of the kits is simplicity itself – instructions are given on the Marketplace listing for each kit, in a note card included with the kits and via a very clear PDF instruction manual. However, in summary:

  • Rez your ‘plane and drop the Vetron script into its contents
  • Wear the Vetron HUD
  • Click the Apply button on the HUD
  • Use the Advanced button to select any additional options which may be available, such as adding materials (normal and specular maps) to the ‘plane’s finish.

And that’s it; simples. The HUD even includes a Restore button, which will roll changes back to the original supplied default colour scheme for the aircraft.

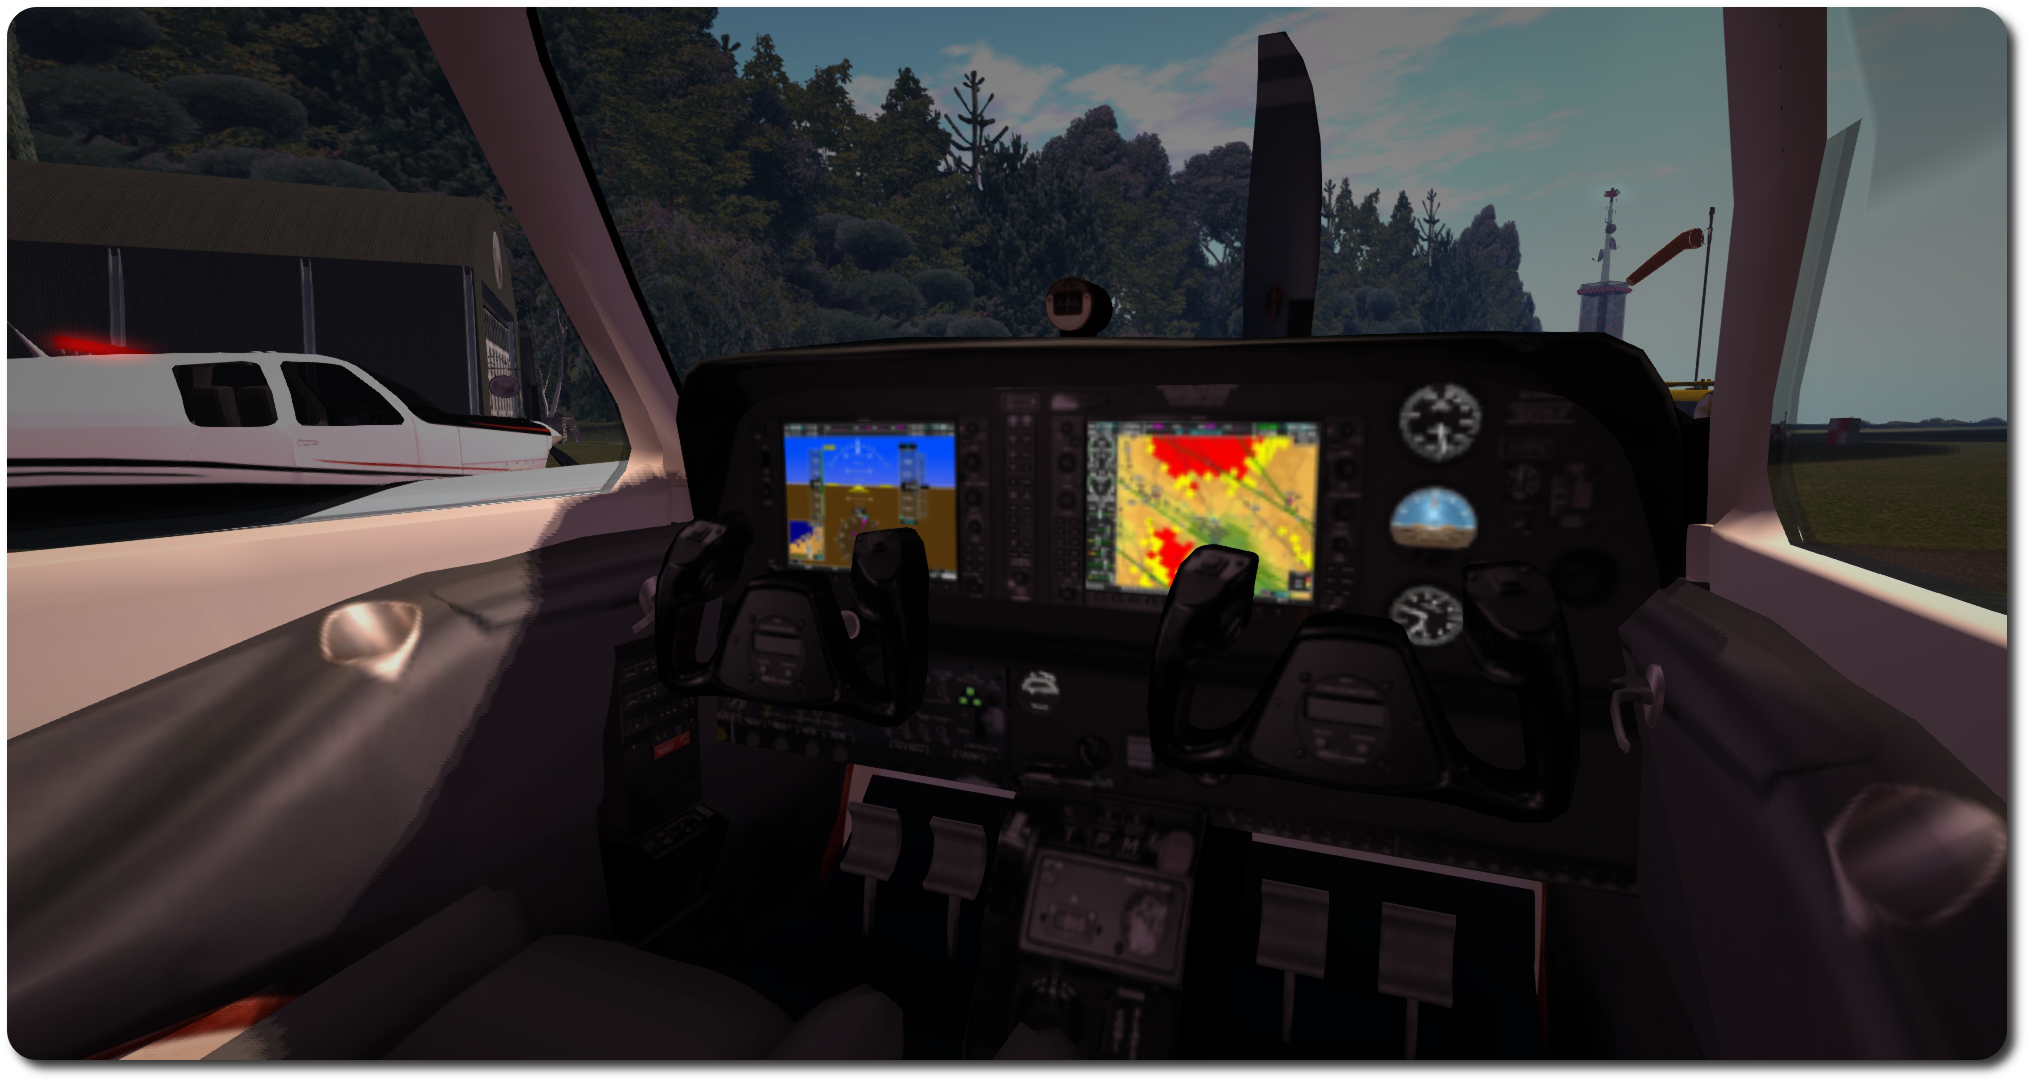
The C33 pack included new interior textures, added via the Materials option on the HUD

Customising the textures is achieve by saving the 1024×1024 files locally and then editing to them make your changes. Testing can be carried out by using the Local Textures option within the viewer, and applying your revised textures to the appropriate faces of the aircraft.

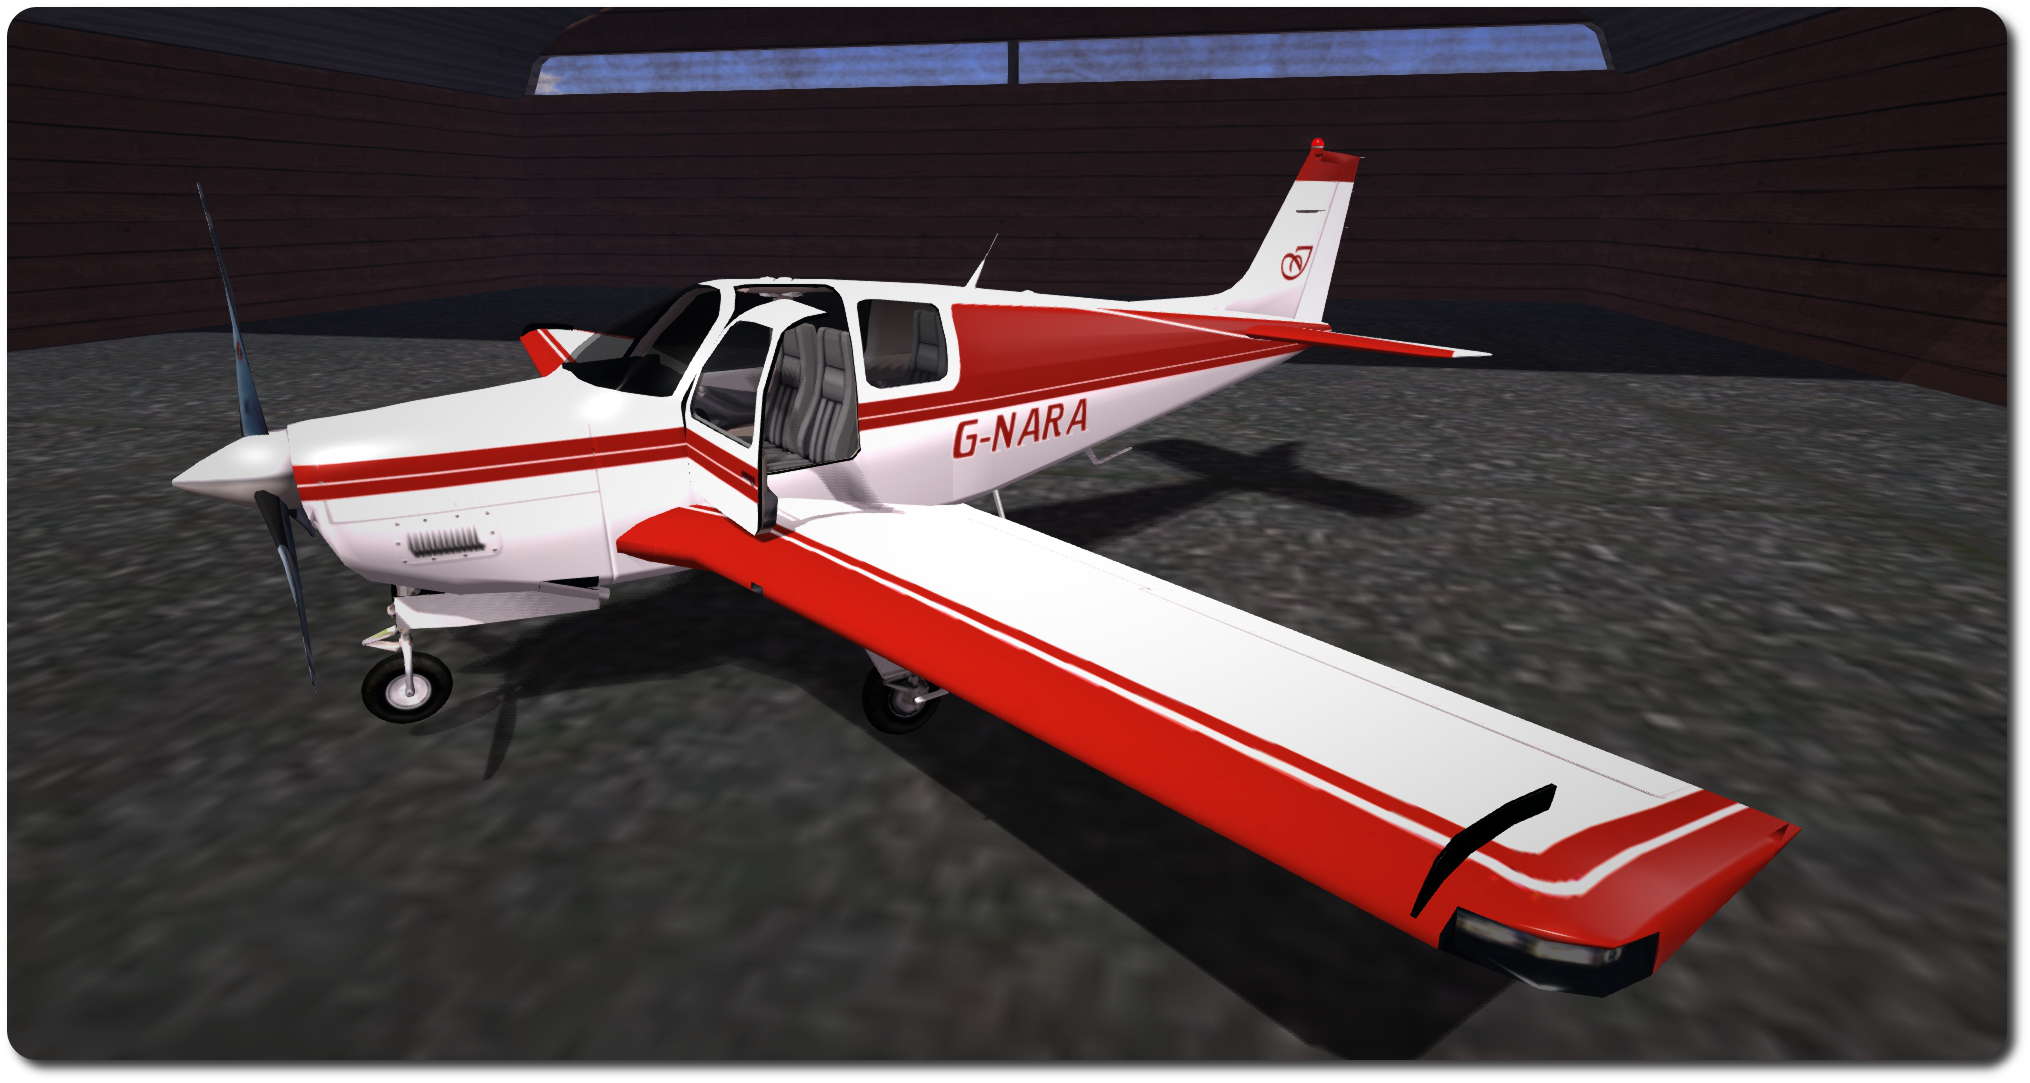
As the kit I purchased gave me a good baseline for how I wanted my C33 to appear, the work I did was pretty basic: altering the rest tints to a single colour, altering the tail and tailplane colour schemes, adding my usual registration & monogram.

The C33 kit does suffer the same issue as the original textures supplied by DSA, in that the ribbing lines on the tailplane’s elevators are significantly out-of-alignment when comparing the upper surface texture with the lower, but tbh, unless someone is looking really closely, this is unlikely to be noticed. Unfortunately for me, it’s also one of those things that, once noticed, can start nagging to be fixed. Fortunately, I wanted a two-tone tail with white elevators, so fixing this wasn’t a major problem, as I had to re-colour things anyway [Addendum: as noted at the top of this piece, VetronUK has / is correcting this.]

My C33 "G-NARA", created using the Vetron paint pack for N as a baseline
My C33 “G-NARA”, created using the Vetron paint pack for N1558Z as a baseline

Once you’re satisfied with your custom textures, upload them as per usual, and if you’re working with a MOD plane like those in the DSA range, again apply them directly from inventory to the required faces of the plane – you don’t need to use the Vetron HUD. However, you can still use the HUD to apply things like materials or glossiness to the plane if you want.

For those who would like a truly unique design, or who have a specific deign in mind that they’re not confident in producing themselves, VetronUK will consider custom work. Information and pricing guidelines are available via note card from her in-world store.

As well as the C33, Vetron produce individual packs (and fat packs) for other DSA aircraft (prices vary) and also kits for other makes of aircraft as well – making a visit to the in-world store worth the effort if you have various makes of ‘plane sitting in your inventory.

All told, the Vetron paint kits are extremely easy to use, and the use of materials really add a nice added finish to an aeroplane, the normal maps somewhat enhancing surface detailing and the specular maps giving a very natural level of light reflection on metallic / glass surfaces. Certainly, I have no hesitation in recommending the kits – in fact, I’m now eyeing-up one of red / white kits for DSA’s C90 GTX King Air! I may even let you know how I get on :).

Related Links

Getting a little Debonair

The DSA Debonair C33 with floats attached

Not too long ago, I wrote about my acquisition of the DSA Beechcraft King Air C90 GTX.  At the time I reviewed it, I mentioned it was somewhat bigger than my “ideal” ‘plane. Well, if only I’d been a little more alert. Not that I’m in any way disappointed with the King Air, I hasten to add (other than the issue in getting it up ramps and out of the water when using the floats), but rather because DSA are, at the time of writing, currently running a special promotion on their Beechcraft C33 Debonair.

This is a variation on the famous Bonanza design, but with a more familiar vertical tail, rather than the latter’s V-tail. However, what matters here is the Debonair comes as a “combo” plane; like the King Air, it can switch between floats and conventional undercarriage with a single command, and is presented, fully-functional, under the promotional offer at the princely some of – L$200!

The Debonair in its default textures and, beyond it, my custom version (some may notice a certain similarity with King Air I recently purchased!)

Obviously, at that price, the Debonair is an absolute bargain (so much so that when I told a friend, they leapt onto the Marketplace and bought two – one for their main account and one for their primary alt account), and I had to pick one up.  And what a bundle of joy!

This is an aeroplane that, given it likely runs the same scripts as the King Air, actually handles somewhat better, with very smooth region crossings for the most part (other than SL occasionally causing the camera to jump from the default view to one set a good ways back from the ‘plane) – no that the King Air was particularly rough. More to the point, with the floats in use and their wheels deployed, the Debonair can climb the ramp of most slips a lot easier than the King Air. I’ve tried my home ramp – although that’s now becoming redundant – the Hollywood airport slip ramp and Honah Lee Surf, and with a little power and a tap of the brakes, the Debonair took all three, where the King Air would frequently bury itself in the ramp / the terrain behind the ramp.

The DSA aircraft HUD, as presented with the Bonanza / Debonair

Being a smaller aircraft than the King Air, the Debonair only sits four, and is a bit of squeeze, but makes for a cosy flight :). As with the King Air, undercarriage options (wheels or floats) can be selected at any time, making landing options very flexible (although you can obviously make a runway landing with the floats attached, thanks to them having their own wheels.

Re-texturing the plane is pretty easy, as one would expect from a DSA plane. Download the maps from the DSA website (they’re labelled “Debonair” on the site, but the ZIP file and textures are all labelled “Bonanza”; this isn’t because they are the wrong files – as noted above, the Debonair is a variant of the Bonanza, and so uses the same texture files. the textures are supplied in .PSD, JPG and (some at least) X2 formats. However, I did note that float textures are currently absent the set (I simply re-used my King Air float textures).

The Debonair is a delight to fly and the DSA scripting makes STOL flights a joy

You can use Local Textures in the viewer to carry out “test fits” of your own designs prior to uploading anything and incurring costs; just make sure you select the required face of the plane when doing so, obviously, and be aware that you’ll need to use the same texture a number of times to achieve a finished result (e.g. you’ll need to use the wing textures individually on the wings, flaps, ailerons, tail & rudder).

Those who read my article on the King Air will see that I went for a similar colour scheme with the Debonair, and the little ego touches! OK, so I now have THREE ‘planes with the same registration, but I think I’ll be OK with the CAA / FAA! 🙂

All told, the Debonair is a great little aeroplane, and one I’ve been having a great deal of fun with – and likely will continue to do so. Certainly, as while the promotional offer is running, it is a genuine bargain.

Comparing size: the C90 King Air (to the rear) and the C33 Debonair side-by-side, and me for a sense of scale

Related Links

The King and I

DSA Beechcraft King Air C90 GTX

No, this isn’t a homage to Yul Brynner, although as the song goes, Second Life could well be a show with everything, even without him… The “King” I’m referring to is the DSA King Air C90 GTX, which has – after some considerable deliberation and bouncing around – become the latest aircraft I’ve added to my collection.

To be honest, it wasn’t actually the ‘plane I started out to get; I actually wanted something a fair bit smaller, given I already have the PBY 6A Catalina, and initially started looking at single-engined ‘planes. But for various reasons, I found myself drifting away from that choice and heading back into twin-engined territory, initially looking at Erick Gregan’s Cessna 421 (which came highly recommended, and looks to be a most excellent aeroplane).

DSA Beechcraft King Air C90 GTX
DSA Beechcraft King Air C90 GTX: the factory default finish, with my customised version beyond

However, as I live “on the water”, so to speak, I was drawn to DSA’s Beechcraft C90 GTX and Baron G58, as both of these are “combo” aircraft: you can switch between standard undercarriage or floats with a single command. In the end, and again on recommendation, I opted for the C90, although I suspect I’d have been happy with the G58.

The C90 is actually a big aeroplane; particularly when up on its floats – the picture of me doing a naughty and sitting on the wing probably gives you an idea of the size, if you’ve never seen this ‘plane before. 100% mesh, it weights-in at 96 LI, which is quite hefty – but it is packing a lot – and a physics weight of 11.7, which is slightly less than that of my MD-900, and almost one-third that of my Kv23H. It is supplied copy / mod, and is suitable for repainting, if desired (and a range of optional paint kits are available in-world from Josh Noonan – and I can personally attest to the quality of his work.

DSA Beechcraft King Air C90 GTX - a closer look at my paint scheme
DSA Beechcraft King Air C90 GTX – a closer look at my paint scheme

Indeed, the very first thing I did on getting mine, other than going for a short familiarisation flight, is repaint it. As I liked elements of the default colour scheme, I decided to stick with this as a base, and then work-in my traditional red and white. The model supports the use of local textures, which means you can play to your heart’s content creating and trying colours, and a full set of textures in JPG, PaintShop Pro and Photoshop formats can be downloaded from the DSA website.

To apply textures when working on things, simply blank a copy of the ‘plane then select the required face, then select and apply the texture from you heard drive via the viewer’s Local Texture option in the texture option of the Build floater. Note that The fuselage and the wing textures are used several times, and you’ll have to make sure they are applied to all the faces using them. For example, the fuselage texture needs to be applied to the fuselage (best to select the face by clicking on the tail), the rudder, and the nose wheel doors. When you’re happy, upload your textures to inventory & apply, or use the painting note card in the ‘plane.

DSA Beechcraft King Air C90 GTX - this is a big turboprop
DSA Beechcraft King Air C90 GTX – this is a big turboprop

I went for a very personalised look, as the photos here show, complete with my usual G-NARA registration and a bit of ego-pandering with a stylised “I” on the tail and on the winglets. I also added a touch of shine to the fuselage and wing textures, to give them more of a polished finish.

Flying-wise, this is a ‘plane aimed towards the more “realistic” end of the market (my one disappointment with the Catalina is that the flight system is rudimentary). DSA aircraft aren’t perhaps as advanced in this area as some other makes, but they are still pretty comprehensive. A detailed HUD is supplied, and commands can be given in chat as well.  One thing that is missing for those who enjoy procedure, is a need to carry-out pre-start checks (battery, magnetos, etc.); “lstart” and “rstart” will kick the respective engines into life once seated in the pilot’s seat, although the Engines button on the HUD will run through a more complete (and automated) pre-start check and engine start-up. This will also enable navigation, strobe and beacon lights for you, as well as close the boarding door.

... with a comfortable interior
… with a comfortable interior

The C90 handles really well in the air, and can be shared between pilot and co-pilot (the HUD is copy / transfer, so you can share it with friends) – make sure you both activate the co-pilot option on the HUD. Range is limited by fuel, and the plane comes equipped with a full fulling station (43 prims, which I presume works with any DSA ‘plane), or a convenient jerry can should you need to set down somewhere to refuel. Another nice touch is the inclusion of an instrument landing system (ILS), although I confess I’ve yet to actually try this, and documentation is supplied on the DSA website, rather than with the aircraft.

A slight irritant I have found is that this plane doesn’t handle water ramps at all well; with the wheels for the undercarriage deployed, it seems to require a decent run-up to a ramp at full throttle. Even then, getting ashore is far from guaranteed, and should you do so, there is the inevitable desperate throttling back before you go careering too far across an apron. Ironically, the C90 cannot make the relatively shallow ramp I have at home at all.

Also, the HUD also seems sensitive to region crossings; In the 4.5 hours I’ve been flying the plane, I’ve had buttons vanish from the HUD when clicked just after a region crossing, only to reappear on their own a short while later or at the next crossing. This is a niggle, but not a major problem.

DSA Beechcraft King Air C90 GTX - guess where? ;-)
DSA Beechcraft King Air C90 GTX – guess where? 😉

At L$5500 (at the time of writing), this isn’t a cheap light plane to have – but you do get the floats / wheel combo, and the mod options are all good, paint-wise. Overall, I’ve found the C90 more than pleasing to fly – the ramp issue following water lands notwithstanding; and particularly like the fact you can swap between floats and “standard” undercarriage mid-flight. OK, so not terribly real, but adds a certain flexibility when flying :). While this may not be the ‘plane I set out to get, I certainly have no regrets over buying it, and I’ll likely be swapping back and forth between the C90 and my Catalina quite regularly.

Related Links