The Sansar release for February 2018, called “Bust A Move” was deployed on Thursday March 1st. This release builds on some capabilities added in recent Sansar releases, as well as adding some new capabilities. to the mix, notably for experience creators, but also to help improve with user-user engagement.
The release notes provide full information on the new features, updates, documentation changes and resolved / known issues within the release. The following is a general overview of the update’s key changes.
Initial Notes
- As with Sansar deployments, this update requires the automatic download and installation of a client update.
- One launching the client the first time, following update, the log-in splash screen’s Remember Me option will be unchecked, and needed to be re-checked for log-in information to be correctly retained by the client.
- Changes to the avatar system (e.g. avatar emotes) means that on logging-in for the first time following the update, users will be placed in the LookBook (Avatar App).
Experience Access Controls
The new means of controlling who can access an experience have been introduced with the Bust a Move release:
- Only Me: only the creator can access the experience.
- Guest List: only those defined on an access list will be able to see the experience in their Atlas, and access it, regardless of whether or not they are on your Friends list.
- Ban List: maintain a list of individuals specifically banned from accessing an experience (they will not see it listed in their Atlas).
These options work alongside the existing options of making an experience open to anyone, or limiting access to only those people on your Friends list, and are set when publishing an experience.
The default published status for an experience is to have to open to everyone, and with only the ban list active (if used). To change this:
- Either edit the experience and select the Publish option or from the My Experiences list, click on the Publishing Options buttons for the experience you with to update.
- Make sure the Publishing Options > Who Can Visit tab is open (if not already selected).
- Use the top drop down (Everyone, Only the Following, Only Me) to set the initial level of access to the experience.
- Selecting Only the Following allows you to limit access to an experience to friends and / or a guest list (both can be set together).

- Note that any experience you have set to access by friends only and / or a guest list will appear in your Atlas with a yellow icon in the top right corner of their Atlas image.
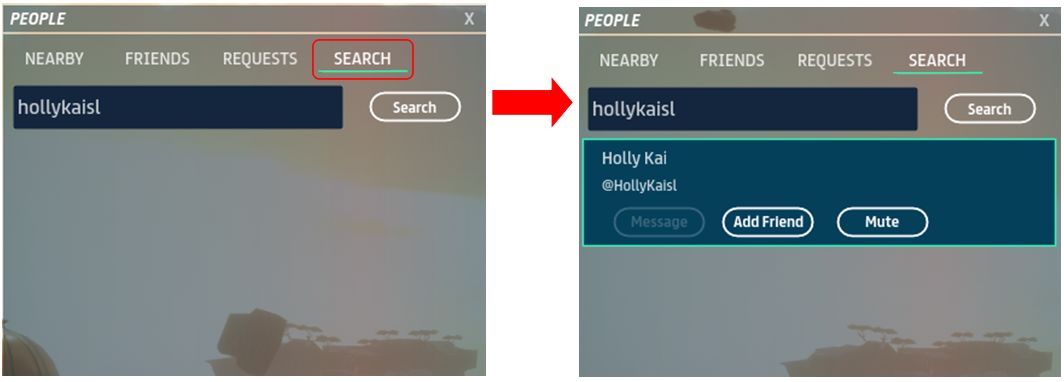
Creating either a Guest List or a Ban List comprises the same basic steps:
- Click on the required Edit List button. This opens the list, which will display the names of anyone already added.
- Click the Add button to add further avatar names / avatar IDs (no “@” required for the latter) and click Search.
- Click the correct name in the list box (if more than one) to highlight it, and then click Add Selected to add them to your list.
- Repeat for each new name; click Done when finished, to return to your updated list.
- Click Save to save the list.

Names can be removed at any time by clicking on any name in a list to highlight it, then clicking the Remove button – note that no confirmation is required.
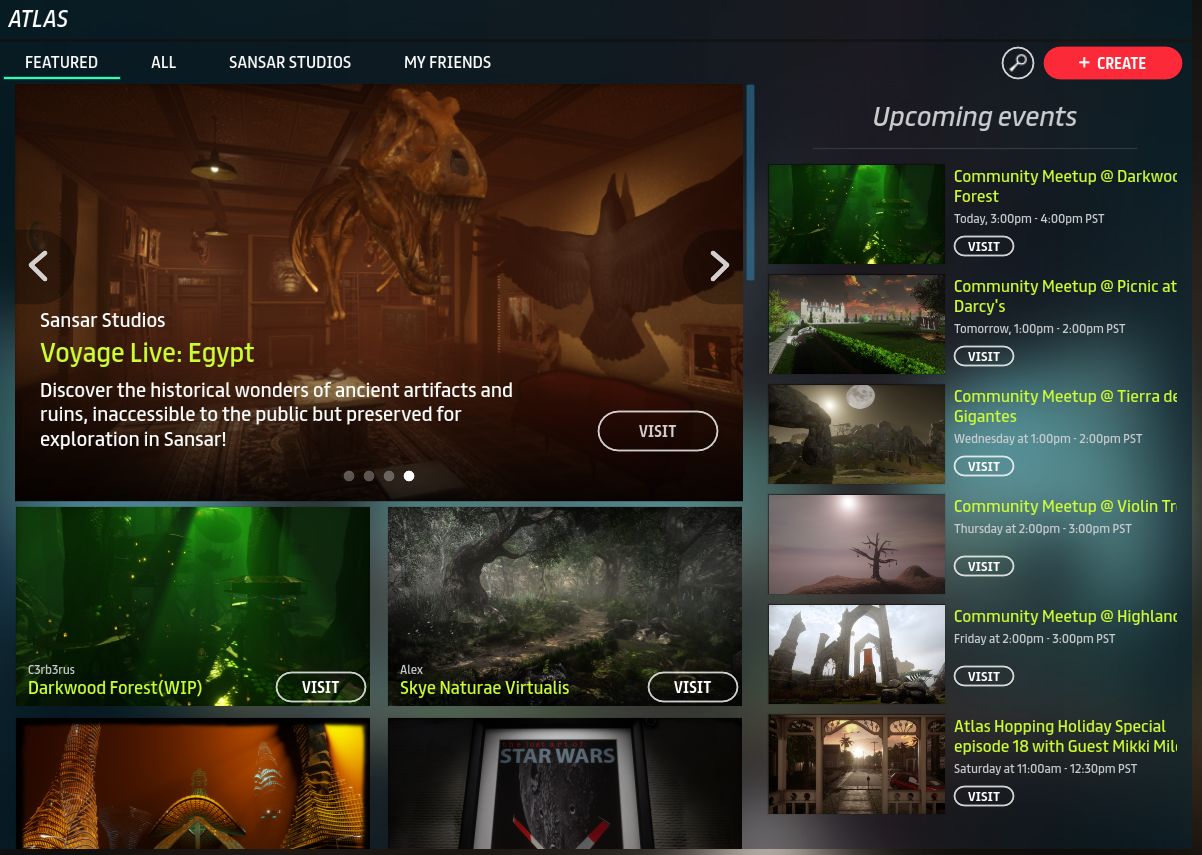
Bookmark Favourite Experiences
Users can now bookmark experiences for display in a Favourites tab within both the Client and web Atlas. To add an experience to your list of favourites:
- Display the information page for the experience in either the Client or web Atlas.
- Click on the heart icon to add the experience to your list of favourites. The icon will turn a solid white, indicating you have added it to your favourites, and the Favourite count for the experience will increment by one.
- To remove an experience from your Favourites, display the information page for the experience and click the heart icon again. It will no longer appear solid white, indicating the experience has been removed from your favourites, and the Favourite count for the experience will decrease by one by one.

Avatar Emotes

A rudimentary set of “avatar emotes” (that’s basic animations to you and me) have been added for Desktop mode with this release.
Triggered by nearby chat commands, three basic animations are provided:
- /clap – Causes your avatar to clap its hands for a few seconds.
- /dance – Causes your avatar to perform a short dance.
- /thumbsup – Causes your avatar to give a “thumbs up” gesture.
The dance animation perhaps leaves the most to be desired, bringing to mind as it does visions of the hoary old “dad dancing at a wedding” visual gags. The clapping is (for me) the most effective, and the thumbs-up sitting between the two.
The Lab has indicated that more sophisticated means of animating avatars will be coming down the pipe, so regard these options as just a first step along the way towards more expressive avatars.
Chat Improvements
It is now possible to access the chat app from experience load screens and the Atlas, allowing conversations to continue more broadly across Sansar.