Lumiya, the go-to Second Life / Open Sim client for Android by Alina Lyvette, updated on Wednesday, October 19th, although it’s taken me a few days to get around to blogging about it.
Version 3.1.2 contains a single up-front change, but it’s one users are liable to appreciate: the ability to save chat and IM logs to their Google drive.
To do so, two things are required:
An active Google account with access to Google drive (no surprises there).
Download and install the Lumiya Cloud Plugin on the devices(s) you use with Lumiya.
Log-in to Lumiya and go to Settings via the menu (top left icon) and select Chat and Messages.
Tap Save chat history to Google Drive to enable it.
Setting Lumiya to save chat and IM logs to your Google Drive
A pop-up is displayed for your Google account (not your Second Life account). If you have more than one Google account, you may be asked to enter the details of the account you wish to associate with Lumiya.
Selecting your Google account
Providing you have selected the Google account you wish to use, tap Add Account.
A further pop-up is displayed asking you to allow the Lumiya Cloud Plugin service to access your Google drive in order to save and retrieve chat and IM log files.
Providing you’re happy, tap Allow.
Granting the cloud app permission to save and retrieve your chat and IM logs
And that’s it. You only need to do this once per device, you don’t have to do it for each of your SL accounts if you have more than one. When you log in to Second Life, your chat and IM histories will be available, and saved automatically.
If you ever want to revert to saving your histories directly onto your device, simply go to Menu (top left) > Settings > Chat and Messages and uncheck Save chat history to Google Drive.
Feedback
This is a handy update for Lumiya, offering a single location for chat and IM logs which could be especially useful for those who may use Lumiya on more than one device (e.g. a Tablet and a smartphone), as it removes discontinuities in saving logs locally – although obviously, you’ll have to use the Lumiya Cloud Plugin to associate each device with your Google account / drive.
And if Google Drive isn’t your thing? Then you can continue to save your logs directly to the storage on your device. Simples!
Lumiya, the go-to Second Life / Open Sim client for Android by Alina Lyvette has received a further set of updates and bug fixes with the rapid-fire release of version 3.1 and version 3.1.1.
Both updates appeared on Tuesday, September 27th, version 3.1.1 offering several bug-fixes following the initial 3.1 release, while the latter offers fixes, tweaks, improvements and new features.
The major improvement is actually under-the-hood, with the adoption OpenGL ES 3.0 support within Lumiya. For those running the app on a modern smartphone or tablet, this should see much improved rendering of meshes in the 3D world view, including mesh bodies and avatar attachments, and improvements in frame rates. It should also provide much better rendering of translucent mesh clothing, getting much closer to how it should actually look.
Alongside of this comes a number of UI / functional changes and additions, including:
The ability to edit parts of your Profile & add notes to other profiles
The ability to take and share snapshots
Setting your home location
Mesh body HUDs should now work as expected
Kemono avatars should now render correctly
Play sound stream moved to the Action menu (top right of screen) when in the Contacts / chat windows
Screen corruption in 3D view on certain Adreno 305 and 320 GPUs (e.g. Sony Xperia T3)
A fix for a crash when saving notecard data.
Some of these updates are looked at in more detail below.
Lumiya 3.1 should allow mesh body users to use their HUD systems – use pinch-zoom to enlarge the HUD if required
Profile Editing
The Profile editing options comprise: changing your Profile picture, editing your About details and creating / editing personal / private notes on either your own profile or the profile of another avatar (personal / profile notes only).
You can change your Profile picture, edit your About description and / or add personal notes in Lumiya
To do this with your own Profile, go to the menu (top left icon) then My Avatar > My Profile. This will open your profile. Tap Change Picture to open your inventory to select a new picture. To update your About description or personal notes, scroll down to the relevant part of your Profile and tap the Edit option. This will take you to an Edit screen, and open your device’s on-screen keyboard for editing.
Tapping the Edit options with About and personal notes will open an edit window and display your device’s on-screen keyboard
Add Notes to another Profile
To add personal notes to the Profile of another avatar, locate the avatar in your Contacts or through the Nearby option. Tap the avatar name, then tap their Profile icon (top right of the window). Their profile will open, and you can scroll down to Personal Notes and tap Edit.
Take and Share Snapshots
Lumiya 3.1 presents users with the ability to create and share snapshots from the 3D view. To take a snapshot, go to the 3D view and position your camera as required. Tap the Action menu (top right of the window) and then tap Share Screenshot…
This will take a picture of your in-world view, and then display your available options for sharing the image. Note that this might include options to save the snapshot to your device which are not supported at this time. You can, however, upload to Google+, Google Photos, etc., or send via e-mail, etc.
You can now take and share snapshots using Lumiya
Setting Your Home Location
When you wish to set home to the location you are in, open the Action Menu and tap Location Details. A Set Home option should be displayed on the right side of the location title bar.
Setting your Home Location from the Locations Details window
Feedback
I’ve not had the opportunity to play in-depth with the updates with this release, so this is very much a rapid-fire overview based on the time I’ve had available with Lumiya 3.1. During my 90 minutes (ish) for fiddling, I encountered no problems and happily edited my profile, updated some notes on another profile, and e-mailed a number of snapshots via Gmail. Testing my Maitreya HUD went well, with pinch-zoom I could enlarge it sufficiently to tap the tabs on it, mask / show parts of my body, etc. Understandably, rendering of the HUD was a little fuzzy and made reading labels a little difficult, but anyone with a reasonable degree of familiarity with their HUD shouldn’t find this a major issue.
Alina indicates that further updates are on the way, and what we have here sees Lumiya take a further step to becoming the indispensable option for Android users needing on-the-go access to Second Life and OpenSim (data charges allowing if not on wifi!).
Update: July 30th: Alina has released version 3.0.2, which should fix the issue of exporting conversations to the Android Documents folder, and which provides the ability to drag a visble HUD on your screen to reposition it.
Lumiya, the go-to Second Life / Open Sim client for Android has been extensively updated, with version 3.0 released on Wednesday, July 27th, and a further 3.0.1 release with additional fixes, options and requests, hitting Google Play on Thursday, July 28th.
For those unfamiliar with Lumiya, it is an extensive Android client offering all the essential functionality found in the viewer: ability to chat, IM, carry out group functions, manipulate inventory and outfits, manage transactions, interact with objects (including viewing & editing scripts, permissions allowing), teleport to places, view the map, and so on. And, for those who wish a more immersive experience on their android device (providing it has the processing power), Lumiya provides a real-time scene rendering capability, allowing you to see the world and other avatars, touch objects, operate your camera, walk, fly, and so on.
With version 3, Alina Lyvette, Lumiya’s developer, has completely overhauled the client, and while there are still some little niggles, the result is once again quite astonishing.
The Interface
For regular Lumiya users the most obvious change is to the client’s UI. This has been completely re-worked top-to-bottom, offering a far more intuitive, mobile device style approach, incorporating things like pinch / zoom screen actions, sliding menus, and a much cleaner look and feel. By default, Lumiya now launches in its blue / white appearance, with the blue / black an option, alongside a new pink appearance option. In addition, the 3D mode has been overhaul to make use of mobile device gestures such as pinch / zoom and drag, and the buttons have been revised and improved to give the in-world view a much cleaner look.
The log-in screen retains much of the “old” look, with short cuts to select the details of any account previously used to log-in to SL with Lumiya & auto-populate the user name / password fields, and to access the client’s settings, together with a drop-down to access the grid selector (where you can also add new grids) or to show your password in text when logging-in.
Lumiya 3 uses the blue / white UI by now the default, although the blue / black (and a pick / white) option remains available for those who prefer it
Once logged-in, the UI is in conversation mode, with local chat open the conversation screen opens. This has two points of particular interest: the first is the Android menu icon in the top left corner of the screen (see above), which replaces the Lumiya icon. tapping this will display the Lumiya menu (which can also be displayed with a simple left-to-right swipe of the screen).
The second is that profile icons are now displayed in the chat and contact tabs throughout Lumiya – in the image above, for example, the profile picture for Preiddeu Annwn is displayed in the image above.
The Lumiya menu can be displayed either by clicking the Android menu icon, or via a finger swipe from the left, and can be scrolled up / down, if required
The new UI design does mean there are some significant changes to where some options might now be found which will take users a little time to get used to; however many of these changes make Lumiya feel more “viewer like” in its approach. For example, group options have all now been brought together under the group profile display, rather than various menu / drop-down options. What’s more, they now allow group roles to be created and assigned, and member’s abilities edited.
So, accessing a group profile is now a matter of clicking Group tab in the Chat window, then tapping the required group and tapping the Profile icon in the top right of the group message display. The group’s profile is displayed in a layout similar to that of many TPVs, with individual tabs accessing various options. Thus, people can be invited into the group from the Profile tab (providing you have the ability to invite new members); roles can be added / edited from the Roles tab; and members can be operated on from the Members tab.
With group, you can now invite new members through the group’s profile windows (left) view group roles (centre) or members; create new role (via the + button, centre), assign / remove abilities to / from roles (right) and changes members’ roles or eject members etc (not shown above). Click for full size, if required.
Given the extend of changes to the IU, the easiest way to familiarise yourself with them is to spend time using Lumiya. Keep an eye out for changing icons, and things like the Android three vertical dots icon (generally top right of the Lumiya window), indicating when further options are available within in given screen.
The 3D View
The other very noticeable change to Lumiya for existing users is the 3D world view (Lumiya menu > 3D View). As noted above, this now uses Android pinch and drag gestures to manipulated the camera by default, leaving the (redesigned) on-screen buttons for avatar movement and flight. However, for those who prefer to toggle the movement buttons between avatar and camera movement, it can be reinstated via Lumiya menu > Settings > 3D View, and then checking Show Camera Button. note that even with the camera button enabled, you can still use Android gestures to manipulate the camera as well. For ease of reference, screen captures here show the camera button.
The updated 3D View in Lumiya
The two overlay buttons – Chat and Outfit – do just that: overlay the in-world view with your chat options or Outfit folder, allowing you to converse or change outfit, as per previous versions of Lumiya. However, the two buttons which are likely to be of particular interest in the new 3D view are the HUD button (lower left) and the Target Picker (top right of the Lumiya window).
Lumiya is an Android client for Second Life which is really quite remarkable. I’ve followed its development through these pages at length since it first appeared back in 2012, all the way through to the most recent 2.6 iterations; and while things have been quiet for a while, rest assured, development work is continuing, although developer Alina Lyvette has been very caught-up with physical world matters.
But did you know you can also run Lumiya on Windows*?
I suspect the responses to this question would be a combination of “No,” and “Why would I want it to?” The former is to be expected, and the latter not unreasonable; after all if you have a computer capable of running the Second Life viewer reasonably well why would you want to try anything else?
One possible “why” might be if you have a relatively low-end laptop you use when on the move, and would like to use it on occasion to access SL, but don’t want to meet the costs involved in running Bright Canopy’s (very excellent) service (which I’ve also covered in these pages), and would prefer something bigger than the average android device screen when accessing SL.
While I’ve not played at length with things, I did come across an Android emulator called Bluestacks which runs on the PC, and used to be available for Mac*. It makes running Lumiya on Windows a breeze in four easy steps:
Download and run the Bluestacks installer
Run the Bluestacks player and sync it to your Google Android account
Run Google Play and install Lumiya (note the app does have a one-off purchase fee if you have not previously installed it)
Launch Lumiya.
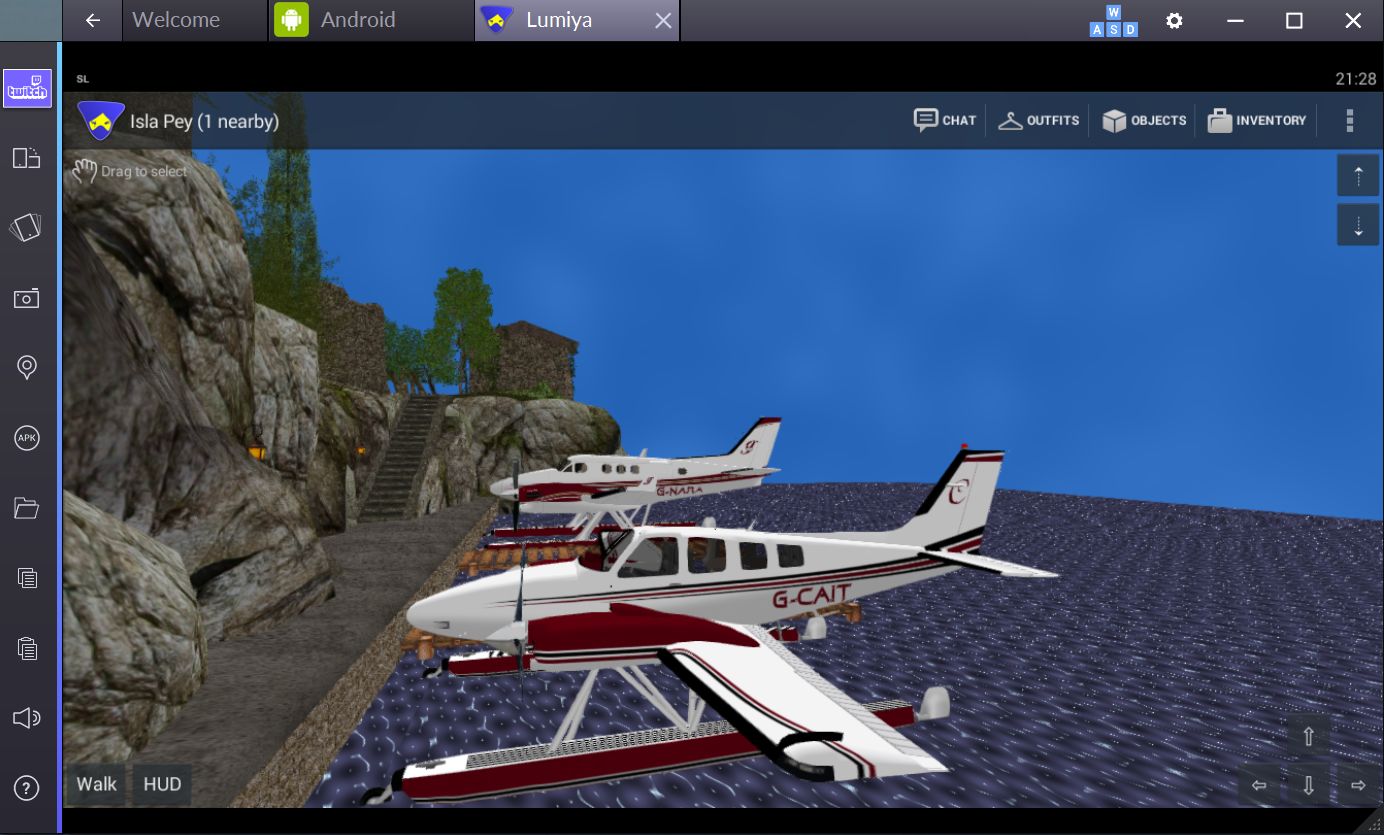
Running Lumiya via Bluestacks on a Windows notebook
There are a few things to note when running Lumiya in this way. Obviously, being built for Android, it is intended for touch screen use. While Bluestacks does a credible job of allowing mouse and pointer control and the use of keyboard controls such as the arrow keys and WASD, I tended to find that things did sometimes “stick”, prompting a return to the on-screen movement / camera focus keys (lower right corner of the screen).
Given Lumiya is running on a “standard” computer, it’s also easy to slip into the expectation that it will respond to things like ALT-camming when it obviously won’t – this is still an Android app running through an emulator, after all! Given this, it goes without saying that if you’re new to Lumiya, you have a lot to learn via the UI and options – feel free to use my reviews linked to above 🙂 .
Also keep in mind that as Lumiya is an Android app, the graphics don’t have the same fidelity as the viewer, and running it through an emulator isn’t going to magically give you that kind of fidelity. If that is what you’re looking for when on the move and don’t have a good laptop, then Bright Canopy is your best option outside of a new computer / GPU.
Lumiya may not have the same graphics fidelity as a full viewer, but if you’re looking for something that can provide you with an in-world view while on the move with a low-end laptop and for whatever reason, don’t want to use Bright Canopy, running it in through the Bluestacks emulator might be a viable option
Also, as you are running through a laptop there might be a temptation to push Lumiya’s settings to the max. I’d actually suggest some caution here; your little laptop / notebook may appear to have more umph that an Android device, but you will take a performance hit in driving things too high.
Overall, I found running Lumiya on an Asus PCee 1201N to be pretty acceptable – certainly a lot less tasking than running a full-blown viewer. I wouldn’t want to do it all the time, but as an alternative and occasional means of access, it’s more than acceptable. The UI, intended for touch screens, works well with mouse and pointer, and while there were occasional niggles (sometimes I had to swap back to using the on-screen movement keys via mouse, for example), my biggest issue came down to trying to use conventional SL keyboard shortcuts simply because I was sitting in front of a keyboard!
Whether this kind of approach would appeal or not is down to the individual – but as noted above, if you are looking for the occasional access to SL from a low-end laptop / notebook whilst on the go and either don’t want to fiddle with the small screen of and android device or would prefer not to use Bright Canopy, then this might be an option for you.
Addendum, June 3rd: While Bluestacks was promoted as a “free” emulator, some 36 hours after installing it, I received a notification requiring a subscription payment of either US 2.00 per month or to install sponsoring games in order to keep using it to access Android apps.
*Note: Bluestacks used to offer an emulator for Mac systems as well. It’s no longer available through their own website, but can be obtained from this review on the TechApple website. However, as I’m not a Mac user, I have no idea how up-to-date it is compared with the latest Windows version of the emulator or whether it is a viable option.
Lumiya on Bluestacks was tested using an Asus PCee 1201N with 2 Gb RAM, Intel Atom 330 processor and Nvidia Ion 2 GPU using shared memory.
Update May 13th: Lumiya 2.6.1 is now available. This includes a fix to prevent the client crashing when rendering megaprims, improved mesh download speeds and reduced lage when walking.
Alina Lyvette announced the arrival of the latest release of Lumiya on Friday May 9th.
Version 2.6.0 marks the arrival of support for Fitted Mesh and some pretty impressive under-the-hood changes which greatly enhance Lumiya’s performance in the areas of memory use, bandwidth utilisation and 3D rendering – and I found the improvements really are noticeable.
Feature Updates
Fitted Mesh Rendering
The Fitted Mesh support is perhaps the most visible update in terms of new features. I only carried out a quick series of tests, but found the FM demos I had from back when testing the SL Fitted Mesh viewer (I’m ashamed to say I’ve still not actually started using any mesh clothing myself…) worked just fine when rendered by Lumiya.
Fitted Mesh on Lumiya: renders perfectly
I did experience slight issues with mesh clothing failing to render when worn, something I don’t remember occurring back when mesh support was first released. Should this happen, a quick fix seems to be hopping out of the 3D view and back again.
Request Teleport
Another feature update with this release is the Request Teleport option. This can be accessed by:
Selecting the person you wish to teleport to from your Friends list, or IM
Tapping the MORE option
Tapping Request Teleport. This opens the Request Teleport message screen where you can enter your request text (or leave blank, if you prefer). Tapping OK will close the message window and send the teleport request
If the request is accepted, you will receive a teleport offer, as per usual; if the request is declined, you will not receive any feedback (which is how Request Teleport is handled in the viewer and not a result of Lumiya failing to receive a notification).
Request Teleport: now in Lumiya
Avatar Interaction
Lumiya 2.6.0 makes it easier to interact with nearby avatars when in 3D view by applying a long touch to the centre of an avatar. This may take a little practice, but when used, will call-up a menu allowing you to initiate an IM session with that avatar, examine them, etc.
Using a long touch or the Drag to Select option on a nearby avatar will allow you to ineract with them via the displayed menu bar
If you have problems using the long touch method when selecting an avatar, don’t forget you can also use the Drag To Select option in the top left corner of the 3D view and drag that down to point to the avatar in question.
Under-the-Hood
The under-the-hood changes in 2.6.0 range from fixes for known crash issues through to better support for transparency in the 3D world view and new notification sounds (courtesy of Lhasa Mencur) to some really quite significant performance improvements.
The latter include a reduced memory footprint together with much improved bandwidth usage, both of which see Lumiya operate a lot more smoothly (not that it was ever particularly clunky). Much has been done to the 3D rendering performance and management as well.Also these combined mean it should be much easier to run Lumiya on lower-end system, and for those on high-end devices, to have more of the bells and whistles turned on. In my case, for example, these improvements make it a lot easier to run with High Quality Textures enabled by default on my Nexus 2013 HD.
Feedback
Lumiya has always offered tremendous value for accessing Second Life while on-the-go with a suitable Android device. Even allowing for trying to maintain compatibility with older versions of Android, Alina consistently pulls-off some impressive miracles with the client, and 2.6.0 more than demonstrates this. While the added features may seem minimal (even though mesh support represents considerable work itself), the performance improvements evident in this release are astonishing.
Obviously, with a fairly high-end Android device running Android KitKat and a quad-core Qualcomm Snapdragon™ S4 Pro, 1.5 GHz / Adreno 320, 400 MHz combination, I stand to benefit the most from the improvements in rendering, but even so, on my old Samsung Galaxy S2 with Android 4.1 Jellybean and Dual-core 1.2 GHz Cortex-A9 / Mali-400 combination, things were still noticeably faster.
For those who require access to OpenSim and are Android users with a decent CPU / GPU combination and a reason screen size, Lumiya stands head-and-shoulder above the rest. For those wanting mobile access to Second Life and have limited screen size, it also beats SL Go hands-down in terms of convenience of use, even if it lacks the full rendering capabilities of the latter.
Alina Lyvette released version 2.5.6 of the Android Second Life / OpenSim Lumiya client on Sunday December 8th, with a further release of version 2.5.7 on Monday December 9th; with both came a chance to have a real play with my latest toy: a gorgeous new Asus Google Nexus 7 HD 2013!
Between them, these two updates comprise:
2.5.6:
View your own profile and your transaction history
Send and receive group invites;
Persistent mute/block list support
Improved performance when handling large chat histories and of flexible prims in 3D mode
Fixes for an issue with touching complex mesh objects and a few known crash issues.
2.5.7:
Quick fix for broken Unicode support in instant messages
Support for editing scripts, both in inventory and objects.
Note that with this review, I am using a 7-inch display screen, and so have split screens enabled. If you are using a device with a smaller screen / without spilt screen functionality enabled, your screen displays may differ from those shown in this review. All examples may not be the only means of accessing specific functions; they are based on my preferred usage of Lumiya.
Viewing Your Own Profile or Transaction History
Until now, Lumiya has only offered the opportunity to view other people’s profiles. With version 2.5.6+ you can now view your own. you can also view your transaction history, which will list any transactions made during your current log-in session.
To view your profile, display the Chat or 3D world view and tap on the More option (three vertical dots) at the top-right of the screen. This will open a menu of additional options. Tap on My Avatar.
If you have split screens enabled, your profile will be displayed on the right, with the My Avatar options on the left
If you are not using split screens, tap My Profile to display your profile.
To view your transaction history, follow the steps above to display the My Avatar options, then tap L$ Balance option. All transactions which have taken place while you’ve been logged-in will be displayed.
Send and Receive Group Invites
Lumiya 2.5.6 starts into providing more group management functions with the ability to send / group invites with those groups in which you have be granted the required ability, or to receive group invites from others.
Sending A Group Invite
Currently, you can only send an invite to join a group to people recorded on your Recent, Friends or Nearby lists, there is no name picker to allow you to search for and invite anyone.
Tap Chat to display your Chat / Group options
Tap the name of a group to which you wish to invite new members. The group’s panel will open
Tap the invite icon located at the top right of the group’s panel.
Lumiya 2.5.6+: the new invite option for inviting people to join your groups
A pop-up is displayed, allowing you to select the person you wish to invite from your Recent, Friends or Nearby Lists
Tap the name of the person you wish to extend an invite. A role picker pop-up is displayed
Tap the role you wish to assign to the person. The role is selected and an invite is automatically sent.
Receiving a Group Invite
As with any graphical viewer, when you receive an invitation to join a group, Lumiya displays the invitation in you Chat panel, with the name of the person sending the invitation, details of the group you are being invited to join and option buttons to join the group or decline the invitation.
Persistent Mute / Block
Lumiya 2.5.6 introduces the ability to mute / block IMs and group chat sessions, either for the current log-in session or persistently across all sessions until the block is lifted.
Muting an Individual or Group
There are a number of ways to mute an individual or group:
Muting via the chat list:
If the person or group you wish to mute is in your local chat list, long-touch the name.
A pop-up menu is displayed:
If you have selected an individual, it will include the option to Block them. Tap this. You will be prompted to confirm your action; doing so will add the individual to your Block list
If you have selected a group, it will include an option to Close and Mute the group chat. Tapping this will prompt whether you wish to mute the group chat for just the current log-in session or permanently (until unblocked). Tap the required option to add the group to your Block list.
You can mute / block group chat for your current log-in session or persistently across all log-in sessions, including via other viewers
Muting via the Friends, Group or Nearby lists or from within an IM or Group chat session:
You can block someone via an open IM session, or by starting an IM session and selecting the mute option
Select the individual you wish to mute / block from your Friends or Nearby lists OR tap on the name of the group you wish to mute chat from in your Group list
The IM or Group chat panel will open. Tap the More option icon (three vertical buttons) to display a further list of options. Tap Mute.
You will be prompted whether you wish to cancel, or mute the individual / group for the current session or persistently across all log-ins – tap your desired preference.
Muting an individual in group chat:
Long-touch the individual’s name within the Group chat panel
A pop-up is displayed allowing you to Copy Message Text or Block the individual
Tap Block to add the individual to your Block list.
Muting via the Block list:
From Chat or the 3D world view, click the More icon (three vertical dots) in the top right of the screen
Tap My Avatar
Tap Block List to display a list of blocked individuals, groups and objects
Tap the ADD button (top right of the list)
A pop-up is displayed for your Recent, Friends and Nearby lists. Tap the required list to display a list of names
Tap on the avatar name you wish to block, it will be added to your Block list
Repeat for any additional names you wish to block.
Blocking an Object
To block a spammy object:
Locate it in Chat and long-touch it
A pop-up is displayed which includes the option to Block it
Tap the Block option to add the object to your Block list.
Unmuting / Unblocking an Individual, Group or Object
The easiest way to unblock an individual or group is via your More menu:
From Chat (or the 3D world view, click the More icon (three vertical dots) to display further menu options
Click My Avatar
Click Block List to display a list of blocked individuals, groups and objects
Scroll through the list to the item you wish to unblock and long-touch You’ll be prompted to confirm the action
Once you have confirmed, the individual, group or object will be unblocked.
Note that you can also unmute an individual or group by tapping on the name in your Friends / Nearby / Group list to start an IM / Group chat session, then tapping the More icon and tapping the Unmute option.
Script Editing
Lumiya 2.5.7 allows users to view and edit scripts to which they have the requisite rights both from within inventory and contained within an object.
Open a Script from Inventory
Tap the Inventory icon to open the Inventory panel
Navigate to the folder containing the script to be edited
Locate the script in the folder’s contents and tap it
The script editor is displayed, together with the selected script in view mode.
Open a Script in an Object
In the 3D world view, long-touch the object containing the script you wish to edit
Tap the More button to display additional options
Tap Open Contents. A panel displaying the objects content is displayed
Locate and tap the script to be edited. The script editor is displayed, together with the selected script in view mode.
Lumiya 2.5.7+: viewing and editing your scripts
Editing a Script
Tap the Edit Script button at the bottom of the script editor
Position the cursor at the point at which you wish to start editing
Use the Save or Discard Changes buttons as required.
Lumiya on the Nexus 7 HD 2013
And now, a short aside.
Until now, I’ve been running Lumiya on a Samsung Galaxy S2. However, when updating my mobile (cell) phone recently, my new service provider offered me a bundled deal of a new ‘phone and free Nexus 7 HD 2013 (and other goodies) for the same monthly tariff rate I had been paying for just the S2. Needless to say, I took the deal.
Lumiya has always worked well on the S2 for me, although it did struggled at times and the relatively small screen tended to make some operations difficult. With the Nexus 7 HD, Lumiya is nothing short of glorious.
Not only do I now have the benefit of full split-screen functionality on a screen big enough to handle it when operating in landscape mode, I have the power of two quad-core processors to handle the application and graphics and twice the available memory to play with. As a result, the 3D view is a joy to behold and move around in, with very fast rendering (as compared to the S2), and much smoother movement – both of which go a long way towards making Lumiya even more of a desirable travel companion.
The in-world view is also given something of a boost as a result of the Nexus 7 HD’s screen resolution: 1920×1200 which is a higher resolution than I’m getting on my main monitor (1440×900) and at an amazing 323ppi. This presents a really crisp, clean in-world image when using the 3D view which is very pleasing to the eye; so much so that I don’t feel a screen cap really does it justice.
My home on Lumiya and the Nexus 7
The Nexus does still struggle when using the High Quality Textures setting, particularly at higher draw distances (48-96 metres), but given the load this is placing on the tablet in areas rich in textures, many of which will be of very high-resolution, I’m not actually surprised by this.
As I plan to use (and already have used) the Nexus to do “serious” work when moving around, I opted to invest in a bluetooth keyboard to go with it; and I have to say it is an absolute joy to have – part of this article was actually written on the Nexus using the keyboard and Kingsoft Office. The keyboard really adds to using Lumiya in that it obviously avoids the need to use the on-screen keypad, and the cursor keys / WASD keys can make moving around a lot more natural in feel if you’re used to using them on a viewer. Another benefit with a keyovard is the reduction in the amount of finger prints and smears appearing on the screen as you work.
I’m actually rather chuffed with the keyboard, which I obtained via ebay for £15.00 (around 18.00 Euros or $24.00 USD). When not in use it forms a protective cover for the screen, clipping securely around the tablet. Despite being aluminium in construction, it adds very little physical bulk to the Nexus when “closed”, and also has the benefit of solid-feeling keys which have a decent travel distance, which aids typing considerably. With Lumiya, it certainly adds a huge amount of ease to chatting and (now) to editing scripts! If you’re a Nexus user and decide to get one, just make sure you get the version which matches your Nexus model (2012 or 2013).
A suitable bluetooth keyboard can further enhance using Lumiya
Feedback
Two more outstanding updates for Lumiya which significantly enhance its capabilities, although on smaller screen the script editor may have limited appeal due to issues of trying to correctly position the cursor for editing and seeing what you’re actually doing when an on-screen keypad is open as well. On a tablet, the editor performs much better, although big fingers may still have problems positioning the cursor. As noted above, use of a suitable keyboard easily overcomes this problem (although are not always easy to use when on the move), and also makes chatting and IMs massively easier for those who aren’t keen on on-screen keypads.
The group and mute / block options are likely to be heartily welcomed by those putting Lumiya to extensive use and / or who routinely visit busy places. Both work very well using the methods I’ve indicated in these notes, and the functionality appears flawless.
All told, these are more than worthwhile updates to Lumiya further enhancing its reputation as the go-to solution for anyone on android who needs to access SL for a broad range of tasks while on the move.