An Inverse House in Second Life

inVerse Tarzana the (latest) Pey abode

So yeah; another couple of months have passed, so it’s time for me to play housey again with yet another build for the home island. There were a couple of reasons for this (outside of me wanting to bore you!). The first was that, whilst happy I managed to customise my Fallingwater build such that it “fit” within the island setting, I couldn’t quite get the interior décor to the point where the place felt entirely “right”. The second was that in thumbing through the Marketplace, I happened across the inVerse Tarzana Contemporary House by Novocaine Islay, and it tickled my curiosity enough to have me take a look at it at the inVerse in-world store.

inVerse is not a new brand to SL; I actually have a couple of their houses from long time ago packed away in Inventory, and if I’m honest, their builds can be (for me) a mixed bag, largely because of the use of baked shadows / lighting in some of their older models. However, once I’d seen the Tarzana in-world, I was sufficiently taken by the design’s potential to start mentally ticking through the possibilities as to how it might fit within the home island without me having to necessarily change too much. And given the house is priced at a mere L$349 with Copy / Modify permissions, it wasn’t as if it was going to break the bank if I opted to get it and things didn’t work out.

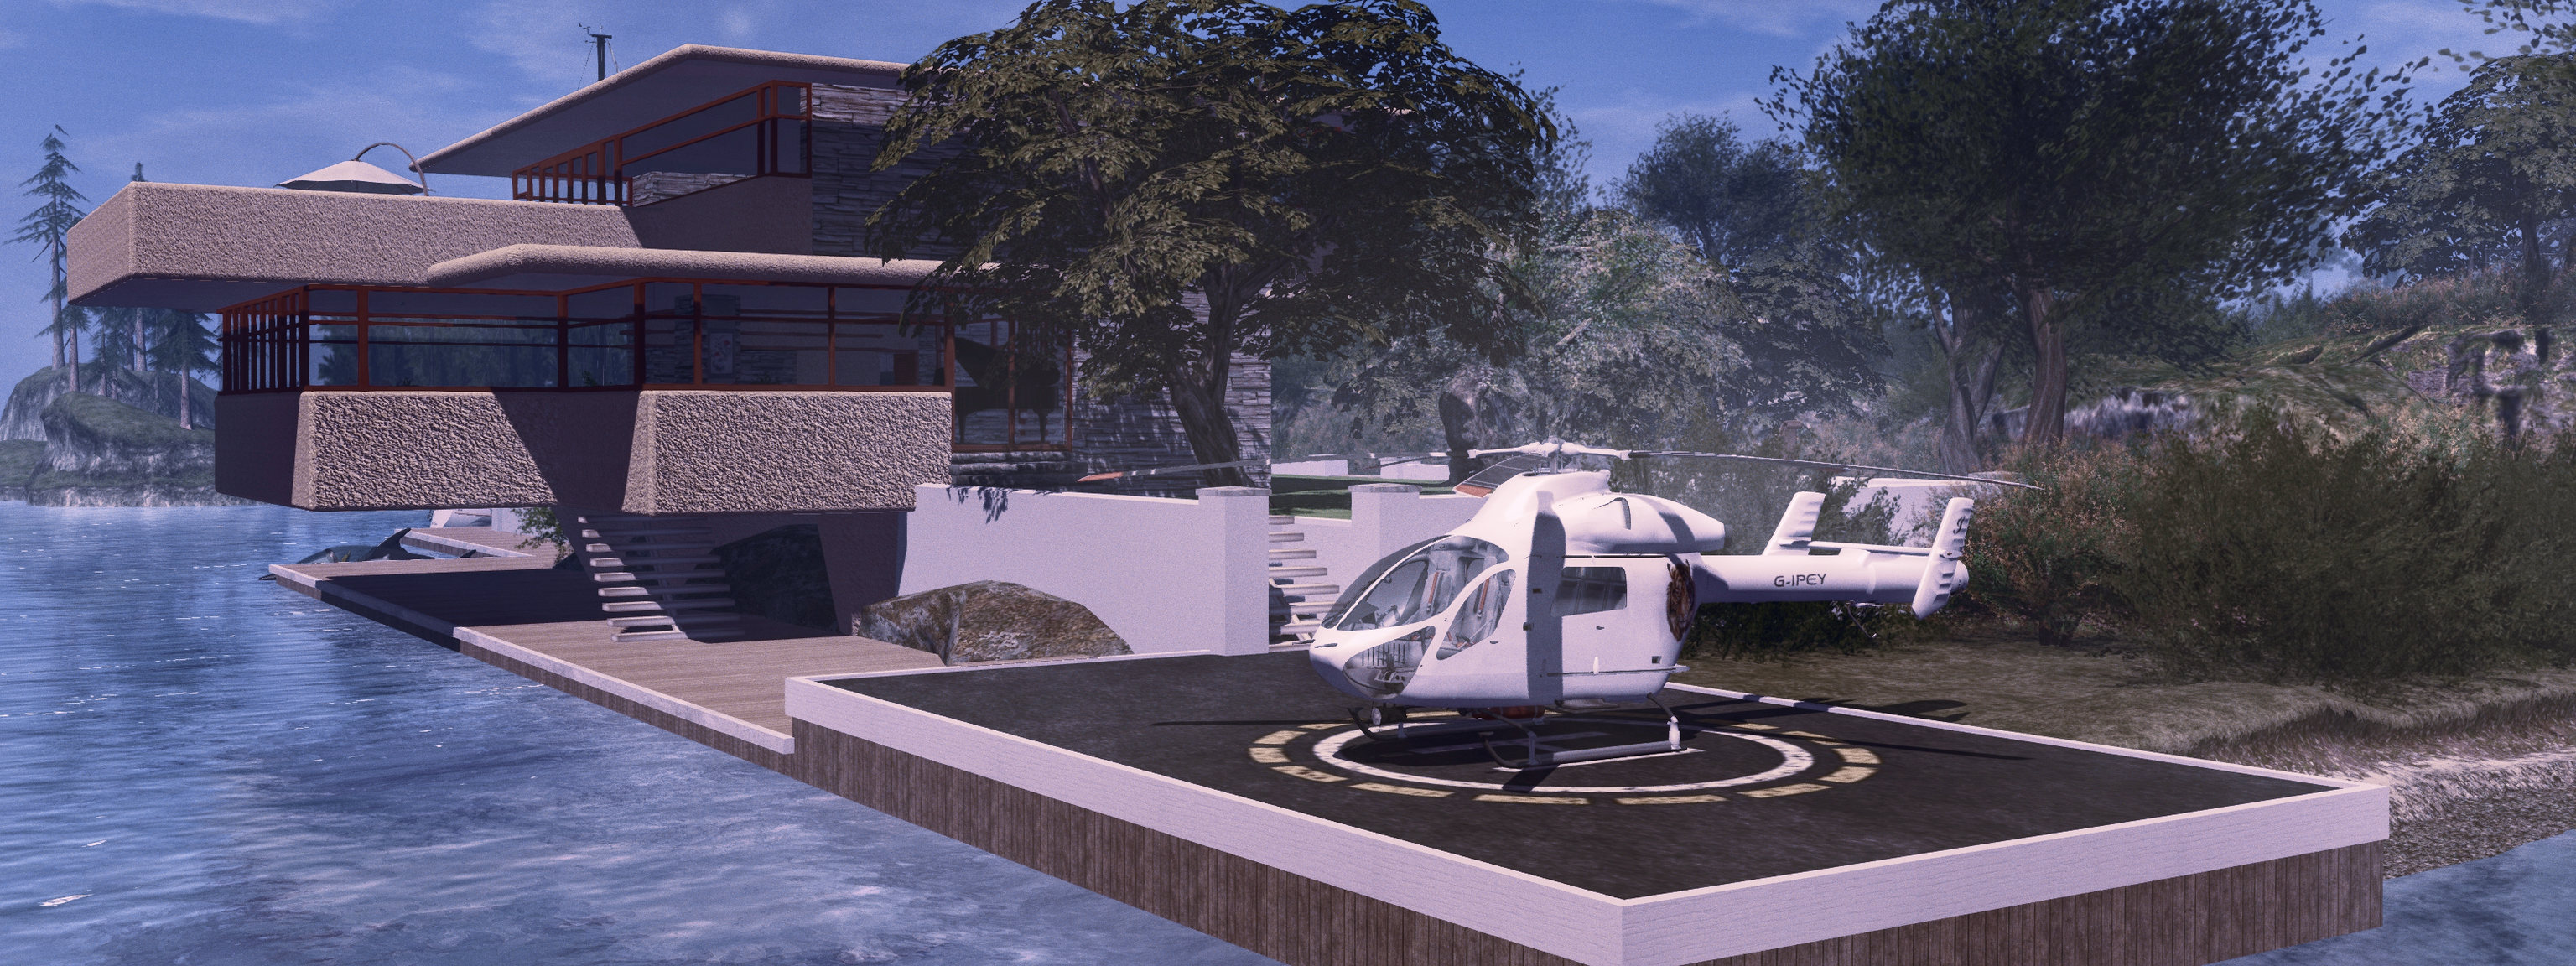
In fact, the package comes not with one house, but two: a version that is the bare-bones house, and a second that includes furniture and furnishings. Both variants include an outdoor pool and a control centre for lighting, security, privacy, and with a built-in radio that can be used to set music streams via parcel audio. The design of the house is also something that attracted me: it’s pretty well established that I am a Frank Lloyd Wright fan, however, I also appreciate the work of Sir Geoffrey Bawa; and with its cantilevered design and use of wood textures, the Tarzana has hints of both.

inVerse Tarzana

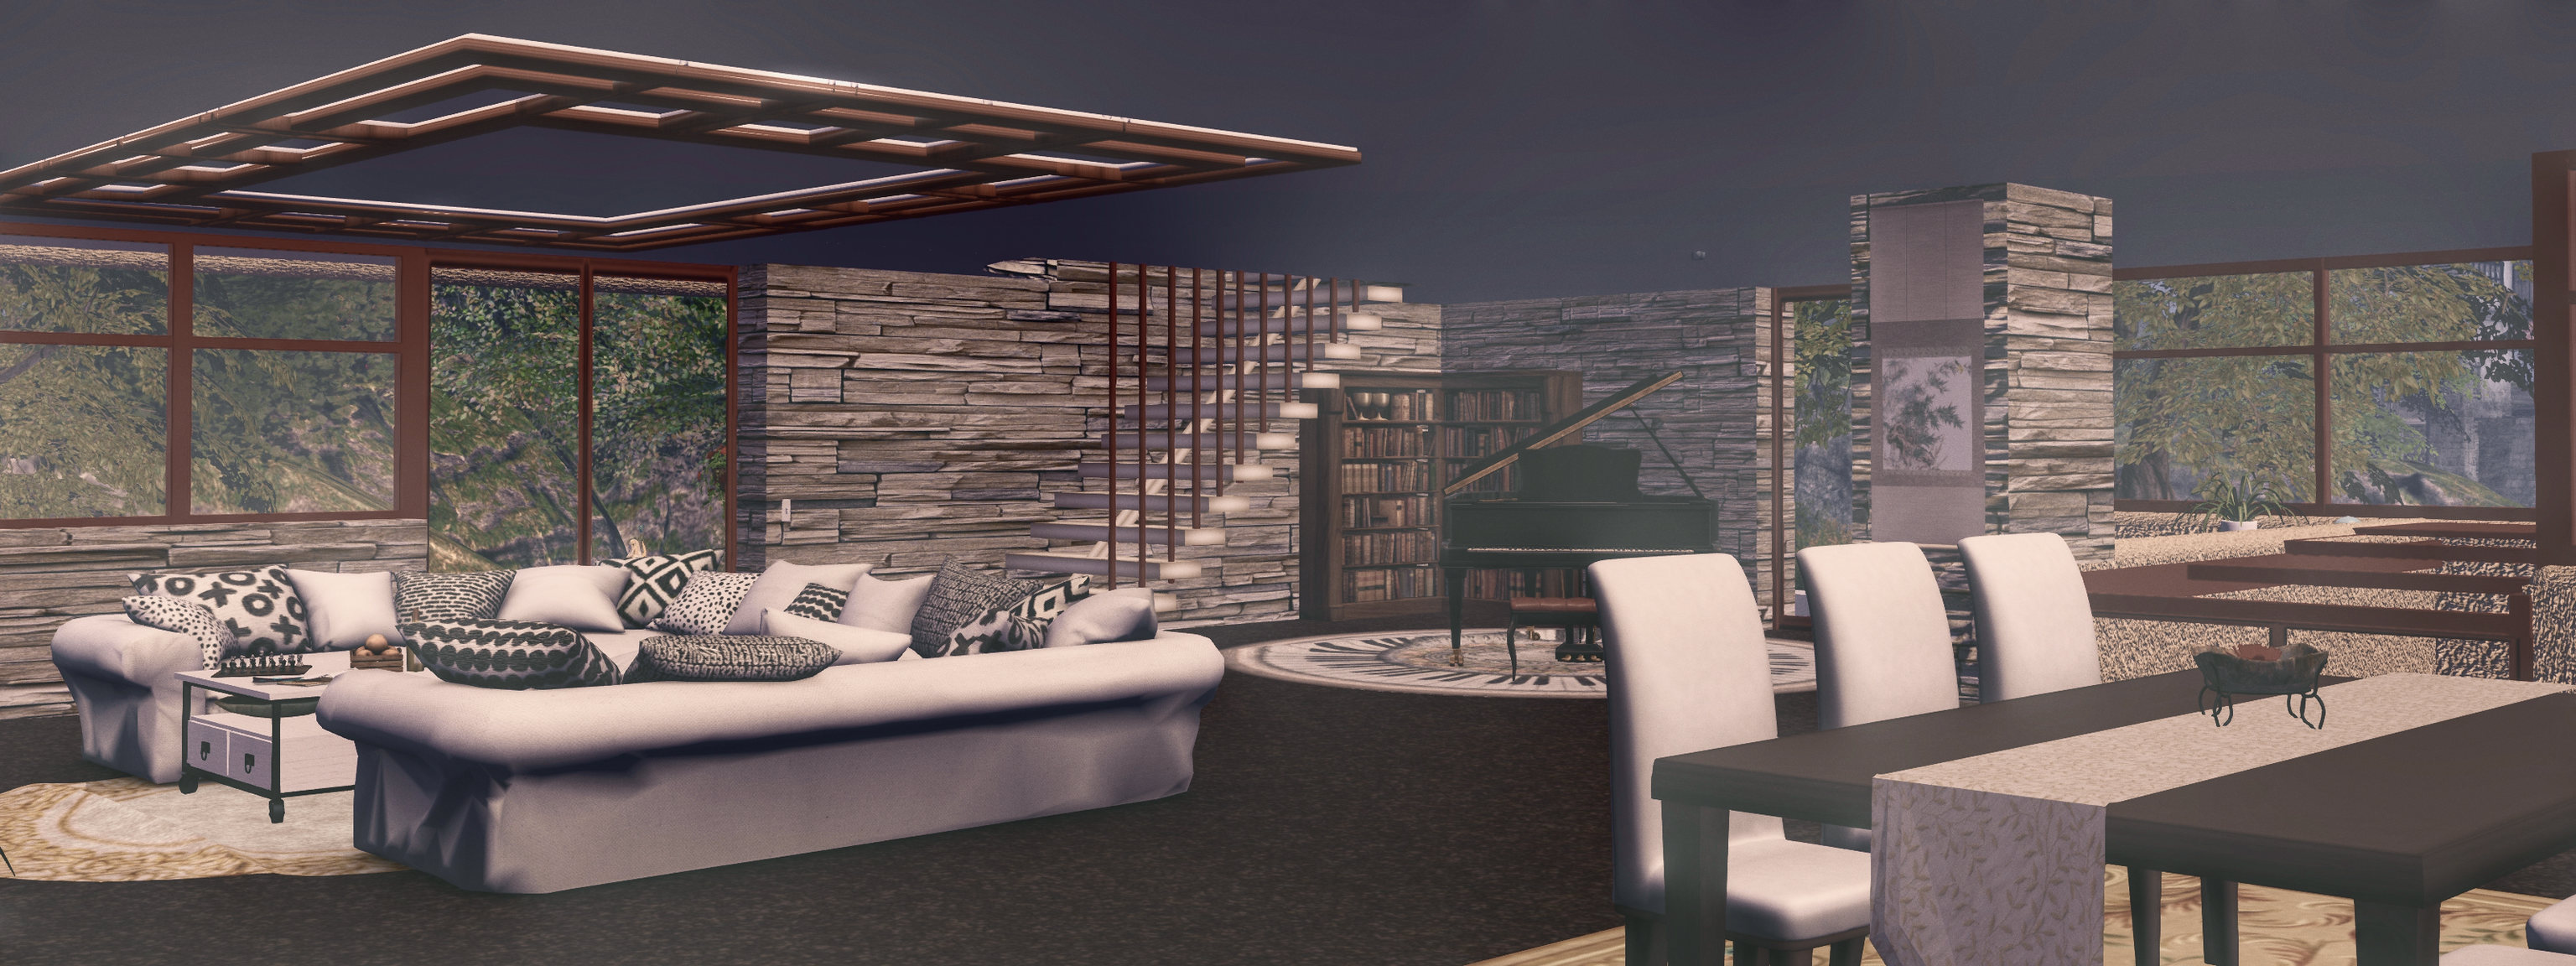
Comprising two large lower / ground floor rooms and three good sized upper rooms, two of which are cantilevered out over the front and one side aspect of the house respectively, and with a neatly stepped roof that avoids it appearing flat and boring, the house offers a layout that gives a good amount of space. In its default rezzing, the house includes a front pool and patio and some outdoor plants, with the patio continuing around one side of the house to the front doors which in turn access one of the two ground-floor rooms. The second on this level room includes a dogleg stairway to the upper floor, and provides adequate room for a kitchen / dining area. Upstairs, the three rooms are arranged so two are in tandem, requiring you pass through one to reach the other, a slightly awkward arrangement, but also a flexible one when it comes to putting the rooms to use.

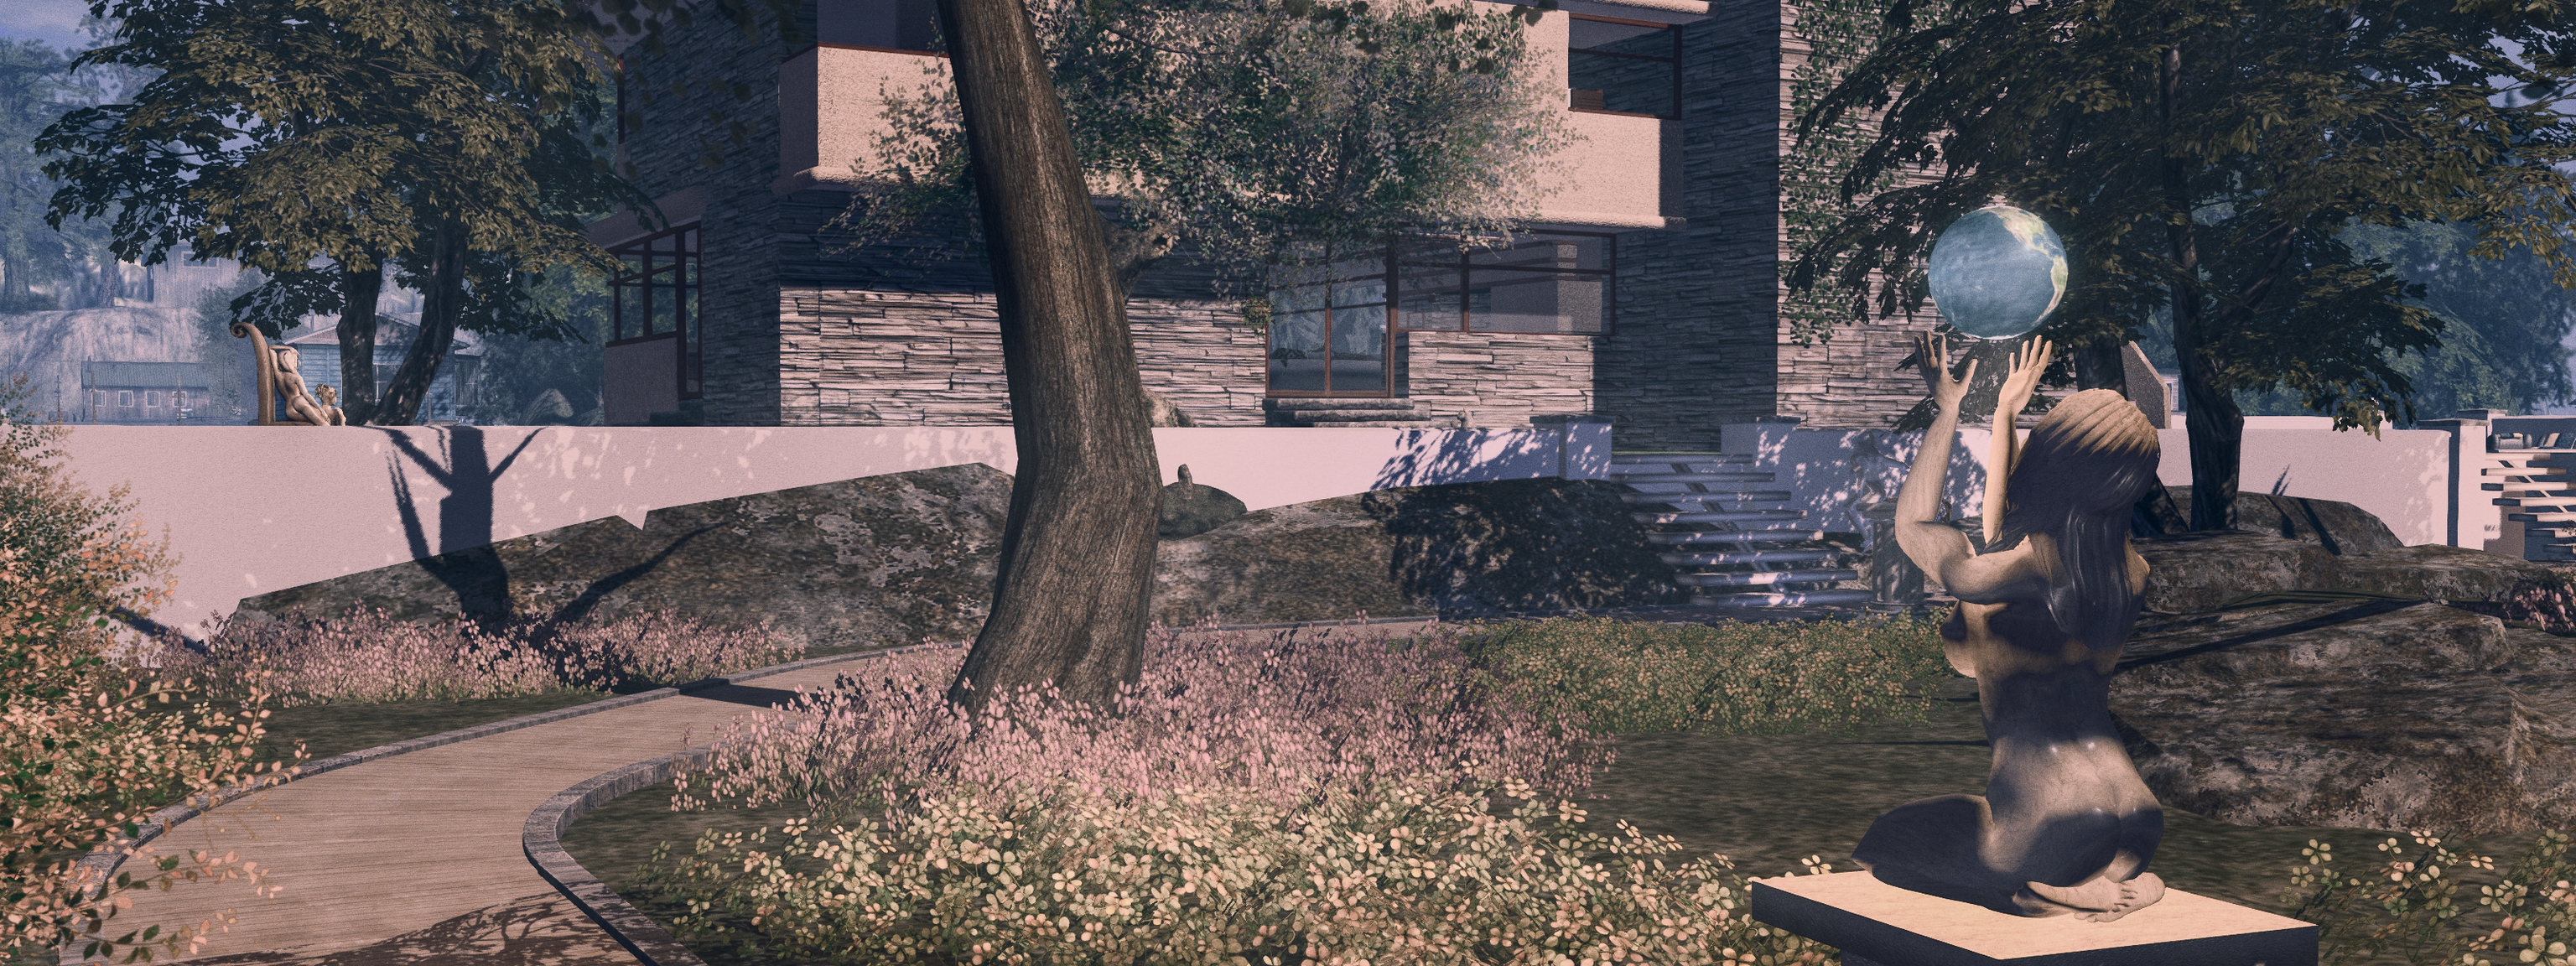
Given the House is Copy / Mod, a check of the demo at the in-store rez areas confirmed it was also modular enough to probably undergo the kitbashing I wanted to perform – essentially trying to fit the Tarzana into a space created for the Fallingwater house without having to make extensive changes to the existing landscaping. In essence, this meant blending the house with a stream running through the island to the front aspect, and an elevated Zen garden to the rear.

As it turned out, checks on the height of the two floors of the Tarzana quickly confirmed it would pretty much fit as intended, the lower floor rooms sitting just above the waters of the stream, and the upper floors almost perfectly placed to allow access to the raised Zen garden. All that was needed was the replacement of the windows to the back of the lower floor rooms with solid walls, and the addition of new sets of doors on the upper floor to provide the garden access. Fortunately, the landing at the top of the Tarzana’s stairs includes a neat little passageway between it and one of the bedrooms, giving me the perfect place to locate one set of doors, and I worked out it would be possible to add further doors to access the garden from the bedroom pretty easily. So, following a check to confirm the overall modularity of the meshes used in the build, it was time to purchase and start work!

The Inverse Tarzana merged into the raised Zen garden from the previous house layout – note the two sets of doors added to access the garden, and the stairway visible to the left end of the house, providing access to the lower floor

The core work of fitting the house into the existing space proved easy, Wall sections can be simply unlinked, copied and used, and windows easily resized to fit their purpose. The basic alterations to fit the house into the garden and river took me a little over an hour, including the construction of the new “back” doors on the the upper level and making some small alterations to the Zen garden. With that work done, I set about some other minor changes.

As noted, when rezzed, two of the upper floor rooms are in tandem – you need to pass through one to reach the other, making the first less of a room and more of a passageway. Also, the upper floor balcony can only be accessed from the front upper room. Not a design fault by any means (in fact, excellent if the front room is to be the master bedroom), but I wanted access to the balcony without having to traipse across the corner of a room. The easily solution to both problems was to divide the “middle” upper floor room to create a passage way and room. The latter then lent itself ideally to becoming the bathroom, while the former was easily adapted to house the balcony doors, with a new window and frame serving to fill the hole they (and the surrounding  wall) left in the side of the bedroom.

Meanwhile, the downstairs dining / kitchen are demanded a few minor changes to suit my chosen positions for both kitchen units and dining table / chairs. These include the addition of a new internal wall and swapping the position of the side elevation windows and wall, the latter to provide a view of the of the island’s modest waterfalls from the dining table. Finally, and as I don’t like script-heavy control systems, I stripped out various security and other scripts and replaced the lighting with a simpler, automated system.

The reason for not wanting the supplied pool and terrace was not because of any fault with them, but simply because I’d already kitbashed my own for the Fallingwater build, and in the location where I wanted the pool to remain: alongside, rather than in front of, the house. So it was much easier to adopt this to suit my needs than buggering about with the supplied pool and trying to make things fit. I also didn’t use many of the furniture and décor items supplied with the the furnished version of the house – I have plenty of my own. But the pieces I did use are well made and naturally lend themselves to modding where required – most notably in replacing those textures that contain shadow bakes intended to match the supplied ornaments, etc.

All of of which not only gave me a house that fitting my existing garden / patio / river space, it also gave me – pool and patio and house for just 103 LI, including additional walls, partitions, doors, replacement lighting, and additional pictures and wall hangings, leaving me a happy bunny with a new house to play with. Well, at least until Christmas!

inVerse Tarzana: by default rezzes with a 31×31 metre footprint, and has the following land impacts: 125 (unfurnished) 234 with furnishings and extras: 234 LI

There are some elements of inVerse houses that can leave something to be desired: the supplied plants generally are not of the highest quality (for reasons of LI), whilst some buildings can made over-use of baked shadows / lighting effects (common to many prefabs). BUT, with this build – which I understand is one of the more recent from the inVerse collection, neither of these is a serious issue. And to be honest, given the price is just L$349, it’s really not worth quibbling over such things. That said, if you are thinking of buying inVerse, it’s still worth checking out demo versions in-world first – which should be done with any house or structure to avoid surprises – even if modding is not foremost on your mind (as it always is with me!)

As it is, the Tarzana is an excellent design, a good build with reasonable LI and physics / display costs. It proved easily up to the challenge of my slinging and dicing and gluing, so no surprises that I give it a thumbs-up.

Links

Sometimes, it’s better to wait

Yet more house play

The other day I wibbled on about the home island and fiddling with my Fallingwater build. Well, as it turns out, that write-up aged about as well as a political tweet…

The problem with me – well one of the problems with me – is that at times I have a half decent idea, and the half that would make it an actual good idea hides in the back of my mind while I try to ignore it because, well, sometimes things take a while to percolate inside my nogging. I’d say it’s an age thing, but…

Back where it should be, over the the water, and with one of the terraces back, with a slight mod

Anyway, that’s been the case with the “Fallingwater” build. In pulling it out of inventory, I decided (stupidly) that I didn’t want to make a huge number of changes to the island – despite the fact the grounds already included a stream fed by a waterfall. So I moved the house to the waterfront, made my changes and then wrote about things.

And then the thoughts of house, waterfall; waterfall, house, started circling between my ears. So, to cut a long story short, I’ve ended up flattening and rebuilding the home island, placing the house so that it could once again stand with waters dropping from an upland pool to flow, as they should, under the front terraces  before dropping away and out into the surrounding waters of Second Norway.

The TLG Chapel Ruins – a little night-time retreat, statue via ArtemisGreece and the plants via Alex Bader’s Zen Garden Kit

I’m not going to bang on about all the changes, suffice it to say that I think that this time, I think I’ve got the balance right; the house looks a lot better – I’ve even found a reason to put one back of the terraces I hacked out. The changes meant shunting the Chapel Ruins from their hilltop setting to the waterfront, but a little bit of terrain pounding means it can sit on a little headland next to the new moorings. But rather than prattle on, I’ll leave some photographic self-indulgence here.

But, any echoes of muttering you hear when looking at these pictures is probably the sound of me calling myself names for not having re-ordered things from the get-go, saving me more fiddling and an excess of blogging. Because sometimes, it’s really better to wait 🙂 .

The waterfalls may not be as high as those at the actual Fallingwater, but they work
And one more, just because 🙂

Getting back to Fallingwater in Second Life – well, sort-of

Yeah… house building … again

As regular readers know, I tend to flip and change with houses on the main island home. Those who have poked at this blog over the years will also know I have an affinity for the Kaufmann House (aka Fallingwater) in southwest Pennsylvania’s Laurel Highlands, as designed by Frank Lloyd Wright, and now managed by the Western Pennsylvania Conservancy; so much so that over the years I’ve reproduced it to varying degrees for personal use, as well as building a reproduction of the entire property from main house and Bear River through to the garages and staff quarters.

Fallingwater is this one-plan, but this works

The latter is far too big to use practically in SL, but over the years I’ve pulled out the main house from time-to-time and fiddled around with it to produce something distinctive by way of living space – and, well, these two aspects of my SL have once again converged.

For the last few days I’ve been skipping on the blogging in order to play housey with the version of Fallingwater I last used in 2018, when I tweaked it somewhat to offer home more in keeping with the old island space.

The TLG Chapel Ruins make for a great garden set-piece

For this iteration, I’ve been pretty harsh with the house, in terms of changes. Not so much to reduce the LI, but simply because much of the previous designs didn’t get much use. So with this version, I’ve lopped off a couple of the terraces completely, and dropped a third (which I’d previously converted to a swimming pool(!) to garden level, where the pool makes more sense.

I’ve made some internal changes as well, whilst keeping the overall look of the Great Room with its unique hatch down to the water (or in this case, the boat moorings). However, I’m not sure it is deserving of the name “Fallingwater” any more given the changes; maybe something like “Dripping Faucet” might be more appropriate 😀 .

Across the back garden

Along with the re-working on the island and the house, one of my other favourites, the TLG Chapel Ruins by Marcus Inkpen has made a return, this time to form an enclosed garden within the wildling garden that makes up most of the island. I also couldn’t resist the ~BAZAR~ Geo Dome after encountering it during a couple of recent region visits, so that now forms a little hideaway in the garden as well.

The main challenge with the house is that really, it is supposed to occupy an elevated position over water, but while Second Norway offers various rocky island and waterfronts, I didn’t want to build the home island up that much; so the result has been a compromise in that I’ve had to install a little rocky table (doubling as a place topped by garden lawns) and lose a little in the way of waterfront moorings. But it least the helipad got to stay 😀 .

The ~BAZAR~ Geo Dome (with some additions), makes for a neat little garden hideway

So anyway, I’m not going to rabbit on; while I have another project that’s in progress (swapping from Maitreya  + Lelutka to Slink HG + Catwa), I’ll not bore you with that, and well be getting back to more usual blogging fare instead 🙂 .

Blog changes, June 2021

The Top menu and LL sub-menu on this blog have been revised – see below for details

I’ve had a handful of comments over the last week concerning further small changes to the blog – notably the header, but also about navigation via the menus, so I thought it was time to offer a note on changes.

The new blog banner is a composite image kindly put together by Sonotech Gloom, and hopefully offers something just that little bit different with its suggestion of stepping through a teleport portal.

Sono is someone who is great fun to be around, but more importantly in this context, is a talented graphics designer. If you have a logo or banner you want for your website, your SL store, your event, etc., you really should give her a shout and discuss ideas / rates. My thanks to her for working with me on various banner ideas.

Turning to navigation: I’m always trying to rationalise the blog’s menu system whilst trying to ensure popular information remains accessible. To this end, I introduced some new “Archive” options to some of the sub-menus (Exploring Second Life, RFL, SLB, etc.) at the end of 2020, the idea being to keep the current (and perhaps previous) year’s entries easily accessible, whilst reducing the overall bulk of a menu. However, the tag cloud and search can help focus down on specific subject areas, if required.

More recently, I’ve rationalised the LL menu tree thus:

  • An updated sub-menu option provides access to articles on the Lab’s board and current / plus past CEOs.
  • Tilia Pay is now included under the LL menu, rather than having its top menu option.
  • An expanded Meeting Transcripts/Summary option provides to all transcripts and summaries I’ve provided on significant meetings  / keynotes / presentations by members of the Lab’s management team. This includes (at the time of writing) the following sub-menu options:
    • Lab Gab / Lab Chat.
    • Lindens at VWBPE.
    • SLB Meet the Lindens.
    • Town Hall meetings.

Hopefully, all this helps reduces some of the clutter and noise in the menus and give a bit more room for expansion, should it bee needed in the future.

A Dripping Wet swim in Second Life

Out for a swim

Water. There’s a lot of it to be found in Second Life, particularly of the Linden variety. Not all of it may be accessible, but the areas that are have encouraged animation override makers to include basic surface / underwater swimming animations in their products, whilst a number dedicated swimming systems have appeared over the years.

One of the most recent of the latter to pop-up is the Dripping Wet Swimming Suite, created by Sakasi Hasudo (HerdMother) and marketed under her Lactopia brand. It is designed to provide a complete Second Life swimming experience for four-limbed human avatars (it will not by default work correctly for merfolk), I found the description and outlined functionality intriguing enough to give it a go.

At L$699, Dripping Wet sits within the typical price range for animation overrides, and offers a genuine swimming experience with surface and underwater swimming animations, idling / floating animations, water effects and splashing sounds, and water droplets that will fall from the body on exiting  Linden Water.

As such, the package comes with no fewer than 14 items: the HUD, 12 water dripping / splashing attachments and a script. The attachments provide particle effects when swimming, entering / leaving the water, and also particle drips that “fall” from the body, and which can be turned on / off manually, if required).

Twelve attachments may sound a lot, but whey you consider that for swimming, many other attachments (multiple mesh clothing items, for example) can be removed, this is actually not too bad. Further, not all of the attachments need to be worn;  as I’m not overly enamoured with the dripping effect, I only use the arm / leg attachments to the swimming particle effects can be generated.

Still swimming!

The included script can be used by those using ZHAO-style animation override HUDS to ensure a smooth transition between walking / swimming animations when moving to / from Linden water and land without having to toggle either HUD on / off. I confess to not having tried this, as I use the TPV client-side AO system, which can be easily clicked on / off via the toolbar.

The HUD and attachments should be ADDed to your avatar, rather than worn – again, possibly the easiest way is to create an outfit and include the HUD and the dripping attachments you wish to use together with your swimming costume.

Sitting at the bottom of the viewer window by default when attached, the HUD is very unobtrusive, comprising three buttons: swim, dive and “drip”. The first two are reasonably self-explanatory, accessing as they do the swimming and diving options respectively, whilst the drip button will turn on the body dripping / splashing (thus allowing the “wet look” to be used n land for photography, etc).

Overall the following animations are included:

  • 12 surface / underwater animations swimming animations (the breaststroke can be used both on the surface and underwater).
  • 6 floating / idling animations (4 available for surface & underwater swimming, two for use when on the surface).
  • 8 diving animations.
The HUD (1) will request permissions to animate your avatar (2) whenever attached; this is to allow the swim / dive animations and teleporting you back to a saved dive point. Clicking the swim / dive buttons will take you to the dialogue system (3 – main menu options shown).

The easiest way to use the system is to select your preferred surface swim and idle animation, and then do the same for underwater (obviously, you can change these at any time you wish). Using the movement keys in Linden Water will automatically engage your swim animation and your avatar will return to the “idle” animation (e.g. treading water) when movement stops.

Using PAGE DOWN will move you under the waves and engage the underwater swim / idle animations. While it may well be an issue with my Bluetooth keyboard, I found I had to tab PAGE UP to cancel the “downward” swimming, otherwise my avatar would simply remain face down stuck in that animation. PAGE UP will return you to the surface, with an automatic transition to surface swim / idle. When swimming / idling on the surface, you can adjust your position in the water via the HUD’s z-offset controls.

The dives will operate at any height, providing Linden Water is properly detected beneath you. If it is not, because you’re attempting to dive onto land, for example, or if the water is simply too shallow, your dive attempt will be stopped and you’ll be warned in chat:

You will break your neck – there’s no water to land in!

All of the dives are exceptionally graceful – if a little rocket-powered, given the height you can reach! In addition, you can save a dive spot to the HUD and use it to return to that spot – handy if you are diving from, say, a boat (assuming there is someone else on  the boat to stop it being auto-returned if in public waters!).

Feedback

Dives are graceful, but tend to reach a fair height!

Admittedly, this is the first HUD-based swimming system I’ve tried, and I’ve found it does exactly what it says on the tin – and does it very well. As noted, the swims are smooth, the dives effective and the entire package easy-to-use whilst the unobtrusive nature of the HUD means it does not get in the way of things.

In terms of the z-offset adjustments, this can be done via the HUD’s dialogue, as noted, and also by editing a configuration note card in the HUD.

The latter could do with more explanation in the user manual for those who may note be comfortable in editing objects and playing with config files. Those who aren’t, and who find fiddling with the HUD’s dialogues irritating, may find tweaking their hover height slider an acceptable compromise.

I understand from Sakasi that an update is in progress,  and that their are plans for the system to work in non-Linden water – all of which will further increase the value of the system.

For my part, the system has already become part of a swimming outfit (with cossie and a suitable hair).

Links

Riding a Moon Shadow in Second Life

My winLab/Dogma Moon Shadow, in my own hull / superstructure finish, moored at Isla Caitinara

Oh, I’ve been ridin’ on a Moon Shadow, moon shadow, moon shadow –
Cuttin’ the waves on a Moon Shadow, moon shadow, moon shadow.

OK, so the words aren’t quite how Yusuf Islam (or Cat Stevens, as he was at the time) wrote them in 1970, but they have been bouncing through my head the last few days.

The reason for this is that I was recently contacted by Spartaco Zemenis who, among his many talents, is a creator, a scripter and a member of the Firestorm Italian support group. Following our conversation, he kindly sent me – in no expectations of any review, but as a simple “thank you” – a couple of items he has put together with Dogma9.

One of these is the Moon Shadow motor cruiser, a vessel somewhat larger than I’ve used – at least, up until now. Curious about it,I decided to give it a go, and in the process it joined the ranks of my regularly-used vehicles, which in turn qualified it for a review.

Heading out to Blake Sea Channel from Second Norway

Comprehensively packaged and packed with features, the Moon Shadow can be purchased in two variants: one with a default black hull and superstructure, and one with a default white finish – which is the versions Spataco sent me. Included in the package – which comes in the form of a boxed model – is the boat, a pair of HUDs (one for driving the boat, and and optional one that works with camera positioning), and a detailed user manual.

Priced at L$7,000, Moon Shadow is a 25m class cruiser with a beam of 7.2 metres and a keel-to flying bridge height of 8.5 metres. It is an exceptionally attractive vessel, nicely proportioned, with a hull clearly designed to cut through the water rather than riding over them.

The main cabin, showing the table set with the breakfast meal option and the open fridge

The main cabin takes up the majority of the interior space, offering comfortable facilities complete with galley, a dining area, forward seating and a cockpit area for piloting the boat. Forward of this is a single sleeping cabin that has a fair amount of space, and includes a working bathroom, closets, and a double bed. Over the top of this cabin is the traditional forward solarium common to cruisers of this type. Aft of the main cabin, and separated from it by a glass screen and sliding door, is a small swim platform area with seating and access to the large fantail swim platform itself, as well as steps up to the flying bridge / lounge. A working panel in the floor well of the swim platform seating area provides access to the engine bay. The flying bridge itself is roomy  and helps classify the Moon Shadow as a sport-fly, with both curved bench seating and a solarium alongside the upper cockpit area.

Moondancer: my version of the Moon Shadow

The boat’s features are impressive, comprising:

  • The ability to carry up to 10 avatars (region crossings allowing!), although I’ve thus far not gone beyond two.
  • 30 multi-purpose seating positions, and an animation system providing 120 couple and 80 single animations, the majority managed by a on-board servers (rather than multiple animations per seating area). In particular, this allows for:
    • Avatar movement between seats without the need to stand up.
    • Use of a manageable suite of animations across all suitable seating areas – lounge seats, top and forward solariums, etc.
    • The ability to add your own animations.
    • (Note that the above excludes the galley, which utilises its own animation.)
  • 75 interactive objects,  including:
    • A selection of meals that can be rezzed on the main deck table and drinks and snacks that can be rezzed from the fridge.
    • Items that can be rezzed when working at the galley.
    • Rezzable mooring piles and lines.
    • An extensive audio video system, including a large deployable screen at the rear of the main cabin, a small deployable screen in the lower cockpit, a flat screen TV in the sleeping cabin.
    • The starlight spotlight, controlled by the boat’s main HUD.
  • A projected light system (requires Advanced Lighting Model to be running on the viewer) for internal illumination.
  • Scripted dynamic control system that can be used to adjust boat handling (stability / performance balance) to suit your driving needs.
  • Automated resource management with manual override: when the engine is running, all scripts deemed unnecessary to motion / navigation are turned off to reduce the vessel’s simulator resource use.

The last two point are particularly useful when driving the Moon Shadow. At 150 LI (248 prim), and a 146 server load (29.6 physics), this is a “heavy” vessel when it comes to region crossings, so minimising resource use and managing performance are important aspect in ensuring crossings are as smooth as possible. Maintaining a reasonable throttle speed also helps – I’d personally recommend not going above 60% of throttle when carrying multiple avatars.

Main HUD

A key aspect on managing the Moon Shadow is the main HUD. This provides access to the majority of the boat’s controls, as shown in the image below right.

The Moon Shadow primary HUD. Courtesy of Dogma Creations /  winLAB

In  order to work, the HUD needs to be synced to a copy of the boat. This is achieved by wearing / adding the HUD  and then sitting on the boat as the driver.

The HUD is pretty self-explanatory, but some of the options are worth going into further here:

  • Show / Hide Sit Panel: displays a panel denoting the core deck / cabin sit points (shown in the lower right of the HUD). When displayed, sit points can be enabled / disabled by clicking on their icons.
  • Camera mode: clicking this displays the Camera Mode dialogue, allowing your camera position to be slaved to the boat and then positioned via the camera mode options. A separate (and relatively compact) camera HUD reproduces the options on the dialogue box to provide an alternative to managing camera positions. Note that once engaged, the Camera Mode needs to be turned OFF to release your camera.
  • Set and Go: these allow you to set a mooring point, with GO jumping the boat to it when in range.
  • Transmitter: if you are unseated from the boat, clicking this will send a request to the boat for its location, which is returned in local chat as a TP link, allowing you to teleport to the boat and rejoin it. This works with the currently synced version of the boat, or the last rezzed version. I can say from experience, this works.
  • Show / Hide Moor Structure: this rezzes a couple of mooring posts off the stern quarters of the boat with lines connecting them to the stern cleats.
  • Privacy: simply darkens the cabin windows.

Continue reading “Riding a Moon Shadow in Second Life”