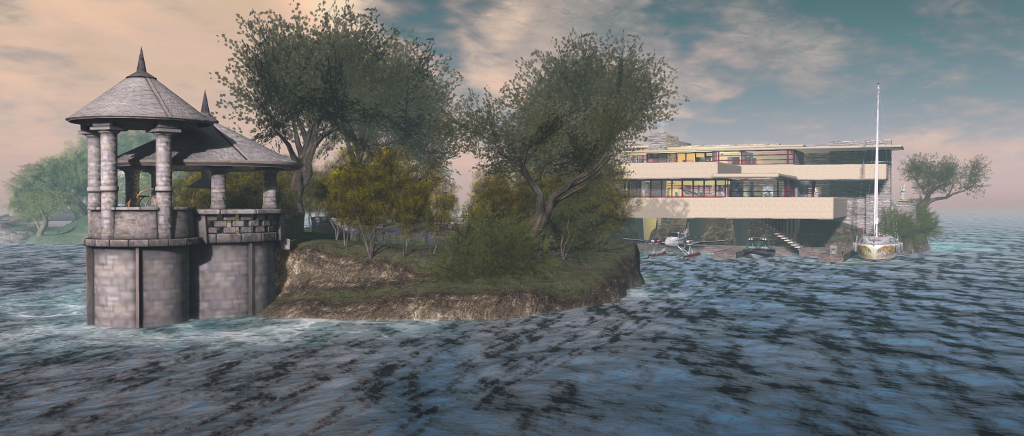
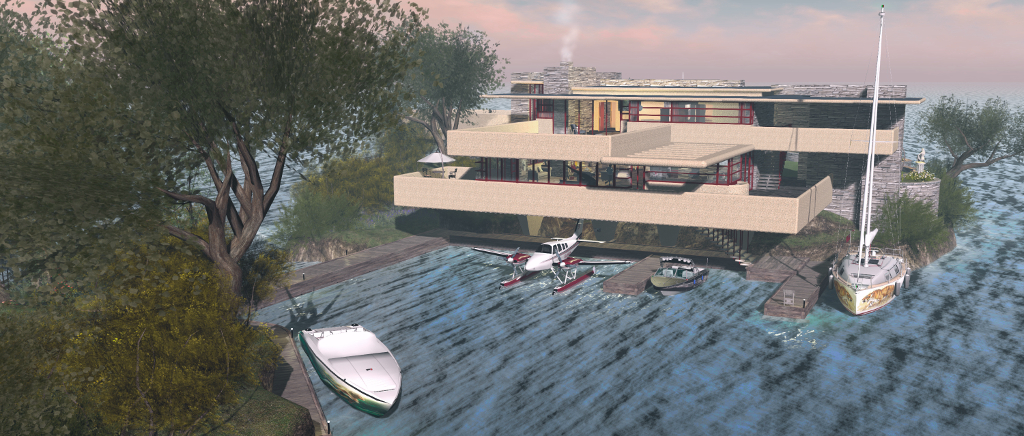
Back in April 2018, I returned Fallingwater – albeit somewhat modified to better suit our needs – to Second Life, redesigning Isla Pey around it in the process. Since then, we’ve been very settled, and the need to fiddle around with things hasn’t really come up.
However, in facing north and out over the “edge” of the grid, we may well see nothing but open seas, but we also miss a lot of the passing surface traffic; something that can be attractive to watch. Making a big move with the house wasn’t something I particularly wanted to contemplate (and not something the shape of the land would really tolerate). But, it did occur to me that by swinging the house through 180-degrees and cutting the island in two, something might be done…
Isla Pey
And so as Caitlyn reached for the hard hats, I started playing. Again.
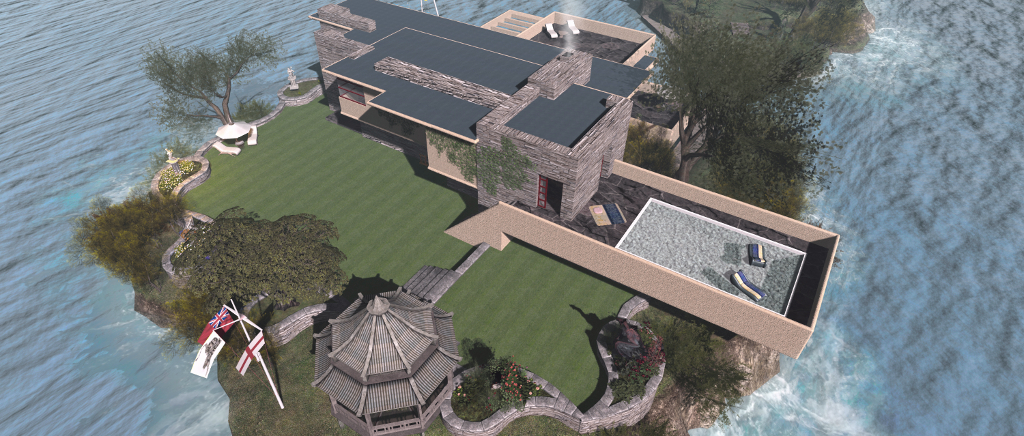
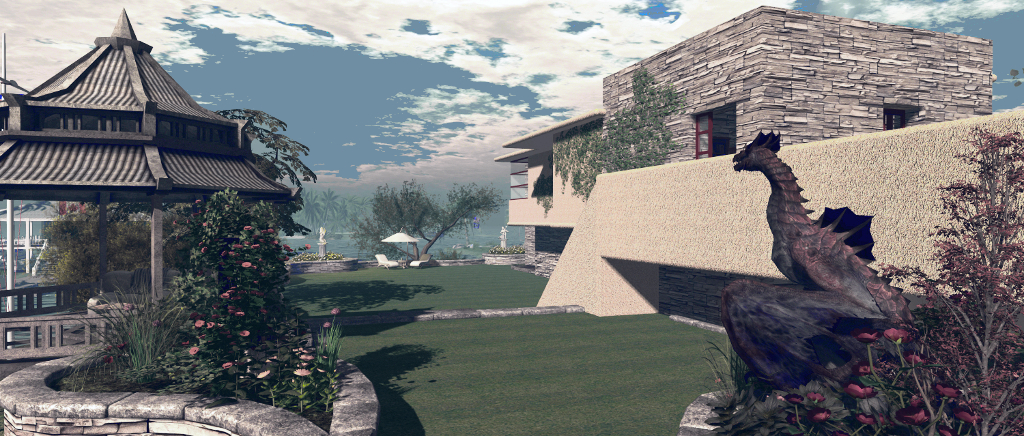
As the parcel holding Isla Pey is rather long and slender, and given we already had a “north” and “south” end, linked by a large pond, stream and waterfall, cutting the land in two was easy enough. Out went the water, the falls and the surrounding mesh landforms creating the basic landmass was created. Then, by swinging the house around and moving it southwards, there was room to add a fair-sized back garden – the landscaping made easier (again) by the re-use of the lawn design from the “old” island design.
Isla Pey
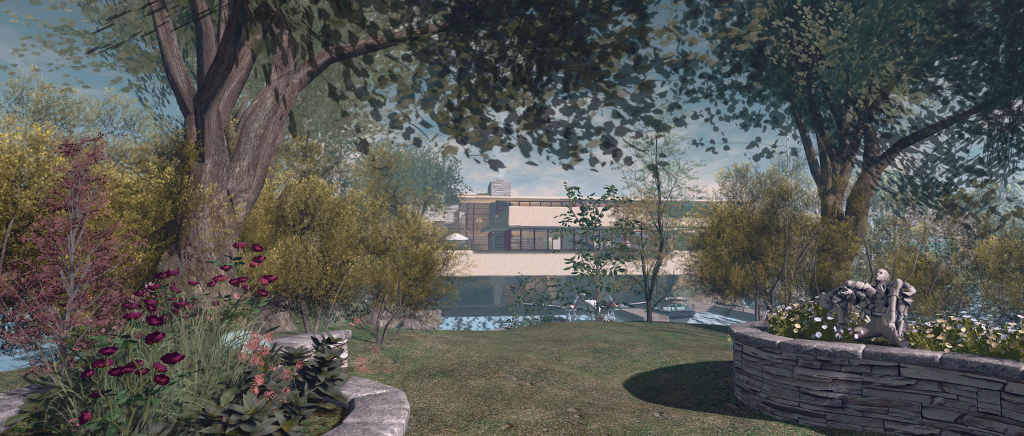
This, expanded with the use of Alex Bader’s superb Tiered Garden Wall Building Set, providing room for the art from Ciottolina Xue and pieces from Morgan Sim Designs that have long been features of our garden, while the JIAN Koi Pond Gazebo I’d modified for use with the “original” garden pond helped fill-out the space in the garden.
The southern end of the parcel, now an island in its own right, needed no real changes. It’s still home to our little folly from Trompe Loeil (actually the Amelie pavilion), just a section of HPMD cliffs needed to be added.
Isla Pey
This little island, also home to our sculptures from Silas Merlin, affords the house retain some privacy (one of the reasons I’ve tended to site houses at the north end of the island rather than the south is to help give a sense of privacy whilst being able to see passing ships). But, we needed a way to reach it.
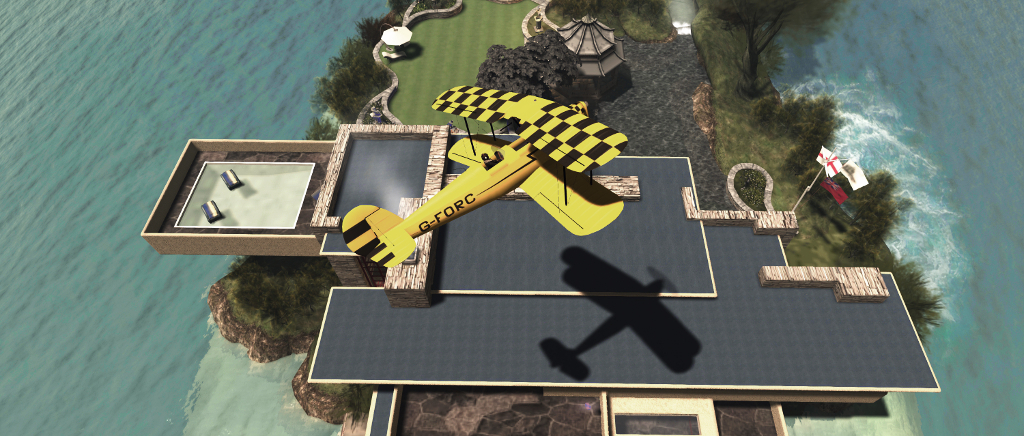
The easiest way to do this was to extend the boat moorings under the house (actually the Botanical Edged Brick Park Path with a little re-texturing), using them as a kind of footbridge while also offering more room for boat / seaplane rezzing in our own little bay. The added room meant I could also add a couple of favourites to our vehicle rezzer that had been missed, the bay offering the perfect area in which to rez them.
Isla Pey
Fiddling with the island home is fun. But with the April changes (which I have nicely stored in a rezzing system 🙂 ) and now this reorganisation, means we probably won’t be making massive changes in the future, unless we opt to move elsewhere.
Twelve years ago on December 5th, 2006, I decided to give Second Life a second chance, creating Inara Pey in the process. At the time I never expected to actually still engaged in the platform 12 months on from that date, let alone twelve years – but here I am. Not bad for someone who was at one time considering hanging up her Second Life boots (so to speak) on reaching 10 years.
So why am I still here?
I can probably sum that up in three words: fun, discovery, and freedom. Fun, because – as well all know – Second Life has an awful lot to offer, from playing games through learning to role-play, to doing things we cannot (or would not) do in the physical world. For me, and as I’ve mentioned in the past, it’s the ability to do things like skydiving, or to enjoy flying whenever I want (or the expense of actually owning / leasing a plane or obtaining my PPL!) or to get out on the water under sail or power.
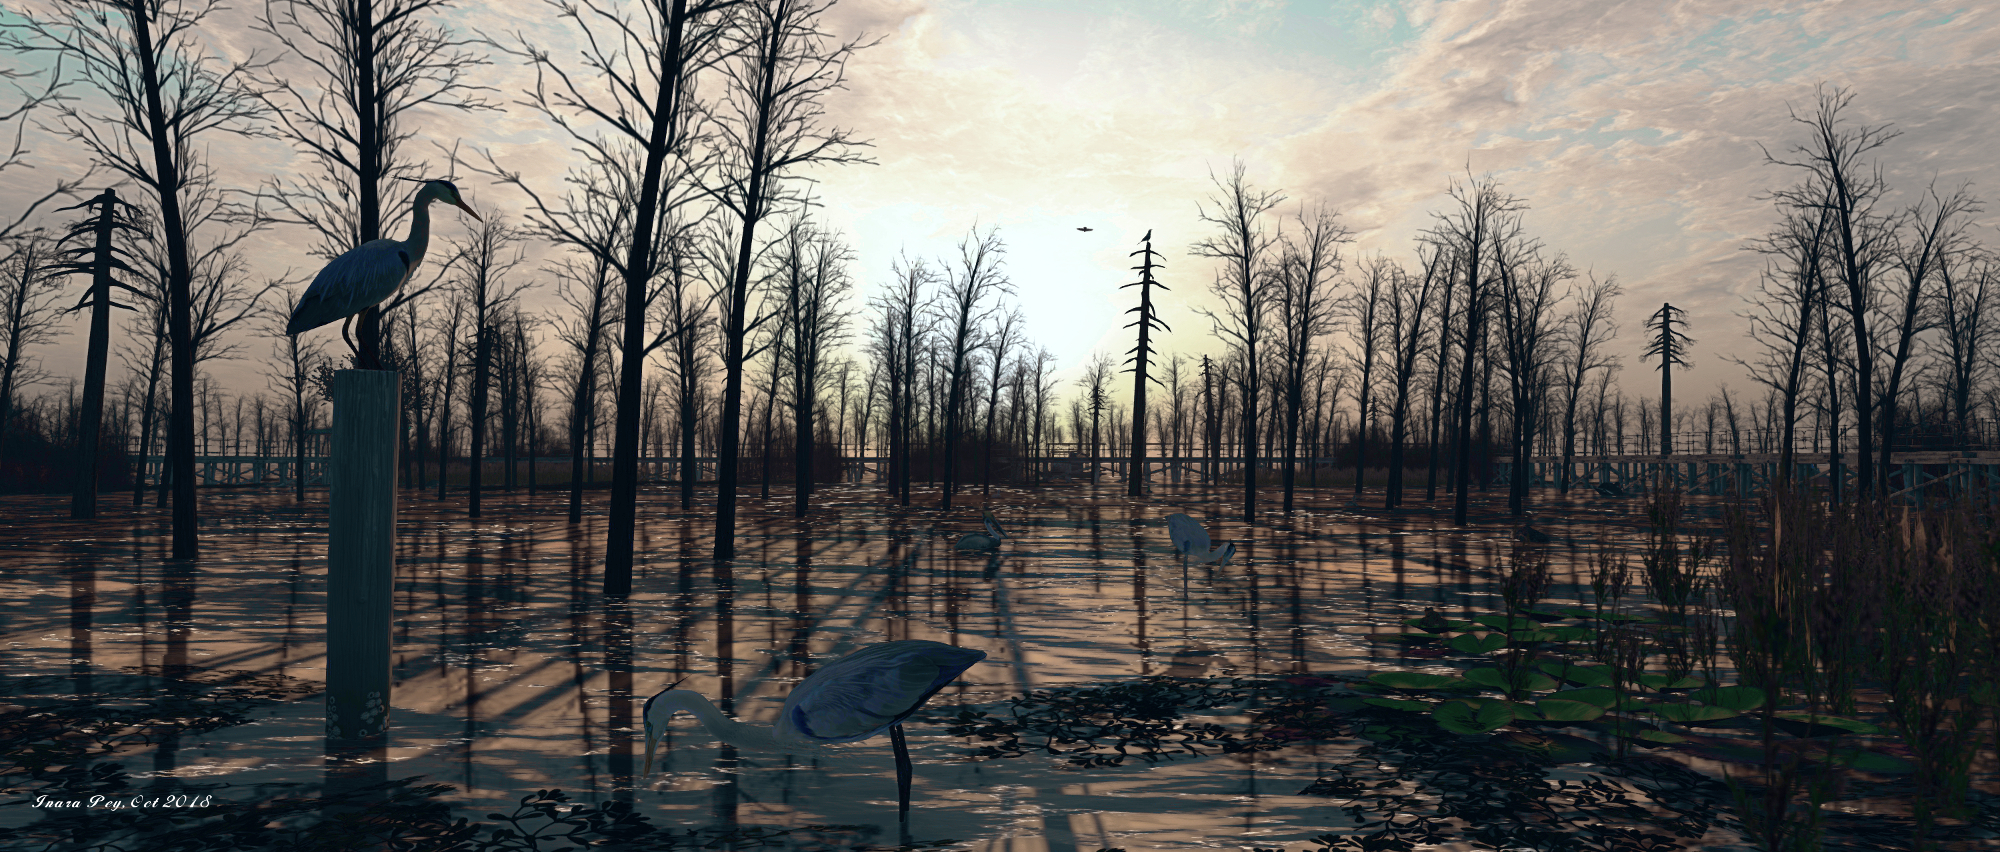
The ability to explore so many fabulous places, likeBlack Bayou Lake, is one of the reasons I continue to enjoy Second Life
Discovery, because Second Life is always evolving. Not just technically – although this year, with the “15 reasons” roadmap, there’s hopefully ample evidence of this – but also in terms of how regions are always in flux. Yes, it is sad when places vanish, and the shrinkage of the last few years has been of fiscal concern (although not necessarily indicative of any large-scale loss of users): but when it comes to publicly accessible regions, things are surprisingly stable – as fast as one popular place vanishes, another pops up elsewhere.
Twelve years – and counting!
Freedom, in that Second Life allows us to meeting, mingle with, get to know, spend time with, people from all over the world, most of whom we’d probably never likely meet in the physical world. This obviously feeds back into both the fun and the discovery elements, as sharing with friends adds depth to everything we do.
There’s also the aspect that our avatars allow us to be who we wish to be, as well as potentially allowing us to extend ourselves in ways that may not be otherwise expressed. I’m actually a lousy formalised role-player, for example; finding a character inside of myself, one I can maintain and live through with personality aspects perhaps foreign to my own, is something I’ve never managed to comfortably achieve. It’s probably the biggest reason my first attempt with Second Life “failed”; I came with preconceptions of dropping into role-play (historical or sci-fi or something on those lines), but never really found anything in which I felt “at home”.
As “me” (or “me through Inara”, so to speak) I’ve found a greater range of freedom than might otherwise have been the case: the freedom to share friendships that can be in some respects transient, but because of the nature of Second Life, allow a lot more depth to be plumbed, and genuine connections to be forged.
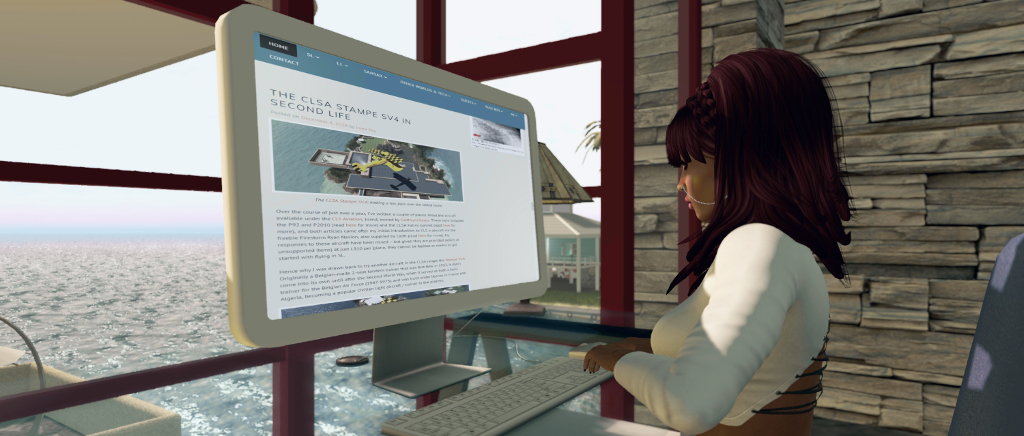
I’d be a fool if I denied blogging had played a role in my continuance with Second Life. I actually started in 2007, but it wasn’t until I relocated the blog to WordPress in 2009 and really set out trying to learn more about how rich and complex the platform is, both in terms of use and technicality, that I felt I’d really found my niche.
I’m genuinely not a technical person, so discovering all that goes on “behind the scenes”, so to speak have been a constant – and still evolving – learning experience for me. It has also taught me a lot about the platform in general – the users, the places, the art – all of which have expanded my horizons, helped grow my understanding of a range of topics and taught me lessons in appreciation and thinking. I may not get things right all the time – but that’s part of the fun and discovery.
Looking ahead, there’s liable to be a lot more to write about – be it technical with the move to the cloud, the return of last names, the arrival of EEP, the potential of Animesh products, or as a result of having yet more places to explore, art to appreciate and things to try. So hopefully, I’ll have plenty of opportunity to continue to experience Second Life and report on it.
Thank you to all of you who continue to read this blog, who support me through Twitter and Plurk; you as much as anything keep me engaged in Second Life. And my thanks once again to Caitlyn and all my friends who continue to make my explorations and time in SL fun.
Over the course of just over a year, I’ve written a couple of pieces about the aircraft available under the CLSAviation, brand, owned by CaithLynnSayes. These have included the P92 and P2010 (read here for more) and the CLSA Fairey Gannet (read here for more), and both articles came after my initial introduction to CLS a aircraft via the freebie Firestorm Ryan Navion, also supplied by Caith (read here for more). My responses to these aircraft have been mixed – but given they are provided (albeit as unsupported items) at just L$10 per ‘plane, they cannot be faulted as means to get started with flying in SL.
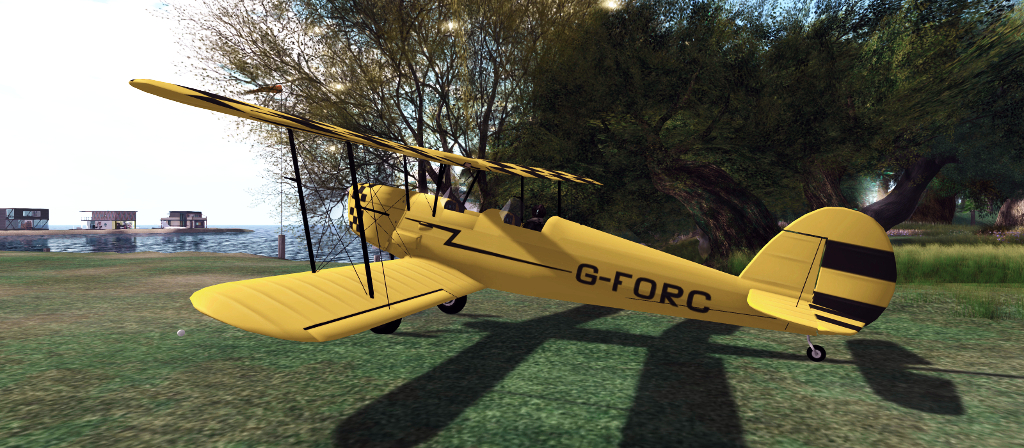
Hence why I was drawn back to try another aircraft in the CLSA range: the Stampe SV.4. Originally a Belgian-made 2-seat tandem trainer that was first flew in 1933, it didn’t come into its own until after the Second World War, when it served as both a basic trainer for the Belgian Air Force (1947-1975) and was built under license in France and Algeria, becoming a popular civilian light aircraft / trainer in the process.
It’s not clear which variant of the Stampe the CLSA model is based on, but its natty performance envelope allows it to potentially be any version you like, and from my perspective it is one of the most fun aircraft I’ve flown in Second Life.
As is usual with CLSA aircraft, the model is a very accurate reproduction of its physical world namesake, including the more rounded vertical tail and rudder and lack of the distinctive “hump” of a fuel tank in the centre of the upper wing to help differentiate it from the British de Havilland DH82 Tiger Moth (which I’ve had the pleasure of flying in, and taking the controls of in the physical world!).
The ‘plane is delivered in the distinctive large crate of CLSA, which drops to the ground with an audible “whomp!” when rezzed. As well as containing the aircraft, the package also provides the default CLSA aircraft HUD, (not vital for flying the ‘plane), a radio headset / microphone combination, a Quick Start manual (a detailed manual can be obtained from the Help option in the aircraft’s menu – touch the aircraft to display this, or say “help” in chat when seated in the Stampe), and “templates” for painting. It would have been nice to have the headset supplied Copy / Transfer, to allow for sharing with any passenger carried in the forward cockpit, but never mind.
“Switches on! … Clear! … Contact!” – readying for take-off in the CLSA Stampe SV.4
Of the CLSA ‘planes I’ve flown, the Stampe is definitely the most fun. The basic controls are as one would expect: PAGE keys for throttle; Left and Right keys for banking; Down / Up for pitching the nose up or down. Additional controls – parking, brake, camera options, engine, etc., can be accessed via chat commands and / or via the HUD.
The low speed of this aircraft means that it really is good for STOL activities: leave the brake on and run up the throttle before releasing, and you’ll be off the ground in a very short run. Conversely, keep your approach speed to around 30 km/h (19 mph or 8 metre per second) and you can drop the Stampe into almost any suitable area on the ground (including places you might not get out of again!). This STOL capability could make the Stampe ideal for GTFO! activities as a light courier, but as the GTFO! vehicle database is unavailable at the time of writing, I was unable to ascertain if it had been added or not.
That same low speed makes aerobatics a joy – I was stall-turning and looping to my heart’s content – and these can be further added to through optional elements such as the Luna Fatale Animated Wing Walker. It also means you can instruct passengers in the forward cockpit at a more leisurely pace than might be the case with other aircraft – just use the “cmd” command in chat to pass control forward or take it back.
When it comes to aerobatics and flying, the Stampe includes a set of options to adjust its flight handling: pitch and roll rates, rate of climb, and throttle. these can be adjusted in real-time when flying, and also output to chat for recording onto note cards which can be added to the ‘plane’s inventory. This means that if the Stampe is permanently rezzed as a shared plane within a group, pilots can load their personal flight preferences, thus allowing more experiences flyers to use more aggressive settings, while those with less experience can opt to use their own or say with the plane’s default characteristics.
A big plus (for me at least) is that unlike the Ryan, P92 and P2010, the Stampe *won’t* regard Linden water as land and happily taxi around on it or land on / take off from the surface. Were I to critique the plane at all, it would be that banking – although far better than the Ryan, P92 and P2010 – can still be flat at times in the default handling mode (so use of the custom handling options might be called for).
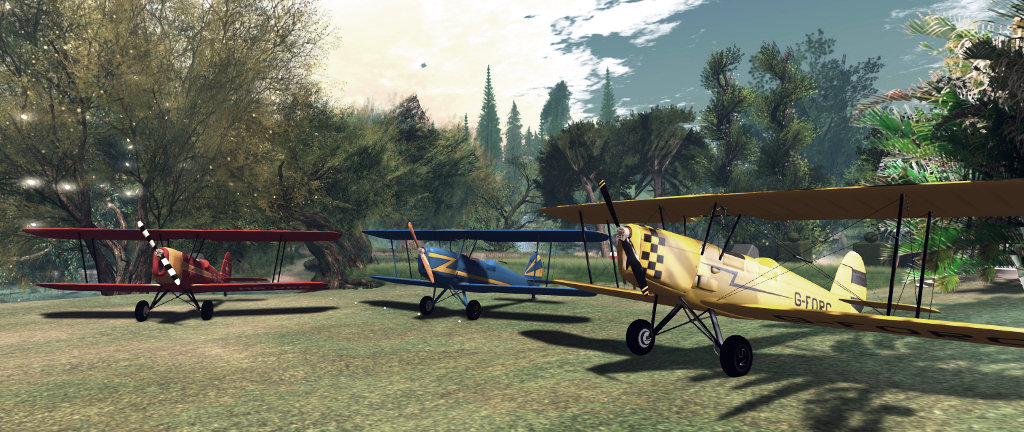
I also feel the supplied exterior painting template leaves much to be desired. Some of the component parts are poorly rendered and indistinct, requiring a certain degree of skill when setting a personal colour scheme. A scripted painting mechanism is provided, which includes two custom finish slots, together with 6 supplied finishes. However, as the ‘plane is supplied with Modify permissions, it is possible to manually apply paint schemes, so multiple personal finishes can be used, if wanted.
Three of a kind: three of the supplied finishes for the CLSA Stampe SV.4
Overall, give this ‘plane costs just L$10, it’s a nice add to any collection and is, as noted a lot of fun to fly, and which tends to handle region crossings pretty well (allowing for speed and how you might tweak the speed settings).
Ape Piaggio has crafted some of Second Life’s more unusual vehicles, be they for land, air, or water (or even some combination thereof). and by “unusual”, I mean fun.
I’ve covered many of them in these pages, and am admittedly a confirmed fan of her work. Most recently, I’ve been involved in the development of her LS33W AirFish (read here for more). That project has been taking a little longer than anticipated, but there’s a good reason for this: Ape has been busy with a fun vehicle that’s she launched at the end of November: the SG33E Roadrunner.
This is a fun little 2-wheeler for running around on – particularly along the road networks of the Mainland, where I spent time testing it. Probably the best way to describe it is a marriage between an electric motor and a traditional push scooter that’s been given a few steroids to beef it up.
From boxed to “assembled”: the SG33E Roadrunner (note the black marks on the optional rezzed fenders are baked shadows for when the optional parcel racks are used)
Delivered in a neat packing case – itself a trademark of Ape’s products (and which will deliver a texture pack as well, when unpacked), the Roadrunner rezzes in its stowed mode – handlebars folded against the footboard, awaiting attention. Select Sit Here from the right-click context menu / the pie menu, and a neat animation will play, causing your avatar to kneel and unlock the handlebar before raising it to its upright position, and then “stepping” aboard the scooter.
At the same time the handlebars are unstowed, a Quick Start guide is displayed in local chat (user only – not general spam) listing the basic driving controls. Using the Touch option will list the Roadrunner’s menu, including the permissions options (who can drive / ride on the scooter); the adjustment options for correctly positioning avatars (the scooter can be resized); access to the couples poses (cuddles plus a couple of adult poses), and the scooter’s accessories options – of which more anon.
Readying the Roadrunner for riding
The basic controls are easy enough to master, and the simple fact is, with a little consideration for SL’s eccentricities, the Roadrunner is a great little ride – and be sure to check out the cute “reversing” animation.
The Accessories option adds to the Roadrunner, allowing a degree of customisation. This includes recolouring, plus the rezzing of the front and rear well fenders and / or the front and rear luggage racks. The racks also include headlights and tail-lights for night driving.
The accessories menu
Also included in the Accessories menu are the battery / recharge options. The former allows the Roadrunner to behave like a real electric vehicle: running only as long as there is sufficient charge in the battery. When it has expired, or is close to expiring, the recharge option can be used. This will display the solar-powered battery charger which, as it is attached to the scooter, doesn’t require rezzing rights in order to appear.
The Roadrunner is additionally capable of carrying passengers. Providing the driver is already on-board and permissions are set, a passenger can right-click and sit on the scooter – this will display the rear luggage rack, which is used as a passenger seat.
At L$350, the SG33E Roadrunner isn’t going to break the bank, and it weighs-in at just 6 LI. Those those who enjoy road vehicles, it offers a fun and unique means of both travel and exploration around the Mainland.
The updated Caitinara Bar uses the La Gare Vintage Train Station with kitbashed elements from other pre-fab builds
I’m not a creator, but as regulars to these pages know, I love fiddling around a building things with prims, and also modding various mesh items I buy “off the shelf”. But there is another aspect of content “creation” I enjoy – kitbashing buildings – taking parts from two or more and recombining them to provide something that little bit different.
Like modding items, kitbashing is hardly new, but in an age when pre-fab builds get used across multiple regions, sometimes resulting in a feeling of “sameness” when visiting, kitbashing – or even simple modding – can offer a way to provide a little uniqueness in look and feel to a place. Take one of my most recent (and admittedly relatively simple) kitbash / mod: the new Caitinara Bar at Holly Kai Park.
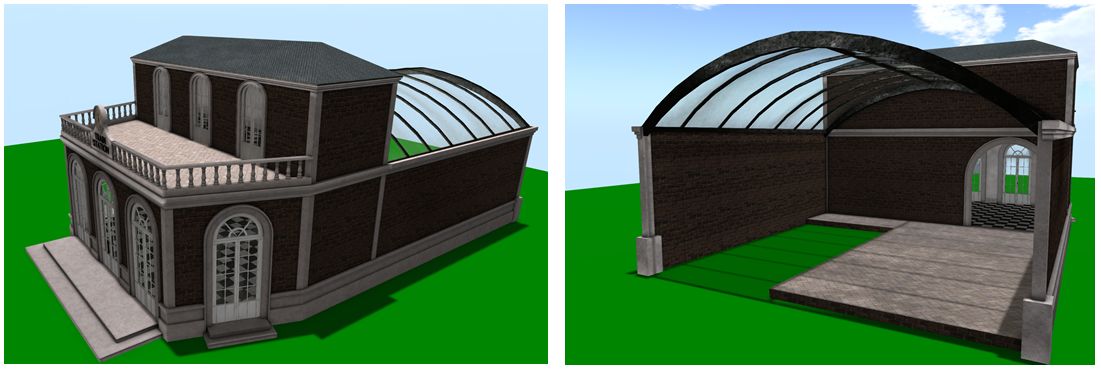
The original La Gare Vintage Train Station, as supplied by Sheerpetal Roussel – note the multiple doors at the front (actually five in all) and the open platform nature of the rear.
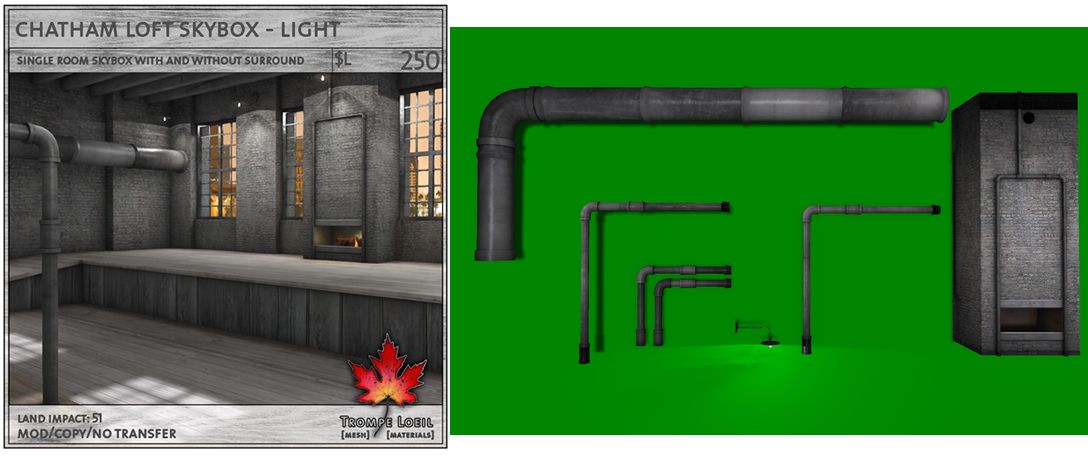
When re-working Holly Kai Park a few months back, I knew I wanted to re-work the look of the bar, but had no idea precisely how to achieve what I wanted. However, my travels around Second Life have frequently brought me to contact with the La Gare Vintage Train Station by Sheerpetal Roussel, which looked like it might make a sound foundation for a re-work, while I knew the Chatham Skybox by Cory Edo, coupled with one or two bits and pieces from other creators and sitting in inventory, would help flesh-out the interior – notably the “brewery” look of the dance area in the bar.
Kitbashing does come with certain pre-requisites: the designs you’re using must obviously have Modify permissions in order to parts to be removed and re-used (and should preferably be Copy to avoid simply wrecking the original); you need a reasonable understanding of the tools in the Edit floater; and you obviously need some idea of what you want to achieve. For me, the Caitinara Bar kitbash was made easier by the fact that once I’d settled on it, the La Gare Vintage Train Station looked like it would fit around 90% of my needs.
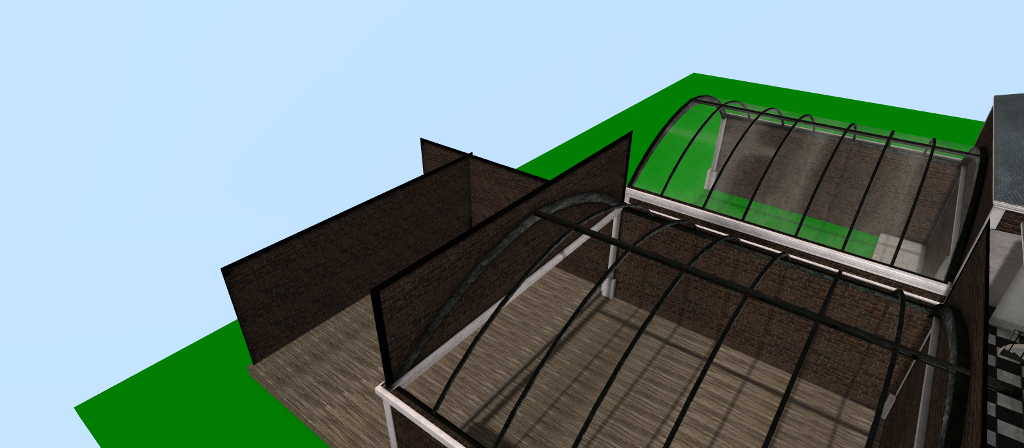
The La Gare build itself is designed in such a way to make basic modding pretty easy: extending an enclosing the “platform” area was a simple matter of copying and using existing wall panels and support beams, and replacing the supplied “floor” with one of my own. As the bar is “underground” I admittedly didn’t have to worry about cutting a cylinder to fit the end of the arched roof
The important thing when assessing buildings for their potential use in kitbashing is to see them in-world, if you don’t already have them. This way you can use the Edit Linked option in the Edit floater to identify specific components – walls, floors, lights, support beams, stairs, fireplaces, etc., – and determine whether or not they might be easily be removed (either because they are not required or because they are the elements you want to use elsewhere). Similarly, the Edit Face option can (to a degree) be used to help determine how textures have been applied and whether surfaces are suitable for re-texturing, should the need arise.
In this latter regard, it’s important to assess whether things like shadows have been baked onto surfaces and whether they may become apparent in removing parts, or whether the bake applies across multiple faces, making it difficult to alter just one, and so assess how much re-texturing might be required and / or whether or not you may need to consider creating things like new materials maps to go with any re-texturing to perform.
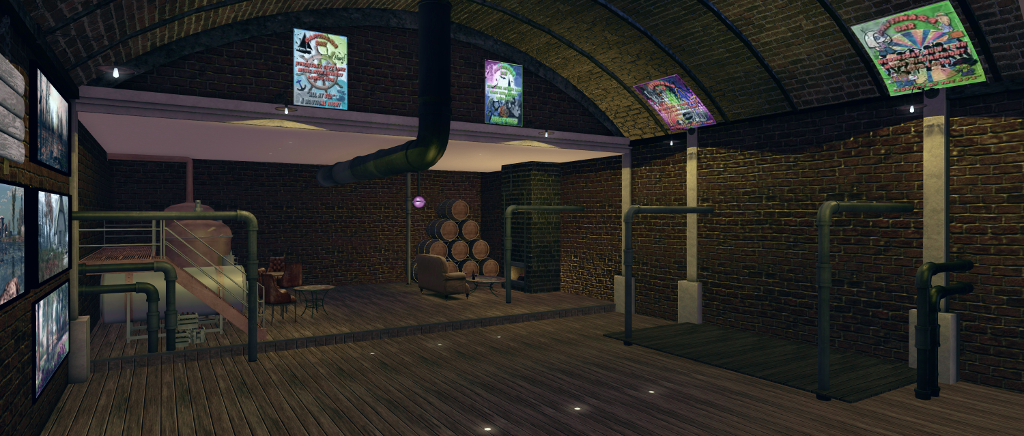
Elements – some with a degree of re-texturing and new normal maps – from Cory Edo’s Chatham Skybox provided the means for me to add to the “brewery” look of the interior of the new Caitinara Bar
If re-texturing is required, and – like me – you’ve not a particularly good graphics artist, there are a lot of resources, both in-world and out, where textures can be obtained; just be sure to check any associated EULA / permissions prior to purchase / download.
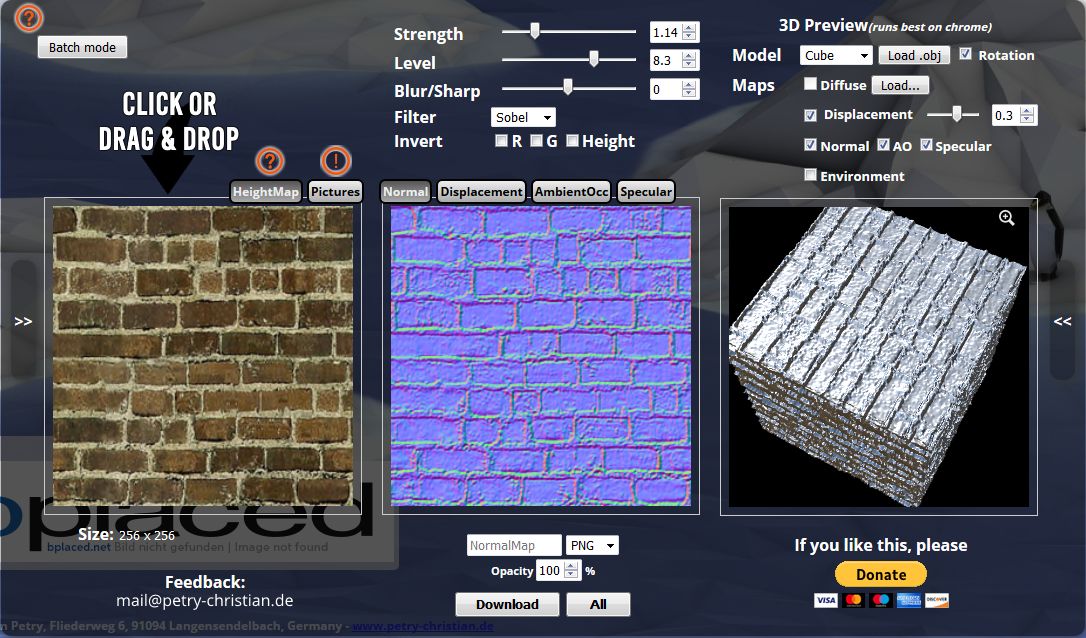
For materials, tools such as PhotoShop and GIMP have options / plug-ins for creating normal maps, and there are plenty of on-line tools that can automate the process to varying degrees. NormalMap Online, for example is an exceptionally easy tool that can be used to generate a range of maps.
Normalmap Online is a useful tool for creating a range of material types, including normal and specular maps
However, automated tools aren’t always perfect – I tend not to use auto-generated specular maps, for example, as they can result in too uniform a result across a surface, making it look somewhat artificial. Also, if you are playing with textures and materials, remember to try them out on a surface using the Local Textures option. This both allows you to check the suitability of a texture ahead of any upload, and similarly, the in-world look of your materials maps can be tested and adjusted accordingly without having to go through paying for multiple uploads.
Putting things together obviously requires a reasonable understanding of how to unlink (CTRL-SHIFT-L) and Link (CTRL-L), moving and rotating objects – but these aren’t hard to grasp. Again, this is where using buildings that are Copy is important, as you’ll always have the original intact and available for use elsewhere in the future (or if things go wrong!).
The revised and enclosed “platform” area of the La Gare, incorporating the fireplace and pipes from the Trompe Loeil Chatham Skybox to add to the “brewery” feel (alongside of props by Jogi Schultz (yogijo) used in past versions of the bar), and with the glass canopy re-textured and mapped to provide the bar’s signature arched brick ceiling
The Culprit Sonata upright (l) with my Lisp grand (r) at our home in SL
It’s no secret I play the piano; I’ve mentioned it a fair few times; I can sometimes be heard playing arrangements on my You Tube videos, and I’ve reviewed the various pianos I’ve had in SL through these pages.
By-and-large, I prefer to go for grand (concert or baby) pianos in SL, simply because a) the comparative sizes of houses in SL tend to mean a grand can be installed easily and not lost against a wall; b) I have a Yamaha N1 in the physical world, that nicely reproduces the sound of a grand (but only takes up as much space as an upright!), so I’m naturally more accustomed to the more rounded sound of a grand, and heaving on in SL puts me in mind of that roundedness.
Thus, finding me writing about an upright piano now might seem a little strange. But the upright in question is a little special: it is the first playable Bento piano I’ve been introduced to.
The keyboard is finished with a very natural looking ageing to the keys
The piano in question is the Culprit Sonata, created by Eku Zhong and Yure4u Sosa – and it is a delight. Two versions of the piano are offered in the pack: “large” (for larger sized human avatars) and “small” (for more “normally” proportioned human avatars (the “small” should not be seen as indicative of the piano being suitable for Tinies). I found the “small” variant ideal for my avatar.
The design follows the standard upright piano look, while the menu system (active once seated) offers four main option sets: Texture, Muted, and Songs, together with an [Adjust] option for setting your seating position at the keyboard.
Texture provides a choice of eight Themes by which to texture / colour the entire piano and its stool; and a Custom option, allowing you to mix and match the textures used on different parts of the piano to suit your individual taste.
Muted presents a total of eight different playing styles without any associated music – so you can set a style in keeping with the music you’re listening to out world, or on your parcel stream. As one of the streams we have on the home parcel is a pure piano stream, I found this option a nice touch.
Songs, as might be expected, offers a total of 32 pieces to play, all public domain, and offering a good cross-reference of music.
Three of the menu-driven Theme finishes to the piano, and one variant of a Custom finish (l)
Sitting at the piano immediately puts you in the “idle” pose (also available from the Muted menu as a ninth option). This has you sitting and moving your arms as if conducting – or perhaps warming-up in readiness to play :).
Selecting a piece of music from the Songs menu will display sheet music on the piano and move your avatar into a matching playing animation. It is here where the Bento element comes in. If you have Bento hands, turn off any animation option you may be using with them so as to avoid possible conflict with the piano, then watch yourself play.
The Culprit Sonata was, at the time this review was written, on display outdoors at the Culprit store
Rather than the traditional single pose hand movements we’re all familiar with when playing SL pianos, the Culprit Sonata will animate fingers and wrists to reproduce a range of playing styles, from the subtle to the quite effusive. Most fit the included music extremely well, and I found a couple of the Muted animations options particularly well suited to “playing along” with some of my favourite tracks on the Westworld TV series soundtrack (such as Sweetwater,No Surprises, Dr. Ford, and The Forest) that was playing on the stereo as I took the Culprit for a test drive – or test play, if you prefer 🙂 .
The finger and hand movements are fluid throughout – and I was impressed to see a thumb-led descending glissando in one of the animations; I don’t think I’ve ever seen that in a Second Life piano animation before, and you can catch it in the video below. Yure4u, Eku’s SL partner, modelled the animations on her own playing style, adding further depth to them, and while I did find a couple a little more dramatic than my own style of playing, they in no way put me off.
Bento hand movements in three of the playing styles built into the Culprit Sonata piano
At 7 LI, including the stool, the Culprit Sonata isn’t going to break the land impact bank, and the texture options offer sufficient variety in finish for the piano to fit almost any environment. Pricing-wise, it is placed at L$995, which perhaps puts it at the upper range of playable piano (I’m excluding those that come as Adult rated or with a host of non-playing animations). However, when you consider this is a Bento piano, offering some very fine finger / hand / wrist motions, and the effort put into producing these, the price doesn’t feel excessive.
The Sonata has some nice attention to detail around the keyboard and the brass fittings, and while I’m still naturally biased towards having a grand piano in SL (and Eku and Yure4u are apparently working on one), the upright version is now gracing the saloon at Caitinara Bar 🙂 .