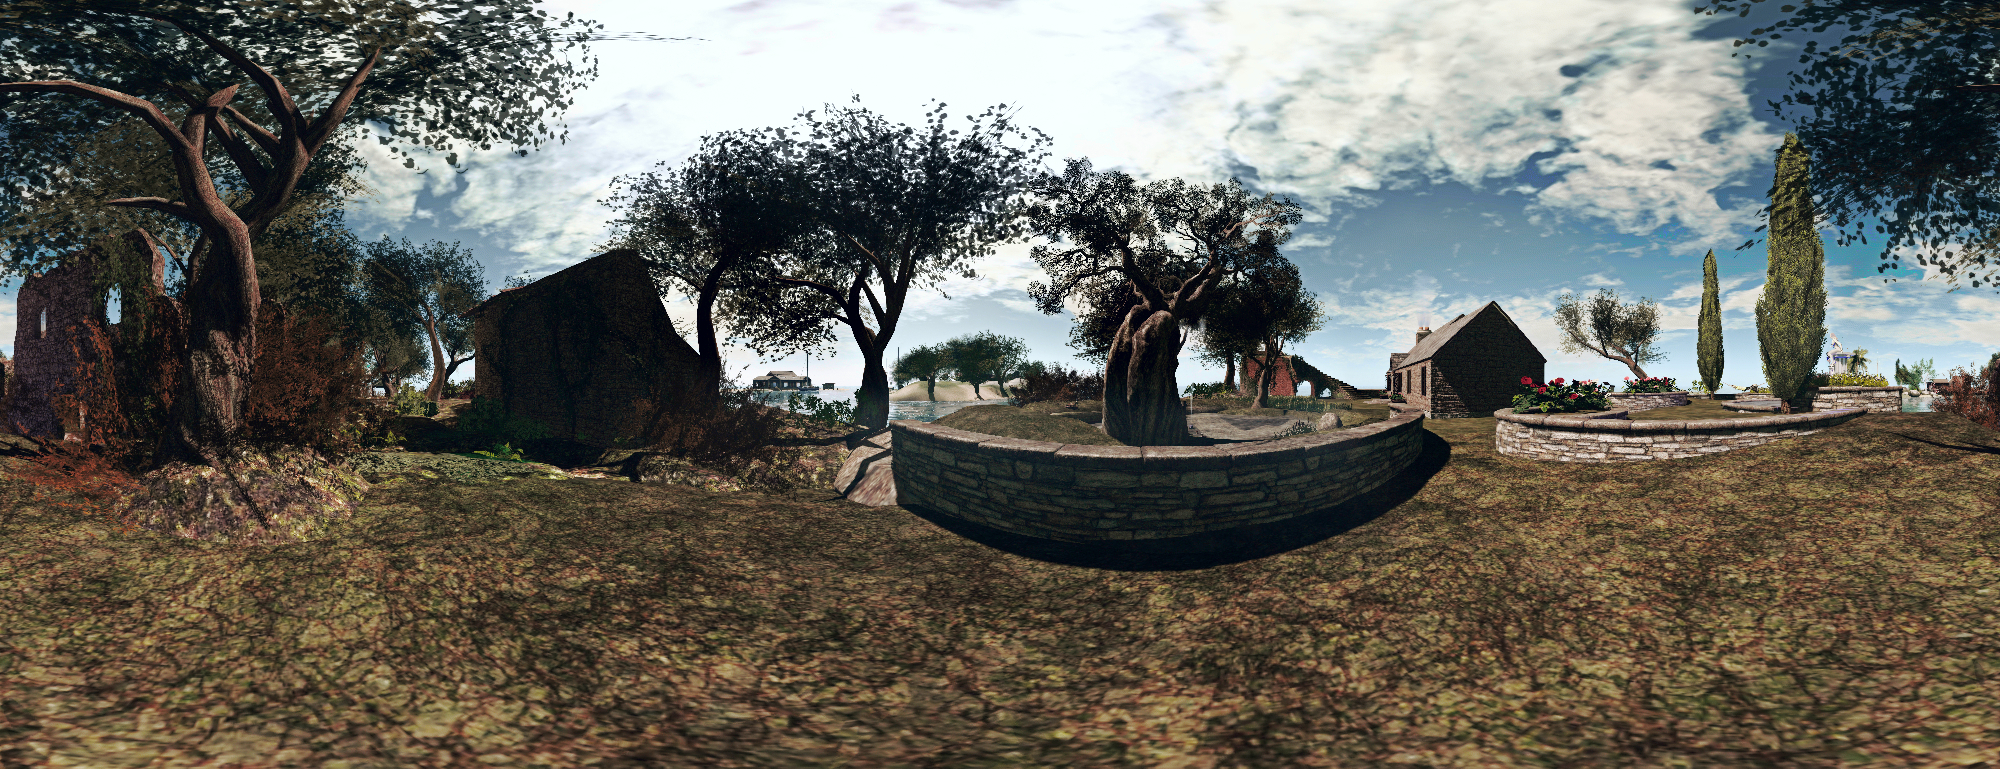
 A static panoramic view of our home island produced using the Illiastra Panoramic Camera and the Hugin Software.
I received a generous gift from Illiastra Ascendent (NVZN, aka James Reichert in the physical world) over the weekend, who sent me the Illiastra Panoramic Camera (MP link) to try-out in Second Life.
This is a HUD-based system which can be used to produce set of images of an in-world scene which can be stitched together using suitable software to create a static 360-degree view. These can in turn be uploaded to Facebook or websites such as VRchive and YouTube, as scrollable, 360-degree views of a location.
The system comprises two camera HUDs, “basic” and Pro, together with a photosphere for viewing captured images in-world. The difference between the two cameras being that the “basic” model uses 8 images to create a 360-degree panorama, while the Pro version takes a total of 26 (including directly above and below you) to produce either a panoramic view using 24 images, or a spherical view using all 26 images.
Producing your static panoramic image is a 2-step process:
- Capturing your in-world shots using the camera
- Stitching them into a panoramic mosaic using a suitable software application.
Once this is done, you can proceed to prepare them for 360-degree viewing on Facebook, VRchive, etc. Illiastra provides comprehensive set of videos on producing your panoramic shots, stitching them together and uploading them to Facebook, which I highly recommend.
For the rest of this article, I’ll take you through producing a panoramic shot and then uploading it to VRchive and converting it to a 360-degree video for You Tube.
Taking the Shots
There are some basic steps to follow when preparing to take shots using the system:
- Position yourself at the centre of the location you want to capture in a 360-degree image. Be careful of where you select – too close to building or trees, etc., could have them dominating a part of the view.
- Set your preferred windlight and daytime settings.
- Make sure you freeze the clouds – you’ll be taking up to 26 images which will need to be stitched together, and moving clouds could make that a bit of a bugger to do. Use Menu > World > Environment Editor >Sky Presets > Edit Presets or PhotoTools > Clouds and check the scroll lock check boxes.
- Make sure the viewer’s camera is set to the default view angle, FOV and focal length
- Hide yourself from view – used the supplied alpha mask after removing all attachments or use something like a Vanish gesture. Otherwise, the top of your head will be in every shot.
- Tap ESC on your keyboard to free your camera (and free it from any other influences acting upon it).
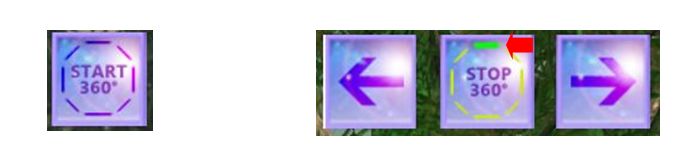
Once you’re set, click the camera HUD your camera will rotate and position itself for the first shot. Use the Snapshot shortcut CTRL-‘ (tilde) to save the image – you’ll be prompted for a file name and location on your computer for the very first short after the HUD is attached.
When you’ve saved the shot – which is effectively the first frame of your panoramic image – click the right arrow on the HUD to advance the camera to the next point (indicated in green on the HUD), and take another snapshot (CTRL-‘). You won’t be prompted for a file name for this and the remaining frames – simply progress on around the HUD, capturing a snapshot at each of the highlighted views in turn.
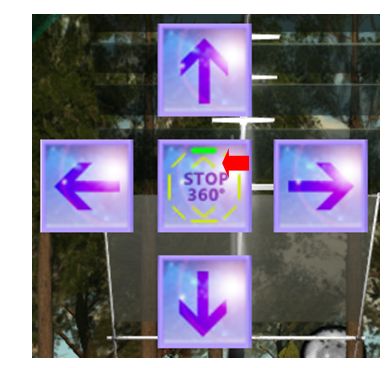
If you are using the “Basic” camera, you’ll be taking a total of 8 shots – once around the HUD. If you are using the Pro camera, you will be taking 24 shots around you – that’s 3 times around the HUD clicking the right button, giving you 8 horizontal shots, 8 angled upwards, and 8 angled downwards – just follow the prompts on the HUD. When you’ve taken all 24, click the UP arrow on the HUD to capture an overhead view, and the DOWN arrow to capture a shot of the ground under your feet. Again – remember to press CTRL-‘ to save each image.
Note that after the very first instance of asking you to select a file location / name for your shot for image ever captured using it, the HUD will automatically save any subsequent set of shots you capture to the last location on your hard drive you used to save images captured using the snapshot floater
Producing your Panoramic Image via Hugin
Once you have taken your shots, you’ll have either 8 (“basic” camera) or 26 (Pro camera) shots of your location. These now need to be stitched together. GIMP or PhotoShop can be used for this for those proficient in using them, otherwise Illiastra recommends using the Hugin Panorama Stitcher available through Sourceforge.net. I opted to use this.
With Hugin installed and launched, proceed as follows:
- In the Assistant tab, click on Load Images…
- If you have been using the “Basic” camera, select all 8 of your shots
- If you have been using the Pro camera, selected the first 24 shots – do not include the final overhead sky shot or ground shot – these can be added later, if required.
- A dialogue box will appear. Enter a value of 90 in the Horizontal Field of View (HFOV).
- Click OK to load your images into Hugin – things will initially look a mess – don’t worry!
- Click on the Align button to initially align your shots – this may take a while to process, depending on your system, the image resolution, etc., and then may end-up upside down. Again, don’t worry!

- When Align has completed, click on the Move/Drag tab and click Straighten. If your shots are upside down, enter 180 in the Roll text box and click Apply. Your images will further align and flip the right way up.

- Click on the Crop tab in Hugin and adjust the values. Left and Top should be set to 0, and Right and Bottom to 9999 – note the latter two will snap to the maximum size of your image.

- Click on the Assistant tab once more and click Create Panorama. A dialogue box will open. Select your preferred image format (.JPG, .PNG or .TIF), and leave the remaining defaults as is and click OK. You’ll be asked to provided a file name and location for the processing file, after which the batch processor will run, and could take some time.
- When done, you’ll have a cylindrical panoramic view, ready for copping as a static image, or for editing and uploading to a suitable 360-degree viewing format.
Do be aware that Hugin can be sensitive in handling images, particularly those with poor contrast / brightness, or which feature a lot of water, and this can lead to problems during the alignment process or in production of the finished image.
Adding the Sky / Ground (Pro Camera)
If you are producing a full 360-degree spherical view view the Pro version of the camera, use your preferred editing tool (e.g. PhotoShop, GIMP, etc), to add the sky and ground frames for a fully spherical image, if required. Use the easer tool to blend them into your panorama, and crop as required.
Producing an Immersive 360-Degree View
Following the steps above will produce a panoramic image, which you can easily crop to remove the “wavy” top and bottom edges and upload to Flickr or a blog for static viewing. However, the real power of these images is when they are loaded into suitable software for 360-degree viewing, such as on Facebook, YouTube and VRchive.
Illiastra Ascendent provides videos (for 8-shot and 24-shot images) on taking a panoramic image and uploading it to Facebook for 360-degree viewing, so here I’m going to cover uploading to using VRchive and producing a YouTube 360-degree interactive video .
VRchive
VRchive is a browser-based viewing tool for 360-degree images. When using it, keep the following in mind:
- It supports images in PNG and JPG formats with a maximum file size of roughly 40Mb file size upper limit (this actually seems to vary between 32Mb and 40Mb)
- Images must be in a 2:1 PAR format (e.g. 6000 x 3000; 4096 x 2048, etc). Images in other pixel aspect ratios will be rejected post upload.
To use VRchive:
- Go to the website at http://vrchive.com/?code=upload and click the Browse VRchive button
- Click the avatar icon, top right and create a VRchive account or log-in.
- When your account is created and / or you are logged-in, click on the cloud icon, top right, and use the browser to locate your panoramic image (or drag-and-drop it).
- You’ll be asked to select whether the image is “Real” or “Virtual”, select the latter and start the upload.
- The file will be processed and added to your default folder. You can optionally create / move it to another folder if you wish.
- To view the image yourself, double-click on it in the folder to open it.
- Note that by default, images tend to be public, and will be added automatically to the main image directory, viewable from the VRchive main page.
- You can share your images from VRchive to Facebook and Twitter directly. If sharing the link manually, ensuring you append “?code=upload” to the end of the URl (e.g. https://vrchive.com/image/Ef7/?code=upload). If your blogging software supports “” hooks, you can also embed VRchive files via the embedding option.
And here is my uploaded sample shot .
YouTube
The easiest way to produce a 360-degree video of a Second Life region is via video editing software which supports 360 production, such as Cyberlink PowerDirector 15+ . If your software doesn’t support 360 video production, you can still produce a video using MP4 export and the Google Fixing Tool – note that while Google don’t specify this, the tool is 64-bit only. To obtain this:
- Follow the link above
- Click on Step 2: Prepare the video for upload
- Download the Mac or Windows version of the Metadata app & unzip on your system.
To produce your video, follow these steps:
- Drop your panoramic image (in 2:1 aspect ratio) into your preferred video editor and extend the running time out a few minutes.
- Render the video as MP4 at a custom 2:1 ratio such as 4096×2048.
- When the video has rendered, run the Google Fixing Tool. You may have to right-click and Run As Administrator on Windows, and right-click to Open on OSX.
- You will be prompted for the video file to be converted.
- Select the checkbox for Spherical and click Save as. Do not select the “3D Top-bottom” checkbox. Enter a file name for your 360-video
- If you don’t enter a file name, the fixing tool will spit out a video with the same file name as the original with “injected” appended to it
- Upload the 360-degree version of the video to your YouTube channel.
If the video above appears black, click the full screen icon and then ESC to reduce back. Uses the scroll control, top left, to pan around, or left-click and drag. You can pause the video playback and scroll as well.
The resultant video can also be played back on mobile devices, where the built-in gyro can be used to move the image around, and through a head mounted device.
The Results
The results with using the Illiastra Panoramic Camera can be impressive – although experimentation is recommended; not all locations are suited to a 360-degree panorama. If you want to add some spice to your travel blog posts but cannot embedded things like VRchive, a static 360-degree image can still offer an interesting perspective.
With video, images should ideally be taken at the highest resolution possible, however, the HUD appears to be “locked” to a resolution size. I couldn’t find any way to get anything other than 3840×2116 (which itself isn’t 2:1 PAR) with captured images, and have an outstanding query with Illiastra on the matter.
Overall, a fun product. Easy to use, does exactly what it says on the can, just requires a little mastery of the external bits – Hugin, etc.
Stop Press!
During the final preparations of this article, I received word that Linden Lab are themselves working on a 360 / panoramic capability for the viewer. Read more about it here.

I’ve been using the Illiastra HUD with Hugin software and it works well. Note that the HUD simply points your camera in preset directions. You use the CTL-` shortcut to take the picture just as you could without the HUD. The resolution of your images and other normal photo parameters are determined by your settings in the Snapshot window. I also normally shoot 3840×2114 images, but for this I found my current screen size (1920×1080) to be more than adequate and much faster.
LikeLike
I tended to find the HUD captures at 3840×2116 no matter what settings I have in the snapshot floater, as per the comment in the article.
LikeLike